|
Legal Notice
No material from Modeler Site any Web site owned, operated, licensed, or controlled by Mario Covalski & Associated may be copied, reproduced, republished, uploaded, posted, transmitted, or distributed in any way, except that you may download one copy of the materials on any single computer for your personal, non-commercial home use only, provided you keep intact all copyright and other proprietary notices. Modification of the materials or use of the materials for any other purpose is a violation of Mario Covalski & Associated's copyright and other proprietary rights.
Read More here > Legal notice
Nowadays, the airbrush has turned out to be a must-have instrument to get a superb result at the moment of finishing a model. Mastering the airbrush, is neither impossible nor requires to be very skilful or experienced. A few techniques and practice, that is still your best teacher, will help you, not to come into trouble that could at times discourage you.
Along this article, I’ll share with you some of the most common problems that can appear when using the airbrush, the reasons and the possible solutions.
These recommendations are especially for double-action airbrushes, but many of them are also valid for the single action ones.
I also advise you to read the following articles from our back issues.
 Painting, the key to plastic modeling? Painting, the key to plastic modeling?
One more technique...
If this happens to you…
|
Problem |
Possible reason |
Solution |
|
The airbrush spits paint and it does not flow regularly.
|
|
|
|
The pressure is not proper for the type of paint you’re using. |
Adjust the airflow. |
|
The paint nozzle is clogged |
Remove it to be cleaned. |
|
The paint is not correctly diluted, too heavy. |
Empty the airbrush, clean it and
fill the reservoir with well diluted paint. |
|
Paint accumulated in the air nozzle. |
Clean the paint needle and adjust
it. |
|
Broken or deteriorated paint nozzle. |
Replace it. |
|
The paint needle and the air nozzle
don’t fit well. |
Replace one or both of them. |
|
Dirt in the paint supply. |
Check out the compressor air filter
or air source.Take the air valve out and blow
compressed air through it. |
|
Paint build up obstruct the
air line. |
Replace the seal from the air valve.
Mend or replace the valve. |
|
Paint has filtered through the air
conduct damaging the valve. |
Mend or replace it |
|
Splashes to one side.
|
|
|
|
Twisted needle.Broken or embossed paint nozzle.
|
Replace. |
|
Splashes when you start painting.
|
|

|
|
Paint accumulated because the trigger
has been pulled back too fast |
Pull the trigger back more slowly.
|
|
The needle is damaged or twisted. |
Replace it |
|
Paint accumulated in the air nozzle. |
Clean the air nozzle and adjust
the needle. |
|
Dust in the paint nozzle. |
Remove it to be cleaned. |
|
Dirt or humidity in the air hose
attachment. |
Check the air filter out.
In case of storage tank compressor,
you should purge it. Have the air line dried by means
of compressed air.
If possible replace it with a translucent
one.
|
|
Splashes at the end of the spraying.
|
 |
|
Excess of humidity or dust particles
in the air line. |
Check out the air filter.
In case of storage tank compressor,
purge it.
Have the air line dried by means
of compressed air .If possible replace it with a translucent one.
|
|
Damaged paint needle or dirty or
damaged paint nozzle |
Replace it or clean it. |
|
Paint dots or puddles at the end of each line.
|
|

|
|
The hand stops at beginning
or end of each spraying. |
Make an extended movement with your
hand before and after concluding the trigger movement. |
|
The trigger bottom has not been
pushed down at the proper time. Paint was supplied before the air |
Make some tests on paper, cardboard
or useless pieces to get confidence. |
|
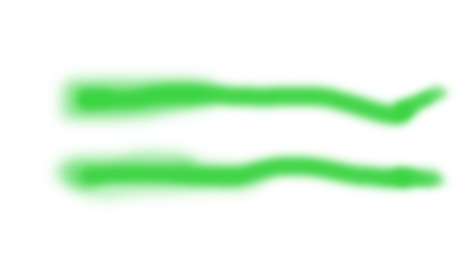
Irregular and splashed lines.
|
|

|
|
Wrong movement when handling the
airbrush. |
Spray leaving the arm movement free.
Test the technique before painting the model. |
|
Dust or dirt in the paint nozzle. |
Remove it to be cleaned. |
|
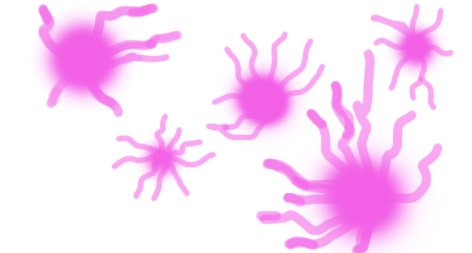
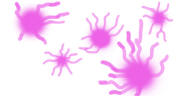
Spider effect. The airbrush forms puddles which spread
|
 |
|
The airbrush is being held too close
to the model. |
Keep certain distance from the model.
Adjust the paint needle and nozzle. Less amount of paint. Lower air pressure
with a proper paint dilution. |
|
Too much paint. |
Adjust the trigger to control the
airflow and paint flow. |
|
You let the paint enters before the air. |
Correct it practising by operating
the trigger. |
|
The spraying doesn't flow continuously.
|
|

|
|
Loss of pressure speaking about
a compressor without tank. |
Install a pressure regulator.
Install a tank to give a constant
pressure.
Have it repaired. |
|
Bad adjustment of the paint nozzle
or air nozzle. |
Remove them to be cleaned if necessary. Adjust them. |
|
Teflon washer of the paint nozzle
has broken. Bad adjustment of the paint nozzle, for those like the Pasche
that doesn't supply a washer made out of Teflon. |
Replace it.
Correct adjustment of the paint
nozzle to the airbrush body. |
|
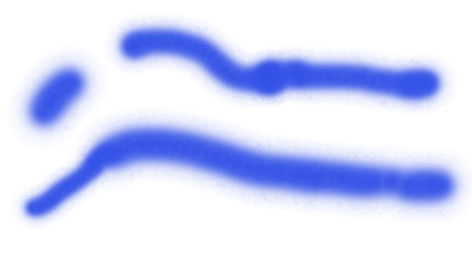
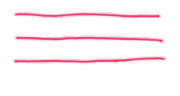
Fine lines without defined borders.
|
|
|
|
Broken or twisted needle. |
Replace it. |
Conclusion
Have into account that an airbrush is a precision instrument, the result you obtain will depend on how you’ve cleaned it after every painting session..
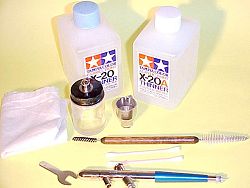
Clean it by using cotton swabs, paper towels an so forth, they will help you to keep things clean inside and out. Use also lacquer thinner, of course. The needle should be removed several times up to get it perfectly clean.
After every session, I recommend you to add to the needle a drop of WD40, especially if the airbrush has teflon sealed hubs, as most of the Badger(s)
It can be tedious and messy but cleaning it thoroughly, is the best way to keep it working properly and guarantee a quality paint job.
Support us ordering our notes in PDF > Here
|