|
|
||||||||||||||||||||||||||||||||||||||||||||||||||||||||||||||||||||||||||||||||||||||||||||||||||||||||||||||||||||||||||||||||||||||||||||||
|
Cars |
|
|||||||||||||||||||||||||||||||||||||||||||||||||||||||||||||||||||||||||||||||||||||||||||||||||||||||||||||||||||||||||||||||||||||||||||||
|
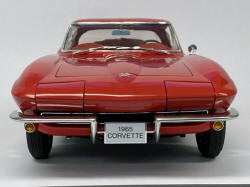
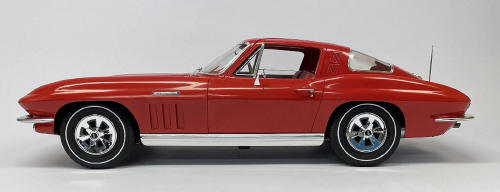
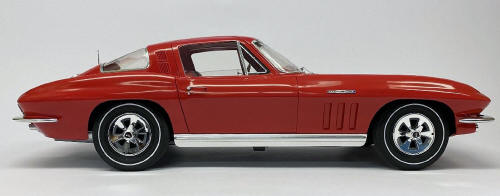
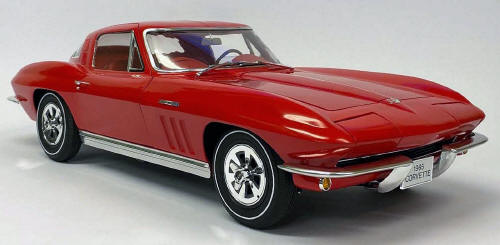
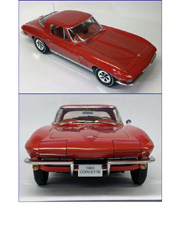
Ultimate guide for the Revell / Monogram 65' Chevrolet Corvette Sting Ray 1/8 scale |
||||||||||||||||||||||||||||||||||||||||||||||||||||||||||||||||||||||||||||||||||||||||||||||||||||||||||||||||||||||||||||||||||||||||||||||
|
by Lars Wahlström © Modeler Site |
||||||||||||||||||||||||||||||||||||||||||||||||||||||||||||||||||||||||||||||||||||||||||||||||||||||||||||||||||||||||||||||||||||||||||||||
|
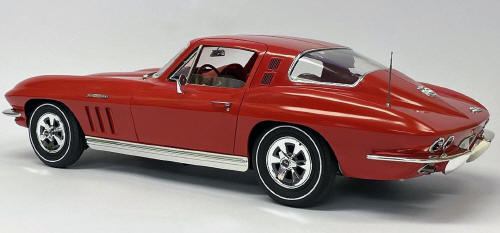
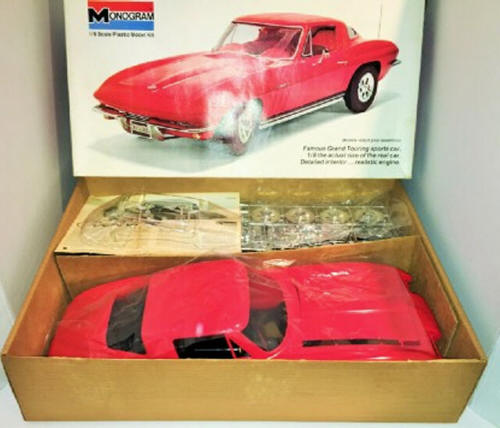
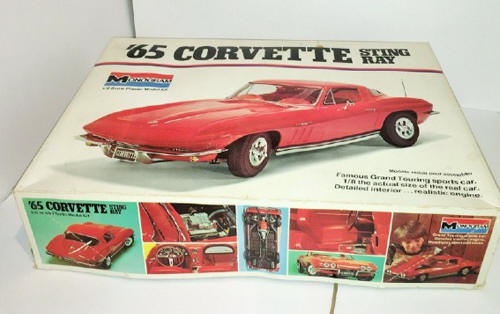
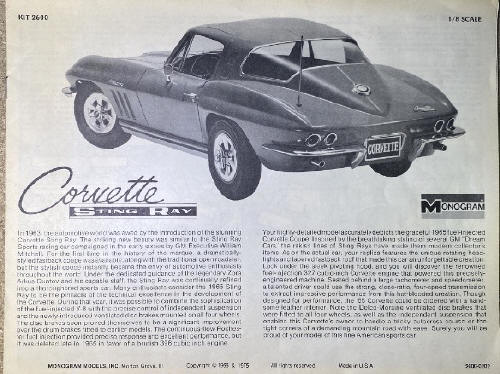
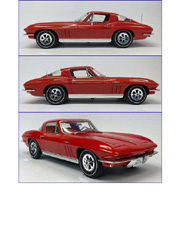
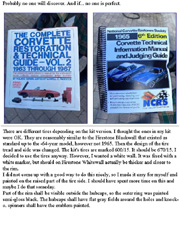
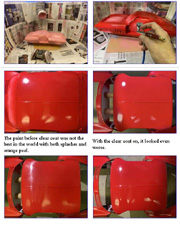
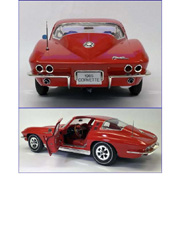
Legal Notice No material from Modeler Site any may be copied, reproduced, republished, uploaded, posted, transmitted, or distributed in any way, except that you may download one copy of the materials on any single computer for your personal, non-commercial home use only, provided you keep intact all copyright and other proprietary notices. Modification of the materials or use of the materials for any other purpose is a violation of copyright and other proprietary rights. Read More here > Legal notice In 1977, as a Christmas gift from my brother, I got a model kit of a 1965 Chevrolet Corvette Sting Ray in 1/8 scale. The kit was made by Monogram, but the same kit was later also released by Revell. There were editions with the body in both red and blue plastic. I noticed quite immediately that the detail level was low, lower than many models in 1/25 scale. Not even the doors were operable and the chrome-plating quality was really poor. Comparing with the French Heller's super detailed 1/8 model kit of the Citroen B15, which I built earlier, the Corvette was toyish and a real disappointment for an experienced modeller. But I decided to take it on anyway.
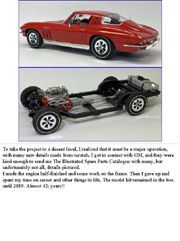
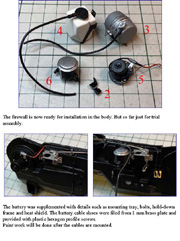
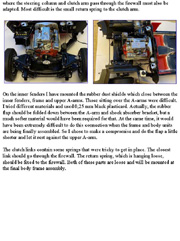
To take the project to a decent level, I realized that it must be a major operation, with many new details made from scratch. I got in contact with GM, and they were kind enough to send me The Illustrated Spare Parts Catalogue with many, but unfortunately not all, details pictured. I made the engine half-finished and some work on the frame. Then I gave up and spent my time on career and other things in life. The model kit remained in the box until 2019. Almost 42; years!!
By some reason I Googled the model kit and saw that others had
built it, adding details and with opening doors but yet not the detail level I
was looking for. It should be as good as the Heller Citroen, or the fantastic
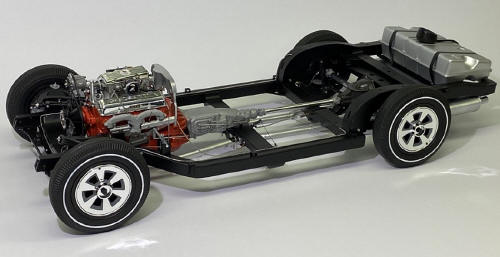
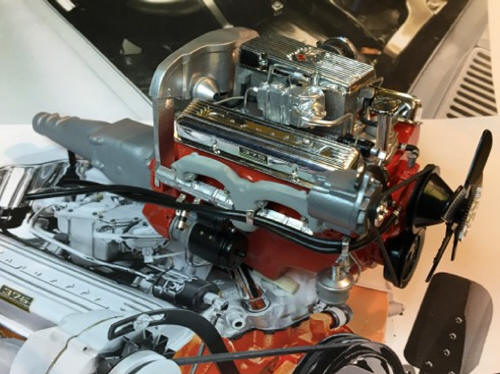
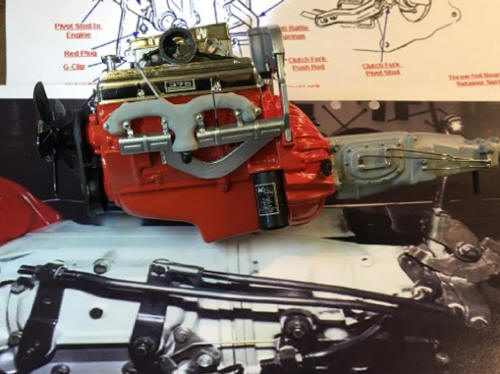
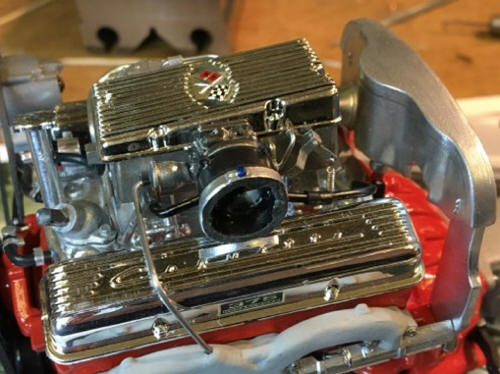
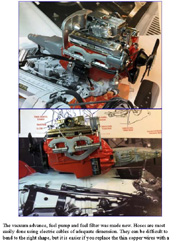
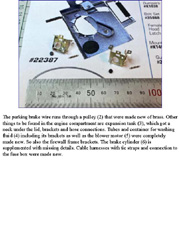
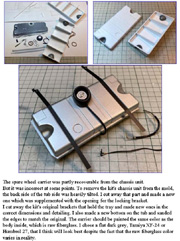
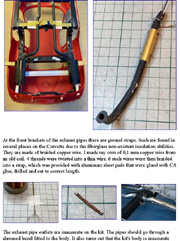
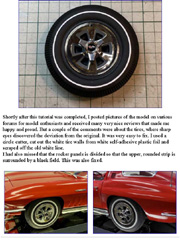
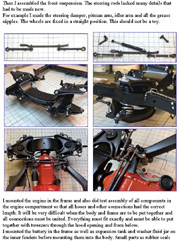
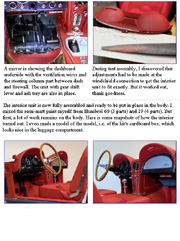
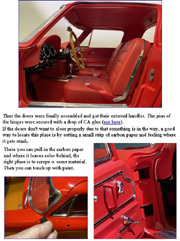
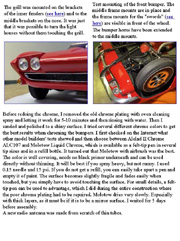
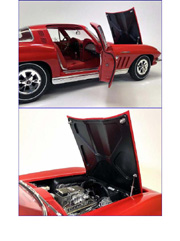
Amalgam models. If could be done... Building The following documentation shows, step by step, how the work progressed, in which order and how I solved emerged problems. Surely it could have been done in other or even better ways, but this is how I did it. I decided to work on several fronts to make it easier checking parts to fit. I started with the engine. The block, the injection house, the air- and fuel meters was already put together, with certain misses i mould detailing, but I let it pass. Due to the research it was possible to see how to route all hoses, cables and pipes. The ignition cable shields, under the exhaust manifolds, were completely missing, so i made them of plasticard from scratch. Also the gear linkage and clutch arm were remade.
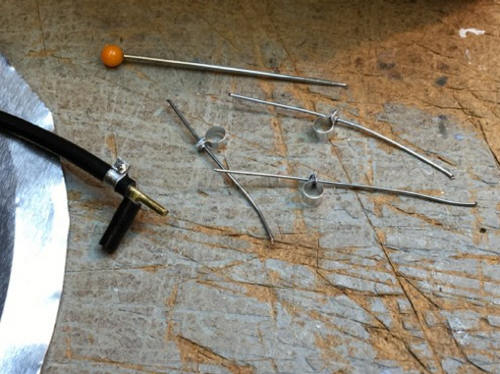
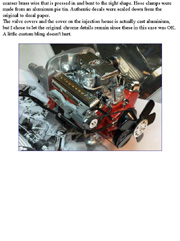
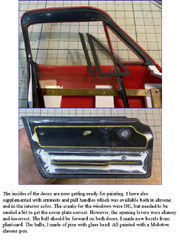
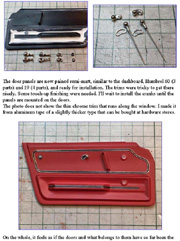
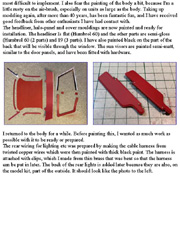
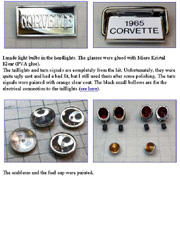
The vacuum advance, fuel pump and fuel filter was made new. Hoses are most easily done using electric cables of adequate dimension. They can be difficult to bend to the right shape, but it is easier if you replace the thin copper wires with a coarser brass wire that is pressed in and bent to the right shape. Hose clamps were made from an aluminum pie tin. Authentic decals were scaled down from the original to decal paper. The valve covers and the cover on the injection house is actually cast aluminium, but I chose to let the original chrome details remain since these in this case was OK. A little custom bling doesn't hurt.
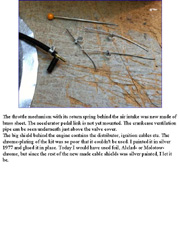
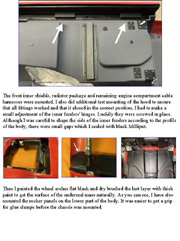
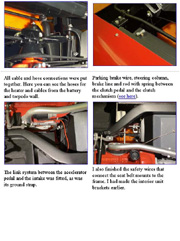
The throttle mechanism with its return spring behind the air intake was new made of brass sheet. The accelerator pedal link is not yet mounted. The crankcase ventilation pipe can be seen underneath just above the valve cover. The big shield behind the engine contains the distributor, ignition cables etc. The chrome-plating of the kit was so poor that it couldn't be used. I painted it in silver 1977 and glued it in place. Today I would have used foil, Alclad- or Molotow-chrome, but since the rest of the new made cable shields was silver painted, I let it be.
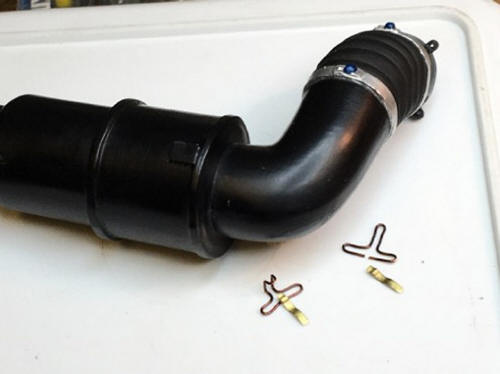
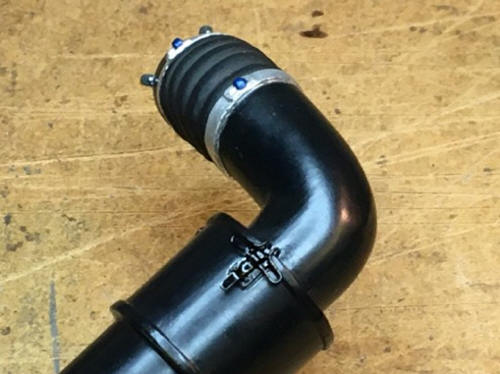
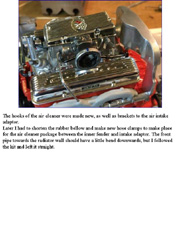
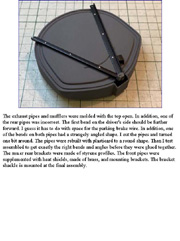
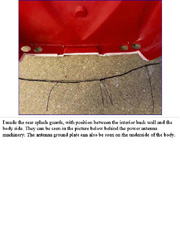
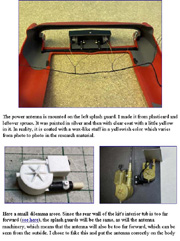
Later I had to shorten the rubber bellow and make new hose clamps to make place for the air cleaner package between the inner fender and intake adaptor. The front pipe towards the radiator wall should have a little bend downwards, but I followed the kit and left it straight.
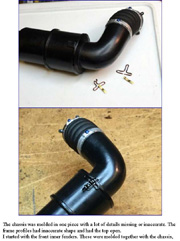
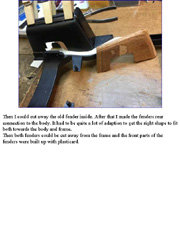
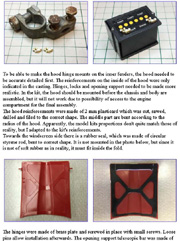
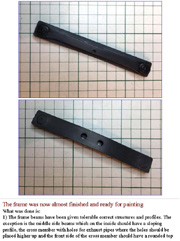
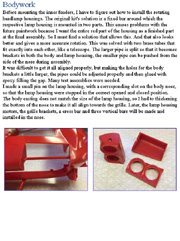
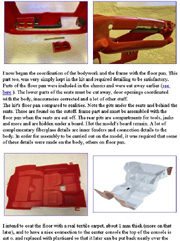
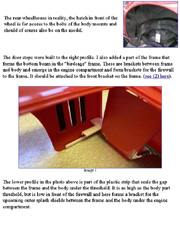
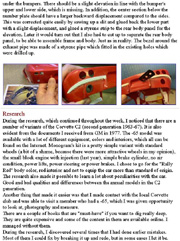
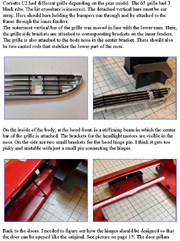
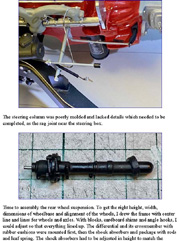
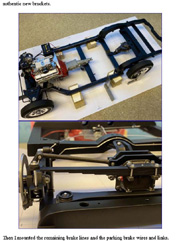
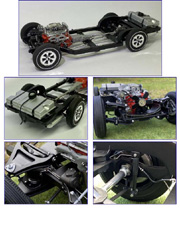
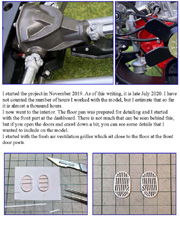
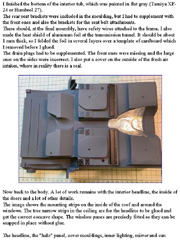
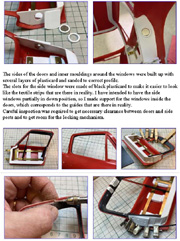
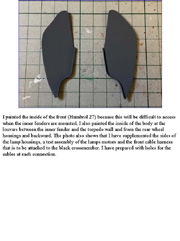
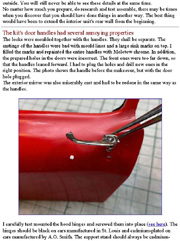
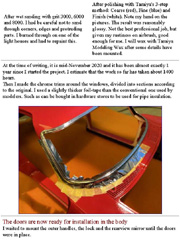
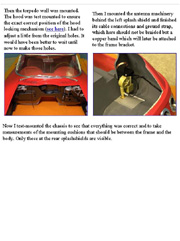
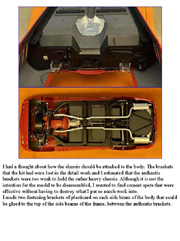
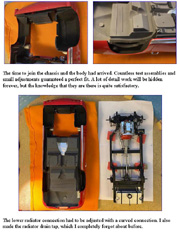
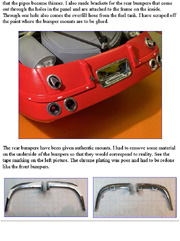
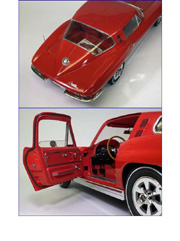
The chassis was molded in one piece with a lot of details missing or inaccurate. The frame profiles had inaccurate shape and had the top open. I started with the front inner fenders. These were molded together with the chassis, had inaccurate shape and didn't connect to the body fenders. The photo also shows the gearbox frame bracket and exhaust pipe bushings, which also were made new of plasticard. This tutorial is offered in PDF format to be read or printed using Acrobat reader, contact our webmaster > Here Includes more than 320 pics, here we show only the text pages.
Esta Nota es ofrecida en formato PDF, el cual puede ser leído o impreso usando el Acrobat reader, contacte a nuestro webmaster > Aquí Incluye más de 320 imágenes, aquí solo mostramos las paginas de texto.
Big size photos are only available in our PDF format. Support us ordering our notes in PDF > Here |
||||||||||||||||||||||||||||||||||||||||||||||||||||||||||||||||||||||||||||||||||||||||||||||||||||||||||||||||||||||||||||||||||||||||||||||