|
|
|||||||||||||||||||||
|
Formula one |
|
||||||||||||||||||||
|
Building the Tamiya Williams FW14B or The Return of the Prodigal Modeller Part II |
|||||||||||||||||||||
|
by Dan Parratt |
|||||||||||||||||||||
|
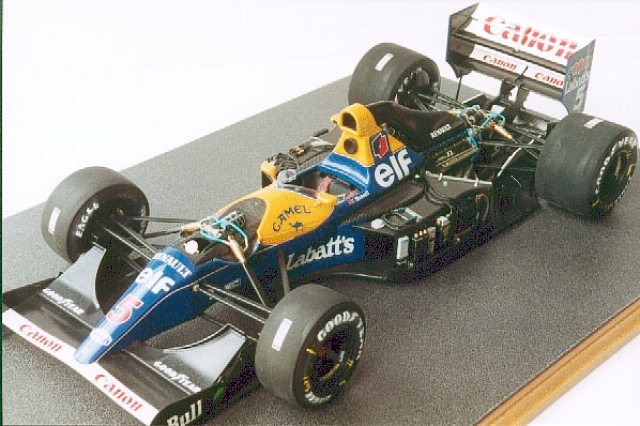
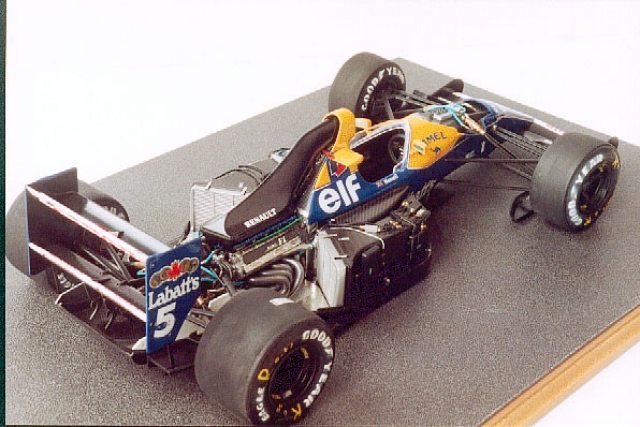
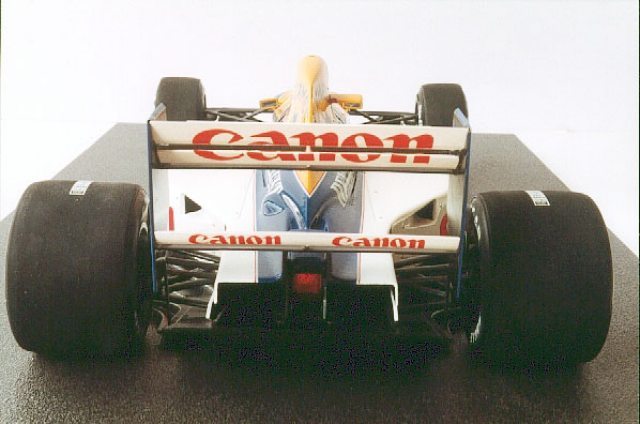
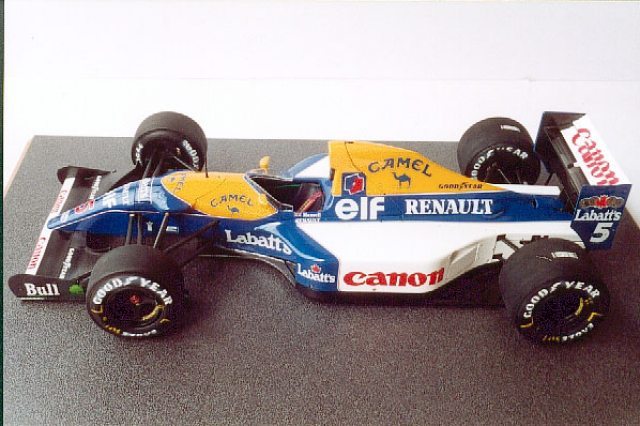
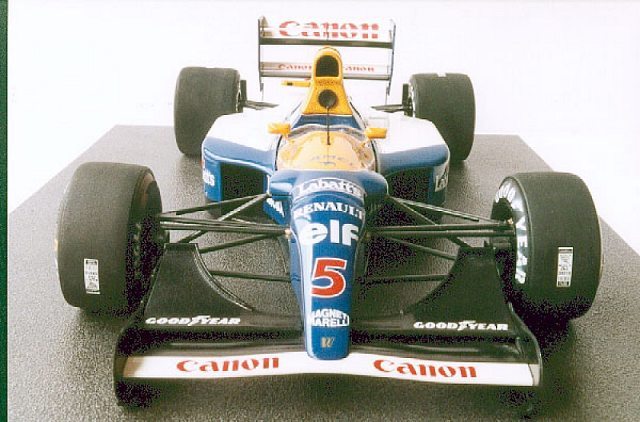
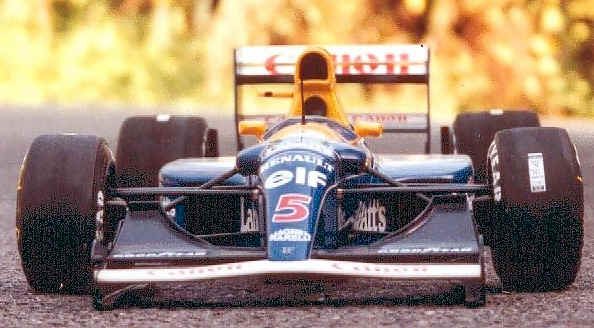
Camel Yellow - or the search for the Holy Grail What is it about Tamiya's TS paints? First you can't find them, second they make the obscure colours nobody else will do, and third they never seem to actually dry. The yellow areas are definitely that rich Camel Yellow shade, which means that you have to use the TS34 paint, or mix it yourself. Either way, it's going to be tricky - I think this was probably the most trying time during the whole construction. I masked and painted the yellow areas, then left them alone for 3 weeks before attempting to gently polish them into the surrounding paintwork. Disaster - do not use T-Cut - it rots TS paints. Strip and start again, oh no, I need another can, where do I get it from? This time my wife was so tired of hearing about Camel Yellow she actually told me it was the paint or her. Hmm… anyway, finally sorted. On to the pinstriping - use the decals in the kit, but trim the blue away totally, and the join lines are gone! The only other challenge was the Elf logo on the yellow rollover structure, which is surrounded by a blue square.
The kit decal colour stands out like a sore thumb, so after many failed attempts at masking and painting blue on, I finally sprayed some clear decal film with Regatta Blue, let it dry for 2 hours, cut the blue square out, and applied it as a decal. Then I made the white surround from scrap white decal, using the kit decals as templates. It looks painted on - if you try this, however, make sure that you can finish the job in one session, as the paint will dry out and make the decal brittle. Take your time and the results are worth the effort. Undertray Someone once told me never throw anything away when modelling. This is very true. The undertray requires application of the heat shielding material, which again is the Tamiya metal foil. Put it in the spares box and use Bare Metal Foil again, but also, here's a little trick. On top of the primary heat shield, there is a secondary shield directly under the exhaust pipes.
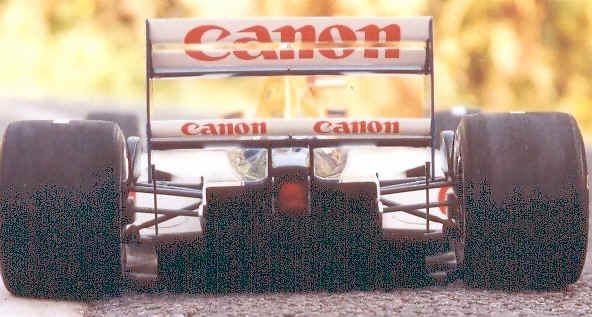
This has a dimpled finish to it which would be very difficult to replicate. However, if you go to your fridge (if you have kids) or your local supermarket (if you do not have kids), and purchase a pack of Dairylea Dunkers (a delicious cheesy snack…not!) the lids, when washed, and lightly burnished, have just the scale effect and dull aluminium colour required. Cut to size, and attach with double-sided tape, but remember to turn the printed side down ……my 4 year old son is collecting these for me now. While on the exhausts, it's worth passing on another tip. Sometimes F1 exhausts are dull brown, sometimes shiny chrome/steel. The FW14B system is matched well by Humbrol Metalcote Polished Steel.
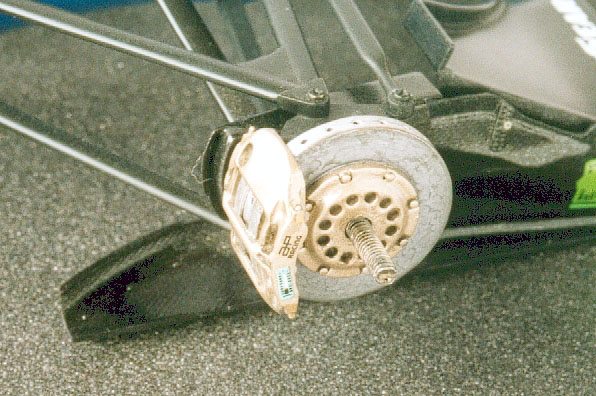
If you have never used this paint before, try it. Spray it on in several coats, leave for a couple of hours, then polish with a soft cloth. It's graphite based, and just like pencil lead, it replicates a steel surface very effectively, and doesn't tarnish. The rest of the undertray was sprayed with Diamond Black, and selective areas finished with more carbon fibre decals. Again, the secret here is to vary the finish. Break it up and make it look like it's made from little bits - because it is. Big psychological moment ….. Joining the engine to the tub. I need say no more, except to note the date - 23rd September 1998, and 150 hours into the build. At this point, I went up to the Model Wheels Expo in Redditch. Coming from Southampton, it was quite a journey, but I had a couple of good reasons. One was to finally meet several people without whose encouragement, I would have not got this far, and the other was to compare the Williams to the standard set by the models on show. Remember, I was back in the game after a long lay-off, and I needed encouragement. At this point I have to single out Ian Harvey and Mike Rosser at MRM International, Ian in particular for his general help, encouragement and enthusiasm, as he spent enough time with me at the show to share tips, tricks and points to watch for the remainder of the build. Thanks Ian…it's mainly due to you that this project actually got finished. In fact the show was excellent, and wel worth visiting for all motor sport nuts. Wheel hubs and brakes So, back to the build. The brake discs were the next challenge - how do you get that blotchy effect on the carbon discs? It's easy - spray the assembled disc with Metalcote Polished Steel, polish it, then - horror of horrors - spray lightly with cyano accelerator - I used 'Zip Kicker' - smells really bad, but works a treat!
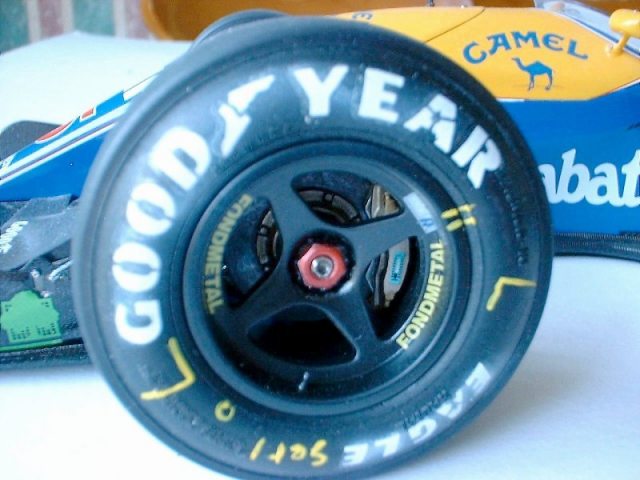
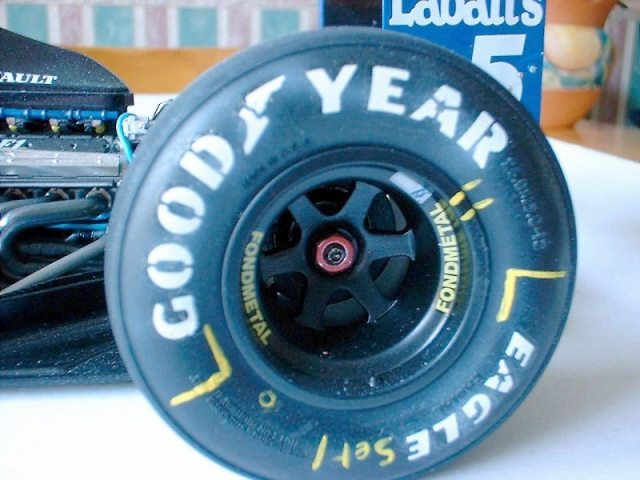
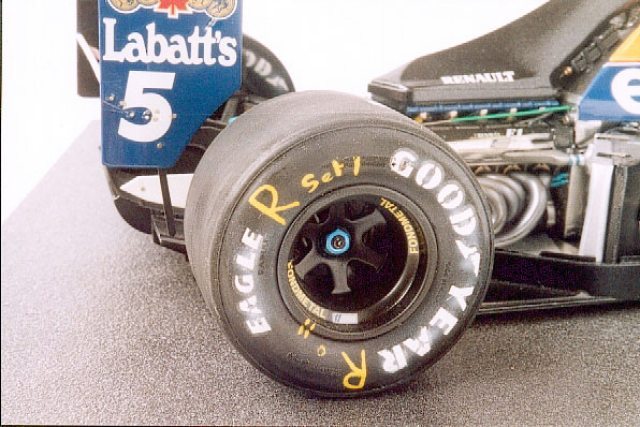
Wheels and tyres I added tyre valves from little rivets and bits of steel wire, and gentle weathering of the wheel rims. The tyres were sanded down by mounting on a dowel in a drill, to remove the mould line, and put on the rims. Next horror - I made a hash of the Goodyear decals on two of the tyres - if I can give any advice here, it's really take your time on this one. Luckily, a phone call to good old Riko (Editor note: Riko is dealer of Tamiya in UK) resulted in a spare set of decals. I have to say it is really nice to feel that the distributors actually care that people finish the kits they sell - my experience in the past has not always borne this out. Anyone remember the complaints slip in Airfix kits of the seventies - I got the feeling that it had already been filled in in pencil by the packing lady whose secondary role was to identify the missing parts to save time for the purchaser! Anyway I digress … eventually all was rectified. I oversprayed the Goodyear logos with white paint, then added the tyre mechanics' markings e.g. Set 1 R etc. Some people use gouache for this, others use wax pastels.
End piece There's lots more I could say, but rather than bore you any more, I am quite happy to share my experiences with anyone currently working on the kit, or anyone about to take the plunge. I have logged about 200 hours on the project, and you never really finish a model - there's always something else you could add. However, it's now time to turn my hand to the next project. I am working on the Tamiya 1/12th Lotus 49B - still available if you look, and probably on the re-releases list at some point. My plan here is to replicate the cockpit interior/pedals (all 4 of them - did you know that those huge aerofoils were controlled by a 4th pedal hooked over the clutch pedal - McLaren weren't the first after all to have extra "footrests"), and exchange the engine for a later, more accurate Cosworth moulding from one of the artefacts that got me back into this game. I will report on my progress at a later date, but for now I would like sign off by encouraging anyone out there to have a go - the tricks are not that hard to do, and make all the difference in the final analysis. But above all, I must pass on one of life's most useful bits of advice - remember, if you don't enjoy it, why bother doing it?
|
|||||||||||||||||||||