|
|
|||||||||||||||||||
|
Formula one |
|
||||||||||||||||||
|
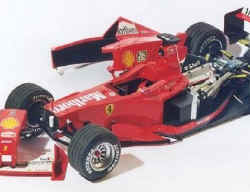
Ferrari F1-2000 a resin and white metal kit, 1/12 scale by MG |
|||||||||||||||||||
|
by Mario Covalski |
|||||||||||||||||||
|
Last September 2000 I wrote a preview of the Ferrari F399 from Model Plus, an Italian manufacturer who produces 1/12 resin kits, in addition to a wide variety of other products in different scales. On that occasion I mentioned that I really didn't have much expectations about this kit, but once I got it I was impressed. Some time later - once the model was already built - I published an article where I explained my particular experience with this great resin kit, as well as all problems encountered during construction. The final result, however, had been great. You can read the articles following these links: Now MG has released the Ferrari F1-2000 (Model Plus series), with which Michael Schumacher won the 2000 Championship and Ferrari the Constructor's Cup. Finally, after so many years and so many bad moments.
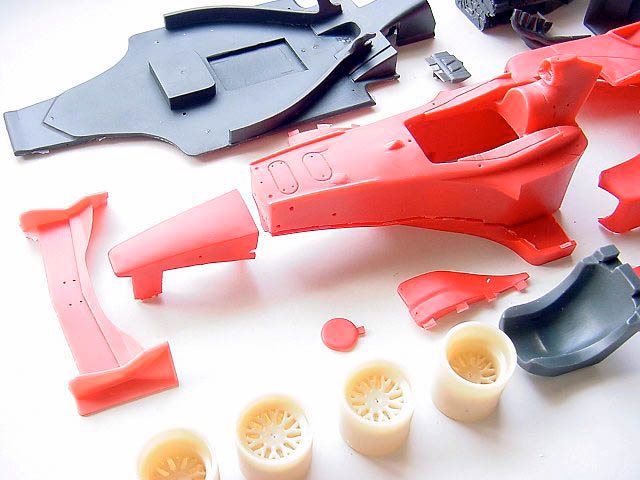
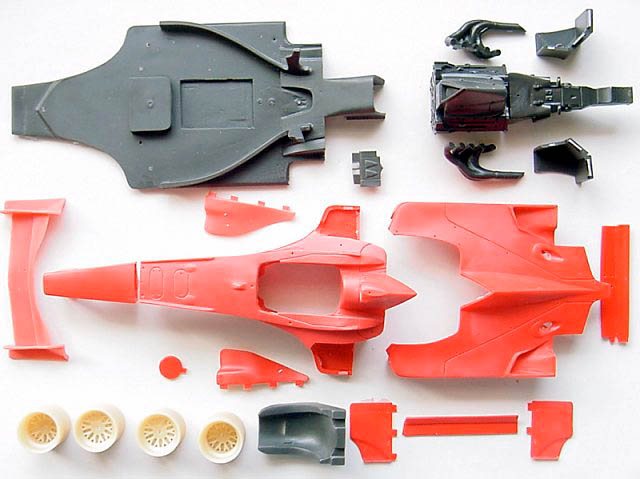
I was really surprised when I opened the box and saw the different parts of this kit. I could not believe my eyes, all those things that I had previously criticized about the F399, including some details of the decals, had been modified for the F2000 model.
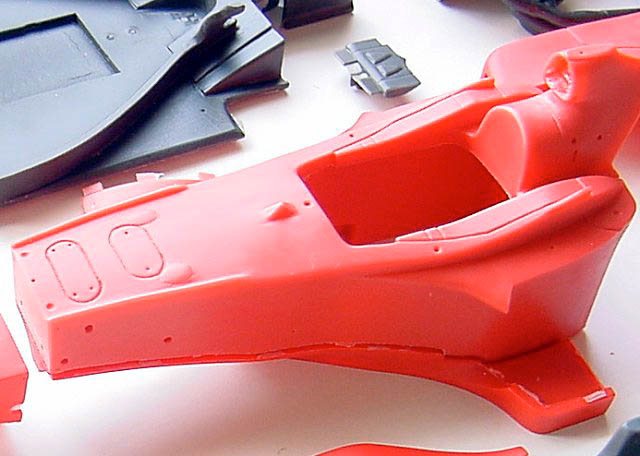
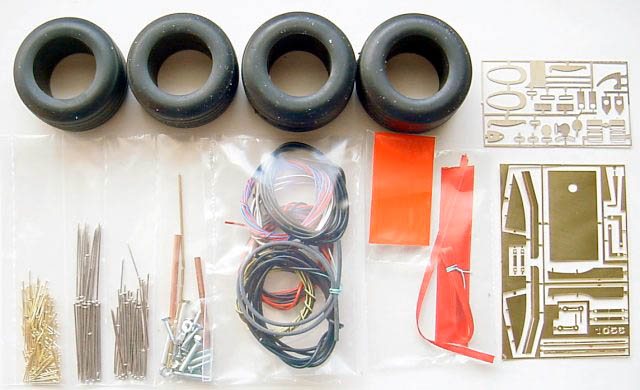
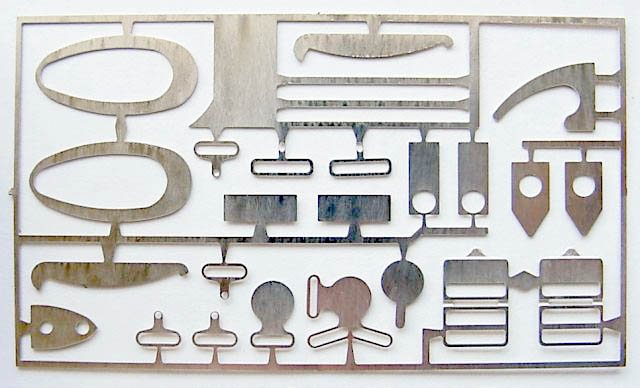
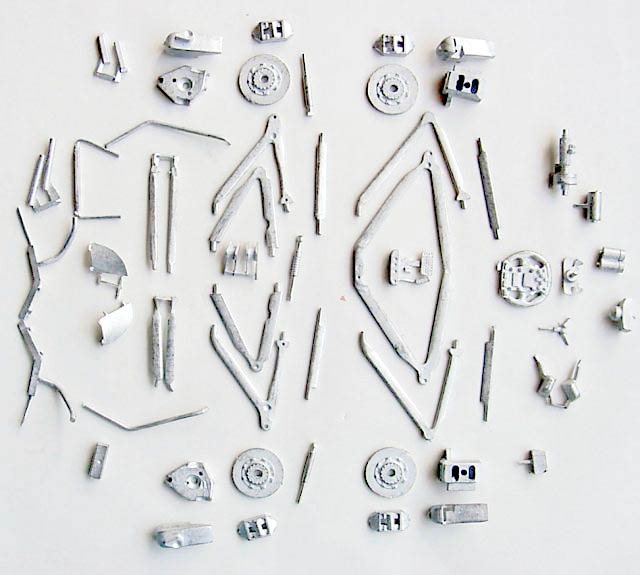
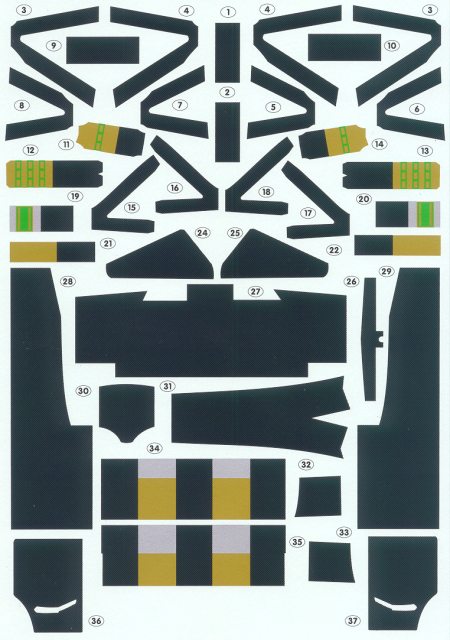
The resin is now less porous and has a more flexible aspect. The engine cover is now thinner and its surface smooth. If you take a look at them with magnifying glasses you can notice that no air bubbles can be seen at all. The use of filler is not necessary, except on the joint of the upper and lower parts of the main body. The nose is retractable and metal parts are provided to detail all mechanic items. The interior finish of these body parts is neat and adequate. The front aileron, cast in one resin piece and similar to that of the 399 model, is now thinner and more realistic. It is detailed with brass photoetched parts.
The bottom, crude and poorly finished in the 399 model, offers now an excellent finish. The manufacturer's name is now small and raised, which make it easier to delete. My thanks to the MP people. Since the air intake for the engine is closed, I decided to use a Dremel with a milling tool in order to make it deeper. But please be careful, otherwise you could damage the body!!
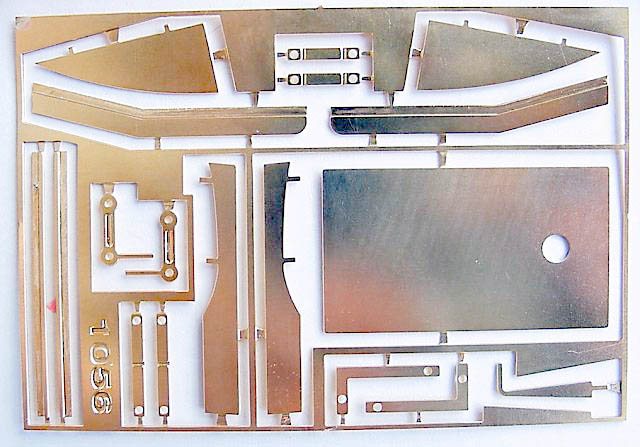
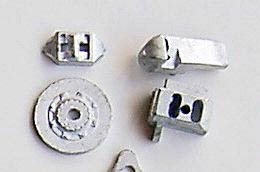
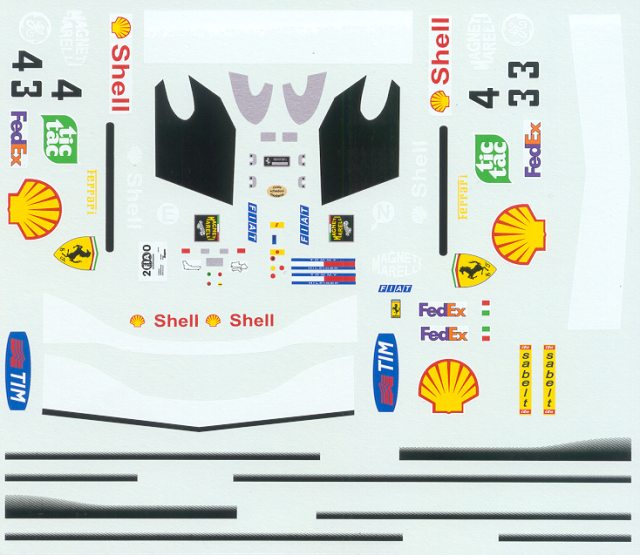
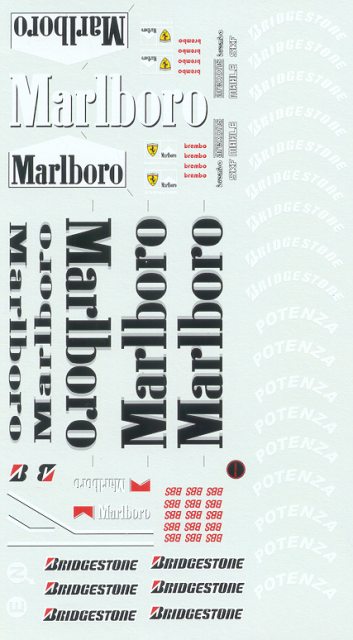
One unbelievable weakness of the 399 model were the brakes, without any detailing. But this has been modified and the new kit provides completely detailed discs and calipers similar to those used for the real car, all of them in white metal. All other metal parts are similar to those of the previous kit; I still don't like the steering wheel, although this 2000 version seems to be more carefully cast. Two sheets of high quality photoetched items are provided, as well as wire and everything necessary, like small brass nails and chrome needles. This set is completed with resin wheels, but not porous ones like in the 399 model. These wheels will allow for the application of realistic metallic paint, compact tires with the proper shape and strips for the seatbelts. Decals The decals of this kit are worth a separate comment. There are three sheets: two of them provide logos and brands for the car and wheels and the third one is an imitation of carbon fiber … but instead of having to cut the parts off, all shapes are already provided with the corresponding pattern, like Tamiya's. This way, you will be able to completely cover the suspension arms, the inner part of the body, ailerons and all interiors carrying this imitation of carbon fiber. Simply wonderful!!
Conclusions The instruction manual consists of a couple of big sheets, where you will find clear diagrams showing all the necessary steps to build this model. I really had no problems with the construction by following these instructions. This is a numbered kit. But the photoetched license with the car model and serial number is no longer provided. My sample is 053/500. As I write these lines I watch the Ferrari 399 on the exhibition rack and think how this new model would look like, which in my opinion, is more beautiful. It is obvious that new techniques have been used in the production of this new model and the price is still reasonable (approximately U$S 300) if we take into account how much a 1/20 model costs. I hope I will be able to write an article on the construction of this Ferrari winner very soon. |
|||||||||||||||||||