|
This model is from Hasegawa, ref PT13. its quality is good enough to build an acceptable model, straight from the box, and includes decals for several versions. However I didn't chose any provided by the kit, but the "MigKiller" one, which fought with the fabulous Mig 15 on the Corean sky. Both planes were similar regarding to power and armament, but the Sabres were piloted by true aces, as in this case, the Captain Clyde A, Curtin of the 335thFighter Interceptor Squadron, 4th Fighter Interceptor Wing.
The model is placed on a diorama which represents a parking zone in the KIMPO AB (K-14) Air Base early during 1953.
|
In the right image we can see how the safety wall was made. These walls were built with sand bags, but in my case I used two parts epoxy putty, piling them to obtain the desire height.
|

|
|

|
The fuselage end has two position lights. You can also appreciate the rudder slightly displaced from the center position, to give the model more realism.
|
|

|
Here the flaps, and how they have been modified. Removing those of plastic provided by the kit, by cutting them with a thin saw, and replacing them for the resin ones of Hi-Tech set ref # 48022.
|
|

|
Generally, the helmet, the parachute and the folder with the mission briefing, aren't provided with the kits. I added these details on the wing leading edge, giving to the whole assembly a lot the realism.
|
|

|
To represent the oil leaks and the normal weathering of an airplane on service, I used Vallejo acrylics applied with airbrush. I also remarked the panel lines using a brush and a mix of Vallejo 950 + 939.
|
|

|
The legends and numerals, were carefully cut to remove most of the film decal. Don't forget do this job, in this way the "silvering" effect will be avoided, saving a lot of time. Then I used enough MicroSol and MicroSet.
|
|

|
|

|
Captain Curtis threw down five Migs, which were marked on the left of the cockpit.
|
|

|
I added to the SNJ aluminum paint (base color), small quantities of Tamiya X-11 (silver) and XF-16 to obtain different shades. Then I painted some panels with these mixes to remark differences among the panels.
|
|

|
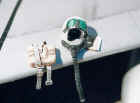
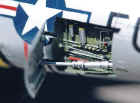
The well of the airbrakes were detailed with several thickness of wire, then they were highlighted using the dry brush technique.
|

|
The details shown in the left images were achieved using parts of the same kit used to detail the flaps, Hi-Tech ref # 48022
|

|

|
The interior cockpit details, like panels, consoles etc., are photo etched parts from Eduard set ref # 48185. I added other scratch build, details like the oxygen tube, etc.
|
|