|
|
|||||||||||||||||||||||||||||||||||||||||||||||||||||||
|
Cars |
|
||||||||||||||||||||||||||||||||||||||||||||||||||||||
|
Building the Tamiya Porsche 935 "Jägermeister" #20005 – 1/20 scale |
|||||||||||||||||||||||||||||||||||||||||||||||||||||||
|
by Guy Golsteyn © Modeler Site |
|||||||||||||||||||||||||||||||||||||||||||||||||||||||
|
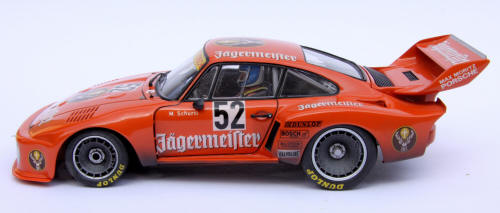
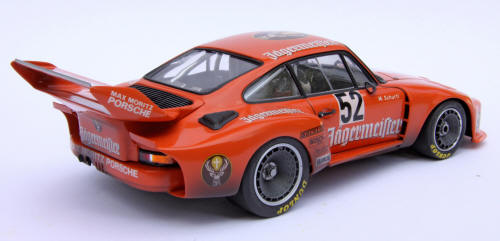
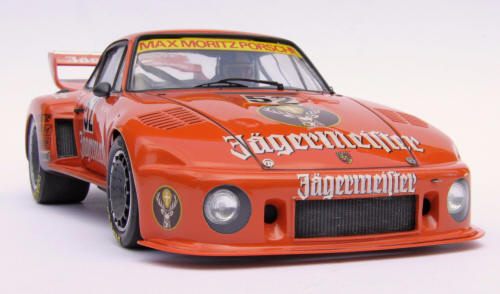
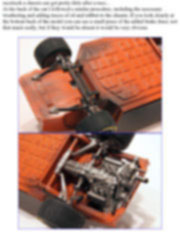
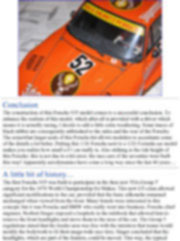
Legal Notice No material from Modeler Site any Web site may be copied, reproduced, republished, uploaded, posted, transmitted, or distributed in any way, except that you may download one copy of the materials on any single computer for your personal, non-commercial home use only, provided you keep intact all copyright and other proprietary notices. Modification of the materials or use of the materials for any other purpose is a violation of copyright and other proprietary rights. Read More here > Legal notice The Porsche 935 is one out of the seven 1:20 closed wheels kits that Tamiya has ever released. Of course there have been produced lots of 1:20 Formula 1 kits, to improve the detailing level in comparison to 1:24 cars, but as far as 1:20 tin top cars are concerned, Tamiya only produced four Porsches, two Fiat cars and one Toyota. The kit with reference number 20005 (equivalent to the fifth 1:20 scale kit) was this Porsche 935. The kit allows to build either the 1976 factory version with ‘Martini'-livery, or the 1977 customer version with ‘Jägermeister'-livery. Because I couldn’t make up my mind whether to build the factory version or the customer version, I purchased the kit twice so that both versions can be built.
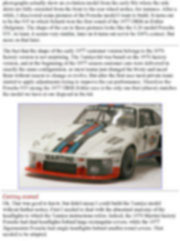
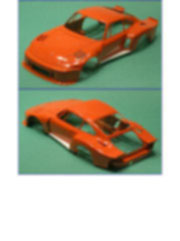
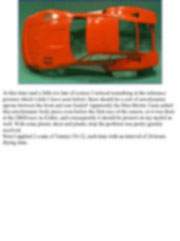
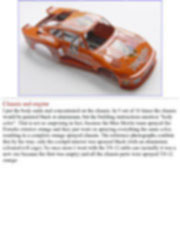
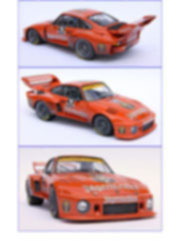
Building I started building the orange customer car. Of course this meant a lot of necessary research, because the assembly instructions don’t give any information about this car, the driver or the races it drove. The only information we can find in the instructions states that the headlights of the Jägermeister version have to be adapted because they don’t look like the Martini version. That’s all we get. Research Right. Luckily, ‘Google is your friend’. Soon I got confirmation of what we already knew: the Porsche 935 was used in 1976 by the factory team (and it won almost every race), then in 1977 it was offered for sale as a "customer" version. The Max Moritz team bought one of the 935’s and painted it in the well-known Jägermeister colors. Furthermore, I learnt that the car (among others) was used in the 1977 DRM (Deutsche Rennsport Meisterschaft), with Manfred Schurti at the wheel. So I tried to find some good reference photos on the internet, but guess what?, most of the pictures found it showed the Jägermeister Porsche 935 with a different shape. Many photographs actually show an evolution model from the early 80s where the side skirts are fully extended from the front to the rear wheel arches, for instance. After a while, I discovered some pictures of the Porsche model I want to build. It turns out to be the 935 in which Schurti won the first round of the 1977 DRM at Zolder (Belgium). The shape of the car in these pictures looks like the 1:20 model Porsche 935. At least, it seems very similar, later on it turns out not to be 100% correct. But more on that later. The fact that the shape of the early 1977 customer version belongs to the 1976 factory version is not surprising. The Tamiya kit was based on the 1976 factory version, and at the beginning of the 1977 season customer cars were delivered in exactly the same configuration, so most teams just changed the livery and raced them without reason to change or evolve. But after the first race most private team started to apply adjustments trying to improve the car performance. Therefore the Porsche 935 racing the 1977 DRM Zolder race is the only one that (almost) matches the model we have at our disposal in the kit.
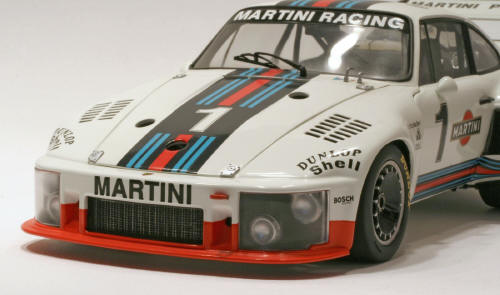
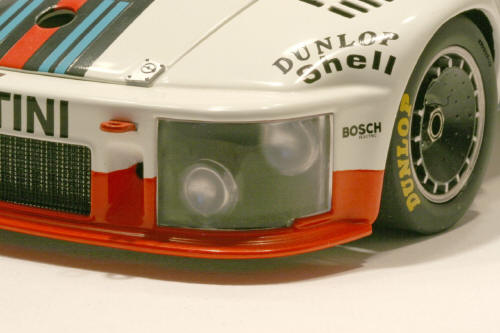
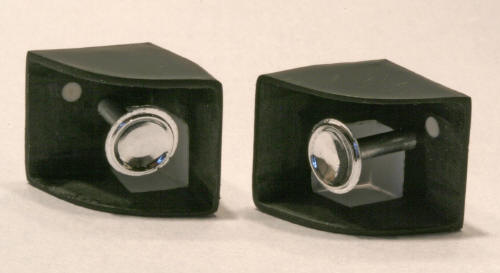
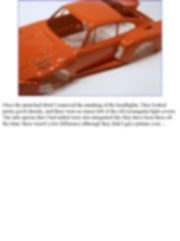
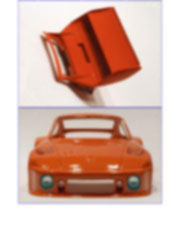
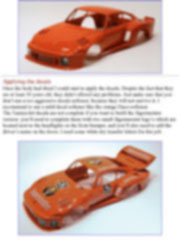
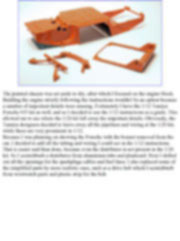
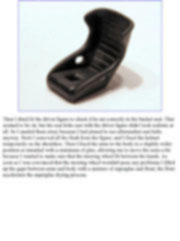
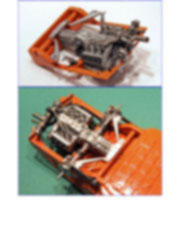
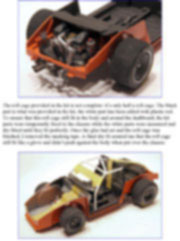
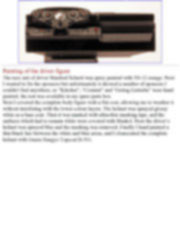
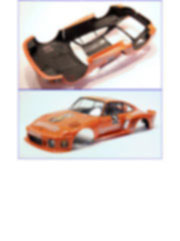
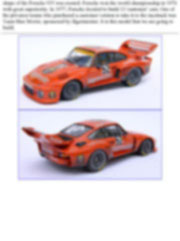
Getting started Ok. That was good to know, but didn't mean I could build the Tamiya model without further notice. First I needed to deal with the abnormal anatomy of the headlights to which the Tamiya instructions refers. Indeed, the 1976 Martini factory Porsche had dual headlights behind large rectangular covers, while the 1977 Jägermeister Porsche had single headlights behind smaller round covers. That needed to be adapted.
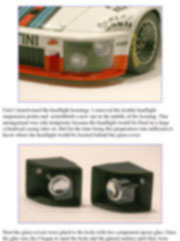
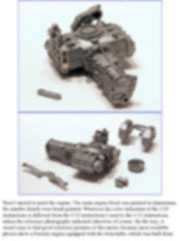
First I transformed the headlight housings. I removed the double headlight suspension points and scratchbuilt a new one in the middle of the housing. This arrangement was only temporary because the headlight would be fixed in a large cylindrical casing later on. But for the time being this preparation was sufficient to know where the headlight would be located behind the glass cover.
This article is offered in PDF format to be read or printed using Acrobat reader, contact our webmaster > Here Includes more than 74 pics, here we show only the text pages.
Este artículo es ofrecido en formato PDF, el cual puede ser leído o impreso usando el Acrobat reader, contacte a nuestro webmaster > Aquí Incluye más de 74 imágenes, aquí solo mostramos las paginas de texto.
Big size photos are only available in our PDF format. Support us ordering our notes in PDF > Here |
|||||||||||||||||||||||||||||||||||||||||||||||||||||||