There are a lot of plastic models manufacturers, whose instruction manuals are clear and well structured. However, there are others quite complicated in their sequential steps, making the building a real nightmare for the beginner. This happens even with the more experienced companies. From our personal point of view, the least explicit manuals are those by some American companies (AMT, ERTL, Revell and Lindbergh) because, in most cases, they don't even include a color guide. Some of the most prestigious companies have well illustrated manuals with an excellent information, although they have a certain difficulty in the building process, making the sequence difficult to follow. All instruction manuals begin with: READ BEFORE ASSEMBLY…, like if we had to memorize it. The beginner faces a dilemma, to follow the steps (even though sometimes this is more complicated), or depart a little from them and adapt them to their personal preferences. For instance, cleaning and gluing some pieces of the same color beforehand, making subassemblies, because once the pieces painted, they are difficult to glue one with the other due to the paint, so you have to scrape the paint from the areas to be glued, with the natural waste of time and, even, making you lose your "appetite" for the model. So, the logic conclusion here would be to modify the building process in order to get to the final through the shortest way, or the one that pleases your personal tastes. There is nothing that forbids us to start building the engine and suspension parts, and start with the body at the same time. The key point here is, not to assemble anything now that we'll have to disassemble later, in order to put the first subassemblies. Besides that, the best technique will be the one dictated by our preferences, and a good dose of common sense. Each kit presents different problems, that is the challenge!, so we must face it in a different way. It's not possible for us to know all the kits we buy beforehand. But this is the "name of the game" for the modeler, to overcome the difficulties and get to
the end with a well finished product, and the most important, one that will give you amusement and personal pride. When we start building a kit, most of us are a little confused about the steps to follow, and we notice it when we are about to finish. Never take a kit's instruction sheet for granted. It often happens that, when you build the model following the instructions, you end up with a lousy fit. This is not due to the kit but to the instructions. When you have spent several years building all kind of models, like us, you learn several "tricks and secrets" that eases your building activities and gives us better built models, and more satisfactions. In this little work that we are presenting here, we are going to share some of those secrets, in order to save you from some disappointments. There are two important rules in modeling. First of all DON'T RUSH, and secondly, CHECK and DOUBLE CHECK the proper fit of every single part, BEFORE
GLUING. If a piece doesn't fit, take your time and find out why. Most of the times, a little cutting and sanding in the right place, or cutting a locating pin, will fix the problem.
Step1 Our first step will be to take a look to the assembly instructions, and determine which modifications we are planning to do and what will be left as it is. If you don't have much experience, or know nothing about the kit, you'd better leave the changes for another occasion. Getting our heads full of ideas when we don't even know what we are going to do, doesn't help much.
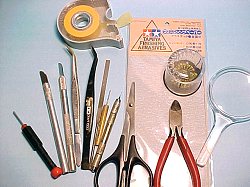
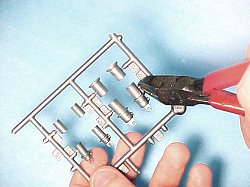
Start "cleaning" the pieces by removing all excess material, like molding marks and seams. Seams are better removed with the flat side of the X-acto, sanded and polished with steel wool or Scotchbrite. Then, check if it would be better to glue parts in the same color, or make subassemblies so while one is drying, you can start on another, so you don't have to wait. If we have any doubts about this, we can do the following: If the parts are very small, you'd better glue them now because once painted it will be more difficult to do it, and less "clean". If the parts have big surfaces to glue, we can leave them now, and do that in a later stage. It is better to do a good masking job, than leaving a loose joint. If we want to make some modifications, such as drilling holes or adding details, this is the time to do them.
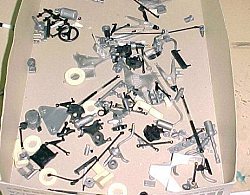
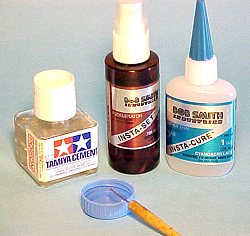
Now, we are going to talk a little about cements. If you don't have much experience, we recommend you to use a "thicker" cement. You can make it yourself by cutting little pieces of clear plastic, and dissolving them in liquid cement for a few days, after that time you come out with a gooey mixture that can be applied with an old paint brush. This mixture makes for a very solid joint. Expert modelers prefer liquid cement; this, as it's name implies, is nothing more but a plastic solvent that gets into the parts to be glued by capillary action, "dissolving" a little amount of adjacent surfaces and joining them in a permanent way. This works wonderfully when surfaces to be glued are big. But when the pieces are smaller, you'd better go for the thicker mixture, specially when the fit is not very precise. At this stage in the building process, we'd better leave out cyanoacrylate cements, because we'll use that later to glue parts of different materials (metal to plastic, etc). Step 2 Basically, we'll do the same with the second stage in the instructions manual, although now we'll check if we can use any of the subassemblies, or parts, that we've already made in the first step. We'll be surprised finding out that many of the parts and subassemblies in step #1, can be glued now, without waiting for the painting process and, best of all, without interfering with the final assembly. Once finished with this, we'll keep adding finished parts to our parts box. Step 3 Now comes the moment to make decisions. Are we going to modify part, or parts, of the model? Are we going to add extra details? If so, the most important at this point is trying the fixing of all subassemblies, they must fit in a natural way, without putting any stress in the pieces. Remember, painted pieces get "fatter", and difficult fixing can become impossible. Besides, we must scrape the paint from the areas to be glued, because otherwise they won't hold together. For the modifications, we must gather information from several sources: other models, pictures of the real vehicle, books, an after market superdetailing kit, PE parts, etc. The most important element in this stage, is our imagination. If this is your first time at building a model, try not to modify it. Modeling is an
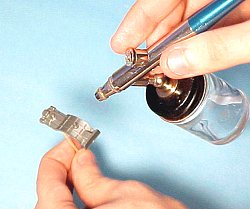
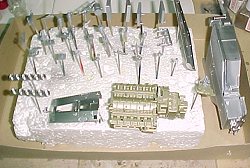
art, and as such, it is very important to finish our model in a correct way, before attempting bigger projects with extra parts. Once finished with the initial assembly of the pieces, it's time to prepare them for painting. How to hold the pieces in order to paint them, is an "art" that we must learn from the very beginning. Always hold the parts in wood pieces (chopsticks or bamboo skewers are great for this). Fix them with masking tape to an "invisible" part, that is, one that will not show once the model is finished. If the piece is going to be painted all around, like the front and rear wings in an F1 vehicle, you can drill a small hole in an invisible part and stick a piece of wire in it. This will hold the part while we paint it (with an airbrush, aerosol cans, or a brush) and after that, you can stick the wire in a piece of soft material till it is completely dry. The
main point here, is not to touch the piece while it is drying. Once we have all the pieces ready for painting, we'll start with it. If any part has more than one color, remember to always paint the light color first, or the one which is not metallic. Once the first color is completely dry, we mask the piece and put on the second color.
Once the pieces are painted, we continue with the following steps: Step 4 Without pulling out the wires, or the wood pieces, we use a brush to highlight small details like rivets, lights, etc. with silver, gold, flat black, yellow, red, etc. paints. After that, we should give some parts a "wash" and some "dry brushing", but this is another technique that we'll write about in a future number. Meanwhile, let us explain that we use the above technique in order to bring out the "volume" in the pieces by darkening the crevices and lower parts of a piece with the "wash", and then highlighting details with their original color using the "drybrush" technique. Step 5 That way, we go step by step in the instructions sheet till we get to the final, gluing everything possible, and leaving the rest for the final stages. If your memory is not too good, we recommend you to make a list of pending items to be glued once the model is painted and assembled, mirrors, antennas, TV camera in a racing car, and so on Once you've finished with all this preparations, painting and detailing parts, we must go back to the first step and start the final assembly of everything.
Summing-up The above mentioned techniques are a product of more than 65 models built by the authors along the last eight years, including racing cars, motorcycles, airplanes, and tanks in different scales, always following the same process. Knowing beforehand what we must do before beginning the construction of a kit, will help us to enjoy the process of building, and get to the final with a well built model. We hope that this little guide will be an effective help, specially for the beginner modeler. Keep modeling, it is a beautiful and creative activity. Till next time, and as we always say… Happy modeling |