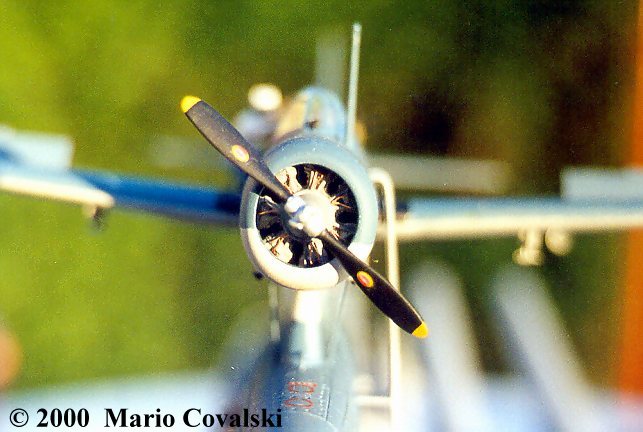
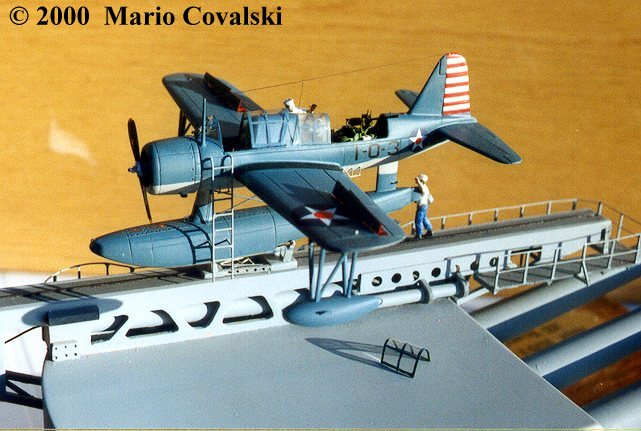
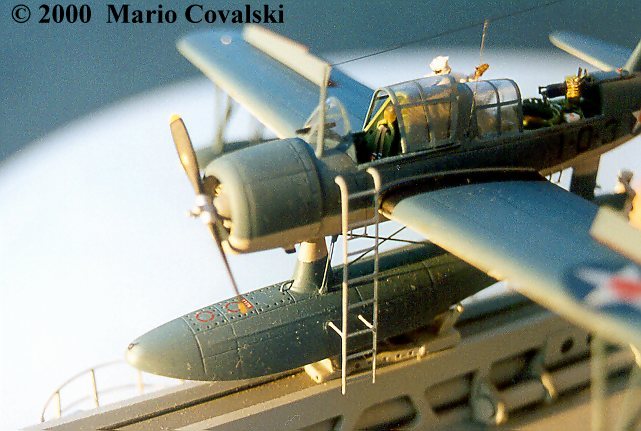
I think that we all know what happened on December 7th, 1941, so I don't want to bother you with history facts. In my opinion, the most fascinating ships that Japanese struck at Pearl Harbour was USS Arizona, and USS Nevada. Also, the Kingfisher is my favorite WW II plane, so I decided to make a diorama presenting the plane on Arizona’s x- turret catapult. The choice of Kingfisher models in all scales is poor. Airfix reissued their old model in 1/72 scale, and Monogram have a kit in 1/48 scale. Airfix model is contour correct, but with raised lines and no useful cockpit details at all. In Monogram’s kit you get photoetched parts, and that’s the only good part of this kit. The main float of Monogram is 12 mm shorter, so the last attachment point is on wrong position. Interior is totally wrong, too. Let me notice that photoeched instrument board is correct, but there’s no navigator’s instrument panel. If you want make correct model, you must realize that it will take a lot of work to correct them. Since I make models mostly in 1/72 scale, my only choice was Airfix.
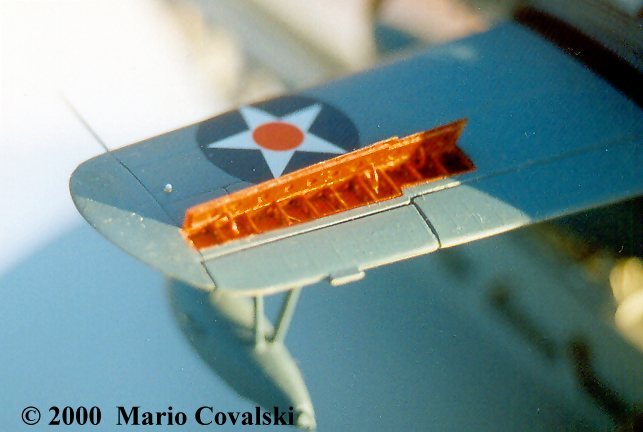
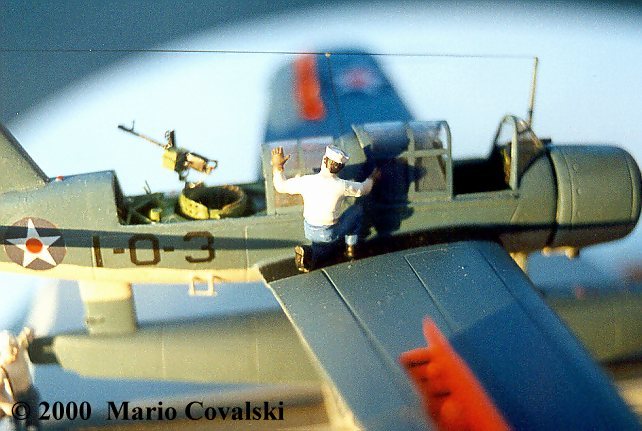
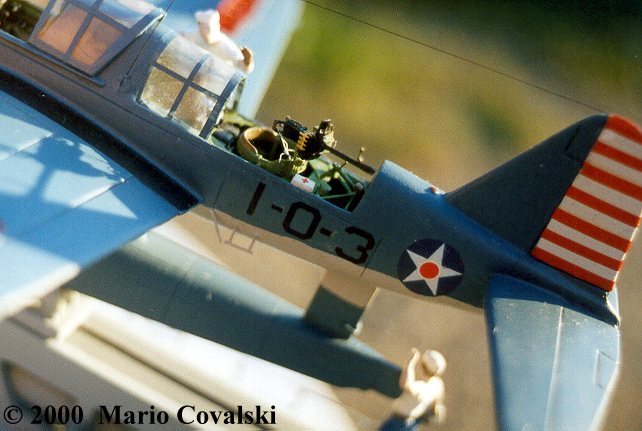
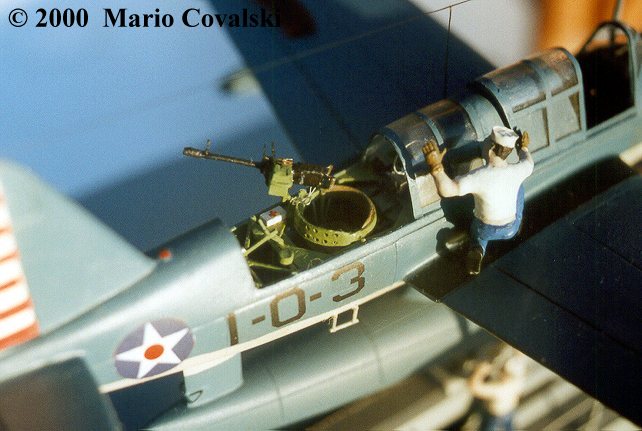
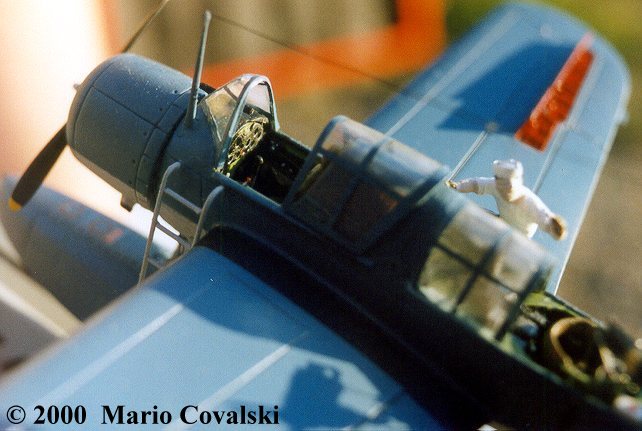
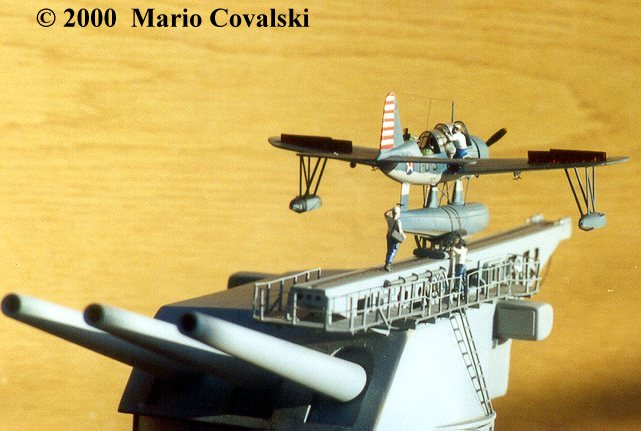
Detailing the rear cockpit was a real challenge. First I made little gadgets that come to the sides – fire extinguisher, Many pistols and cartridges on right, then smoke grenades and other stuff on left fuselage side. Then the fuselage halves are glued together. The main float, wings and horizontal stabilizator were glued on fuselage later. After this had been painted, I added the rest of the details in rear cockpit: radio equipment, rear instrument panel, gunner’s seat and gun, first aid box, flare boxes, life raft in compartment between crew seats, and so on. I vacuformed new canopy parts, leaving only the original windshield ,drilling in front to receive medical needle that act as pilot’s telescopic gunsight.
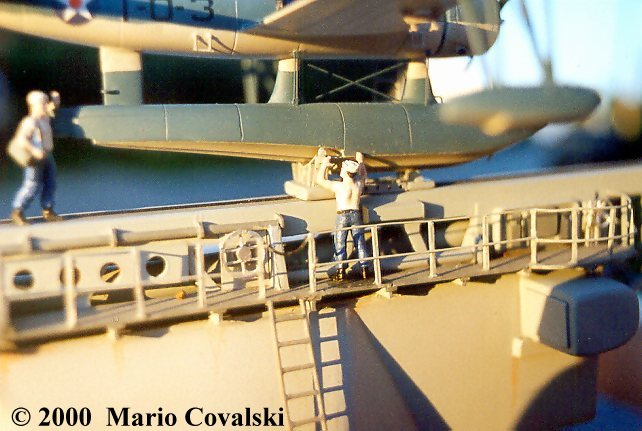
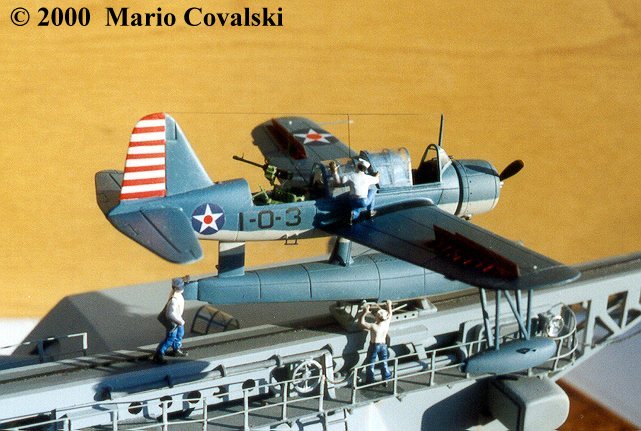
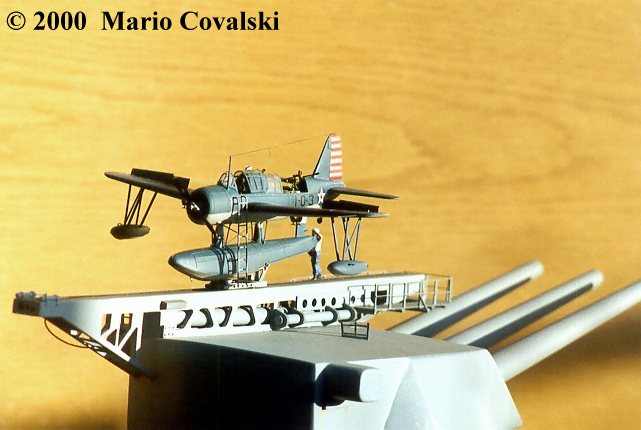
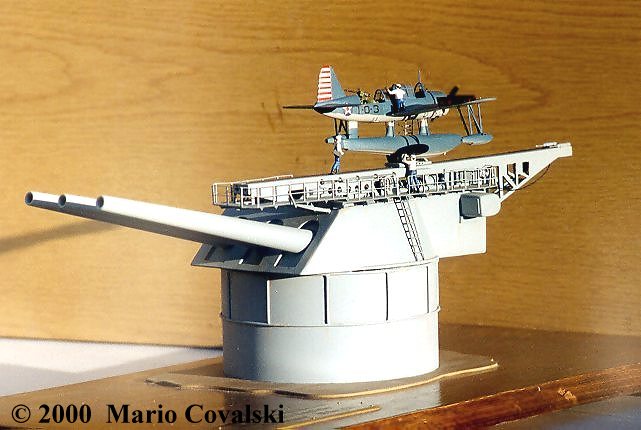
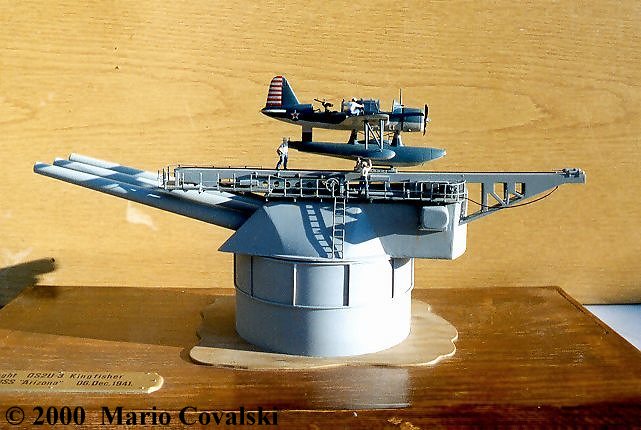
Turret & Catapult Revell’s Arizona in 1/429, that my brother put together many years ago, was my template to measuring some dimensions of Arizona’s X-turret, with catapult on it. This model, and some photos of Arizona were enough to draw the plans in 1/72. The turret was made of 2.5 mm thick sheet styrene, and the main catapult’s framing too. The ladders on left turret’s side are made of cooper wire pieces soldered together. The catapult catwalk and railings are made of 0.9 mm thick styrene sheet and stretched sprue. Gun barrels are solid iron, turned on a lathe by a friend of mine, with screw on the thicker side, then screwed on “L” shaped piece of aluminum. The whole construction is then screwed to block of hard wood, hidden in turret bottom. The most complicated part was the plane mowing cradle, that is so delicate, and must be strong enough to accommodate the plane safely. I drilled the cradle, the main float and the catapult , and connected them with two steel wires , glued with cyanoacrylate, to make strong and safe connection between catapult, cradle, and airplane. The figures are taken from Esci’s “Nato pilots and ground crew” set, slightly modified by adding aluminum foil strips around their heads, then painted white, together with upper side of head, that becomes sailors hats.
All photos by Mario Glozinic It took me one year and a half to finish this project , without the time spend to find Kingfisher documentation, as well as good and useful Arizona’s shots. I didn’t count the number of parts , but I assumed that only in plane must be some 300-400 parts, if not more. |