|
Legal Notice
No material from Modeler Site any Web site owned, operated, licensed, or controlled by Damian Covalski may be copied, reproduced, republished, uploaded, posted, transmitted, or distributed in any way, except that you may download one copy of the materials on any single computer for your personal, non-commercial home use only, provided you keep intact all copyright and other proprietary notices. Modification of the materials or use of the materials for any other purpose is a violation of Damian Covalski's copyright and other proprietary rights.
Read More here > Legal notice
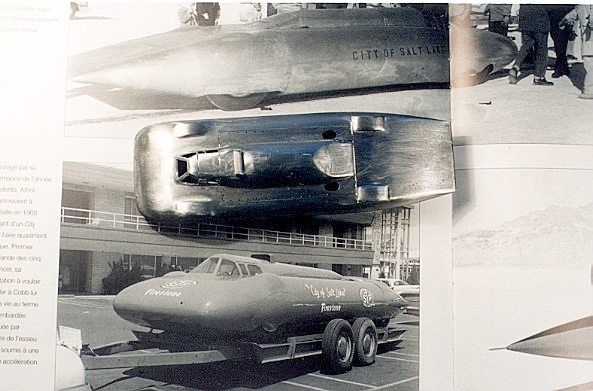
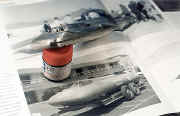
Athol Graham, " the Mormon preacher ", took to racing on the Salt Flat after a dream in 1957 suggested him he should go and break the land speed record.
His car was an outrageous construction, using many stock Cadillac component in the chassis, a modified B-29 Superfortress drop tank as a bodyshell, the cockpit from a surplus P51 Mustang ,and an Allison V12 aircraft engine from an " unlimited " hydroplane called " Miss Wahoo ".
|
The car certainly had more of an airplane than any other LSR contender so far. Unfortunately, even after many modifications had been carried out (some at the demand of race officials, judging the car to be too dangerous to be run on the salt flats !), the car and driver never achieved their aim.
|
|
|
Eventually, Graham was killed in 1960 whilst trying to break the record that still stood at 393.8mph (633.8 kmh), as it had been set in 1947 by John Cobb in the Railton-Mobil-Special.
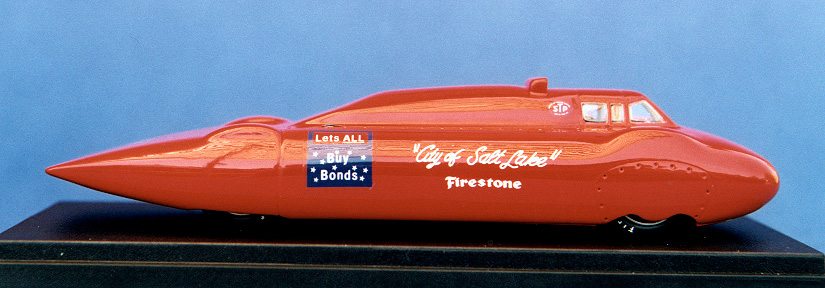
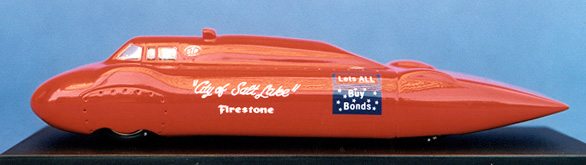
The particular car modelled here is the December 1959 version, which was quite a good season for Graham, as he was able to build speeds up to a 344.7mph two-way-average
|
|
Opening the box and assessing the kit
|
This is a simple, yet comprehensive kit.
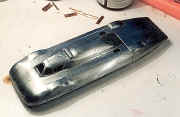
The 15 cast metal pieces are quite nice. The body comes in two main sections, upper and lower half, which will have to be glued or soldered (that's the option I would choose now) together. The separation line between the two halves must be invisible on the finished car !
|
|
My sample had some porosity and imperfections on the upper half of the body, which needed some grinding, filling and sanding. All the other bits and pieces are nicely cast, and fairly well detailed. The kit also includes 2 axle rods, which will have to be cut to the appropriate length. The wheels are cast and can be polished to a nice sheen, or simply painted silver.
 The decals had yellowed a bit (the kit is very old by now, and I had acquired my sample at a swapmeet, so it was probably from the first issue), but this was rapidly eliminated by exposing the decal-sheet to direct sunlight for some days (check back often to avoid exposing them too long, which will result in brittle, crackling decals !). The decals had yellowed a bit (the kit is very old by now, and I had acquired my sample at a swapmeet, so it was probably from the first issue), but this was rapidly eliminated by exposing the decal-sheet to direct sunlight for some days (check back often to avoid exposing them too long, which will result in brittle, crackling decals !).
The instructions are comprehensive enough to find a place for each of the 20 individual pieces. Painting instructions are quite basic but largely sufficient. A very nice touch is the inclusion of a comprehensive history of the car.
Rubber tyres are included, and although they look like standard o-rings, they look absolutely correct. Windows are provided as a one-piece vac-formed clear part.
General Assembly and additional detailing
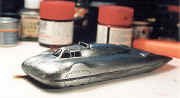
I glued the two halves of the body together using 5-minute-epoxy, and filled the seams with gap-filling superglue. As the curvature of the two parts is slightly different, some filler and sanding was needed.
|
The leading edge of the airscoop was filed and sanded to near scale thickness, and glued into place using the same glues ; the seam was filled with superglue and filler. All panel lines were rescribed, and the rivets redrilled using 0.5mm drillbits, …which is a bit too large…
|
|
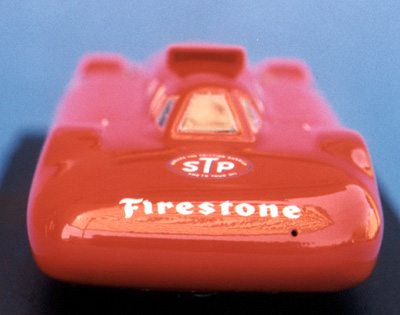
I added a 1mm hole at the left front of the car (see pictures). The purpose of this hole is not clear to me (maybe it's sort of an air vent ?), but it is definitely present on the real thing.
I polished the wheels, and placed the decals to the tires after putting them onto the rims. A good dose of solvaset helps the decals to adhere to the rubber, and a final coat of matte varnish both protects and blends in the decals.
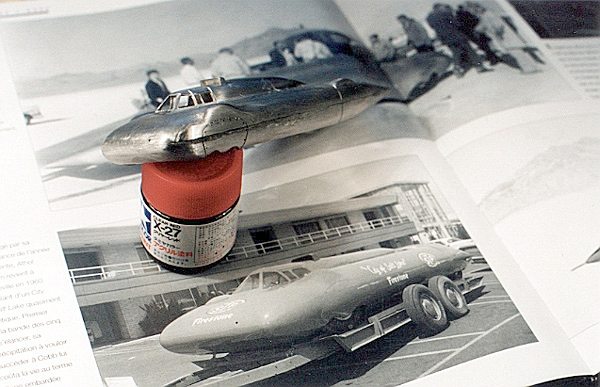
The model was primed using automotive primer (light tan), which I also used as the color for the interior (cockpit area). The body was in fact primed and sanded twice, as I had to eliminate further small imperfections and some filing/sanding marks left in the area where the upper and lower body are mated. The instructions suggest to use " Bright red (Peugeot Cherry Red - car plan CC/XAR 054) ". My personal choice was Motip 41750 ; it´s just one " bright red ", and probably as good as any other.
The first two coats of red were very light, followed by a heavier final coat. The same color was used for the chassis/floorpan. I still have my doubts about the shade of the color ; STP was one of the main sponsors for Athol Graham's car, and they were famous for their very bright red, even fluo red at some time (remember the Lotus 56b's ?). Also, on
some color pictures, the red looks quite light, and has definitely a " flashy " appearance. Anybody able to shed some light on this subject… ?
Applying decals and finishing
Placing the decals was no problem at all. As a matter of precaution, I applied a coat of decal varnish (Microscale) before removing the individual decals from the sheet. Although there is no problem with curvature (the decals sit on gently curved surfaces only), I applied a good dose of Solvaset. This eliminates the risk of dissolving or disintegrating decals during the application of the clear varnish.
As always, I applied 2 light, and one heavy coat of gloss varnish, let this harden for at least a week, then sanded using a polishing system, with increasingly fine grades of polishing cloths, finishing with automotive polish and wax.
A bit more of details...
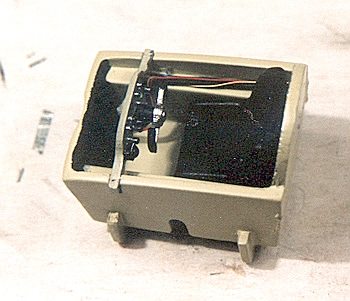
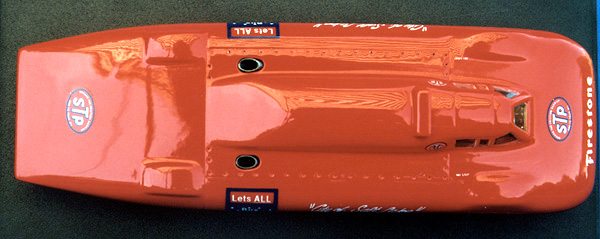
The interior was detailed by removing most of the cast in pipes and lines, replacing them by rubber hoses and different detail wires (Detail Master).
The instrument panel was detailed using Provence Moulage generic instrument faces (decals) and Detail Master instrument faces (printed paper). A punch & die set is very useful for cutting this kind of small roundels. A drop of crystal clear protects the faces, and simulated the bezels.
|
Most of this work is now hidden inside the finished model, and can't even be seen through the windows ; the next version I will build of this car (LSR Productions make 5 versions of the Spirit of Salt Lake City) will feature some more details in the interior, … and an open access hatch so you can see what's inside !
|
|
|
The windows were cut out individually from the vac formed acetate, and glued into place using Provence Moulage glue. This glue has less " gap-filling " qualities than Krystal Klear, but gives a stronger bond, faster. It looks like thinned Krystal Klear, and it's the best type of glue I have ever come across for fixing windows and small trim. Sadly, the new boss at Provence Moulage (he admits not even being a model car collector …) has apparently deleted this glue from their range, because it doesn't pay enough... Well, thanks for that!
The inside of the air-scoop was painted semi-gloss black, the wheels glued to the axle-rods (which were cut to fit). The exhausts were painted matt black, then dry-brushed with toned down silver (chrome-silver mixed with matt black). Finally the axles, exhausts and floorpan (with the cockpit interior glued into place) were glued respectively screwed to the body.
|
The finished model was firmly fixed to the base of a display case (BBR in this case, which is too tight a fit, and will be replaced by a more suitable size)
|
|
|
Conclusion
This is a nice model, giving an accurate representation of the real thing, without using too many parts. The quality of the castings is pretty good, but the casting and engineering of the body make it's assembly a bit of a challenge for the beginner in white metal kits.
The LSR Productions kits have been difficult to find for some years. Apparently they are back in business, which is good news, because their kits, even if they usually come without the now common p-e parts and other gimmicks, are still amongst the best and most accurate models of LSR vehicles.
Next LSR racer on the workbench : The 1960 Flying Caduceus of Dr. Nathan Ostich…
Useful Library references
"Land Speed Record", Cyril Posthumus & David Tremayne
"100 years of the World's Land Speed Record 1898-1998; Part 2 The second half century", Ferdinand C.W. Käsmann
"The fastest Men on Earth; 100 years of the Land Speed Record"(1), Peter J.R. Holthusen
"The Land Speed Record 1947-1997 as chronicled in the UK Motoring Press", Transport Source Books
"Vitesse Illimitée; L'histoire du record absolu de vitesse de 1898 à nos jours", William Huon
(1) contains some very interesting color pictures of different LSR cars, but some say the accuracy of the text is questionable
Special tools/materials used
Detail Master "0.012 in. Detail wire, black & red"
Detail master p-e instrument gauges & printed dials
Microscale Liquid Decal Film
Micro Mesh polishing kit by Micro Surface Finishing Products
Support us ordering our notes in PDF > Here
|