|
|
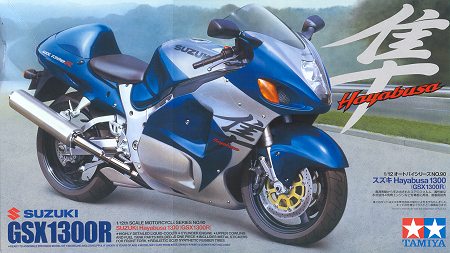
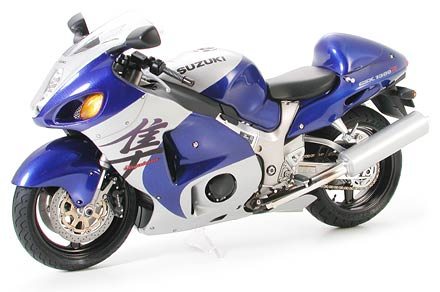
The Japanese Hayabusa falcon can reach incredible speeds and therefore it lends it's name and it's beacons shape to Suzuki's 200 mph missile, the 170 hp GSX1300R.
Tamiyas Hayabusa kit follows in the series of Japanese ultimate sports bikes it has been releasing, including Honda's CBR1100XX, Yamaha's R1 and Kawasaki's ZX-12R, the Suzuki being the final in these series.
|
|
|
|
Photo from the Tamiya site > Here
|
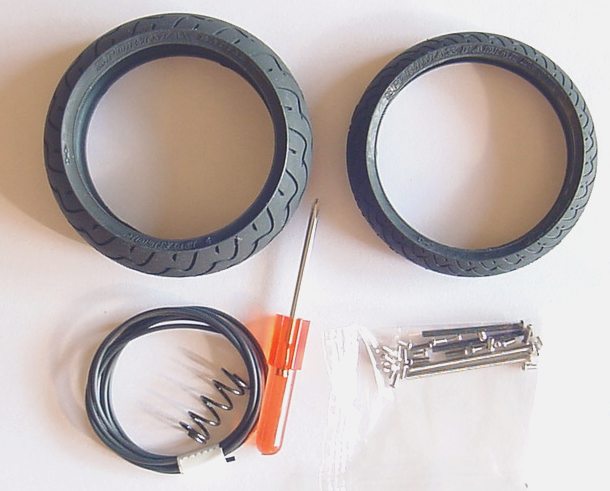
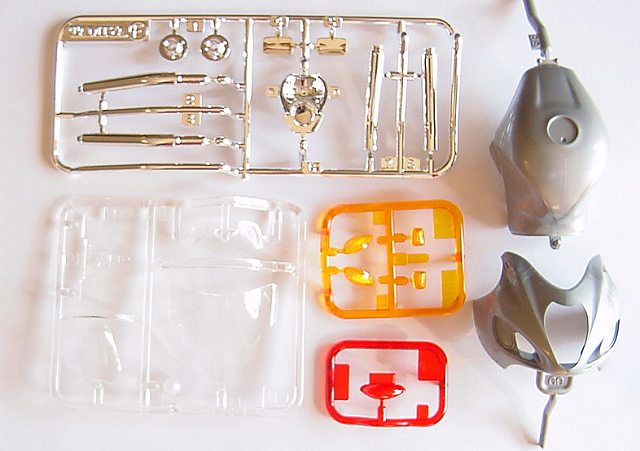
The box contents
The box art is nice as always, showing a 2001 model silver and blue Hayabusa painted by one of Tamiya's artists.
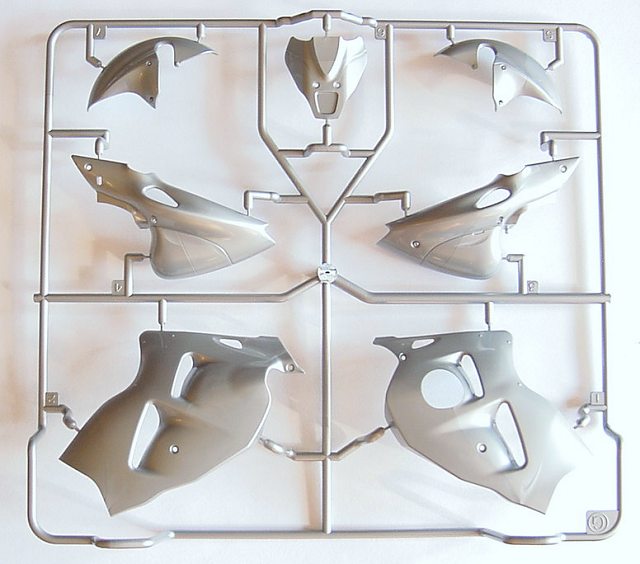
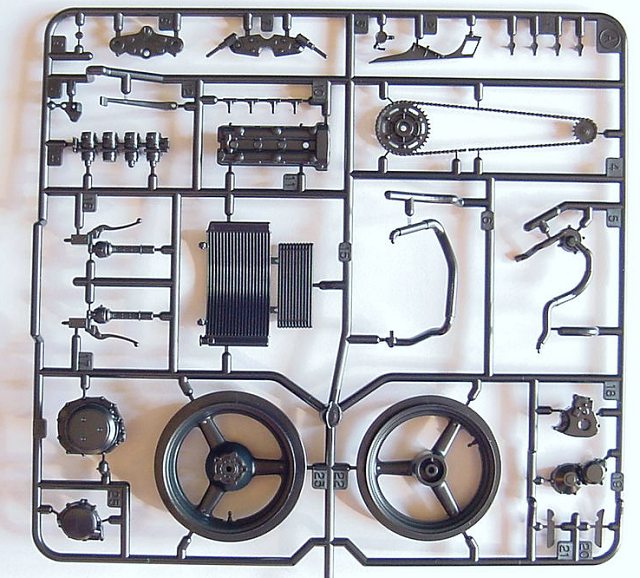
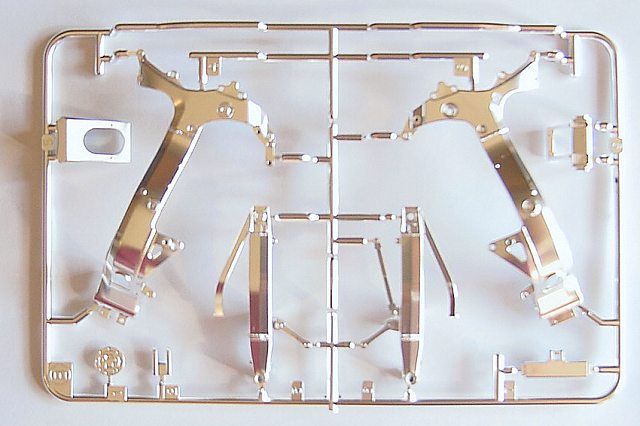
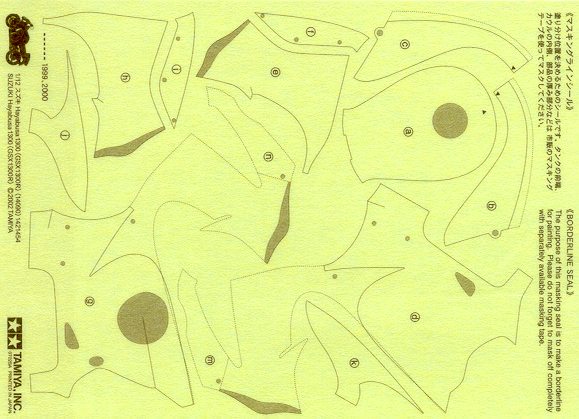
Inside the box You'll find an assortment of grey and black sprues holding most of the bodywork and the engine and chassis parts which all will require painting, plus one bright chromed sprue containing exhaust pipes, mirrors and the head light lens, one satin chrome sprue containing the frame and the rear swing, a clear sprue with the windshield and the headlight glass plus a cleverly moulded ram air intake lens that when painted looks like a mesh covering the intake. There's also red and orange sprues with the blinkers and the tail light plus a sheet of chromed stickers for the blinkers and the taillight lenses as well as the chromed part of the front forks. Furthermore there's an adhesive sheet with templates that can be cut out and used to mask the bodywork in order to obtain the Hayabusa's two-tone paint scheme with different schemes for the 1999-2000 bikes and
the 2001 bikes. Finally there's the decal sheet with markings for most of the available color schemes during 1999-2001 plus the usual tire bag and the well laid out instructions sheet.
The kit
If You are used to modern Tamiya kits You will not be disappointed. Everything is precisely moulded and very little filling and sanding is required. The tank is moulded as one piece, eliminating the task of removing the centre join line but it has a mould line that has to be removed. The only parts of the bodywork that has to be glued together is the front fender and the rear cowling wich has an integrated "seat hump", meaning that a two seater is not an option, You have to build the single seated version of the bike.
Once the bodywork has been assembled and painted in it's base color there's time for the masking templates wich has to be cut out and applied with great care, they sit very well and makes masking the bodywork much easier. I used a decal scissors from micromark to cut out the templates and it did the job well.
If You are after a precision reproduction of the real bike the pre chromed frame and swing arm has to be refinished as they are too bright and shiny, plus parts of the real bikes frame and swing has a rougher cast and is not polished. A friend in Italy suggests Alclad II white aluminium as an alternative finish, maybe combined with a matt or satin varnish coat on the parts of the frame supposed to be unpolished.
I decided on a stock kit frame in my build and it looks fine if not 100% accurate.
Tamiya's painting suggestions are fine except for the use of silver, gold and aluminum/ metal looking finishes, the use of Alclad II and/ or Model master metallic finishes will enhance the appearance of the parts with these finishes and make it easier to apply black washes thinned with white spirits, as this thinner always dissolves Tamiya enamel paint which never really dries properly.
The inclusion of the chrome stickers are welcome, on the front fork they look better than bare-metal foil because of their thickness, imperfections in the surface are hidden and the chromed fork leg look very realistic.
You should not experience any specific problems assembling this kit, but if You are going to build up a heavy paint coat on the bodywork I will advise You to mask off the joining points between the upper and lower fairing parts before the paint gets too thick, so that a perfect fit of the parts is maintained. Consider such masking also for the fitting points of parts such as the windshield, the headlight and the gas tank cap.
Improving the kit.....
This kit is so good that it's almost impossible to improve very much, but You can consider these things:
 The brake discs' ventilation holes are only countersunk by Tamiya, but most modelers drill them fully open with a pin vise. The same goes for the bobbins that supports the disc and make it "floating" The brake discs' ventilation holes are only countersunk by Tamiya, but most modelers drill them fully open with a pin vise. The same goes for the bobbins that supports the disc and make it "floating"
The bodywork's fastening bolts can be replaced with aftermarked bolt heads or (if You are very brave..) a centre hole can be drilled in the bolts to simulate a hex bolt head.
Tamiya's phillips screw heads can be hex shaped using a Dremel tool and after installation they can be filled and painted to make them look like bolt heads.
The supplied tubing can be replaced with a thinner, more accurate tube such as Modeler's.
You can always try to customize the bike by adding carbon end cans, carbon interior, custom paint job, scratch built two-seater or anything you fancy, and remember; most owners remove the warning stickers on the tank and frame so consider leaving them out.
Conclusion
I am a big Tamiya fan and I think this kit is very good, offering very good value for money. I like the new elements like chrome stickers, one-piece tank and colored red and orange lenses.
I suppose die-hard modelers who like to struggle a bit won't agree but for me less work on things like sanding join lines is a big gain wich means I can spend more time on enhancing the appearance of the model rather than shaping it from the ground up.
|