Well this started to be a quick build, you know straight from the box…. yeah right. After reading an article in Scale Aviation Modeler that dealt with superdetailing the kit, I had to give it a shot. Now I'm not going to go into the history of the aircraft, because its been done and re-done…Everyone knows that this aircraft was one of the Luftwaffe's work horses, and provided the Allies with a worthy adversary.
The kit
|
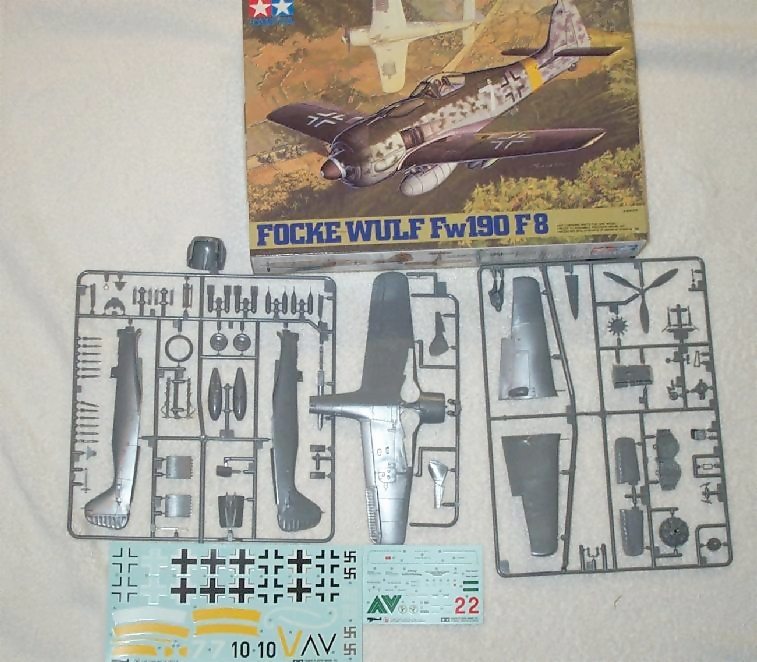
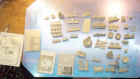
The 1/48 Tamiya kit is of typical quality that we have come to expect. There are only three sprues of gray molded, flash free beautiful styrene, and one sprue of clear parts. The decals are comprehensive and include a smaller sheet of stencils. Now, on to the CMK kit. When you empty out the box the sight of all that resin is almost overwhelming. I had only one piece that had an air bubble that had to be filled.
|
|
Building
|
I don't like resin. There, I said it. Let me be more specific. I don't like most resin sets. I prefer to scratchbuild most of the details in my models. However, some details just cant be scratchbuilt, such as the engine, access covers, etc. I enjoy modeling, but I am not going to spend 8 hours scratch building an access panel when I can use an aftermarket product. I guess I feel like I'm cheating when I use an all resin cockpit.
|
|
|
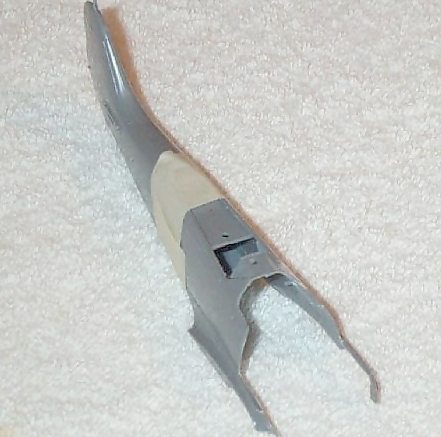
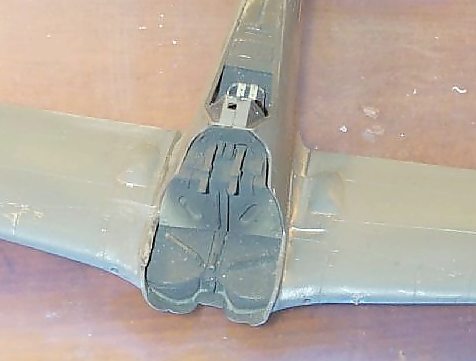
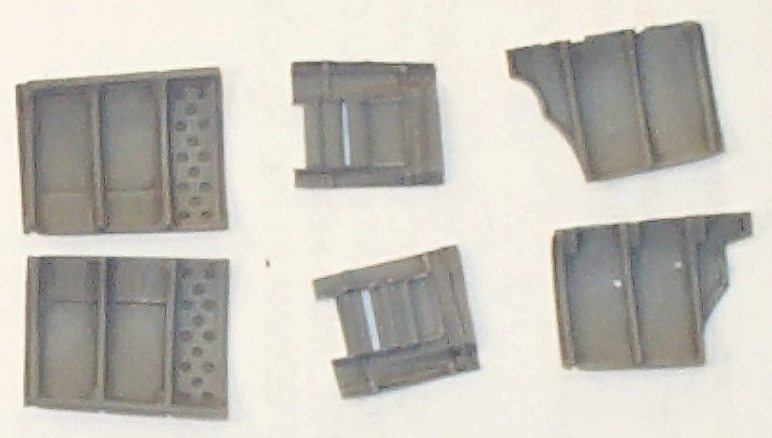
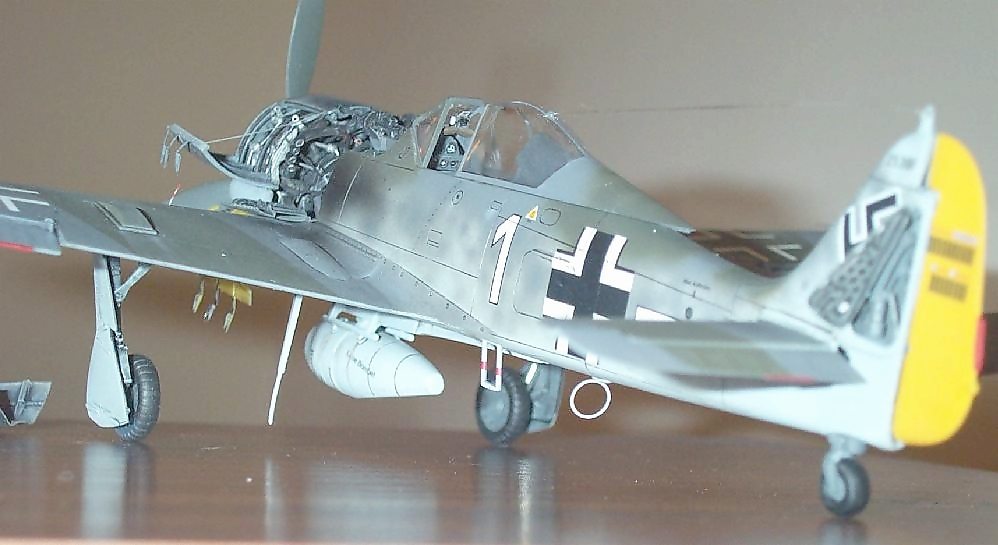
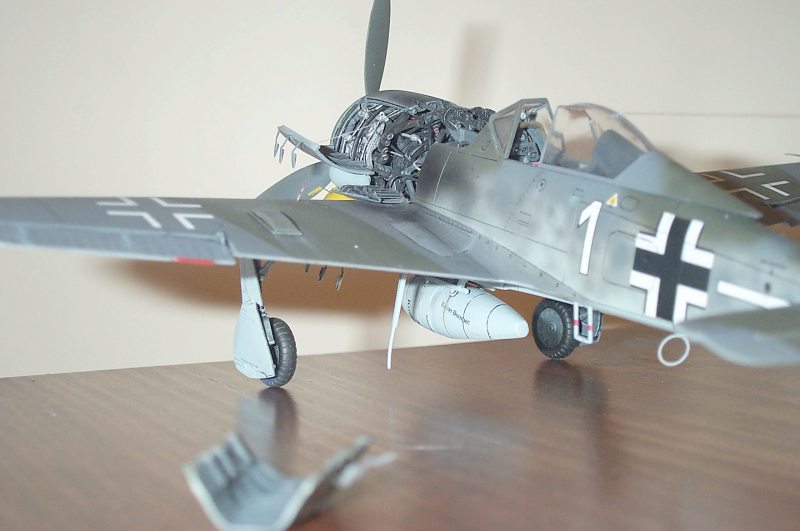
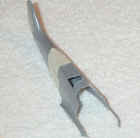
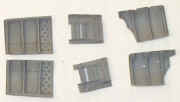
One of the first things I did was to make the necessary cuts to the fuselage. Using this set requires you to do some surgery on the kit. The right image shows how much.
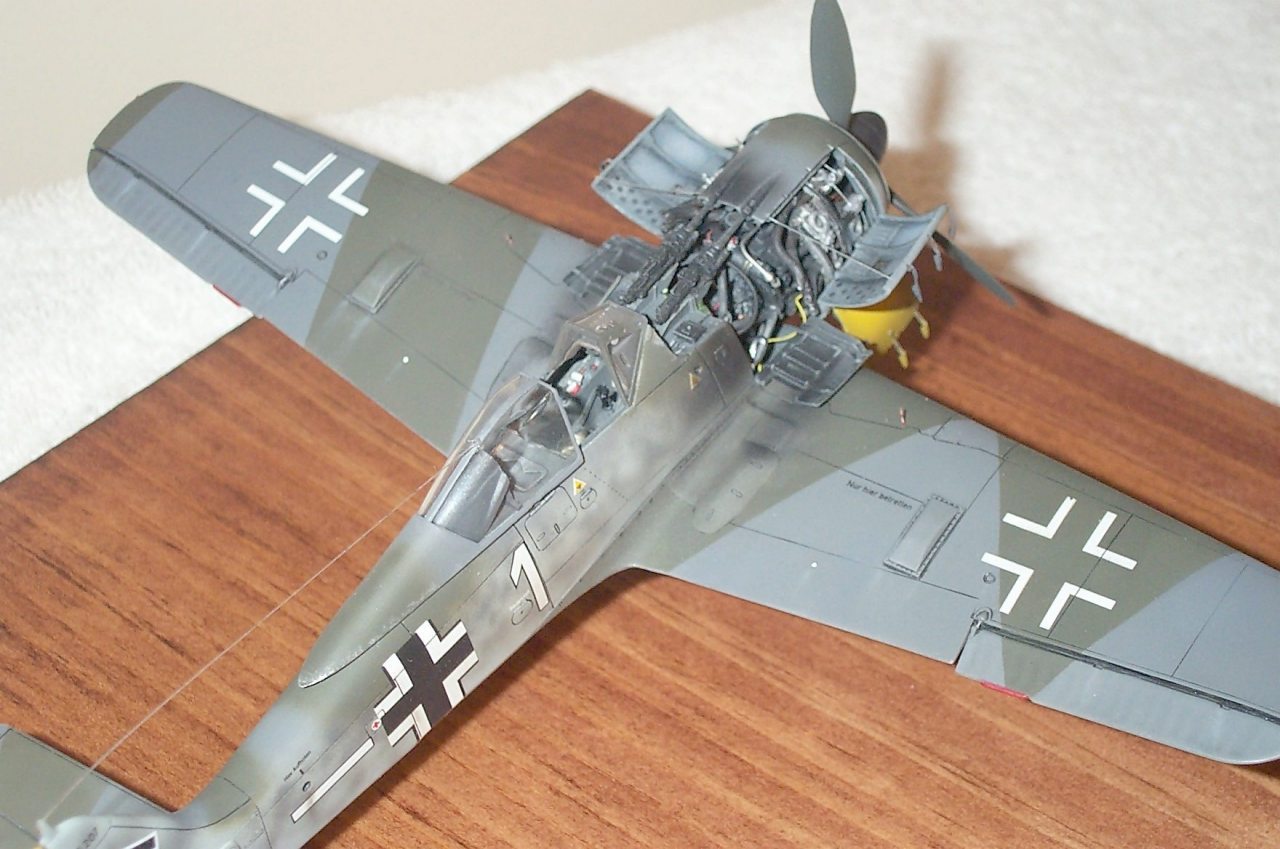
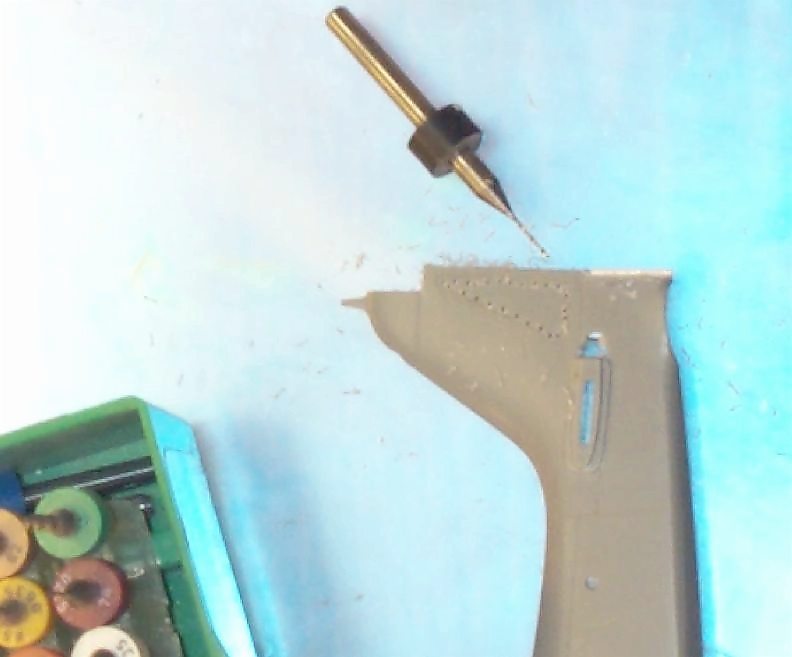
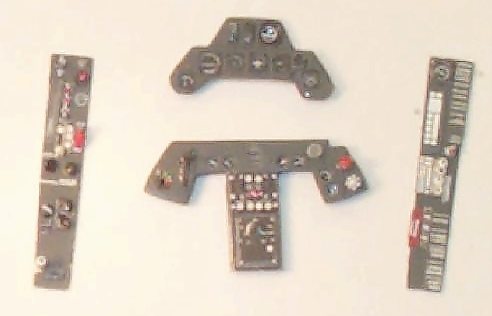
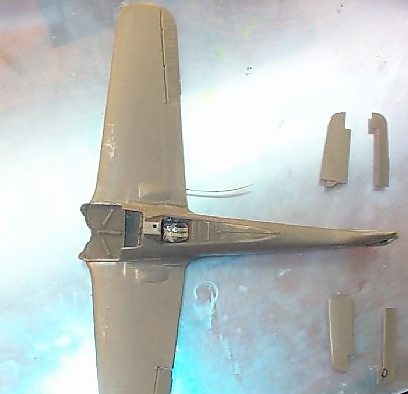
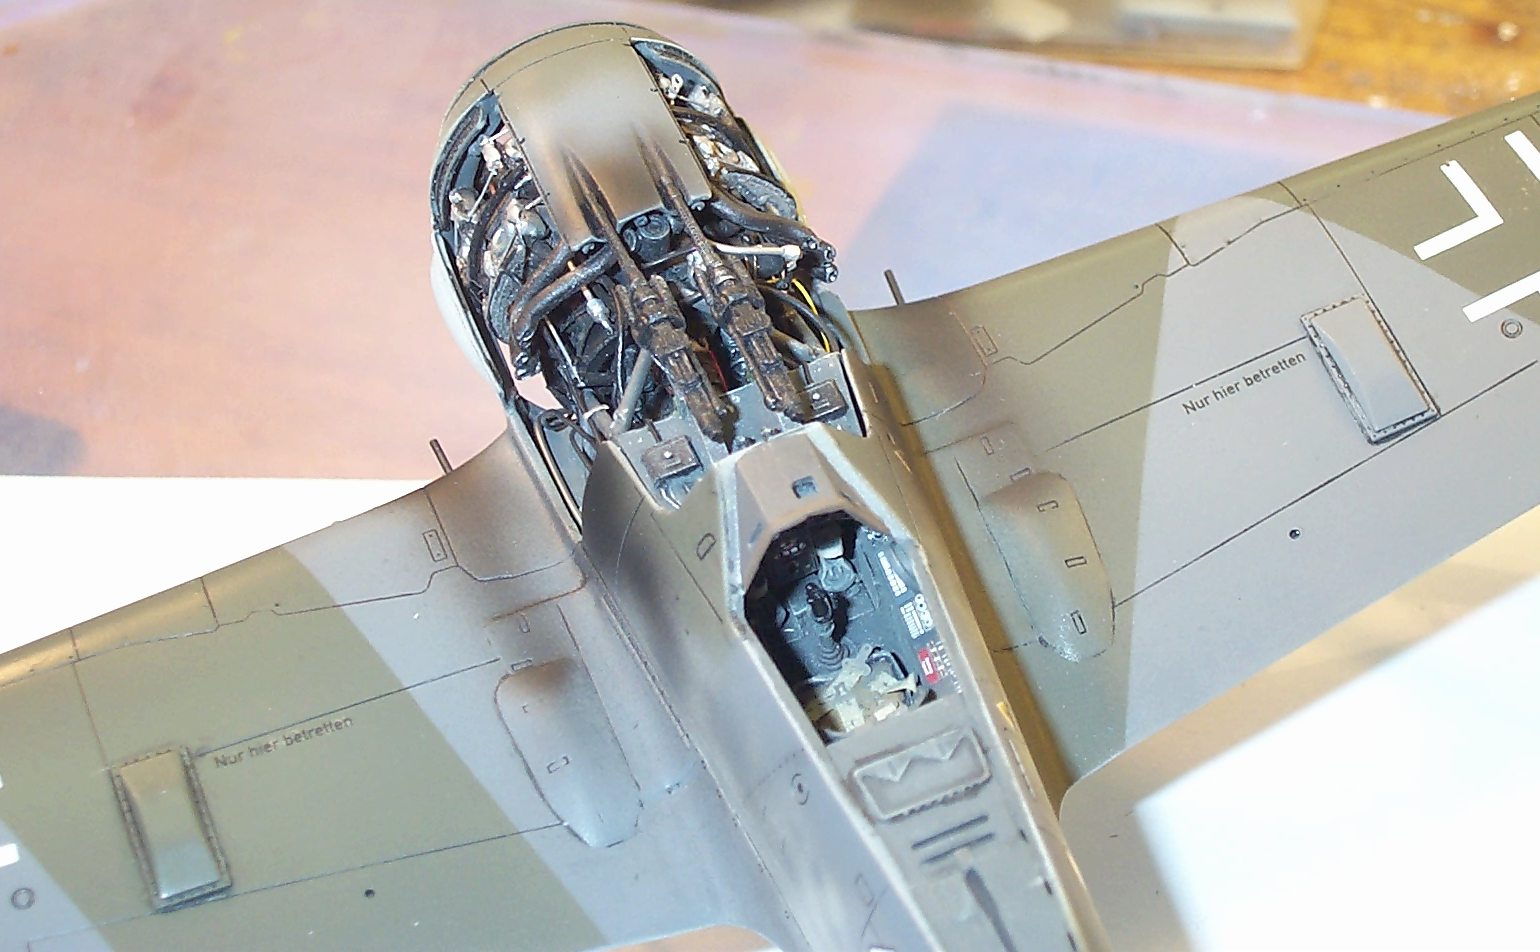
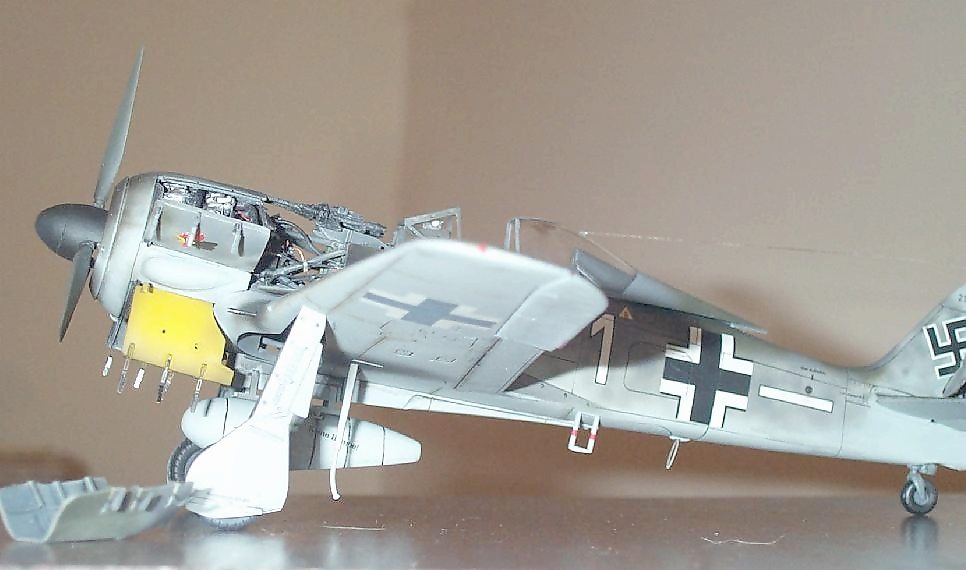
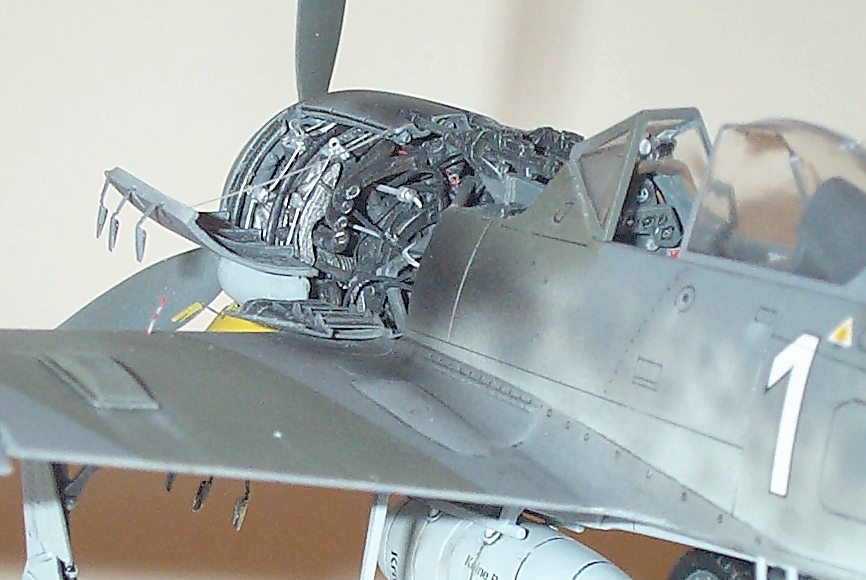
After chain drilling the access cover on the tail, it was off to the cockpit. Now the CMK resin tub has really nice detail, and you could create a real gem by carefully painting all of the switches, buttons, etc. I chose to file off all the detail and use a Waldron detail set. This took about two nights to build and I am happy with the results.
I used decals from a ProModeler set. The side panels are from the Waldron set. Note the dry transfers. I was leery about using them, but they went on without a hitch. The individual buttons were punched out with a Waldron punch. If you are an aircraft modeler, you need one of these toys. I use it for nearly every build. I used Testors "clear parts cement & window maker" to attach the buttons. This stuff is stronger than white glue and has a longer set time than super glue. It dries perfectly clear. Once dry, you can give the panel a light mist of dullcoat and it disappears. The CMK kit provides no rudder pedals. You can use the kits, or buy aftermarket pieces. I used the kits.
|
|
|
|
|
|
The fuselage
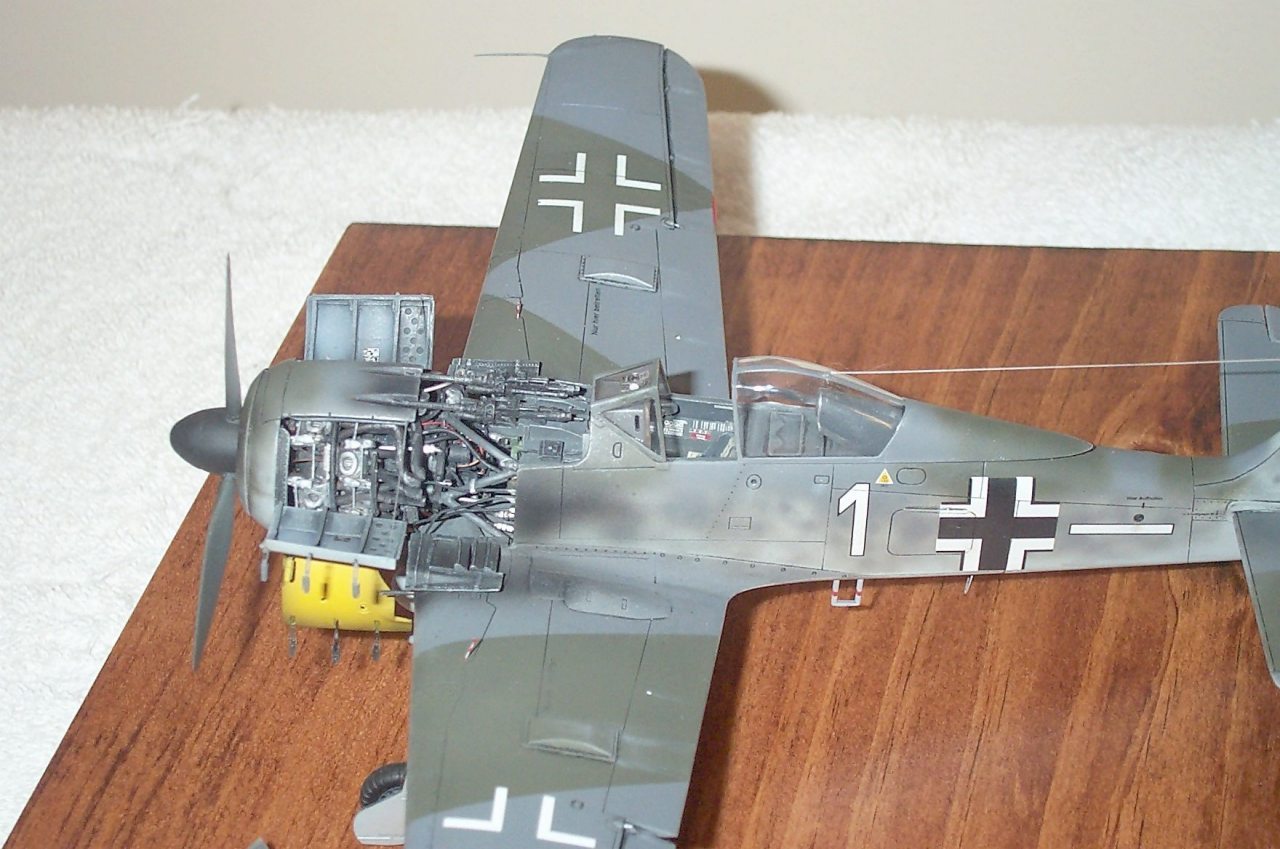
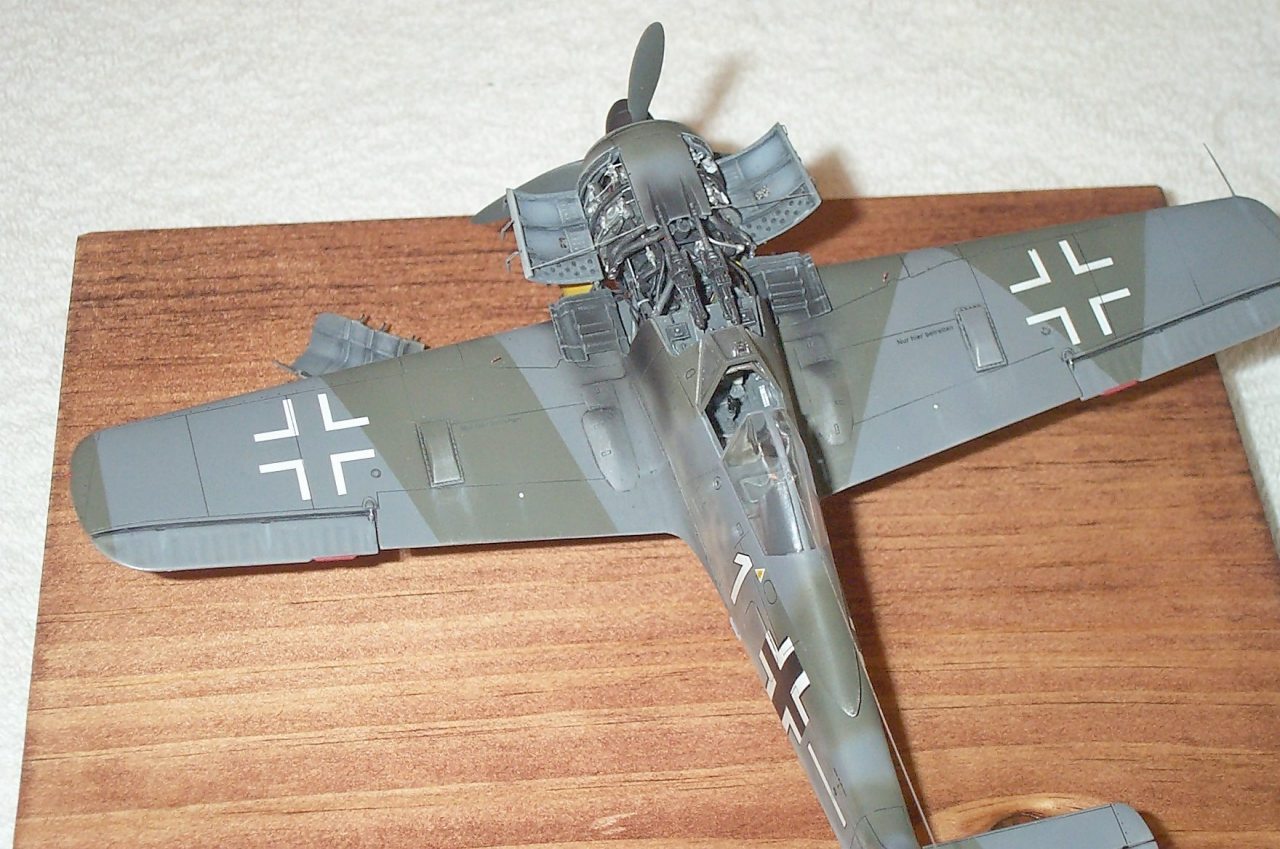
Next I glued the fuselage together. You'll have to remove a lot of material to the model in order to get most of the major resin pieces to fit. Take your time and constantly test fit your pieces. After gluing the wings on I attached the firewall. I was very pleased with the fit. No filler needed.
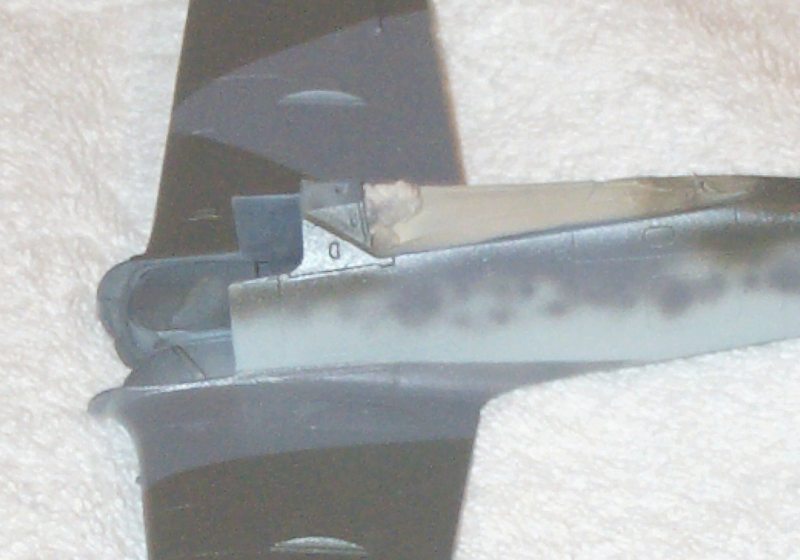
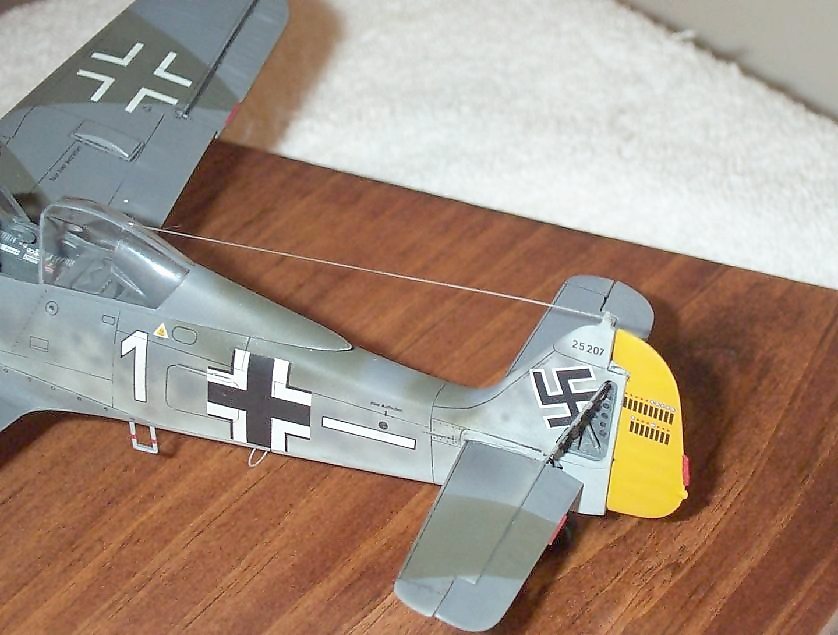
OK, next I painted the camo scheme. This was my first German camo scheme, and I think it came out pretty good. I used MM enamels. I sprayed multiple coats of future on the model and set it off to the side.
|
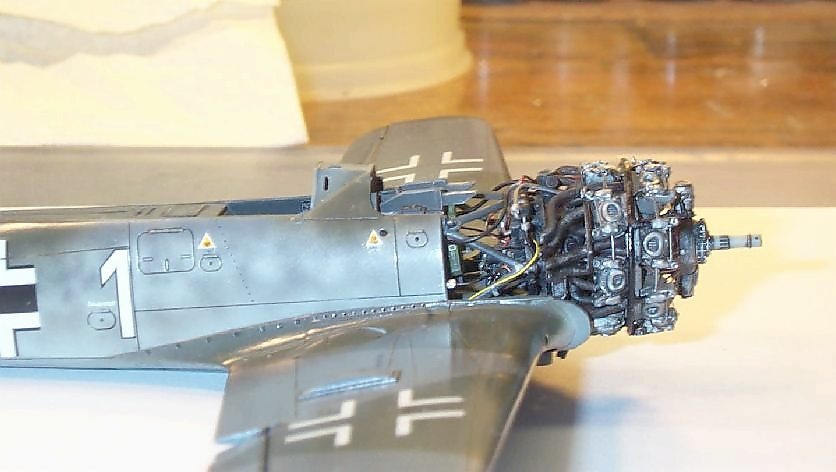
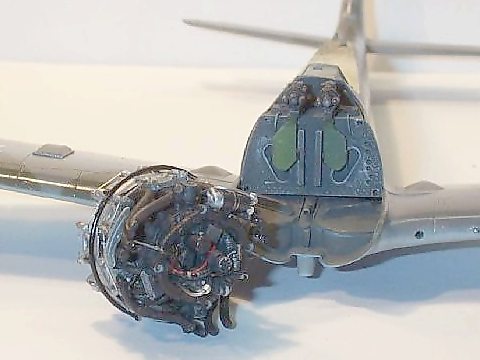
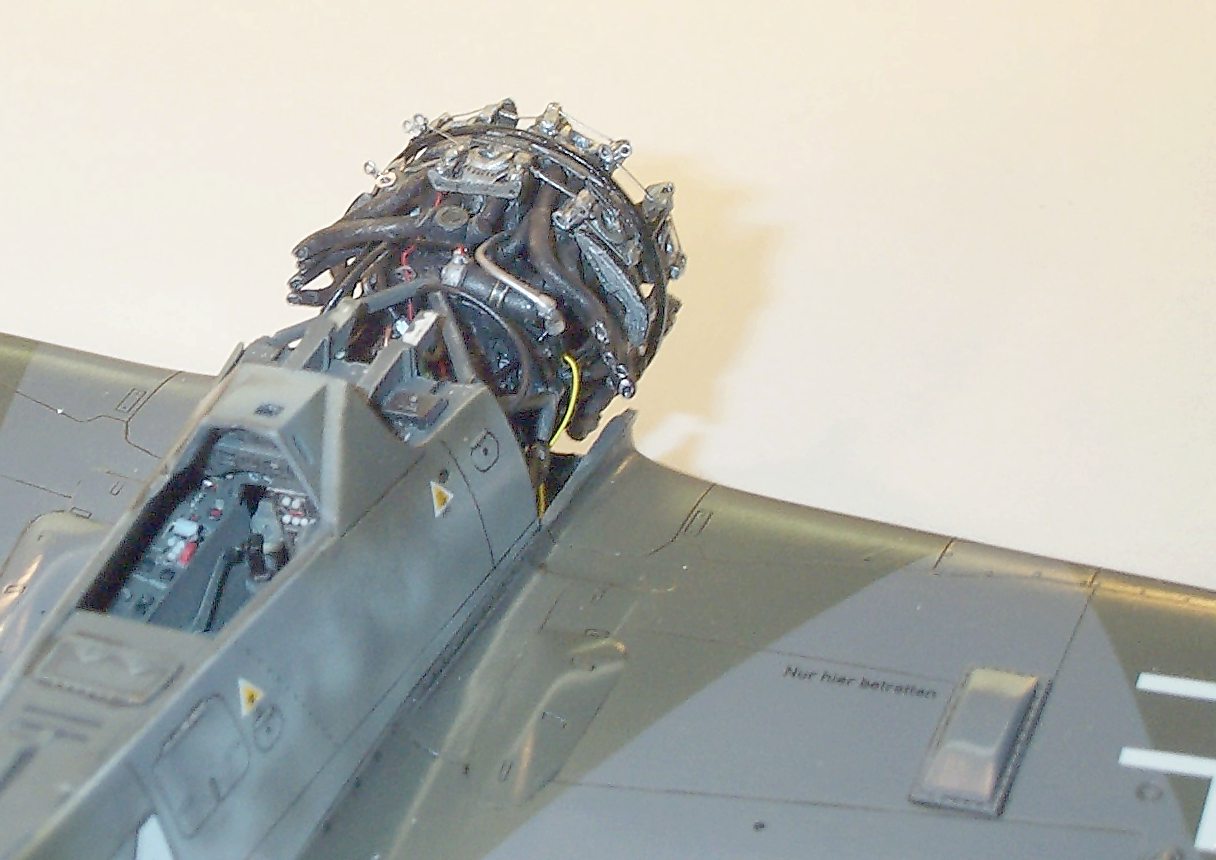
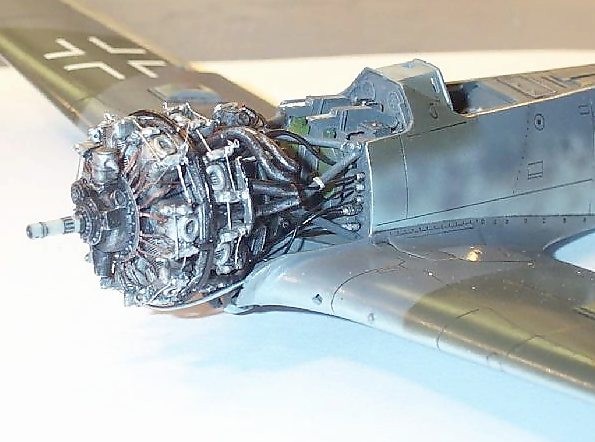
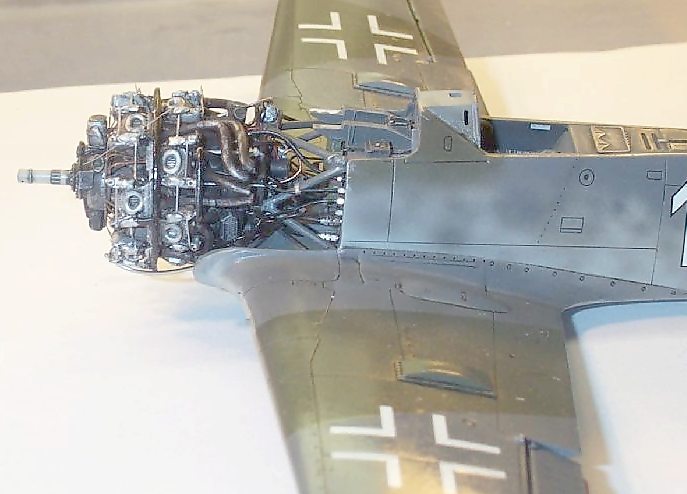
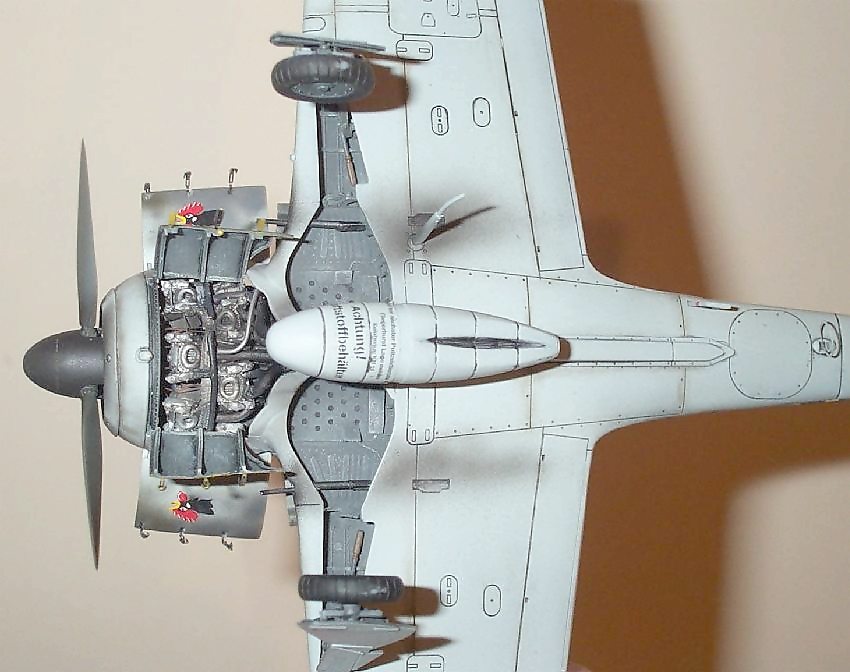
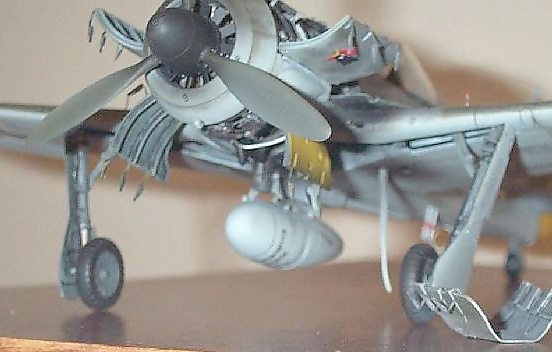
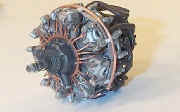
The resin engine
On to the engine. The CMK instructions can be frustrating at times. Try to gather as much reference as you can. I had a hard time finding good reference photos of the BMW 801. The engine is pretty straightforward.
|
|
|
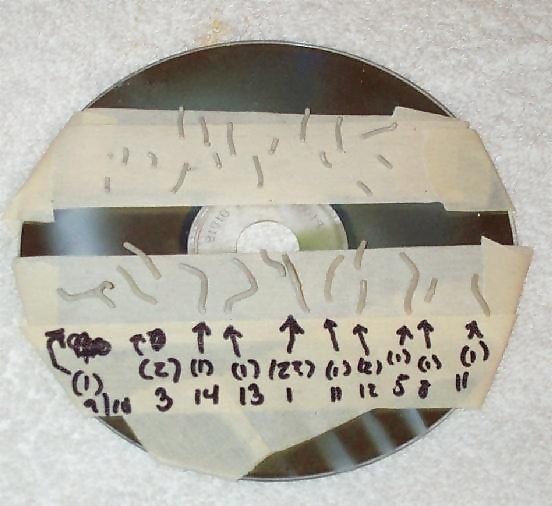
Do yourself a favor and keep track of the exhausts while you remove them from the cast. I spent way too much time fooling with the exhausts simply because I had lost track of what was what. I plumbed the rear of the motor with solder, wire, and different size brass stock. I used fittings that were made for model car motors. I can't recall who makes them, but I am going to go to the shop that I originally bought them from and get some more. If you want to know the name of the company, shoot me an email and I will get the name.
|
|
They really dress up the motor. I used stretched sprue for the wires that connect the engine heads. I didn't add the pushrods because you cant see them.
|
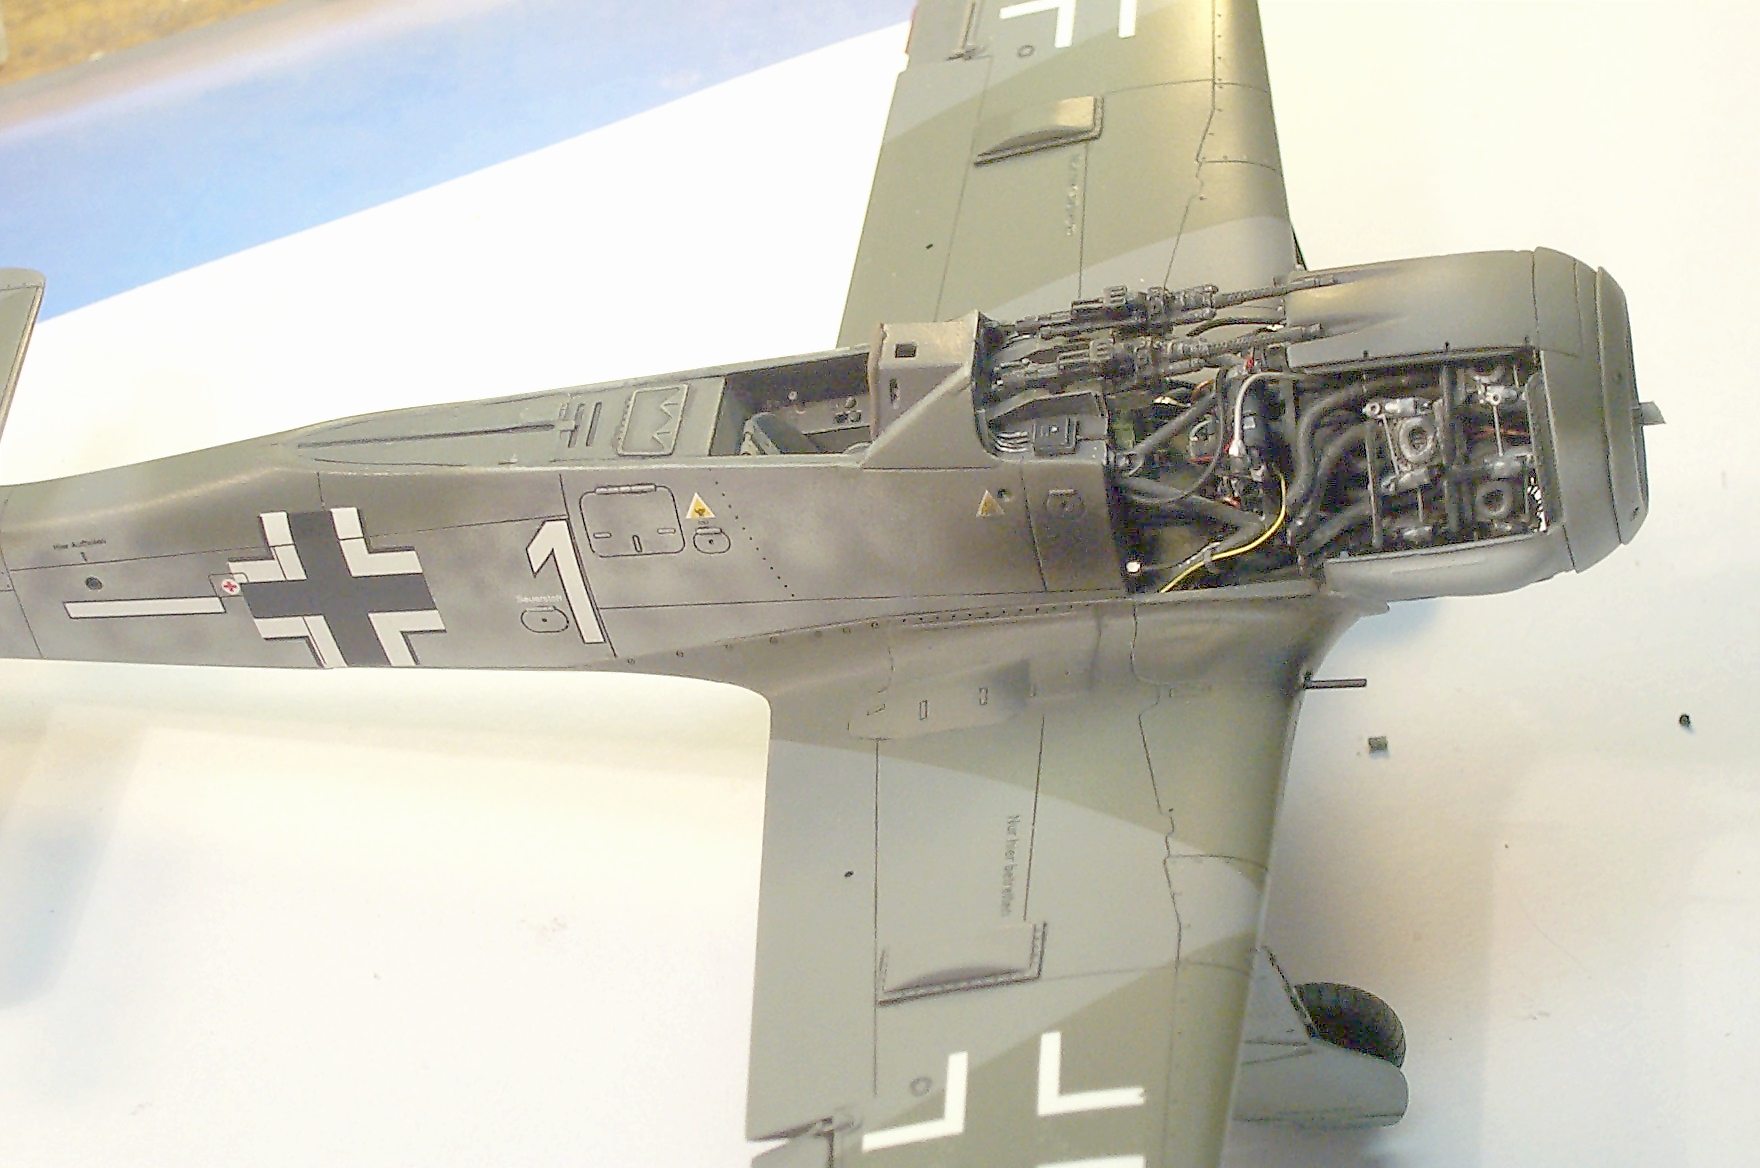
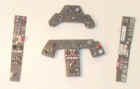
I began to dress up the firewall when I remembered the article in SAM. There are no Machine guns or ammo boxes with the CMK kit. Thank goodness for Squadron mail order. I ordered a set of Aires machine guns and got them about three days later. Everyone has a favorite vendor. Mine is squadron. The turn time is unbelievable. Next I began to scratchbuild the ammo boxes. I used a reference from the Walkaround book.
|

|
|
I used some assorted doo-dads from the spare parts box to dress it up. All of the assorted access panels were painted and the insides drybrushed to show wear and tear.
|
|
Finishing
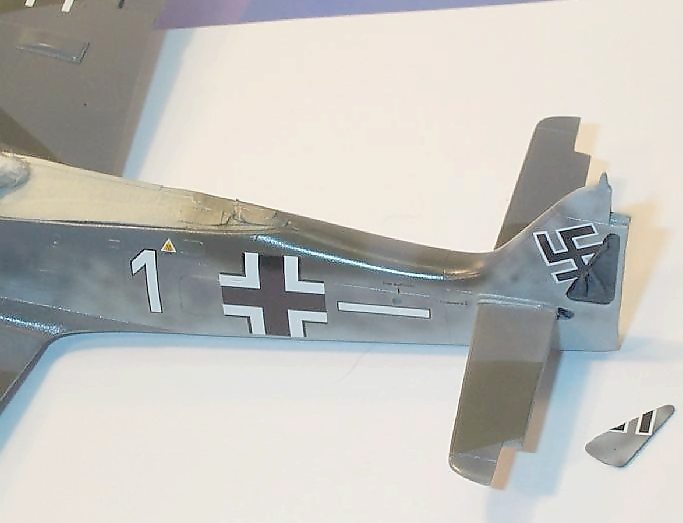
For decals, I didn't use the kits. Everyone knows how thick Tamiya's decals are. You would think that by now they would have done something about it. Anyway, I used a set from Aeromaster.
The landing gear was added next. I used the kits tires. To tell you the truth, they look better than the resin tires.
Finally, after shooting it with a couple of coats of Future and letting it dry, I filled in the panel lines with a wash consisting of dishwashing detergent, acrylic paint (Polly S) and a bit of water. I wiped the excess with a damp paper towel. The exhaust stains were done using a combination of watered down acrylics shot with an airbrush, and pastels. After a bit of drybrushing, I was done. Not bad for a rookie.
I'm sure there are some areas that are inaccurate. I had a hard time finding reference material. Hope you enjoyed!!
About Derek
I am originally from Rhode Island (US) but I have been living in South Carolina for the past five years. I am a production supervisor by trade, but I also work a second job unloading trucks, which keeps me in shape.
My interests in modeling range from WW2 Aircraft (and some early jets) To ships, mainly the old classic ocean liners. Here is a couple of links to some of my work.
http://titanic-model.com/models/derek/derek.html
http://modelwarships.com/gallery/misc/alvin/35-dj/alvin-main.html
http://www.buildthetitanic.co.uk/others.htm#Derek