|
|
|||||||||||||||||||||||||||||||||||||||||||||||||||||||||||
|
Armor |
|
||||||||||||||||||||||||||||||||||||||||||||||||||||||||||
|
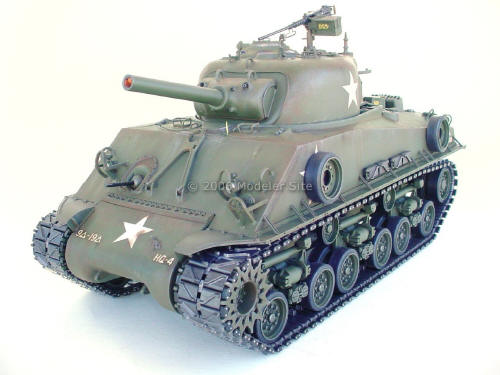
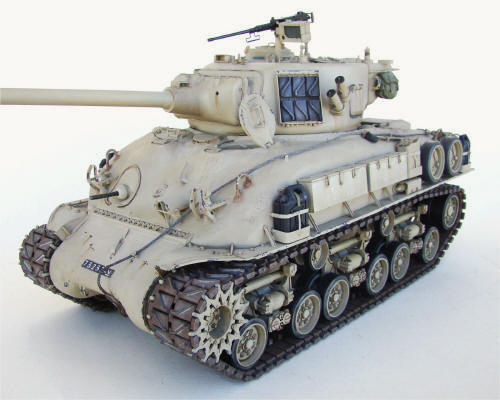
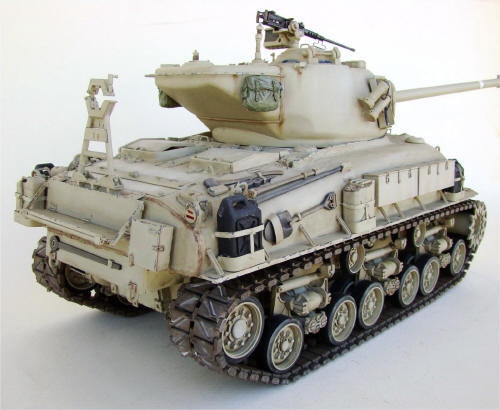
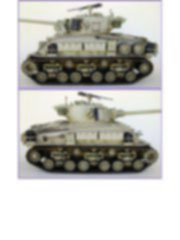
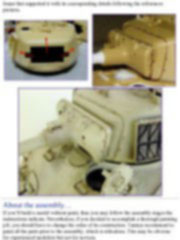
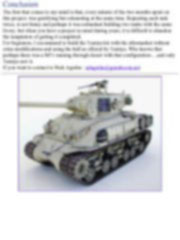
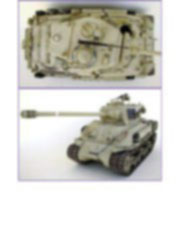
Building an accurate M51 Isherman from the Tamiya RC kit 1/16 scale |
|||||||||||||||||||||||||||||||||||||||||||||||||||||||||||
|
by Mario Covalski © Modeler Site |
|||||||||||||||||||||||||||||||||||||||||||||||||||||||||||
|
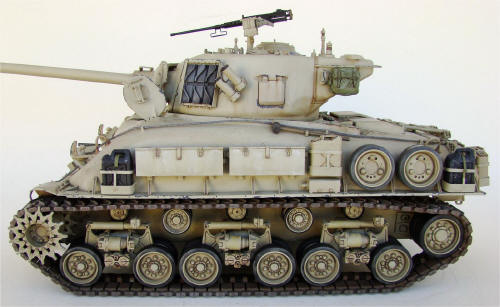
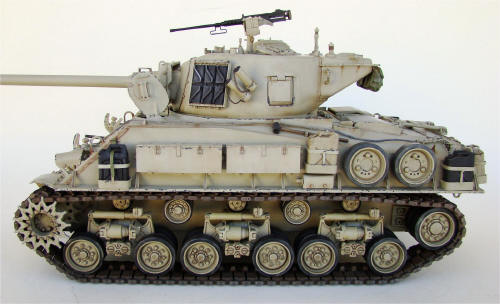
Legal Notice No material from Modeler Site any Web site owned, operated, licensed, or controlled by Damian Covalski may be copied, reproduced, republished, uploaded, posted, transmitted, or distributed in any way, except that you may download one copy of the materials on any single computer for your personal, non-commercial home use only, provided you keep intact all copyright and other proprietary notices. Modification of the materials or use of the materials for any other purpose is a violation of Damian Covalski's copyright and other proprietary rights. Read More here > Legal notice There were many versions of the Sherman, however, the last modification the Israelis made on them, is to my liking, the most showy and the one that converted a WWII tank into one of the 60 and 70 decades. I’ll not extend in describing the history of the M51, there’s a lot of information in books and internet, just enough to say that, as well as the M50, there were so many variants, that it’s recommended to build one tank in particular if you look for historical accuracy. As is my custom….I didn’t do so and just made generic versions that could have really existed.
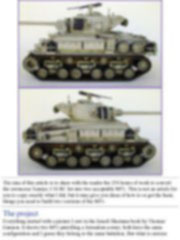
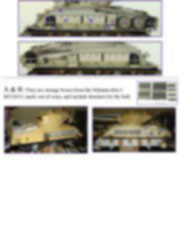
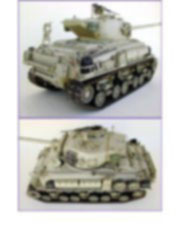
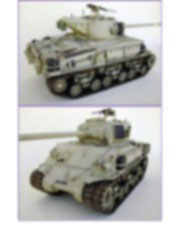
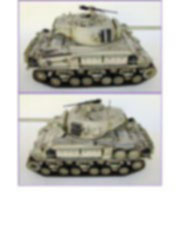
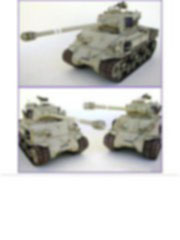
The aim of this article is to share with the reader the 250 hours of work to convert the erroneous Tamiya 1/16 RC kit into two acceptable M51. This is not an article for you to copy exactly what I did, but it may give you ideas of how to or get the basic things you need to build two versions of the M51. The project Everything started with a picture I saw in the Israeli Sherman book by Thomas Gannon. It shows two M51 patrolling a Jerusalem corner, both have the same configuration and I guess they belong to the same battalion. But what is curious with this picture, is that while one of them is based on the A1 cast hull, the other is a 47’( degree) welded hull. This surprised me since to my knowledge the M51 had been modified from a cast M4A1 hull with the HVSS suspension and adding a French 105 mm CN105 F1 56 gun which had to be shortened so that it could be installed in a Sherman turret, as it offered not enough recoil space. By the time I saw the picture, Tamiya only had in 1/16 scale the M4 with HVSS suspension and 105mm howitzer. Since I did not have great modeling skills, building a complete turret like the M51 (based on the T23) meant a very difficult task and the project was left aside.
At the end of 2009, appeared the M51 wrongly called “Super Sherman” by Tamiya which refreshed my interest in the project.
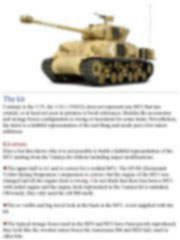
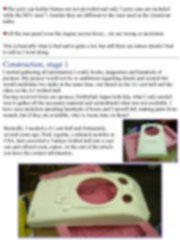
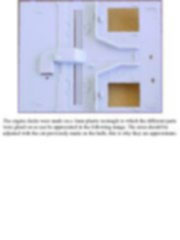
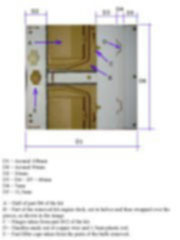
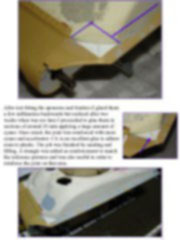
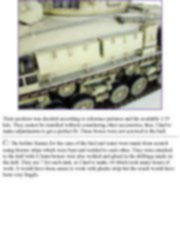
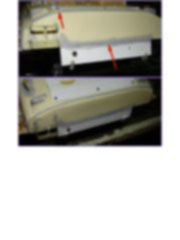
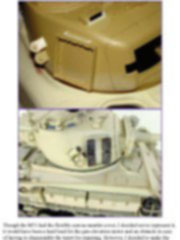
The kit Contrary to the 1/35, the 1/16 ( #56032) does not represent any M51 that has existed, or at least not seen in pictures or book references. Besides the accessories and storage boxes configuration is wrong or inexistent for some items. Nevertheless, the turret is a faithful representation of the real thing and needs just a few minor additions. Kit errors: Here a list that shows why it is not possible to build a faithful representation of the M51 starting from the Tamiya kit without including major modifications:
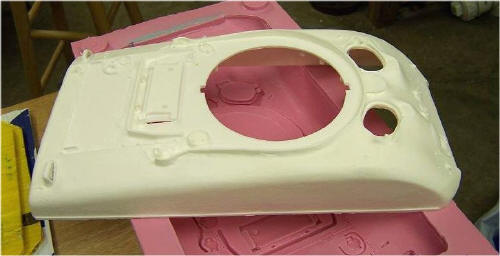
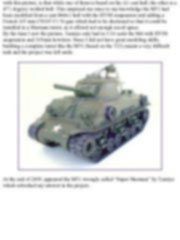
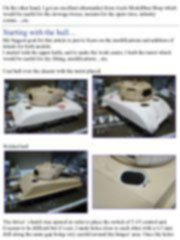
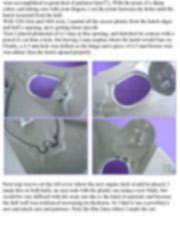
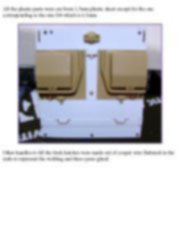
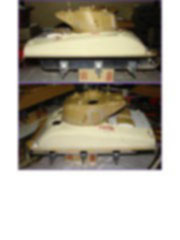
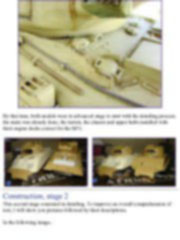
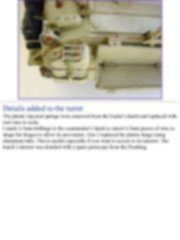
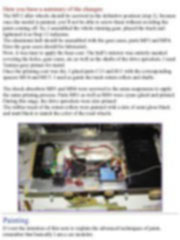
This is basically what is bad and is quite a lot, but still there are minor details I had to add as I went along. Construction, stage 1 I started gathering all information I could, books, magazines and hundreds of pictures. My project would not be so ambitious regarding details and scratch but would undertake two tanks at the same time, one based on the A1 cast hull and the other on the A3 welded hull. Having received from our sponsor, Hobbylink Japan both kits, what I only needed was to gather all the necessary material and scratchbuild what was not available. I have seen modelers spending hundreds of hours and I myself did, making parts from scratch, but if they are available, why to waste time on them?.
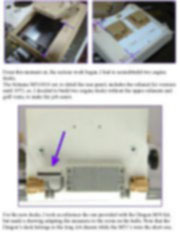
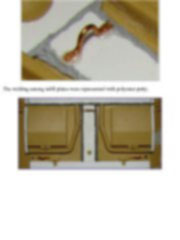
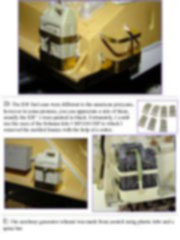
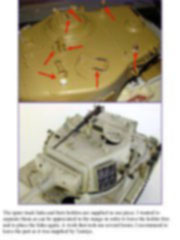
On the other hand, I got an excellent aftermarket from Axels Modellbau Shop which would be useful for the stowage boxes, mounts for the spare tires, infantry comm….etc. This note is offered in PDF format to be read or printed using Acrobat reader, contact our webmaster > Here Includes more than 100 pics, here we show only the text pages.
Esta Nota es ofrecida en formato PDF, el cual puede ser leído o impreso usando el Acrobat reader, contacte a nuestro webmaster > Aquí Incluye más de 100 imágenes, aquí solo mostramos las paginas de texto.
Support us ordering our notes in PDF > Here |
|||||||||||||||||||||||||||||||||||||||||||||||||||||||||||