|
|
||||||||||||||||||||||||||||||
|
Formula one |
|
|||||||||||||||||||||||||||||
|
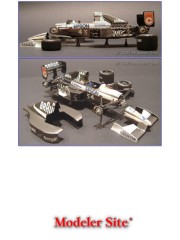
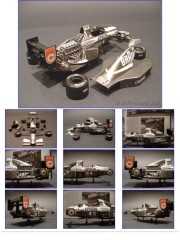
Detailing the Tamiya Tyrrell - Honda 020 1/20 scale |
||||||||||||||||||||||||||||||
|
by Alessandro Prini © 2005 Modeler Site |
||||||||||||||||||||||||||||||
|
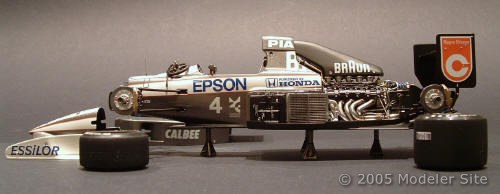
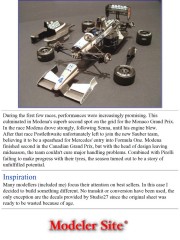
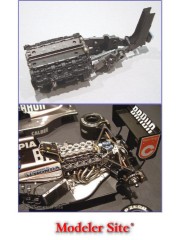
Legal Notice No material from Modeler Site any Web site owned, operated, licensed, or controlled by Damian Covalski may be copied, reproduced, republished, uploaded, posted, transmitted, or distributed in any way, except that you may download one copy of the materials on any single computer for your personal, non-commercial home use only, provided you keep intact all copyright and other proprietary notices. Modification of the materials or use of the materials for any other purpose is a violation of Damian Covalski's copyright and other proprietary rights. Read More here > Legal notice For 1991 Ken Tyrrell managed to get hold of Honda V10 engines, while Stefano Modena replaced Jean Alesi. Braun was attracted as the new main sponsor. To accommodate for the engine, a new chassis called 020 was built by a design team led by George Ryton with Postlethwaite supervising. This excellent chassis was magnificently mated to Honda's normally aspirated, 3498cc, V-10 cylinder, type RA101E powerplant, and the transmission gear casing was transversely mounted in front of the rear axle. The front suspension system used a double wishbone push-rod type damped by a single-shock unit, while the rear end used a conventional push-rod with horizontally mounted dual shocks.
During the first few races, performances were increasingly promising. This culminated in Modena's superb second spot on the grid for the Monaco Grand Prix. In the race Modena drove strongly, following Senna, until his engine blew. After that race Postlethwaite unfortunately left to join the new Sauber team, believing it to be a spearhead for Mercedes' entry into Formula One. Modena finished second in the Canadian Grand Prix, but with the head of design leaving midseason, the team couldn't cure major handling problems. Combined with Pirelli failing to make progress with their tyres, the season turned out to be a story of unfulfilled potential. Inspiration Many modellers (included me) focus their attention on best sellers. In this case I decided to build something different. No transkit or conversion have been used, the only exception are the decals provided by Studio27 since the original sheet was ready to be wasted because of age.
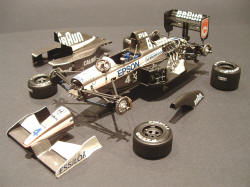
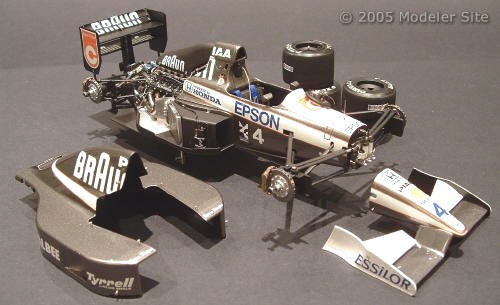
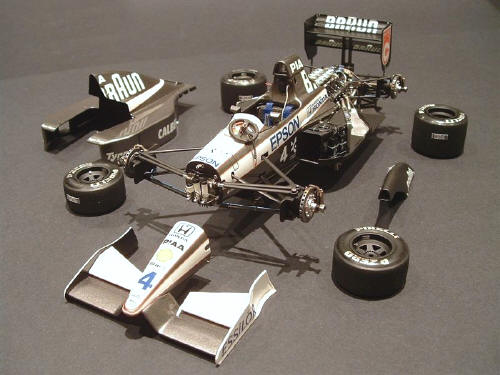
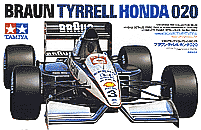
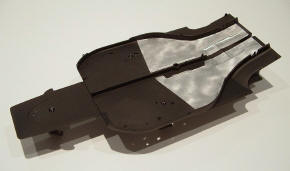
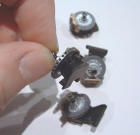
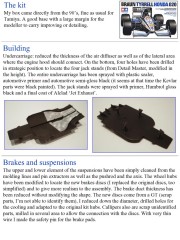
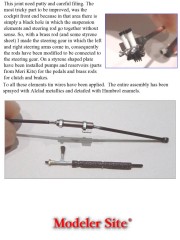
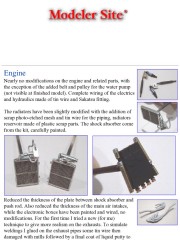
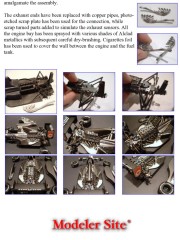
Building Undercarriage: reduced the thickness of the air diffuser as well as of the lateral area where the engine hood should connect. On the bottom, four holes have been drilled in strategic position to locate the four jack stands (from Detail Master, modified in the height). The entire undercarriage has been sprayed with plastic sealer, automotive primer and automotive semi-gloss black (it seems at that time the Kevlar parts were black painted). The jack stands were sprayed with primer, Humbrol gloss black and a final coat of Alclad ‘Jet Exhaust’.
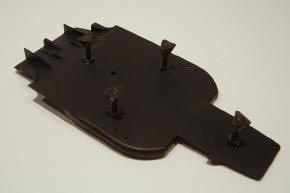
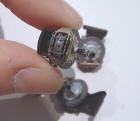
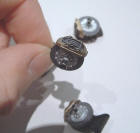
Brakes and suspensions The upper and lower element of the suspensions have been simply cleaned from the molding lines and pin extractors as well as the pushrod and the axis. The wheel hubs have been modified to locate the new brakes discs (I replaced the original discs, too simplified) and to give more realism to the assembly. The brake duct thickness has been reduced without modifying the shape. The new discs come from a GT (scrap parts, I’m not able to identify them), I reduced down the diameter, drilled holes for the cooling and adapted to the original kit hubs. Callipers also are scrap unidentified parts, milled in several area to allow the connection with the discs. With very thin wire I made the safety pin for the brake pads.
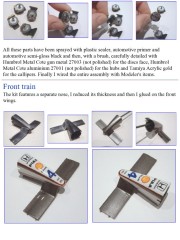
All these parts have been sprayed with plastic sealer, automotive primer and automotive semi-gloss black and then, with a brush, carefully detailed with Humbrol Metal Cote gun metal 27003 (not polished) for the discs face, Humbrol Metal Cote aluminium 27001 (not polished) for the hubs and Tamiya Acrylic gold for the callipers. Finally I wired the entire assembly with Modeler's items. This note is offered in PDF format to be read or printed using Acrobat reader, contact our webmaster > Here Includes more than 76 pics, here we show only the text pages.
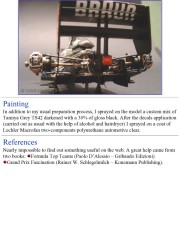
Big size photos are only available in our PDF format. Support us ordering our notes in PDF > Here |
||||||||||||||||||||||||||||||