|
|
|||||||||||||
|
Airplanes |
|
||||||||||||
|
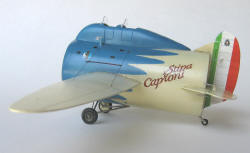
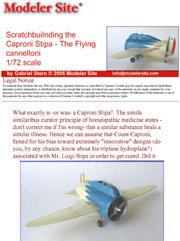
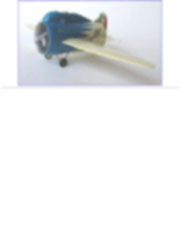
Scratchbuilding the Caproni Stipa - The Flying cannelloni 1/72 scale |
|||||||||||||
|
by Gabriel Stern © 2006 Modeler Site |
|||||||||||||
|
Legal Notice No material from Modeler Site any Web site owned, operated, licensed, or controlled by Damian Covalski may be copied, reproduced, republished, uploaded, posted, transmitted, or distributed in any way, except that you may download one copy of the materials on any single computer for your personal, non-commercial home use only, provided you keep intact all copyright and other proprietary notices. Modification of the materials or use of the materials for any other purpose is a violation of Damian Covalski's copyright and other proprietary rights. Read More here > Legal notice What exactly is -or was- a Caproni Stipa?. The simila similaribus curator principle of homeopathic medicine states -don't correct me if I'm wrong- that a similar substance heals a similar illness. Hence we can assume that Count Caproni, famed for his bias toward extremely "innovative" designs (do you, by any chance, know about his triplane hydroplane?) associated with Mr. Luigi Stipa in order to get cured. Did it work? We'll see.
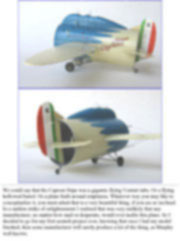
We could say that the Caproni Stipa was a gigantic flying Venturi tube. Or a flying hollowed barrel. Or a plane built around emptiness. Whatever way you may like to conceptualize it, you must admit that is a very beautiful thing, if you are so inclined. In a sudden strike of enlightenment I realized that was very unlikely that any manufacturer, no matter how mad or desperate, would ever tackle this plane. So I decided to go for my first scratch project ever, knowing that once I had my model finished, then some manufacturer will surely produce a kit of the thing, as Murphy well knows.
This article is offered in PDF format to be read or printed using Acrobat reader, contact our webmaster > Here Includes more than 25 pics, here we show only the text pages.
Esta Nota es ofrecida en formato PDF, el cual puede ser leído o impreso usando el Acrobat reader, contacte a nuestro webmaster > Aquí Incluye más de 25 imágenes, aquí solo mostramos las paginas de texto.
Big size photos are only available in our PDF format. Support us ordering our notes in PDF > Here |
|||||||||||||