|
Legal Notice
No material from Modeler Site any Web site owned, operated, licensed, or controlled by Mario Covalski & Associated may be copied, reproduced, republished, uploaded, posted, transmitted, or distributed in any way, except that you may download one copy of the materials on any single computer for your personal, non-commercial home use only, provided you keep intact all copyright and other proprietary notices. Modification of the materials or use of the materials for any other purpose is a violation of Mario Covalski & Associated's copyright and other proprietary rights.
Read More here > Legal notice
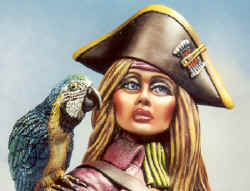
Painting figures is probably the task that complicates modelers the most. This note by Rick & Janine, creators of the figure showed, aims at explaining novices "how to", step by step in order that the newcomer can confront this important modelling task.
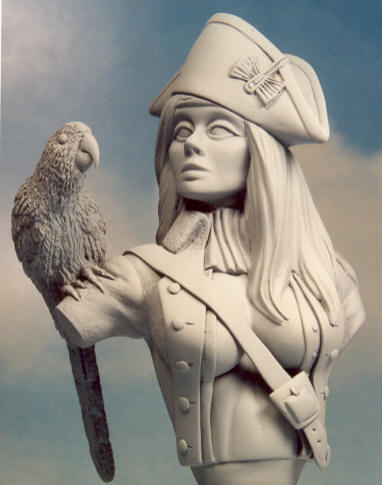
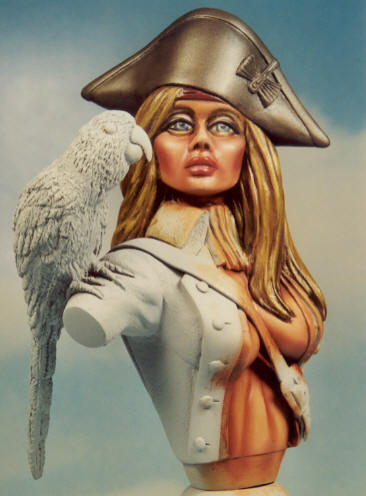
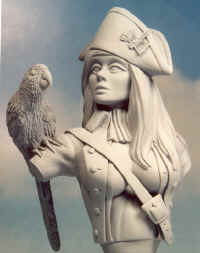
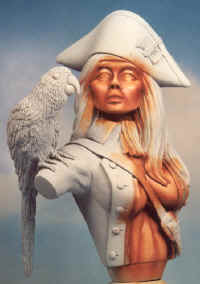
Figure in primer state
|
|
Step 1
The prepaint stage of cleanup has left the figure free of flaws and a primer coat has been applied. My preference in primer is Floquil light grey. A thin coat is airbrushed onto the figure. Having the primer a light grey has allowed me to create a more believable flesh color. Since I started painting figures with a light grey primer my choice of colors and how I paint the skin has become a process I use again and again. The few times I have been forced to paint a figure with a white primer I found that the skin tones always came out too pink or pale for my liking.
|
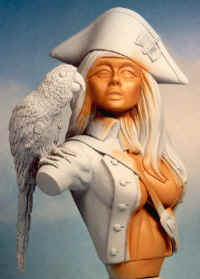
Figure with basic flesh coat
|
|
Step 2
I have found that when confronted with a figure that has a relatively large area of flesh, for purposes of unity it is advisable to paint all the fleshy areas at the same time. I find that by painting all the flesh at one time allows me to visually perceive the clothing or equipment as it drapes and caresses the body adjacent to it, this becomes most beneficial later on when it is time to paint the clothing and details. The basic flesh color shown here was created by using Winsor & Newton Burnt Sienna and Titanium White oil color. I combine these two colors until I reach the proper foundation color. I test this color for a believable skin color by applying a dab in the fold of my thumb and index finger. Once I am satisfied with the coloring a base flesh coat is applied to the face and all other exposed flesh areas.
|
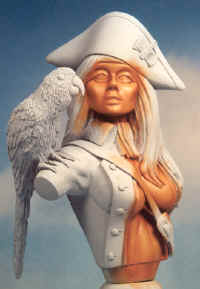
Figure with shadow to define form
|
|
Step 3
Once the figure has a basic flesh coat I like to go in with a shadow color to more clearly define the shape and contour of the underlying elements that define the skin and give it form. Shadow is applied beneath the eyebrows, underneath the cheekbones, at the jaw line, below the upper and lower lips, around each nostril, beneath the breasts and between the muscles and bone structure of the ribcage. For this step I have always used pure Burnt Sienna oil color.
|
Figure with highlight to blend
|
|
Step 4
Following the application of the shadow beneath the form I add the highlight color that surrounds and touches off the form. These highlights are applied at the eyebrows tip of nose, cheekbones, center of lips, chin center and jawline, center of breasts and raised bone and muscle curvature. For this step I use pure Titanium white. When the shadow and highlight are blended with a broad bristle brush the result is a three dimensional defining of the figures body shape.
|
Figure with hair and eye color - Further body shaping and definition
|
|
Step 5
Once I have defined the basic overall body shape I like to put a personality to the whole by painting the face. I always start with eyes which gives a view and identity to the spirit of the individual. I hadn't decided on an eye color but had toyed with the idea of brown eyes. Since I knew she was to be blonde this was an experiment to see what a blonde with brown eyes would look like. I made up a light brown base color mix and applied the iris and applied brown eyelashes above and below her eyes. I couldn't tell if I was going to like this color for her eyes so I thought I might be able to decide better if I could get an idea of how the hair color was going to look. It was looking pretty blah to me so I applied a bit of wine-colored lipstick to see if I could create the dynamic look I wanted. I further worked at defining the features of her
face by adding a brick red cheek rouge shadow and a pink highlight.
|
To maintain a form of consistency I worked at further defining her chest and ribcage. Alizarin Crimson and Permanent Rose were combined and applied as a lip color.
Figure with eyes of blue
|

|
Step 6
I found I did not like the look of the brown eyes with the yellow blonde hair so I gave her eyes the color blue. Manganese blue with a small bit of sap green was combined and then lightened with white to represent the blue eye color. I liked this look much better. I began to defined the eyes with a light blue highlight and a red brown shadow. I painted the headband to visually have her full face surrounded, to see if the overall look was pleasing. The eye was then lined above with black oil paint and the lower lashes were defined with Burnt Umber.
|
Figure with basic hat color
|
|
Step 7
The eyebrows were applied above the eyes and the shape and colorings of the shadow and highlight were again dramatized further. I began to apply some shadow coloring to the hair to help define it. Raw and Burnt Umber were used to shadow and outline the Yellow Ochre hair color. Burnt Sienna and Lamp Black were combined to create the basic hat color.
|
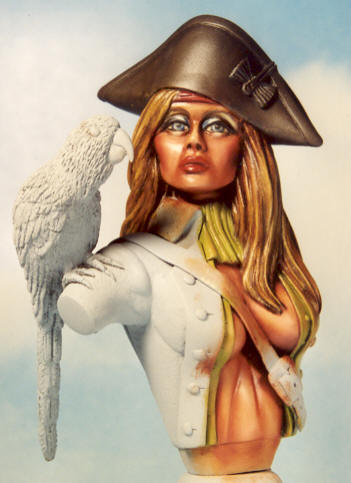
Figure with blouse based in
|
|
Step 8
The blouse color was based in using Thalo Yellow and Sap Green. The eyes were also enhanced with powder blue eye shadow. The eye shadow color was created using Cerulean Blue and Titanium White for the highest highlight at the outermost curve of the eyeball and Ultramarine Blue and Cerulean Blue were mixed together and applied to contour and follow the shape of the eyelid. Venetian Red was used to "tan" the face. The color was applied in small amounts below the cheekbones, beneath the jawline, and around the area of her lips.
|
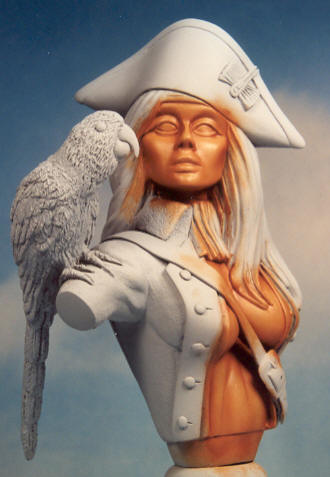
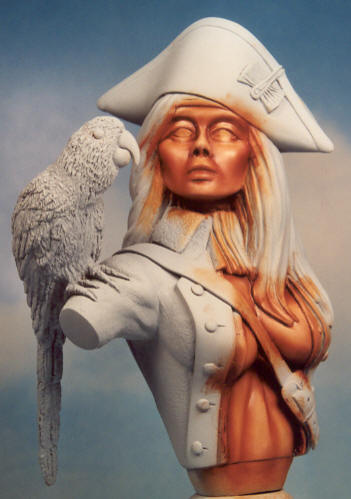
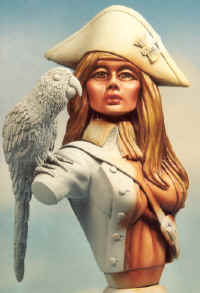
Figure with enhanced hat and hair
|
|
Step 9
To shape the hat Ivory Black was applied on the pinched areas of the hat. White was added to Payne's Gray and then applied to the outermost curve of the hat and blended with the Ivory Black. Her hair needed further definition. Burnt Umber and Raw Umber were added to separate the strands of the hair and to shape the hair style. Naples yellow and Chrome Yellow were used for the main hair coloration highlight. A small dab of Cadmium Red was added to Titanium White to make a very light pink. This light pink was added to the upper cheek bones, the bridge of the nose, the center of the forehead, center of the chin, above the upper lip and along the jawline and with a wide chisel brush was blended into the surrounding colors.
|
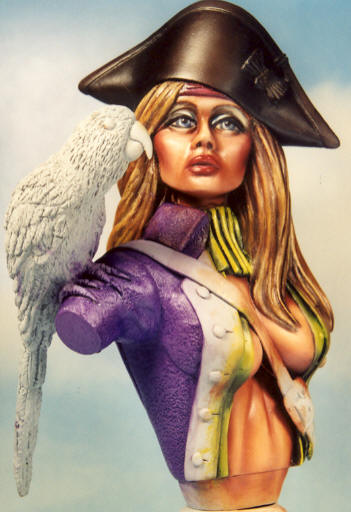
Figure with coat color added
|
|
Step 10
The hat was addressed again and Burnt Sienna was added to Payne's gray and applied to the pinched portion of the hat, blending forward and into a Titanium White, Payne's gray and Burnt Sienna mix which was applied to the outermost tip of the hat. Ivory Black was applied in the deepest valley of the hat shape and blended into the surrounding Burnt Sienna and Payne's gray mixture.
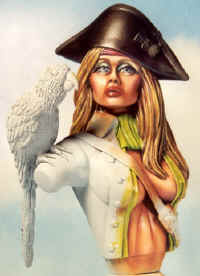
Olive green was added in the recesses of her blouse, below the frill, beneath her breasts and beneath the edge of the jacket. Winsor Violet was applied as the coat's base color. I did not paint the lapel at this time because my original plan was to have the lapel a darker shade of the jacket color but it did not look as wonderful as my colored pencil rough did.
|
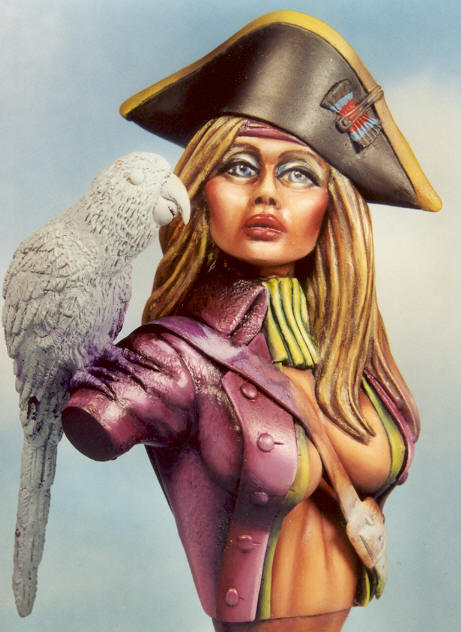
Figure with hat trim and lapel
|
|
Step 11
The trim for the hat was painted using Gold Ochre. Dioxazine Purple was then added to the lapel. I did not find it that stunning so later made the coat and lapel the same color. The look I believe is much more appealing. The blouse was worked on a bit more. Phthalo green was added in the blouse recesses and blended into Thalo Yellow green at the top of the folds.
|
Figure with coat shading and highlighting
|
|
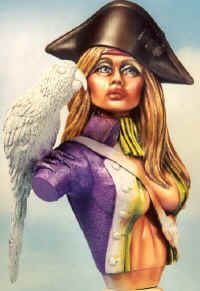
Step 12
In painting the coat I gave myself a wider palette of colors. I applied them solely and collectively. Winsor Violet, Magenta, Purple Madder Alizarin, Dioxazine Purple are the colors represented.
I first applied the shading or outlining color to the lapel edge, beneath and surround the breast, inside the folds of the sleeve, in the hollow of the collar at the collars edge, and at the stub of her arm.
|
Figure with belt color added
|
|
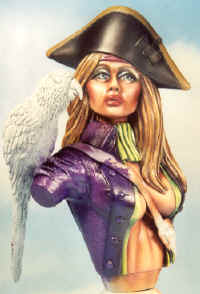
Step 13
This step was a bringing together of a lot of different areas to a fuller more complete appearance. Starting from the top I worked the hat over bringing a nice highlight definition using Burnt Sienna and White as a highlight and Ivory black as the shadow. I added to the bow the last of the three colors white to the bow edge. Gold Ochre was also added to the rope holding the bow in place. The colors for the coat were more fully expressed by adding a bit of White to the Purple Madder Alizarin to highlight the raised portions more specifically. Dioxazine Purple was again added as the shading color and blending the two color combinations to form a smooth transition to define the coat.
Gold Ochre and Burnt Umber were combined to form a dark gold and then applied to the buttons. Burnt Sienna was then added to Ivory Black to form a Rich Brown and the strap was painted with this color.
|
The blouse was soften and blended taking the Deep green color acquired by adding Sap Green to Olive Green and applying this to the recess areas and in the shading areas and blending this color into the highlight color received by combining Thalo yellow and a touch of Titanium White thereby smoothing out the transition of colors.
Figure with beginning parrot colors
|

|
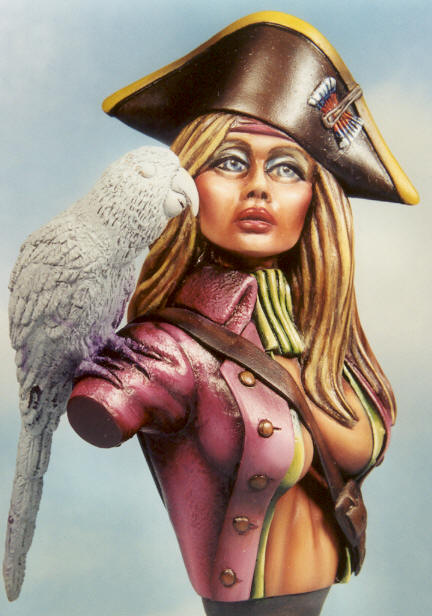
Step 14
The strap color was smoothed out using Burnt Umber to shape the material and Burnt Sienna to heighten the color. Then Payne's Gray and White were combined and the resulting color was brushed onto the buckle. The first colors I applied to the parrot were Phthalo Turquoise and Ivory Black. The beak was suggested by combining a touch of Lamp Black and White oil paint.
|
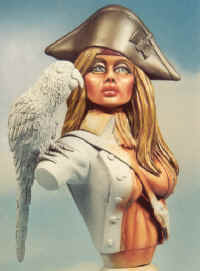
Figure with addition of yellow and white to parrot
|
|
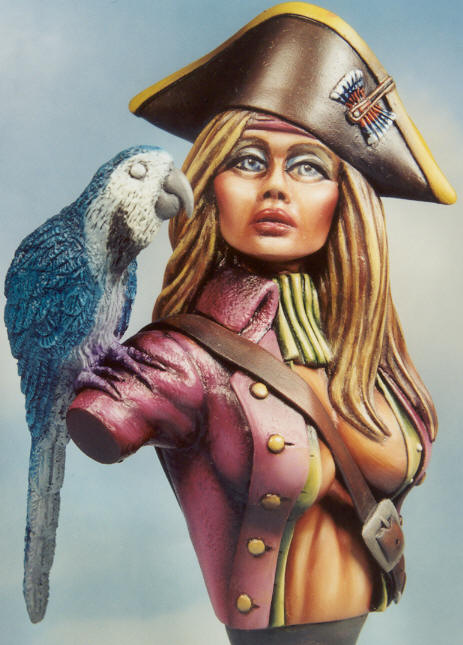
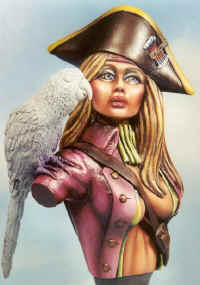
Step 15
The blue of the parrot was strengthened by shading the feathers with Indigo and lightly drybrushing White added to the Phthalo Turquoise to the tips and detail of the feathers. Then Cadmium Yellow was painted on the belly lower tail feathers and the lets. White was painted around the beak and face. The parrots feet were painted Paynes gray and lightly brushed over with white while still damp. The eye was colored in using Green Gold, Canary Yellow and a bit of White. The beginning suggestion of the black feathers that are within and between the white facial feathers were applied. The pupil was represented by a touch of Ivory Black paint
|
Figure with parrot complete
|

|
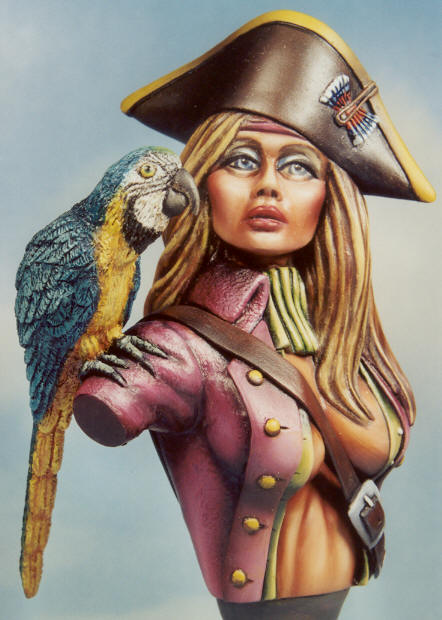
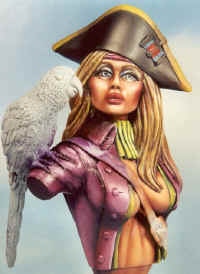
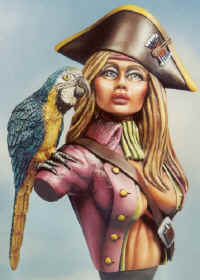
Step 16
The parrot was finished by shading the Canary Yellow feathers with Cadmium Yellow with Gold Ochre and then applying a light drybrushing of white to the round of the belly and to help separate the feather definition. The beak was finished by highlighting the curve of the beak with white and underling the lower beak with Ivory Black. The buckle was finished by highlighting the edges with a light grey/silver by combining Paynes Gray and White to highlight and Ivory Black to separate the buckle from the strap. The buttons were tipped with a Yellow Ochre -White mixture to highlight and separate them from the jacket.
|
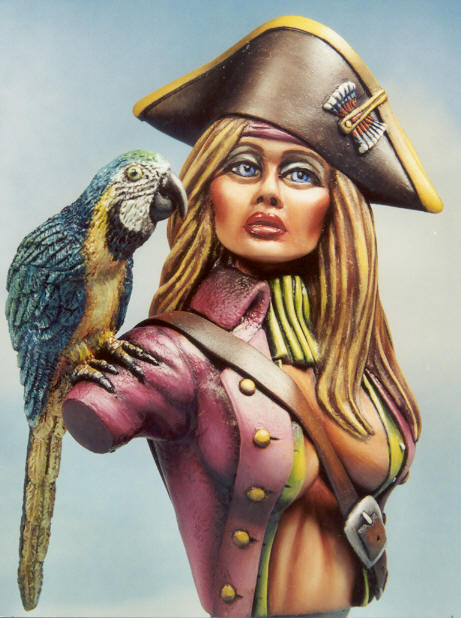
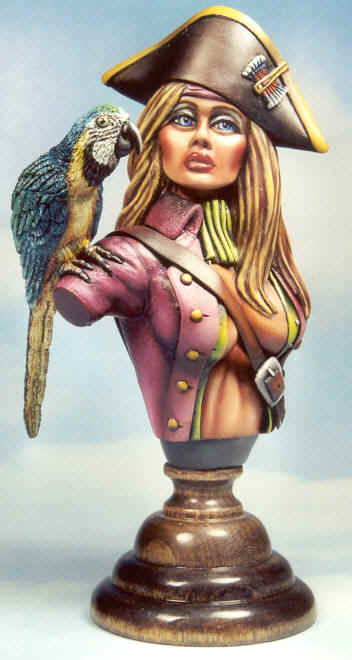
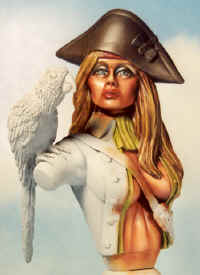
Figure Complete and on base
Step 17
This is the completed figure. I have painted the bust extension/base a dark grey to "ground" the figure. The bust was then glued to the wooden base. A rod was inserted into the base for 1/2" and 1/2-3/4" of rod was inserted into the bust itself to assure support and anchorage.
Rick & Janine Bennett are owners of "Quality fantasy figure kits and scale modeling accessories".
Support us ordering our notes in PDF > Here
|