|
|
||||||||||||||||||||||||||||||||||||||||||||||||||||||||||||||||||||||||||||||
|
Motorcycles |
|
|||||||||||||||||||||||||||||||||||||||||||||||||||||||||||||||||||||||||||||
|
Building the Pocher Ducati 1299S Panigale 1/4 scale |
||||||||||||||||||||||||||||||||||||||||||||||||||||||||||||||||||||||||||||||
|
by Adie Gerber © Modeler Site |
||||||||||||||||||||||||||||||||||||||||||||||||||||||||||||||||||||||||||||||
|
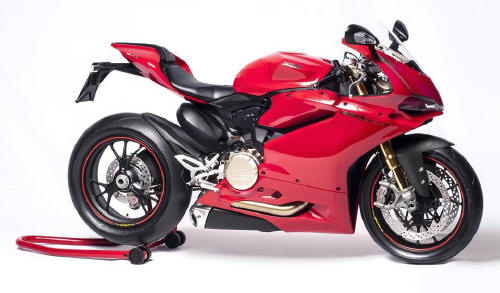
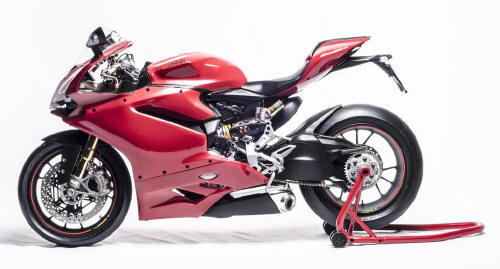
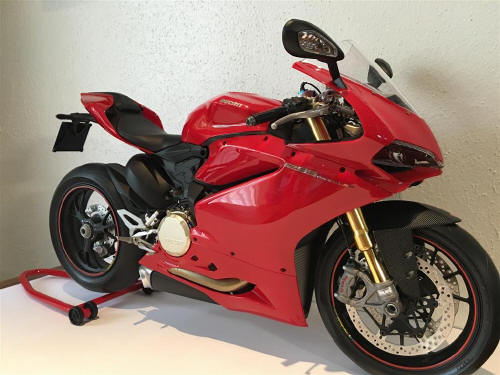
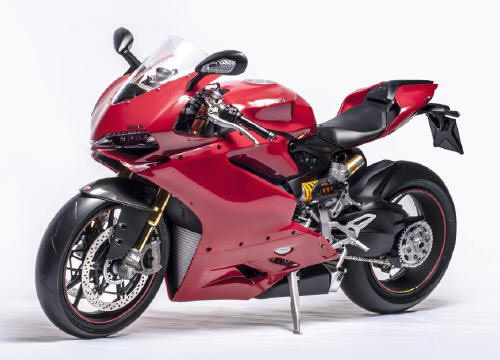
Legal Notice No material from Modeler Site any Web site may be copied, reproduced, republished, uploaded, posted, transmitted, or distributed in any way, except that you may download one copy of the materials on any single computer for your personal, non-commercial home use only, provided you keep intact all copyright and other proprietary notices. Modification of the materials or use of the materials for any other purpose is a violation of copyright and other proprietary rights. Read More here > Legal notice Editor note: Some months ago, Adie sent me this text with pictures, he was very exited with this amazing model from Pocher. I felt it wasn’t the way we used to show articles, we like better pictures, however the model itself, and the work of love Adie put on this deserves to be shared with others in our pages. So here the article as was sent, no correction or translations were made, only fresh bread from the oven. This is the Pocher 1/4 Ducati 1299S Panigale. The kit was released in 2015 and reached South Africa in early 2016. I was fortunate to build this one for a friend who collect hi end car models.
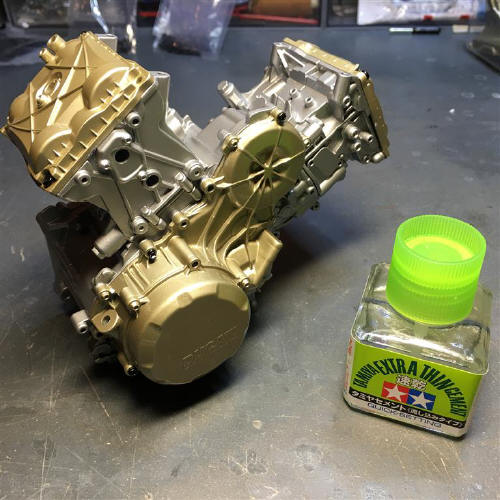
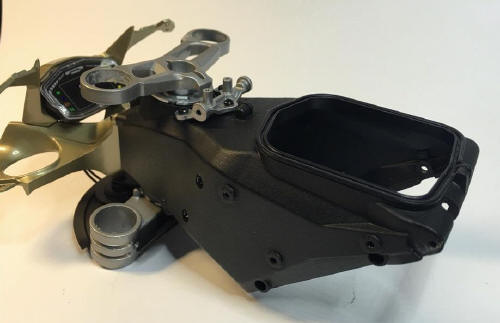
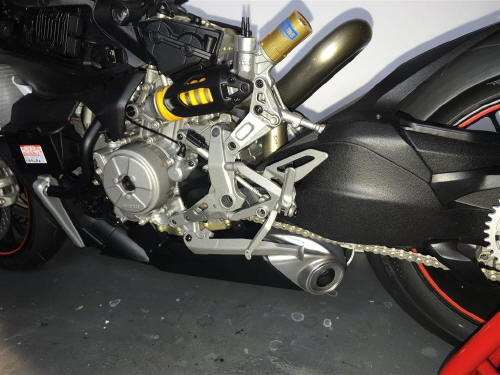
Building Photo and is just to give you an idea of the size of this thing… the Tamiya glue bottle for reference is not a new miniature bottle by the way.
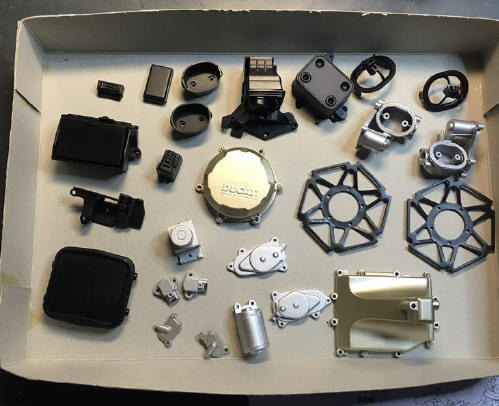
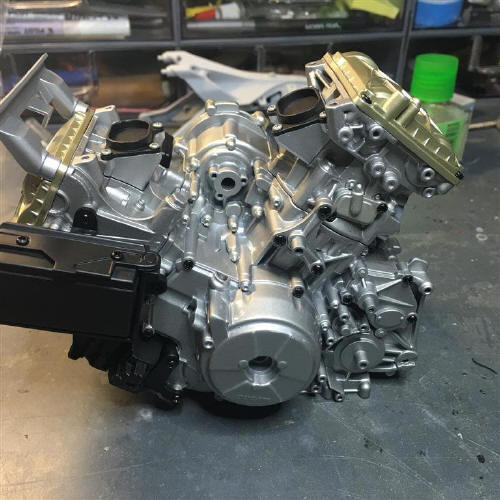
The kit is a new release with new tooling which implies that moulding quality and fit is generally very good. A number of the parts come pre painted that does help, but which also introduces a few challenges. The unpainted parts come in a plastic colour similar to what is needed for the real version.
In the end about half of the parts where re-painted with the exception of the silver engine pieces, the red bodywork, wheels, swing arm, etc.
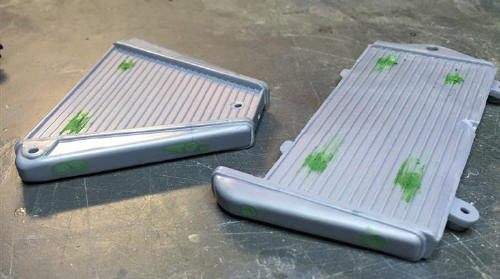
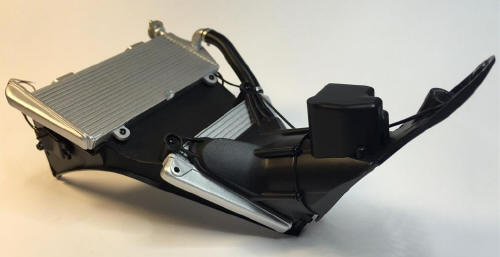
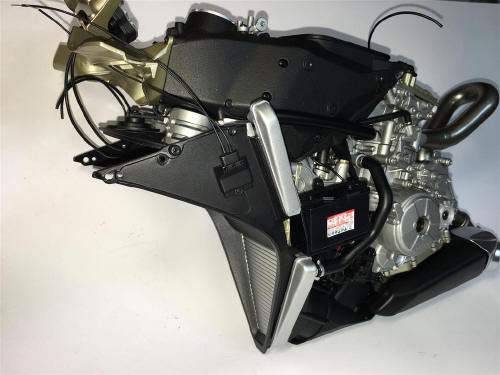
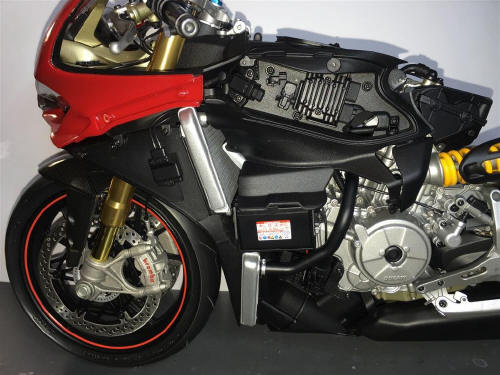
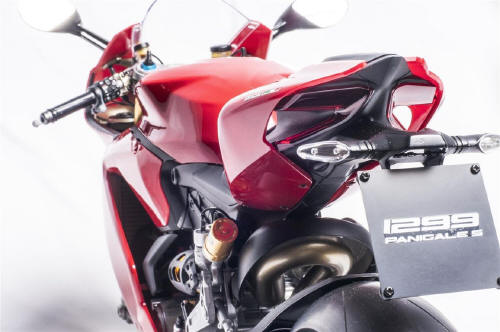
The kit only makes provision to have everything closed up. When discussion the build with the owner, we agreed that we need to be able to have the side cowlings off to see some of the detail. The full impact of this decision would only manifest itself later during the building process. Radiators Although the kit allows for cowlings to be removed through the use of screws, you are faced with a lot of screws showing where they should not be …the radiator side and faces, etc. Initially I tried to close this up with filler.
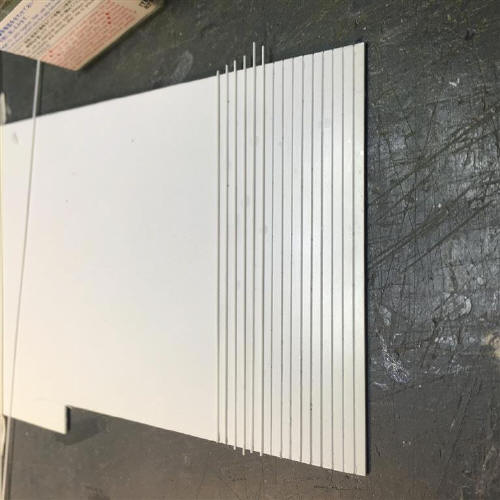
After 2 attempts this was abandoned for the larger top radiator and a new radiator face was made from plastic card and strip.
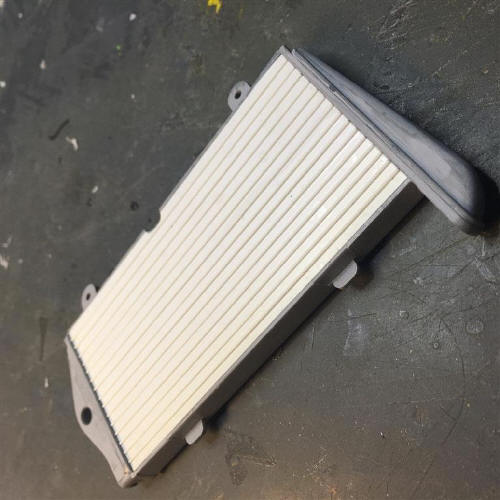
The new radiator face was fitted and now it looked significantly better.
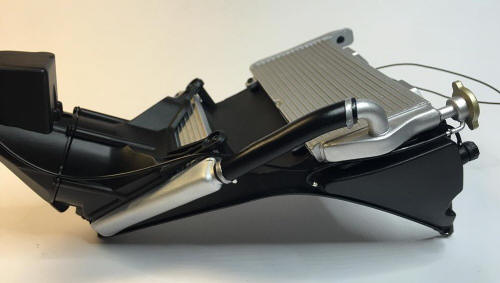
The radiators and fan assembly could then be finished up, together with plumbing.
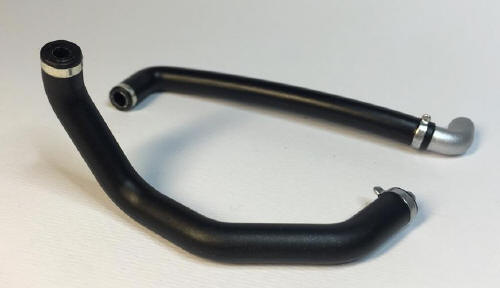
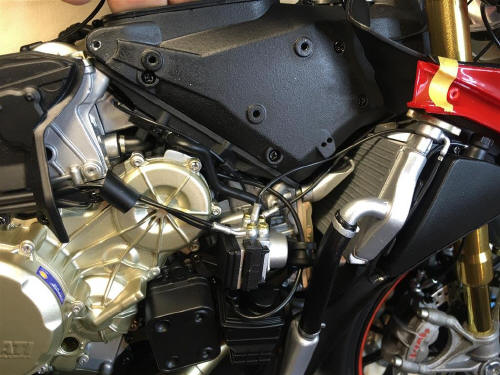
The two pipes feeding water to the engine only has a clamp on one side.
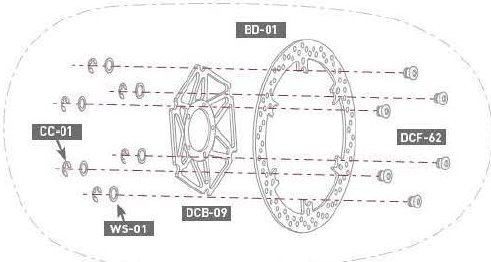
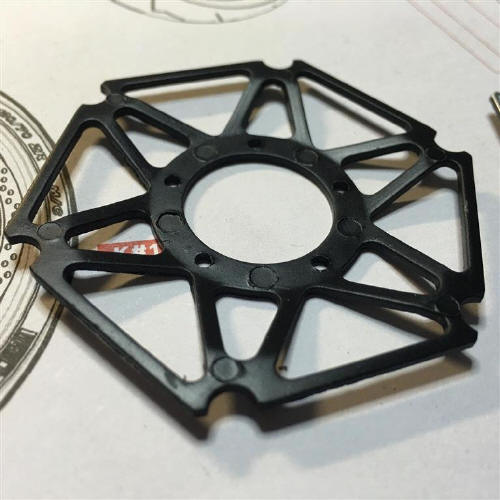
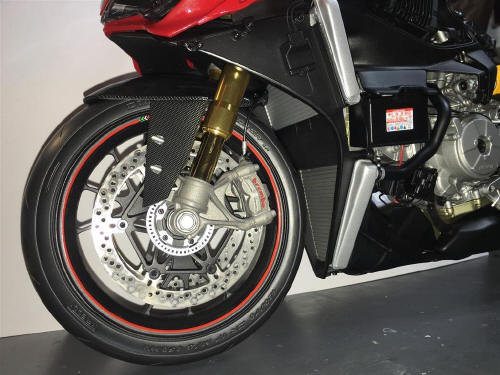
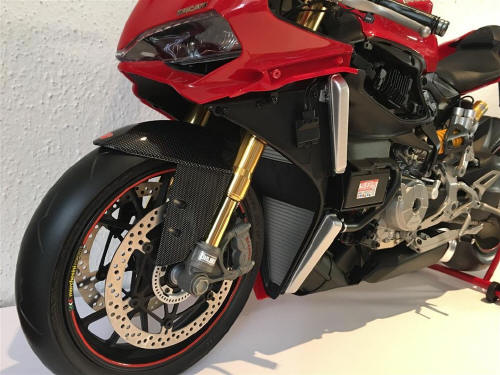
Some thin strips of bare metal foil was used to create the impression of a clamp on the other side to balance the look of the pipes. This same technique was also used for a number of smaller pipes. Front discs The front brake disc on this model is phenomenal, each one consisting of 20 parts, it builds up like a real one and is fully floating.
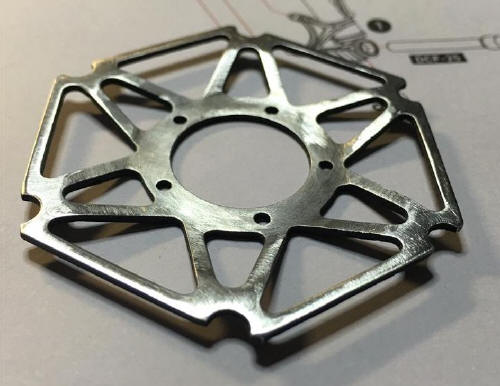
The problem is that the inner retainer bracket is pre-painted but the tooling marks are on the outside which is the visible side.
The only solution was to sand them down.
Once cleaned up it was a matter of primer and paint sating black, and assemble the wheels as required.
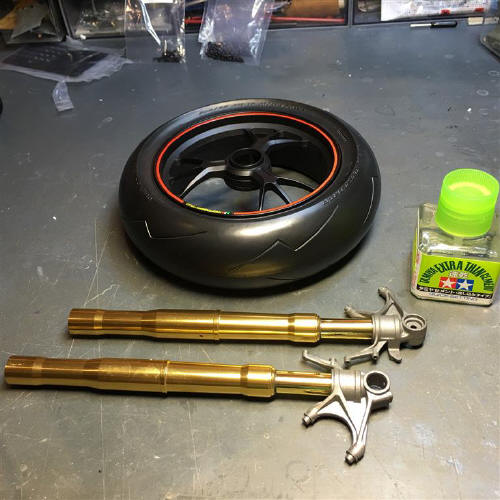
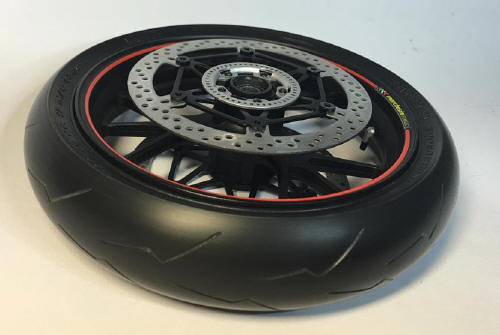
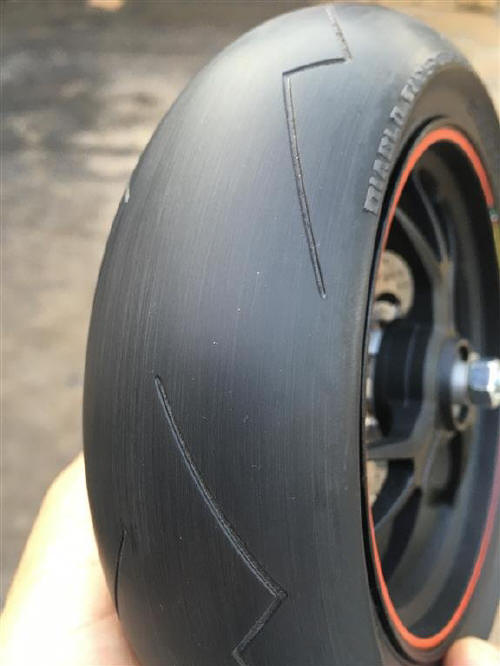
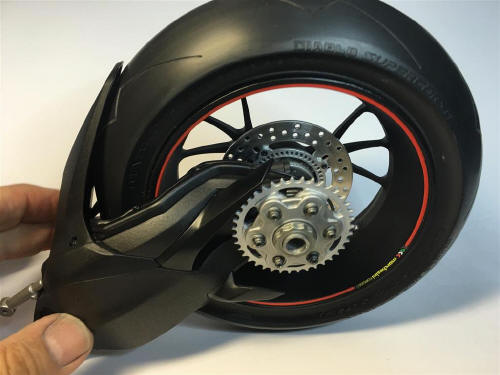
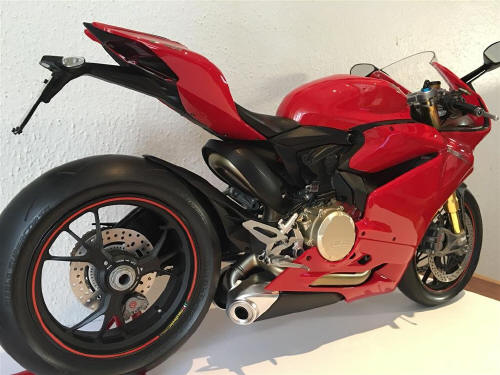
Tires On the topic of wheels, they come pre-painted with the red line already applied. The tires are solid rubber and weighty… The challenge is there is a seam in the middle and they have a very are shiny. In the end I made a threaded rod to go through the centre, fitted it to a drill press and sanded them, going down to a 220 grid. The rear tire is shown for reference.
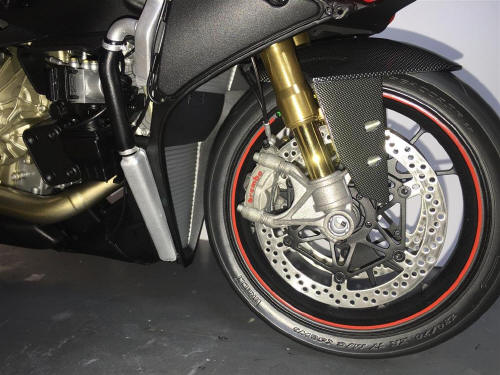
It is important to finish this process before the delicate parts such as the tire valves and the 10 decals for the rear wheel is added. Front fork assemblies The front forks come pre-finished and this does two things, firstly saving a lot of time and secondly, it looks stunning. The front end was completed and the brake calliper “Brembo” lettering was done with red paint using a thin brush.
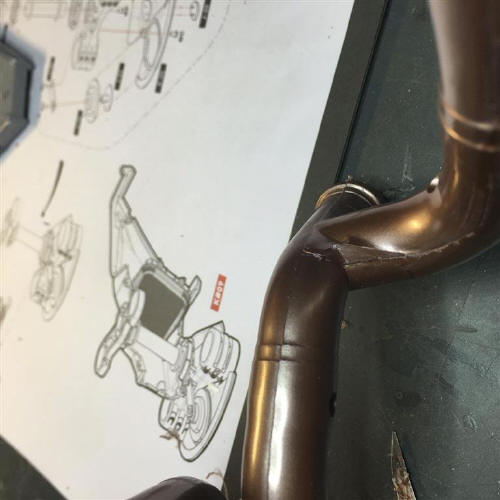
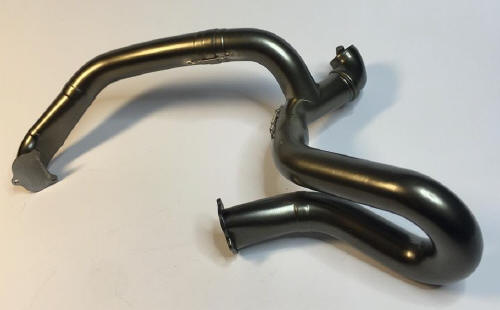
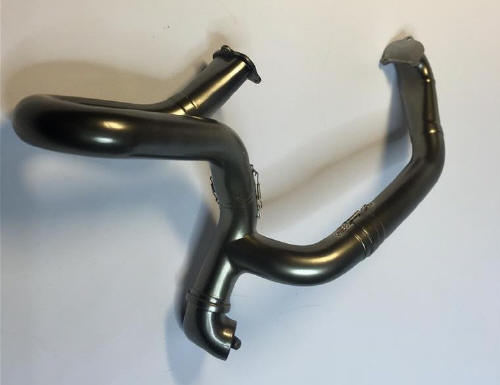
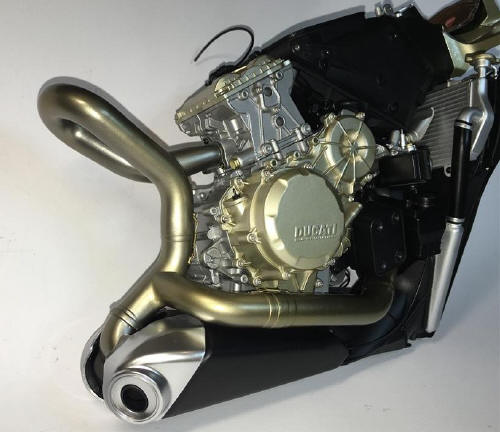
Exhaust system One of the most challenging and time consuming tasks on this kit is the exhaust system. The pipe part of the system is made up of 10 pieces which excludes the lower silencer boxes. This all screwed together with seams all over.
Although a lot of the pipe system is hidden when assembled, some of it will show, especially when you take the cowlings off. The answer was to cover the screw holes and sand the seams until a smooth system could be achieved. The final painting was done with Alclad Dark Aluminium, lightly coated with Alclad clear yellow, thinned with lacquer thinner.
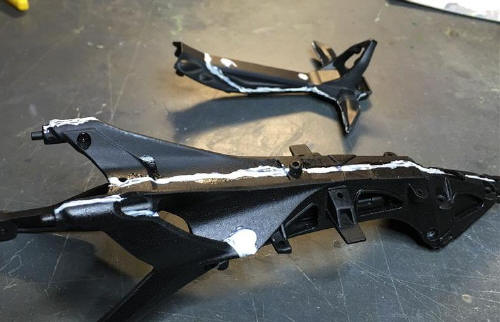
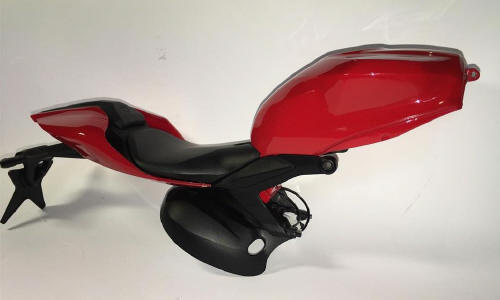
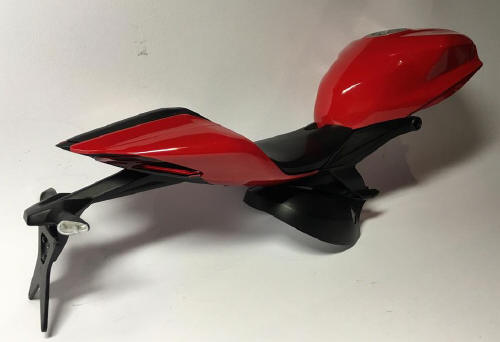
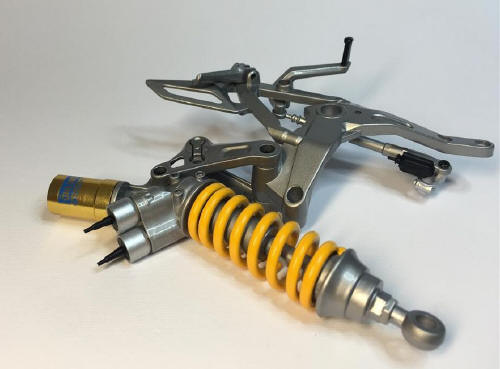
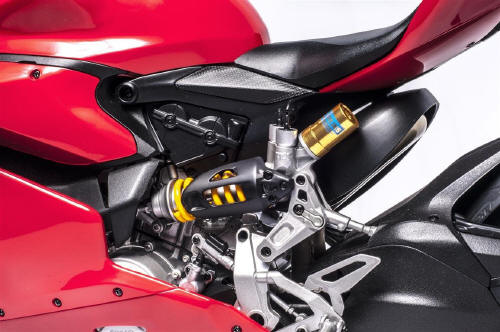
The kit is missing the 3 retainer spring that hold the system together. These were made by wrapping thin wire around a steel pin. Rear chassis section The chassis section that support the seat and rear lights come in a number of pre-painted metal pieces that is screwed together.
I decided to fil up the seams as some of them will show, but to also sand the rough texture on it down a bit as I felt it was bit out of scale. Final finish was Tamiya acrylic Satin Black before all was assembled.
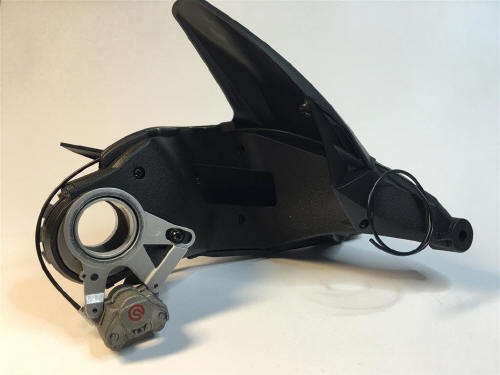
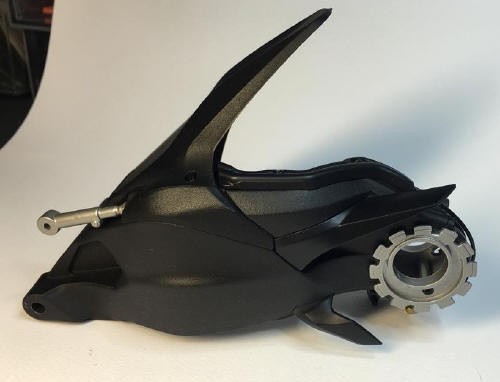
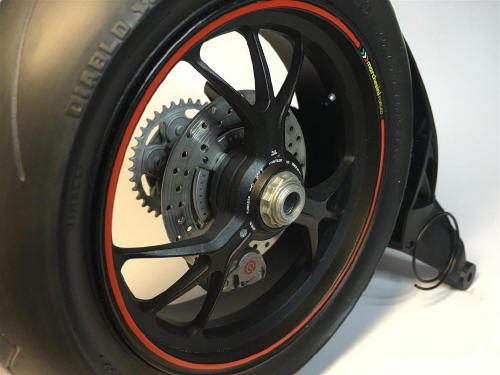
Swing arm The rear swing arm was assembled per the instructions.
The sanded and decaled wheel was then fitted to the swing arm. After visit to the Duacti dealer in Johannesburg I realised the wire for the rear wheel ABS sensor was missing and this was added from thin black wire.
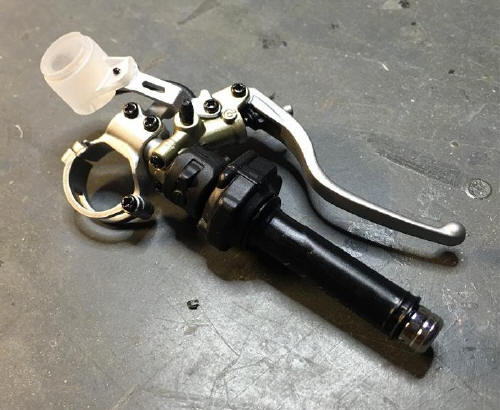
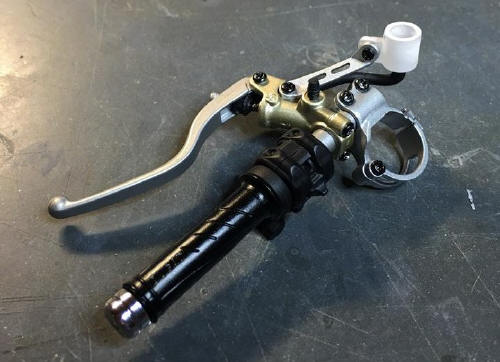
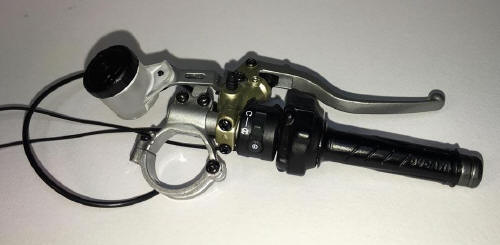
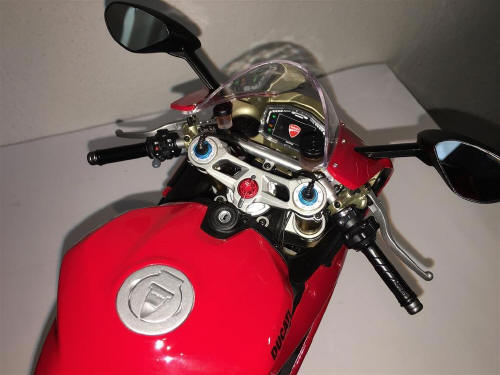
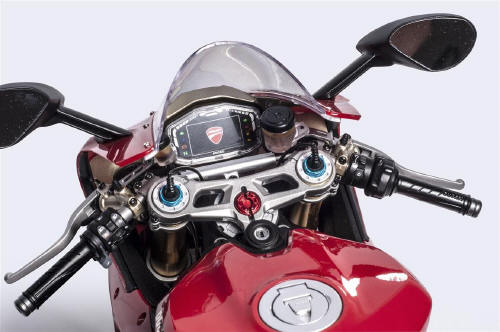
Handle bars The handle bar control when then assembled per the instructions.
The kit includes the oil lines for the front brake and clutch units. I added wiring for the controls/switches and painted the some of the switches in grey/black tones as per pictures found on the internet. After adding the decals provided it all looked quite convincing.
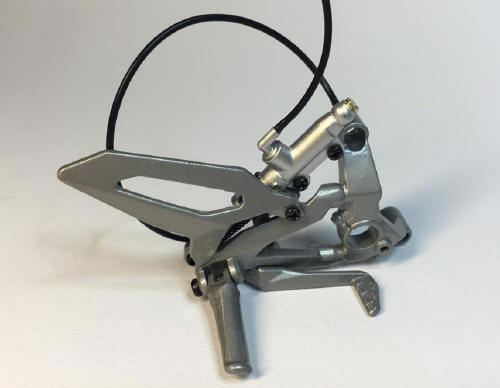
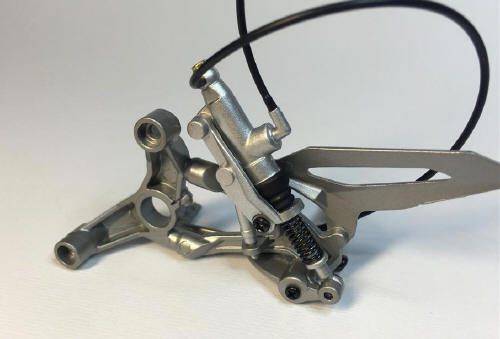
Foot pegs The rear foot pegs and controls where assembled as per instruction with decals and plumbing per the kit instructions.
Even the side stand comes with its own return spring.
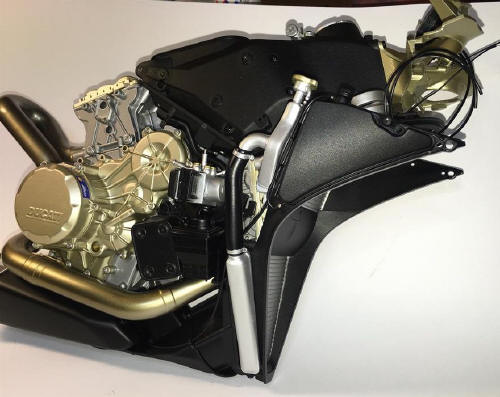
Front chassis section The front chassis frame was then assembled. The instructions require you to assemble half of this unit, then fit it to the motor/radiator unit, and then fit the rest of the chassis unit. After a test fit I realised that you can assemble this as a whole assembly and then fit it to the engine.
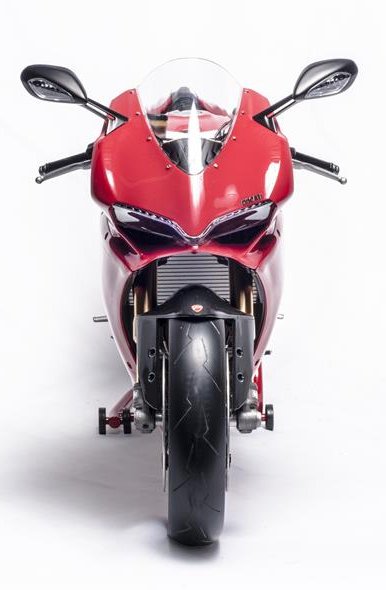
During one of my trial runs I realised that once you have the front forks installed together with the handlebar controls, you need to fit the front cowling and right towards the end install the mirrors. Getting to the 2 screws for each mirror is impossible unless you have fingers not longer than 20mm but with the ability to apply great force. Final assembly. Front cowling
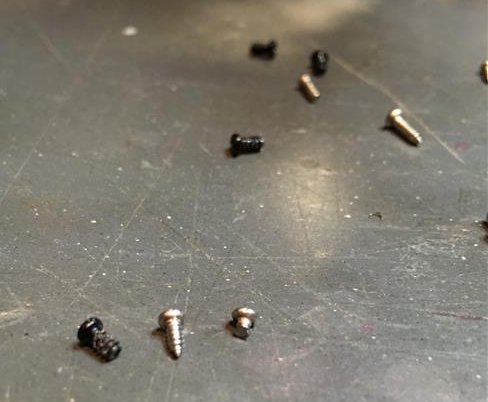
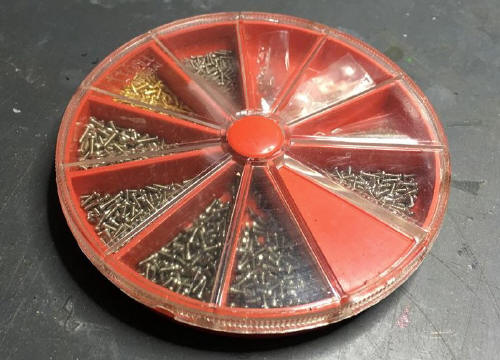
I also change the kit supplied one to smaller silver screws coming from a set purchased via E-bay.
The front of the screen is supported by laying flush on the instrument support bracket so the 4 missing screws does not weaken the structure and final look is much closer to the factory look.
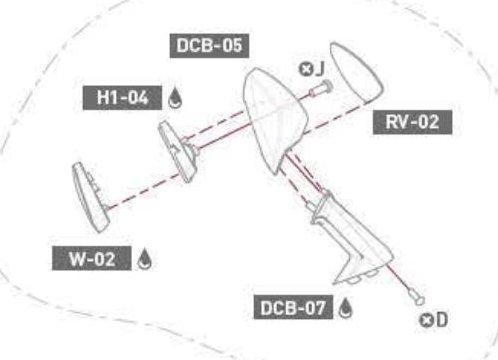
Mirrors The mirrors was another item where I had to deviate from the instructions. They come as 2 metal pieces, screwed together with the mirror and lights fitted afterwards.
I decided to ignore the crews, glue the 2 metal pieces together, fill the seams, primer and paint with satin black. This was quite tricky as the black paint reacts to the Tamiya grey primer and very thin coats of primer must be applied to prevent bubbling. Once the primer was dry there was no problems with applying the satin black and fitting them together with provided metal mirrors and side indicator lenses.
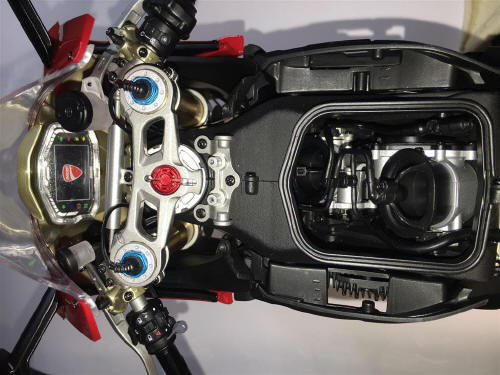
Final assembly When it came to final assembly, I had already put together and taken apart most of the bike twice before finishing finer details. I decided to deviate from the kit sequence in two ways.
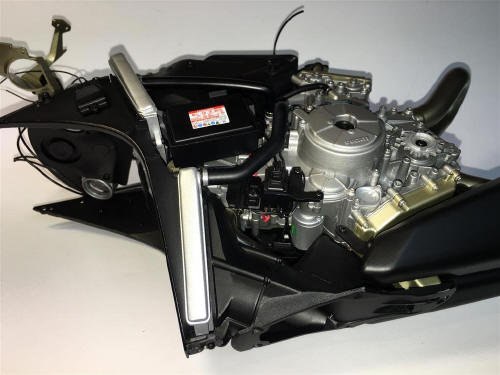
Firstly, I left the rear frame, seat and fuel tank assembly off until after all the controls, mirrors, front cowlings and side inner covers were fitted. The reason for this being that the frame/seat/tank assembly makes the model very difficult to handle and top heavy. It is also very easy to add these items at the end so for me it was a win-win situation.
Secondly, the previously mentioned mirrors. You have to start by screwing the small screws fully in and out of the two holes in the mirror mounting to make sure the will turn easier.
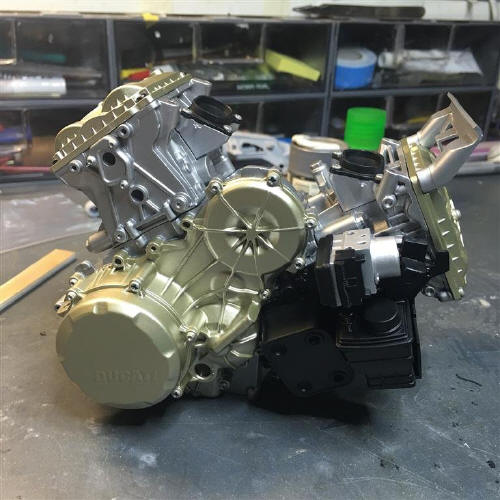
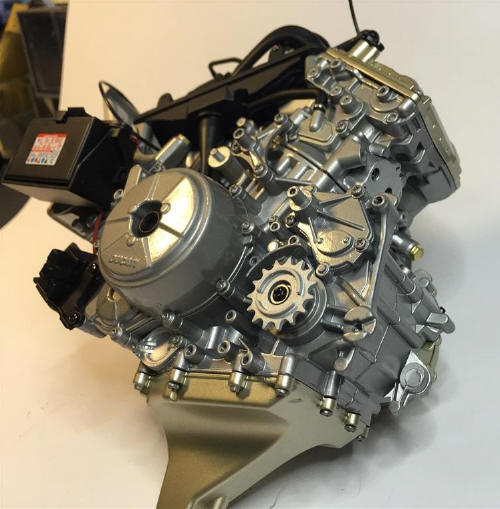
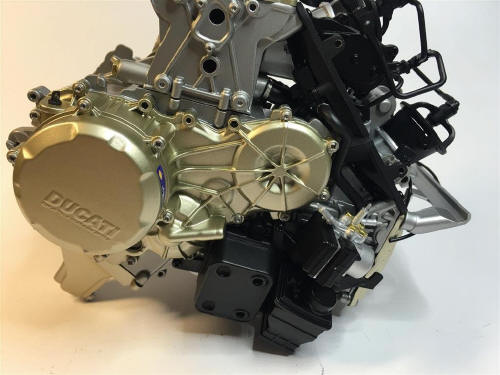
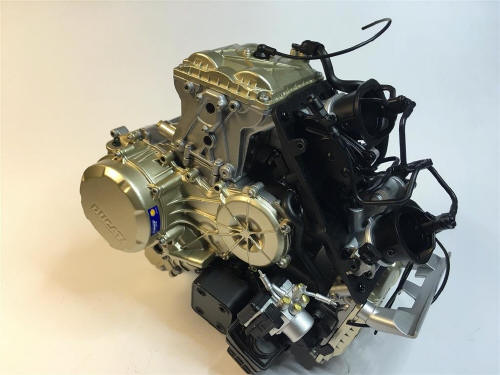
Assembly starts with the engine, radiators, exhaust and a few loose pieces.
My work around for the mirror challenge was to install the complete front chassis section to the engine/radiator assembly without the top yoke being fitted.
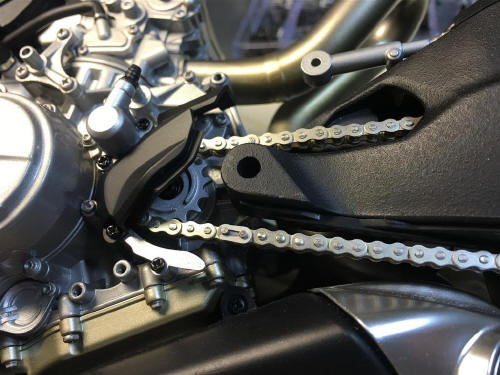
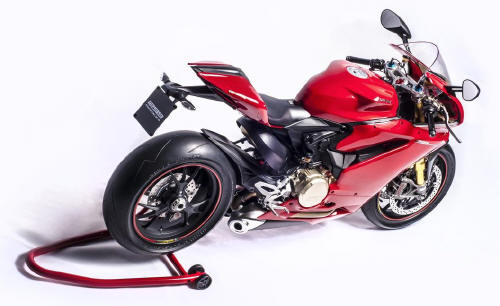
The front and rear suspension was then added, and one of the jewels of the kit, the rear wheel stand can then be used to keep the bike vertical, making all further work much much easier….
Be careful when fitting the drive chain and it link it is easy to scratch the silencer boxes and then it is repainting time, ask me how I know that?
Next the front cowling with its inserts is fitted and you then have enough access to fit the mirrors with a very small screwdriver, or as I did with just the screw driver bit from an electronics toolkit.
The rest of the assembly was per instructions with no surprises.
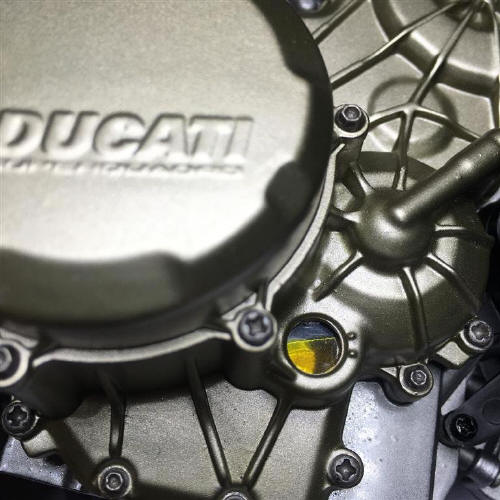
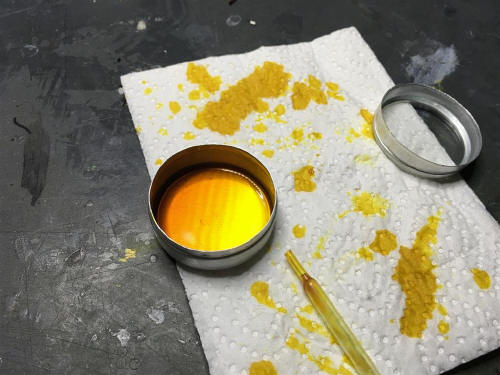
I mixed Tamiya clear yellow and clear to get a thinned mix to fill the brake and clutch fluid reservoirs with. First put a drop of super glue in each cup to seal the holes at the bottom.
Lastly the fitting of cowlings, and adding decals.
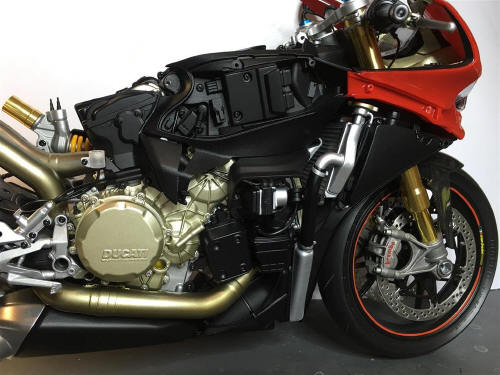
The cowlings needed a little trimming of the flat surfaces the screws tap into before it all fitted neatly. Be very very careful when trying to bend the cowling end to get a better fir, the plastic is fairly brittle and one of mine broke. Thanks to Simon from Pocher they send me a replacement part free of charge, very good service to say the least. Conclusion For me, this was great fun building and making a few improvements. Wanting to take the cowling off introduced a lot more work but we modellers are never scared, and it would be an insult to the makers of the kit to hide all that beautiful detail. The size and basic ingredients you have with this kit means you can either have a great model with little effort, or go to town if that is your preference.
The only real negative… two actually…... The price, mostly a factor of our country’s lousy exchange rate, and then the big issue… I have to hand it over to the person I build it for…
Big size photos are only available in our PDF format. Support us ordering our notes in PDF > Here |
||||||||||||||||||||||||||||||||||||||||||||||||||||||||||||||||||||||||||||||