|
|
||||||||||||||||||||||||||
|
Armor / Advanced Techniques |
|
|||||||||||||||||||||||||
|
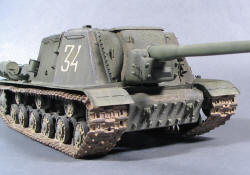
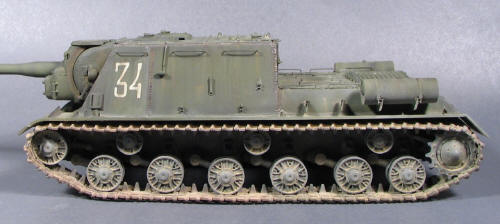
Detailing a weathering a Dragon JSU-122, ref. 6013 1/35 scale |
||||||||||||||||||||||||||
|
by Patricio Delfosse © 2005 Modeler Site |
||||||||||||||||||||||||||
|
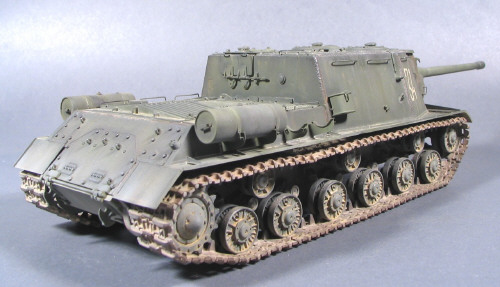
Legal Notice No material from Modeler Site any Web site owned, operated, licensed, or controlled by Damian Covalski may be copied, reproduced, republished, uploaded, posted, transmitted, or distributed in any way, except that you may download one copy of the materials on any single computer for your personal, non-commercial home use only, provided you keep intact all copyright and other proprietary notices. Modification of the materials or use of the materials for any other purpose is a violation of Damian Covalski's copyright and other proprietary rights. Read More here > Legal notice The JS/JSU series which has been available for years, is still today an excellent base to work. Over the JS-2 chassis, Dragon made several Self Propelled Guns different in tiny but visible enough details to justify that any ruskie-nut wants to build all of them. (JSU-122 early, JSU-122S, JSU-152, JSU-122/152)
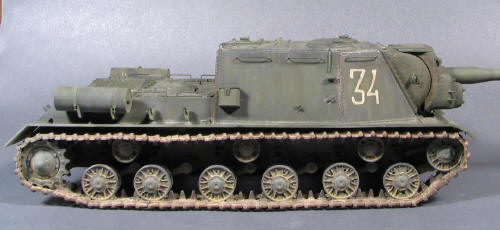
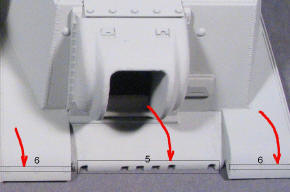
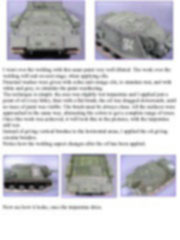
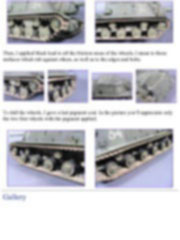
There are not hidden woes with regard to its construction, and although you’ll see later, I had to detail certain areas; it was not a difficult task and could easily be resolved. The only correction that is often done, but, unnecessary in my opinion, is the height of the fenders. In point of fact, if you build any kit of the JS/JSU series out of the box, you’ll find there is a narrow space between the tracks and the fenders. To solve this, you should place a 1mm strip around the hull’s contour, prior to joining both the upper and lower hulls. But this would turn the rear area of the vehicle distorted. So, I decided not to do so, anyway, this improvement would not be very noticeable. This note aims at showing the corrections made from scratch, as well as pointing out the necessary modifications to include the Eduard's improvement set to the kit. Also, I focused on the painting aspects to get a weathered effect. Preparing the hull First of all, and prior to cutting the first part of the kit, study the PE set instructions to see which parts you are going to use. Usually, the PE sets are “too” complete, comprising unnecessary parts and, hardly ever you will use the 100%. Which parts you’ll use or not depends on your experience and also to see how much work will you devote to this project. The etched parts are not the best just for being metal ones, actually, sometimes it’s not worth replacing the kit parts but in others cases, these PE parts are worse than the (original) from plastic. Before beginning, I insist again that you should decide beforehand which parts will you use: this is the key to achieve a meticulous and neat assembly.
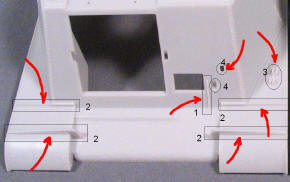
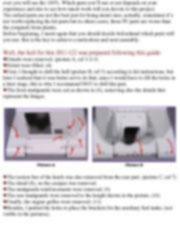
Well, the hull for this JSU-122 was prepared following this guide:
This note is offered in PDF format to be read or printed using Acrobat reader, contact our webmaster > Here Includes more than 100 pics, here we show only the text pages.
Esta Nota es ofrecida en formato PDF, el cual puede ser leído o impreso usando el Acrobat reader, contacte a nuestro webmaster > Aquí Incluye más de 100 imágenes, aquí solo mostramos las paginas de texto.
Big size photos are only available in our PDF format. Support us ordering our notes in PDF > Here |
||||||||||||||||||||||||||