|
|
||||||||||||||||||||||||||
|
Airplanes |
|
|||||||||||||||||||||||||
|
North American T-6G Texan 1/48 scale |
||||||||||||||||||||||||||
|
by Orlando Rueda |
||||||||||||||||||||||||||
|
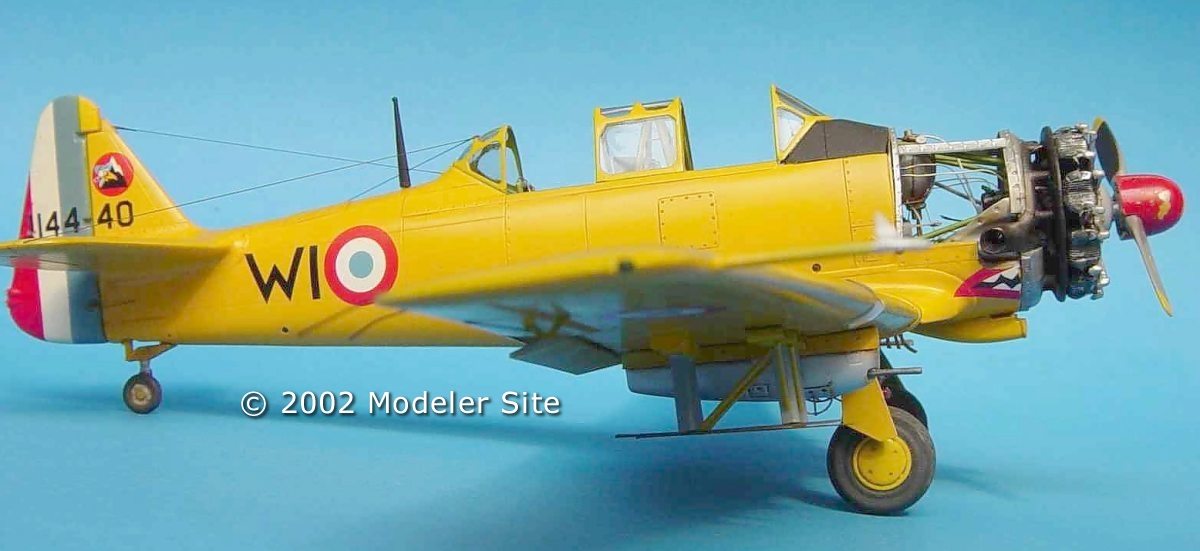
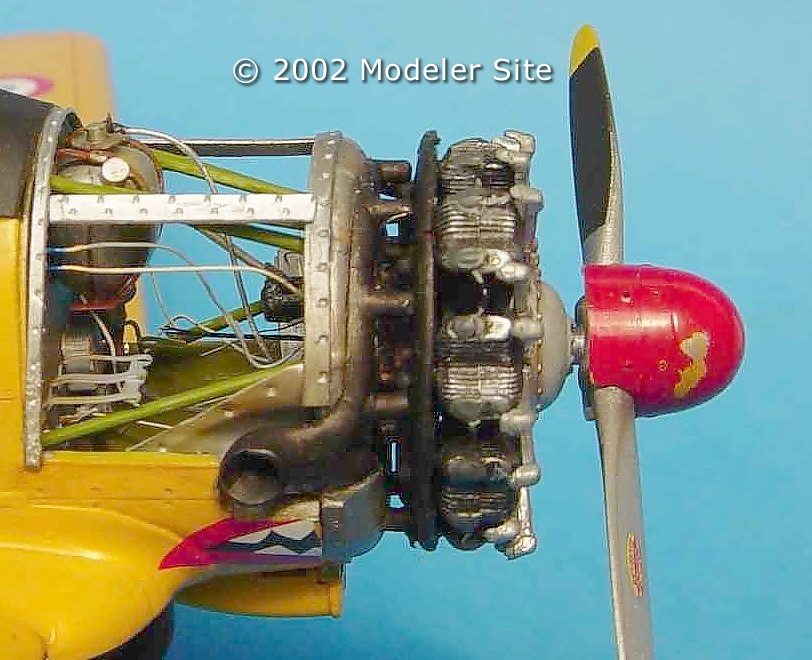
Pilot Maker is definitely a well-deserved nickname for an aircraft that was a true landmark in the field of pilot training between 1935 and 1970. The Texan's structure was entirely metallic built and it had a 400 hp Wright Ciclone engine which was later substituted for a Wright R-975 E3 for the navy version, called BT-9.
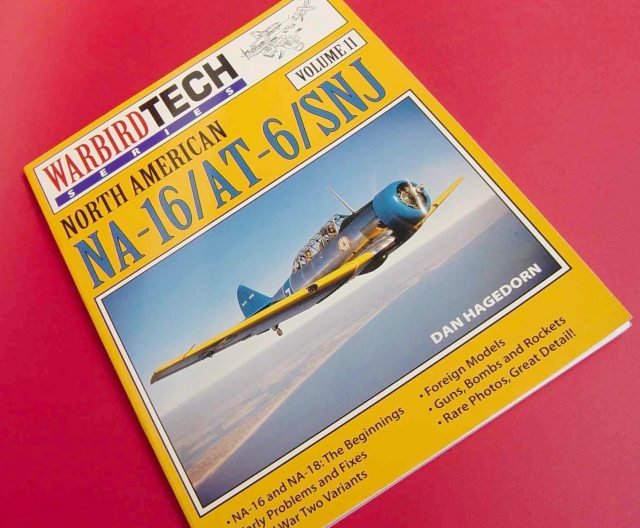
I checked many pictures of the structure, engine and cockpit. Likewise, I checked the book by Dan Hagedorn, North American NA 16/T-6/SNJ of Warbird Tech Series; In Action North American T-6 by Squadron Publications; and North American T-6 by Francis Bergise of Ouest France. As accessories, I only used the Aeromaster 48398 Texan in Algiers sheet and the Eduard decal for the cockpit.
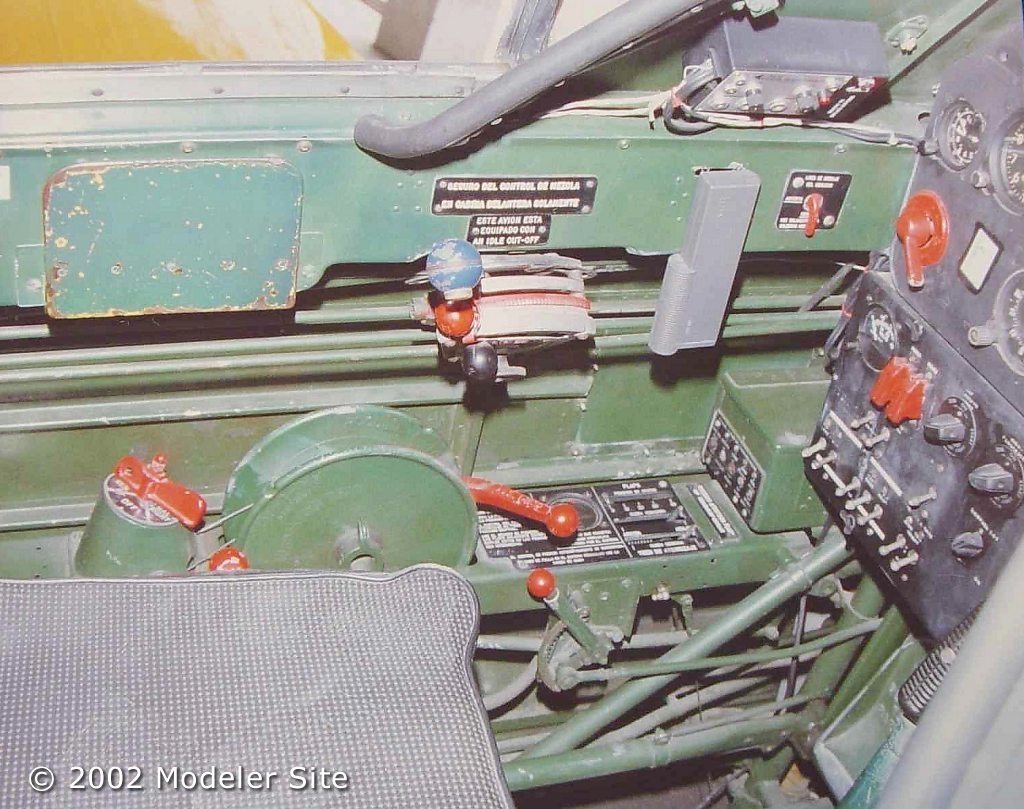
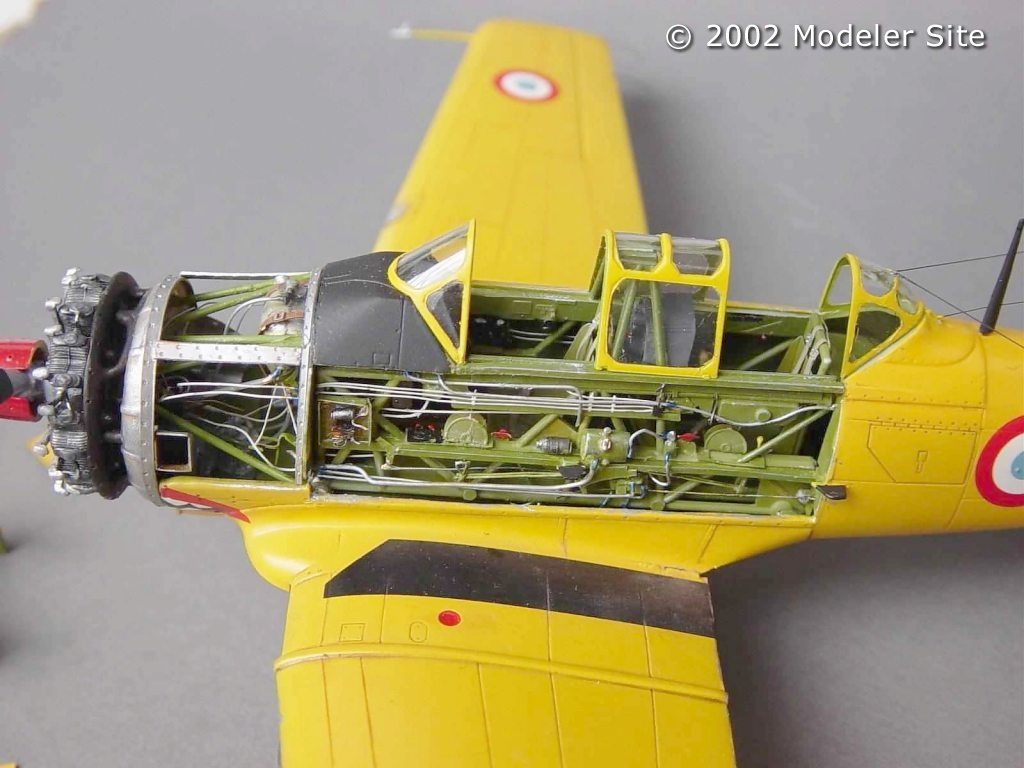
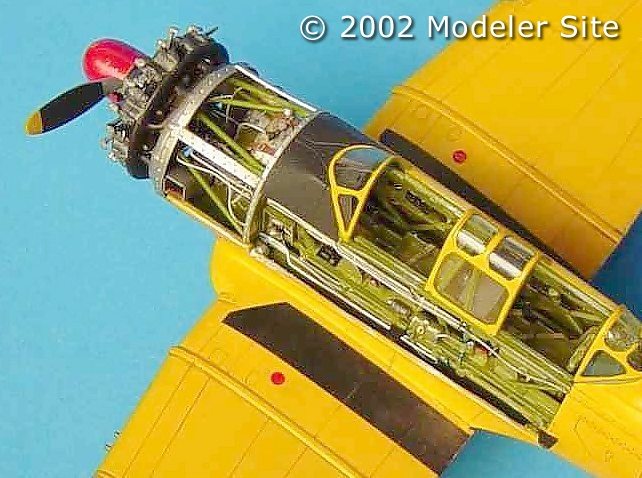
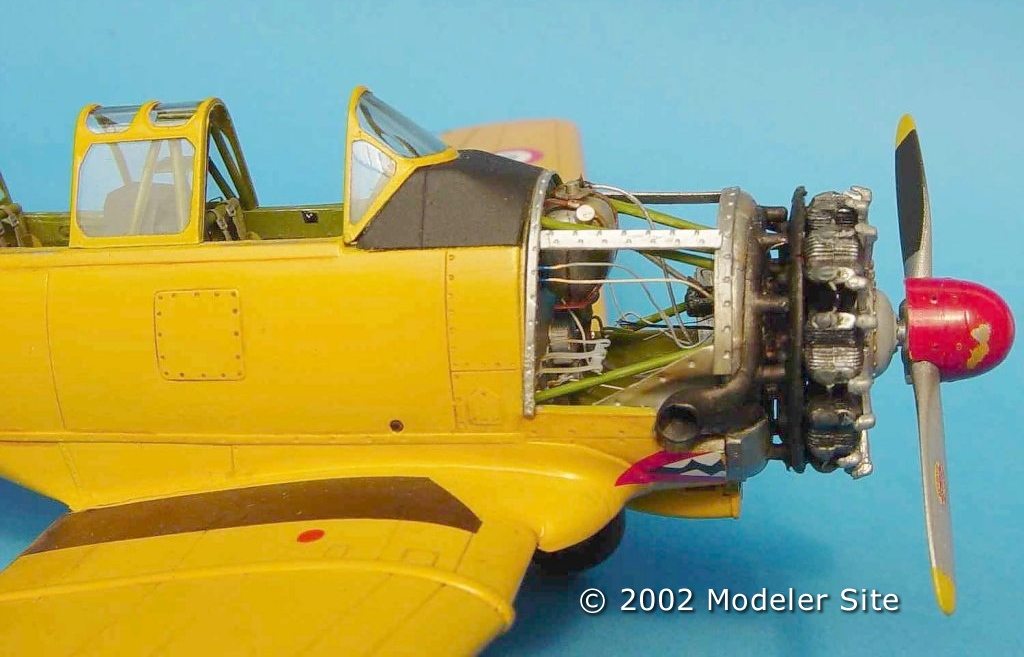
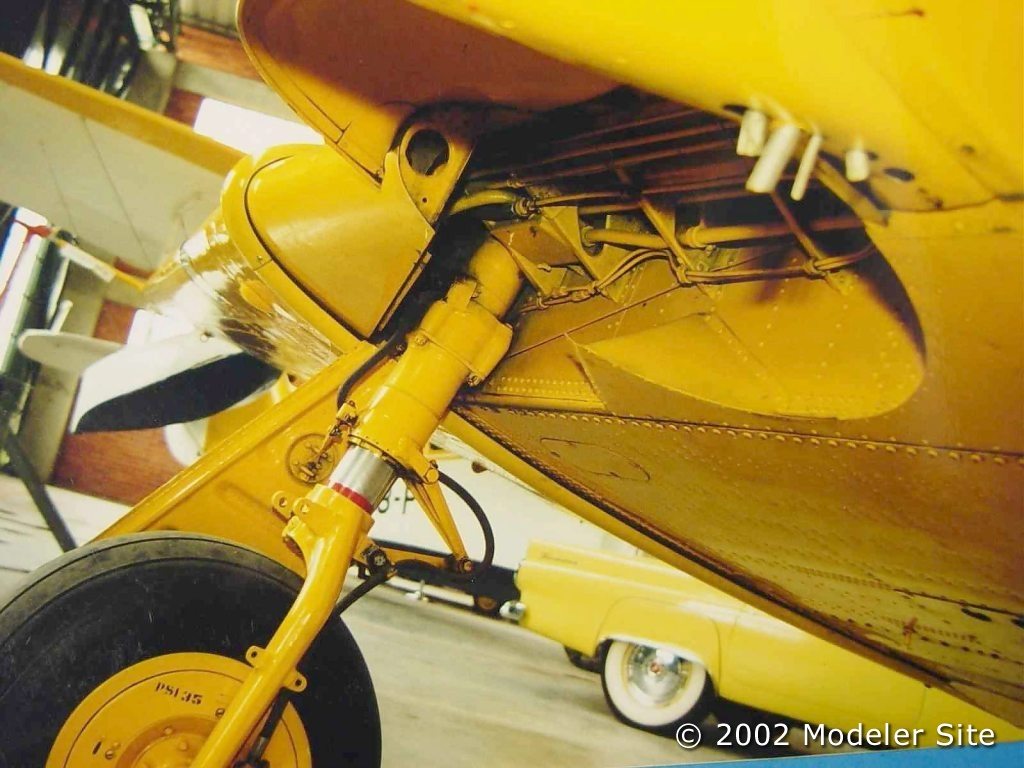
I should point out that the control and hydraulic lines were made of sprue. It is a simple process. I heat a piece of plastic -it is absolutely perfect to use the models' trees, and stretch it until I reach the desired thickness. Then, I cut out the fragments and condition them as required. Some lines have curved segments or right angles and need special care since they may break. In order to avoid this, I hold one end of the sprue with tweezers and with another pair, I mold the curves very carefully. This is done according to a previous technical scheme of each component, according to blueprints drawn as from the innermost part. Once the cockpit was finished, I painted the fuselage inner sides with the same green as inside and cut out the area I wanted to expose by removing panels. Afterwards, I cut the engine area as from the bulkhead where the oil tank is held and glued the fuselage.
After detailed study of the documents I had, I built the oil tank in autopolimerizing acrylic of which I had made a small mold in carved wood. I placed the firewall and started the work of including all the components (electric and hydraulic lines, battery platform, heating pipes, filters and the rear part of the engine). Each of these parts had been painted before gluing them in their proper place with cyanocrylate. The next step was to glue the engine that had been previously detailed with sprue and telephone and computer wire filaments -try it since the size is perfect for our work. The engine had initially painted with Testors Burnt Iron. With dry brush technique, I later applied coats of aluminum and ochre and coffee oil, to give it the typical look of the stains made due to high temperature and burnt oil leaks.
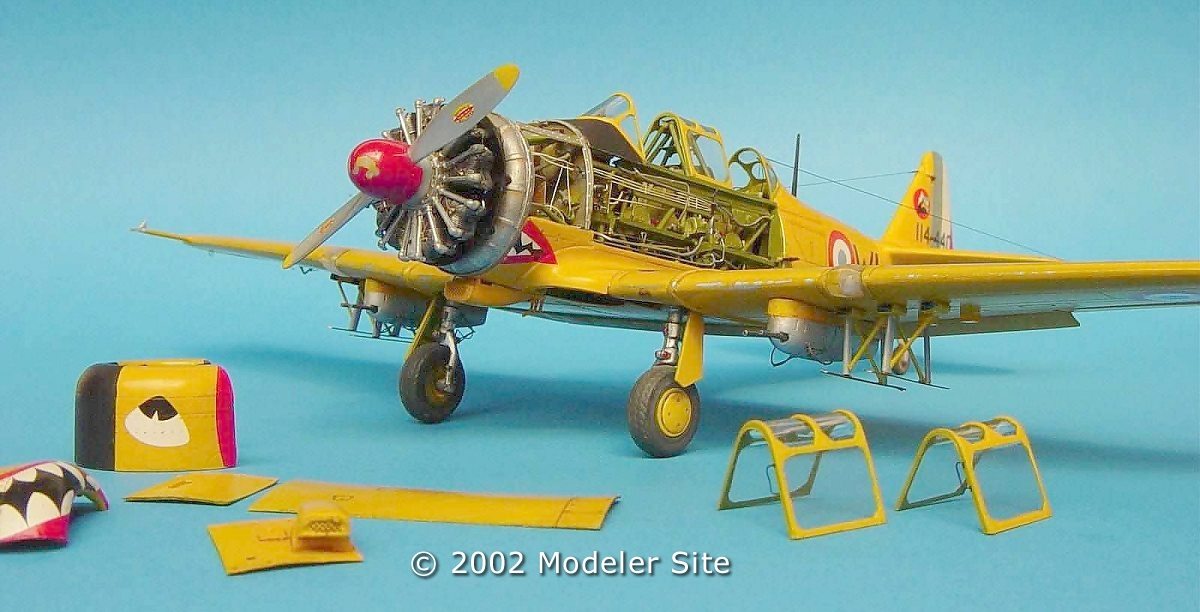
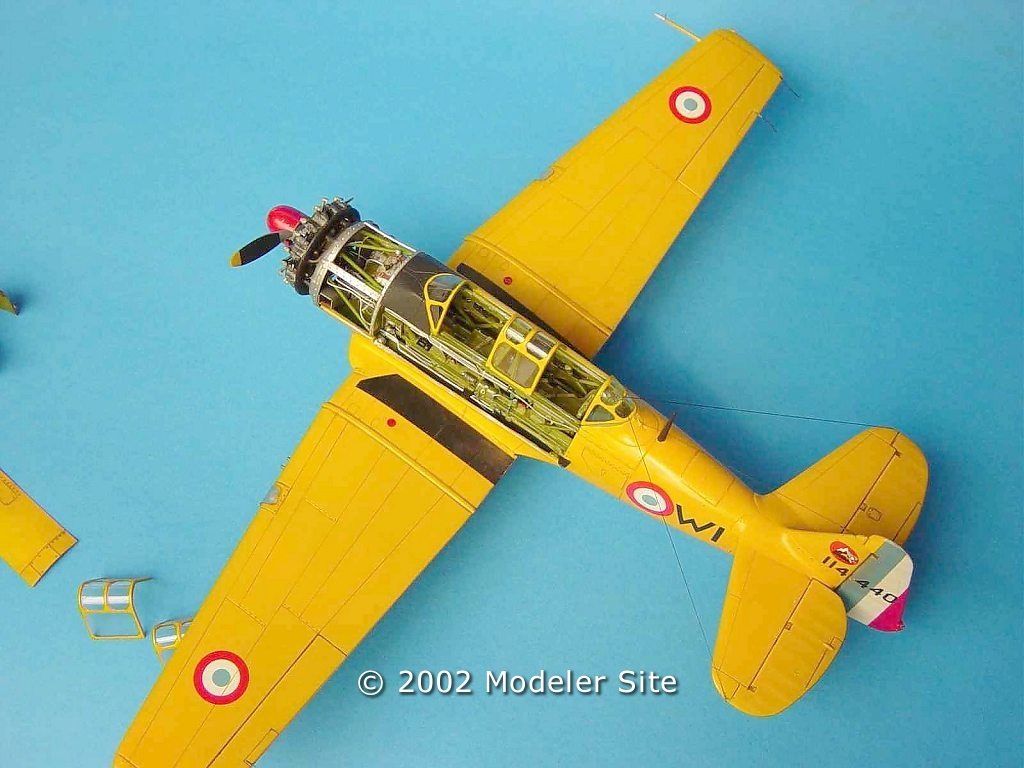
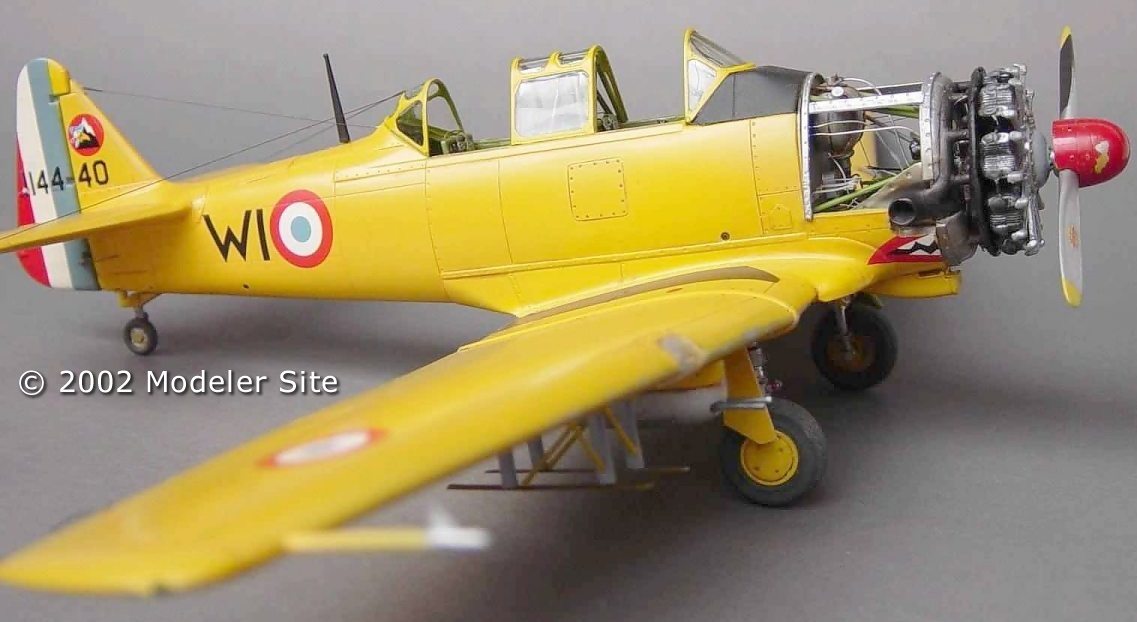
Painting Once the paint (Humbrol) was dry, I applied a thin coat of darker yellow and another one with the initial yellow on the joining areas. I also applied Testors bright transparent lacquer to the whole surface. Then I placed the decals in the correct place and after two days for drying, applied a new semi matt transparent coat. After the model was totally dry, I started to detail the joints with ochre and coffee oil. I painted the anti-reflex surface and the walkways with matt black. With a tiny Cristal Clear bubble, once dry, I made the lights. At this stage I added the landing gear which had been previously detailed with supports under the wings and the rocket rails. The last step was to weather with Spiner, put the antennas -made from sprue, and finish the tyres with a thing coat of bright gray pastel…wuuufff!!! Conclusion You may see the results for yourselves. I know that it cannot be clearly seen from the way I have narrated it but it would be too long to describe the whole technique in full. If you allow me, in another article, I will show you an assembly and detailing of another model, this time 1:72, with step by step pictures. With simpler things, we get better results.
My wife, María Margarita is an ophthalmologist and we have three children. María Lucía is a writer and lives in Germany; Juan Manuel is studying Plastic Arts at the Javierana University and Alejandro is finishing high school. |
||||||||||||||||||||||||||