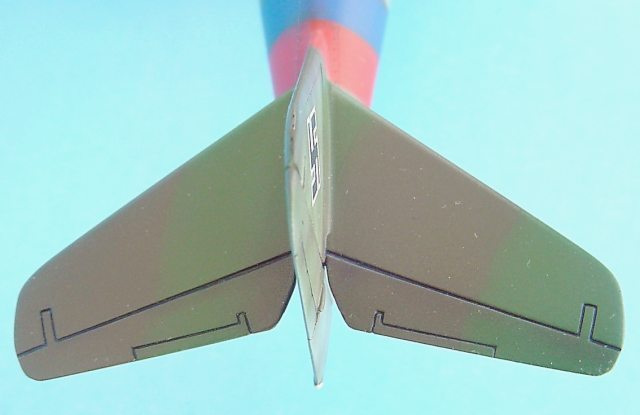
German engineers studied and tested early in 1941 the swept wings platforms, searching high speeds for his figthers; then, these designs were applied to a new aircraft generation: the jet. One of these planes was the Messerschmitt Me 262. The proposed improvements to the Me 262 were to be achieved in three steps, wich were designated "Hochgeschwindigkeitsentwicklungsstufen", or HG, High Speed development stages. The first, the HG I, nicknamed "Pfeilflugel" or Flying Arrow Wing, incorporated the proposals for an increase in the inboard wing chord, which was to be achieved by modifying the wing forward of the main spar, a tailplane swept back 40 degrees and a cockpit canopy with a lower profile, the last item so being referred to has the "Rennkabine" or racing canopy. The design of the swept tailplane was to be
based on the use of a standard production unit.
The second step, the HG II, called for an outboard wing of increased chord, an improved engine installation and a new front fuselage; the racing canopy and swept tail surfaces incorporated in the HG I were to be retained.
The final stage, the HG III, required more radical modification, like new swept wing with engines housed in its roots, etc.
The general arrangement drawings of the Me 262 HG I with two Jumo 004 B turbojets were issued by Messerschmitt's Project Office on 18 April 1944.
The Me 262 V9 ( W.Nr. 130004, VI+AD ) was chosen to test this conversion; it was fitted with the swept tail and racing canopy but not with the inboard leading-edge extensions. The first fly of HG I was on 17 January 1945.
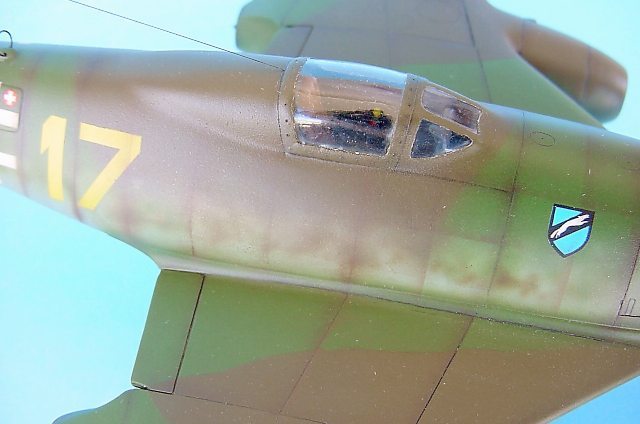
Tests were not particularly satisfactory because the test pilot, Karl Baur, reported that his head often bumped against to the top of the canopy, particularly when taking off; this new canopy was more streamlined, with forward slope of 15 degrees instead of the normal 33.
As well, the also fitted 40 degrees horizontal tail surfaces were completely unsatisfactory. Due this comments, the HG I development was abandoned. The aircraft was found by American troops at Lechfeld in bad conditions, at the end end of the war.
Building the conversion
|
Always, to build Me 262 kits results interesting, but when we can introduce an important improvement, it can turn more interesting. This is the case of the Antares Models set: with which, we can assemble the Me 262 HG I , the first development of HG series.
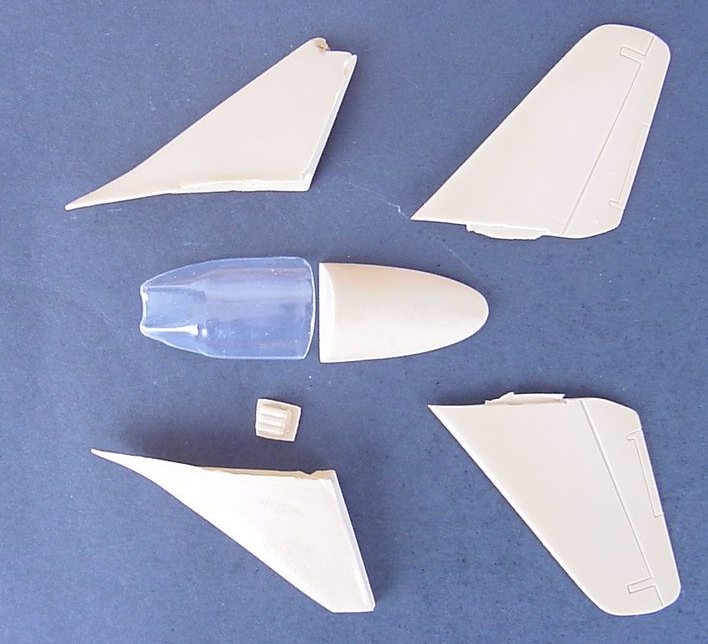
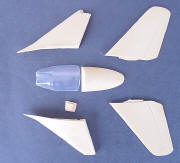
The conversion set ( ref. ANT-04) features 6 resin parts ( the two leading edges extensions, two swept stabilizers, the rear portion of racing canopy and a little headrest), each of them, well cast with no sign of air bubbles, and two vac-formed canopies ( one spare).
|
|
|
Set de Antares ANT-04
|
The resin is of good quality and easy to work; the instructions are simple, and consist in two sheets with many drawings, easy to follow.
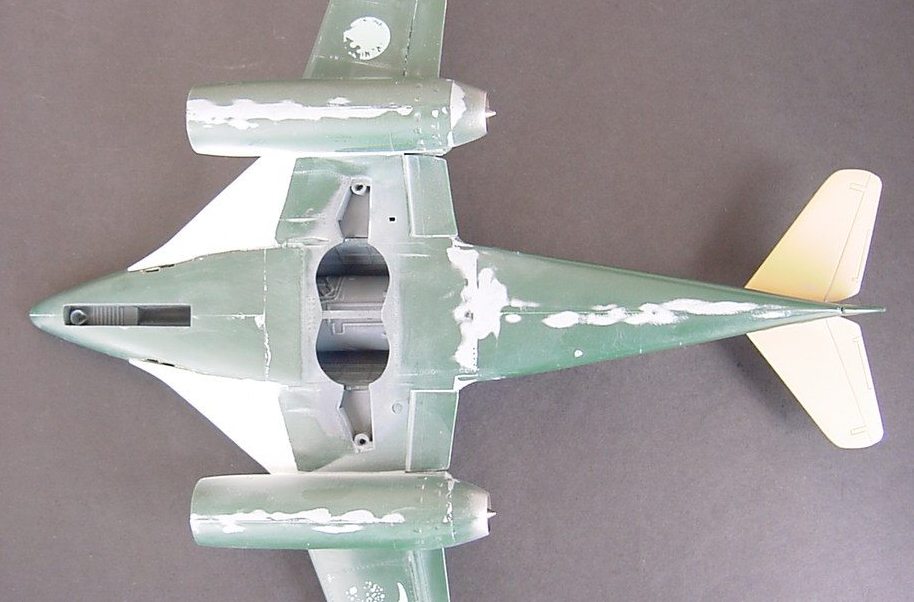
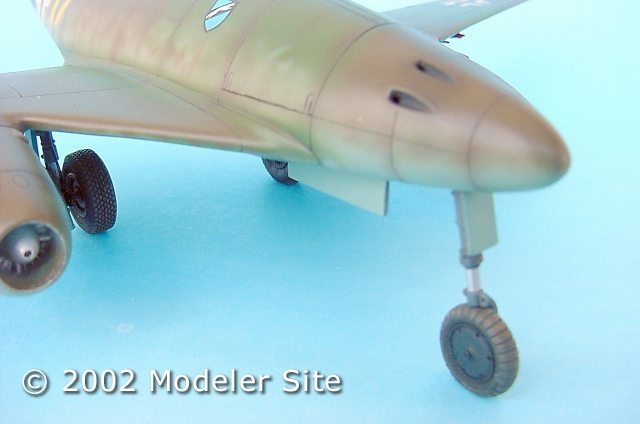
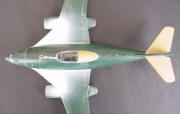
Because it's possible to use in any Me 262 kit in 1:48 scale, I decided to use this conversion in a very old Monogram model. It had been assembled since 1980, forgotten in a corner of a shelf, almost covered by a mountain of dust, and missing parts of its landing gear. I saw this gloomy spectacle and said "this is the ideal subject to use with the conversion set".
First of all, I submerged the kit in a solution of 5 litres of hot water with 2 pounds of caustic soda; I did it using appropriated gloves, safety glasses and a mask on my mouth, to avoid the inhalation of the harmful fumes of this mixture. It's very important to mix this solution in an old pail as well, because the caustic soda is highly corrosive. Then, I took the model ( always using gloves), rubbed it with a soft cloth to remove the old paint and decals. Finally, I rinsed the model with clean water, and let it dry .
|
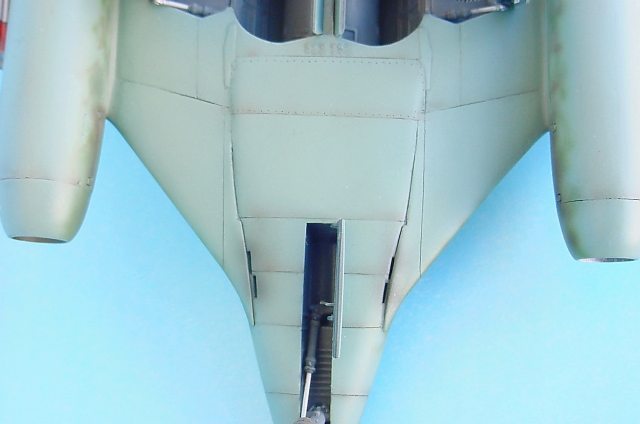
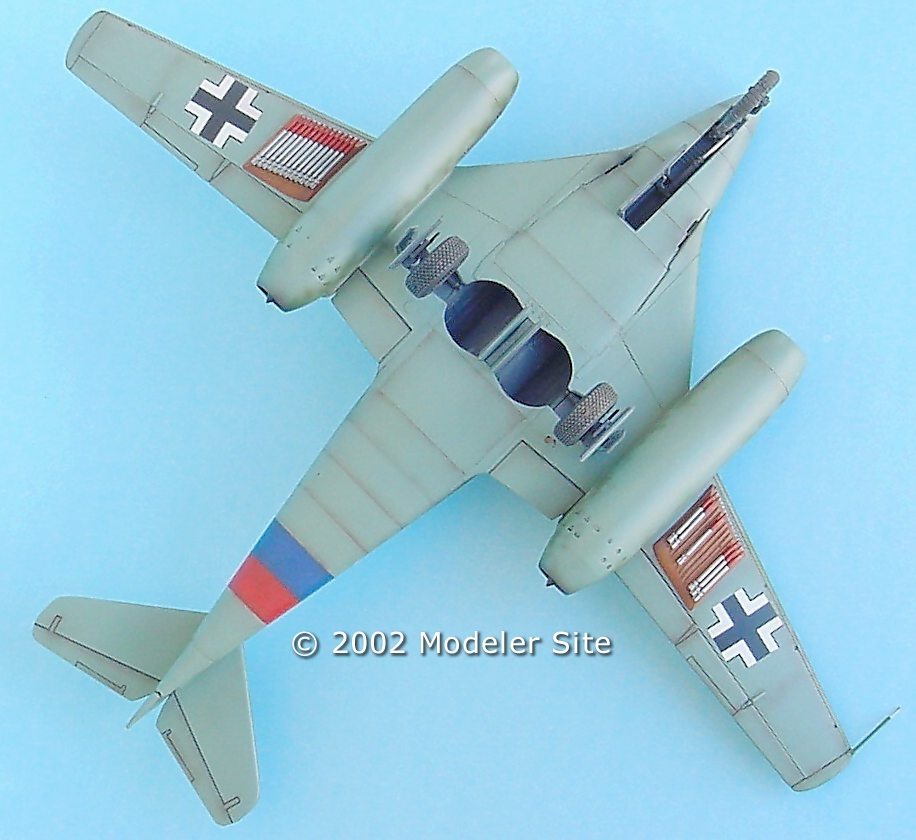
I started the conversion cutting off the leading edge slots between the engine nacelles and fuselage, and attached the extensions for HG I in its place with epoxi glue. To clean this parts of its pouring reservoirs, I sanded it on a flat table. I put it in the correct position using the three views that the instructions provide.
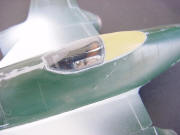
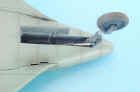
Then, I removed the rear portion of the canopy from the Monogram's 262 fuselage and attached ( not glued) the resin rear fairing.
Besides, with a hobby knife, I removed the excess of plastic from the vacu canopy. It was essential the dry fitting and trimming between these parts and the fuselage for best results.
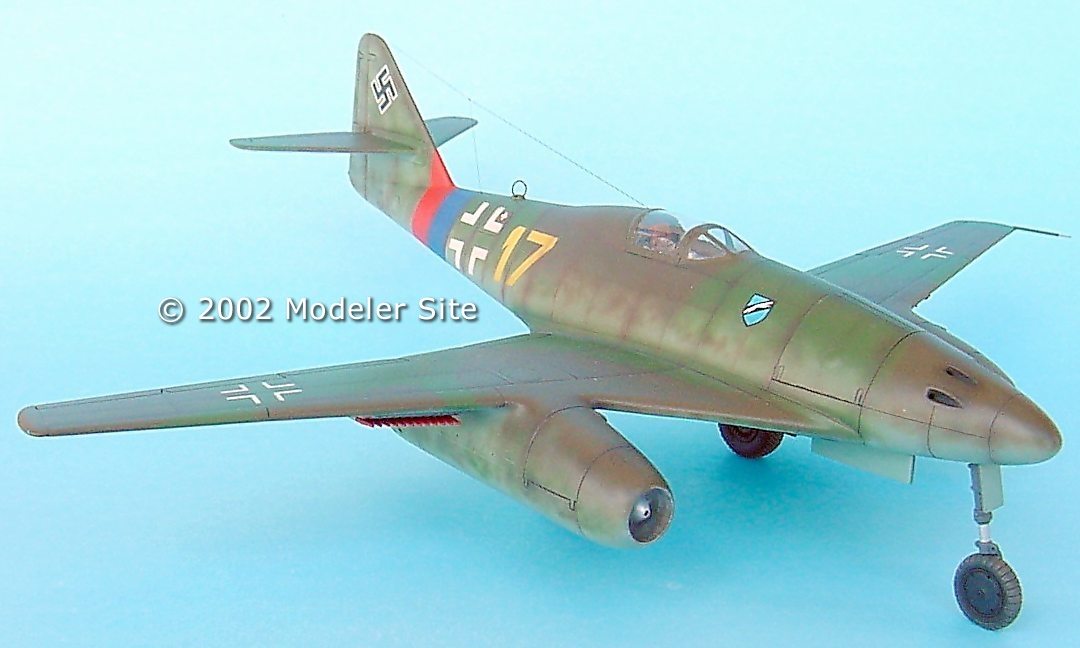
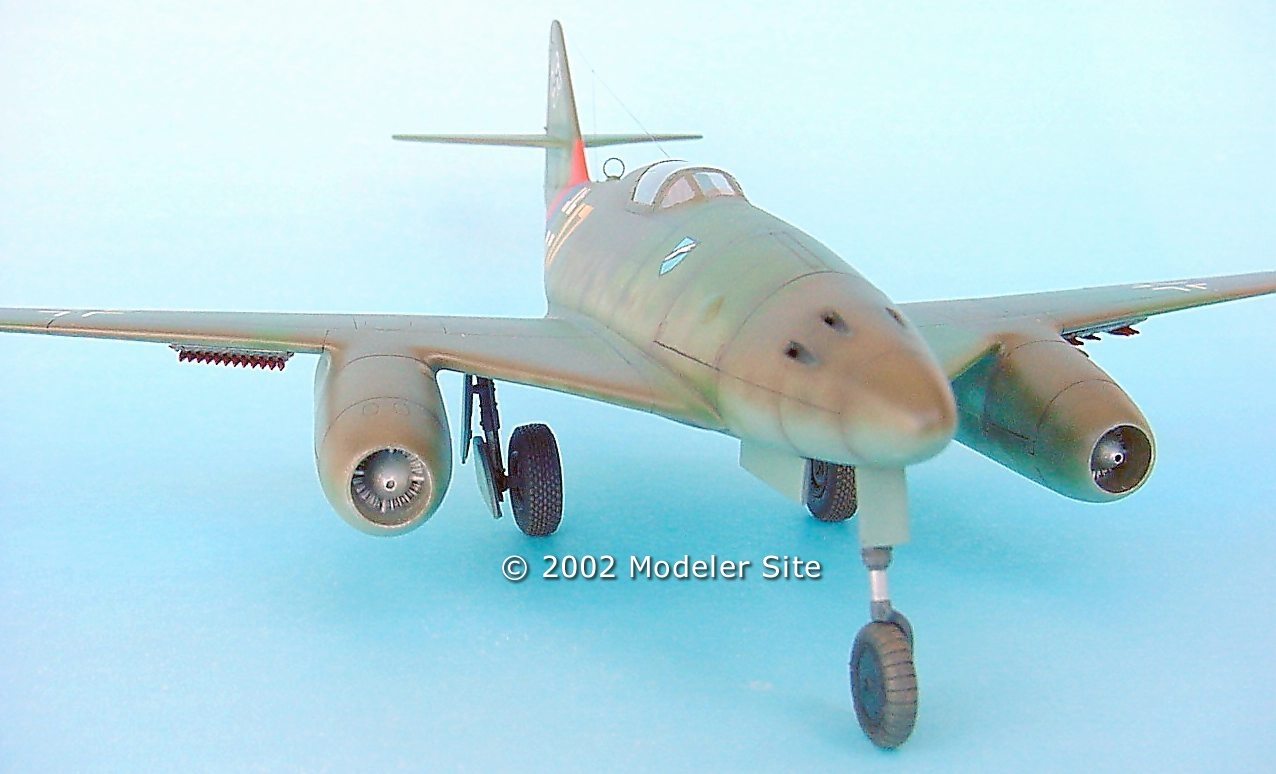
When I was sure that all items fit well, I painted the cockpit interior, glued the headrest to the fairing, and finally, attached the clear canopy. I did not want to assemble this piece in open position, because I was pleased to see the clean low-profile of this aircraft (for the same reason, the gun nose compartment is closed).
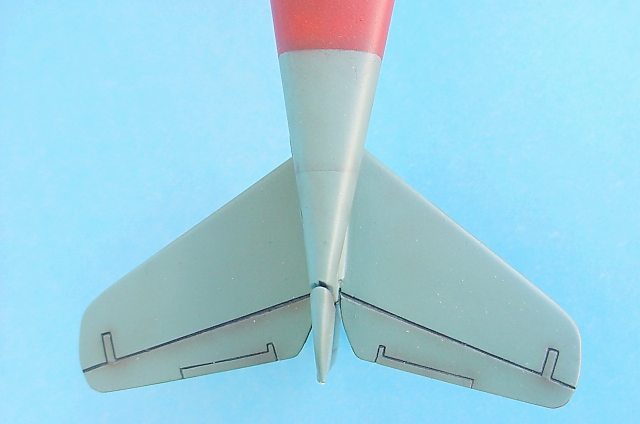
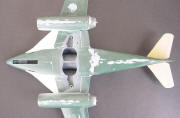
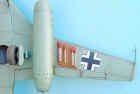
The swept back stabilizers were cemented in its place, replacing the standard ones, probably this was the easiest step of the building.
|
|
|
|
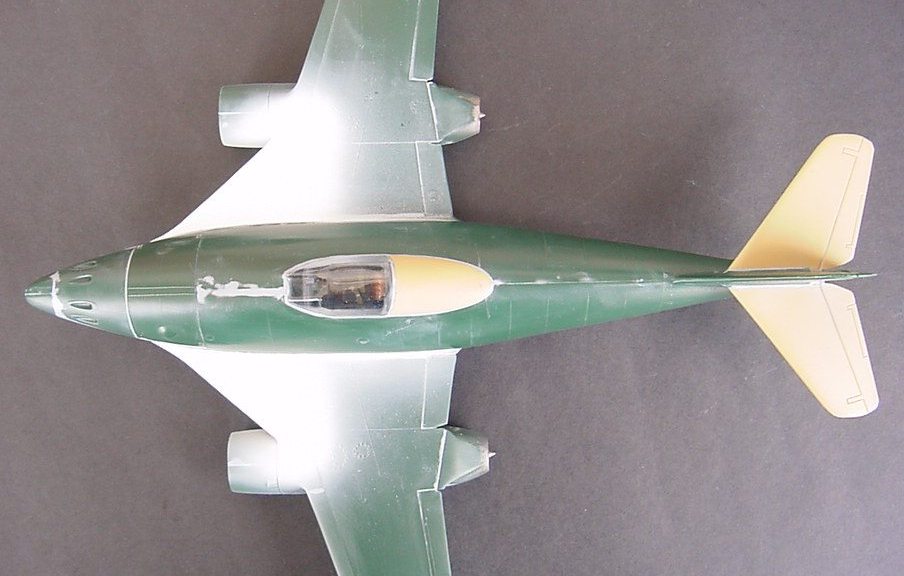
After all parts were in its place, I applied Tamiya filler in the joints where necessary, mainly in the wing extensions; then I sanded the filler with a 600 grit sandpaper to smooth the surface and applied two coats of Humbrol matt white paint as primer : the assembly process was ready.
Finishing
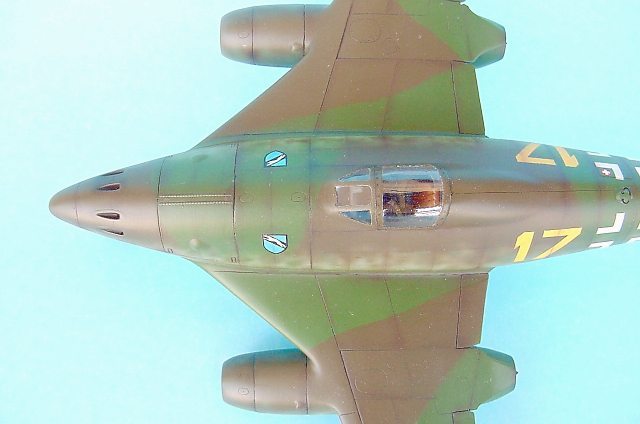
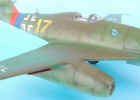
I started to paint the Me 262 applying RLM 76 light blue ( ref. XF 23 Tamiya )on the under surfaces, lower portion of fuselage sides, and tail. Then, applied the first upper color, RLM 82 green ( ref. XF 5 Tamiya) following a camouflage pattern that I saw in the instruction sheet from Revell's 262 kit; the final upper color was the RLM 83 brown violet, which I made mixing 70% olive drab and 30% brown ( ref. XF 62 and X 9 Tamiya respectively). Both colors were applied on the upper sides of wings, upper portion of fuselage and stabilizers; as well as, in little spots, on tail surfaces and lower half of fuselage sides, covering the RLM 76. Some spots of RLM 02 ( ref. XF 22 Tamiya) were applied on the sides. All paints were enamels.
|
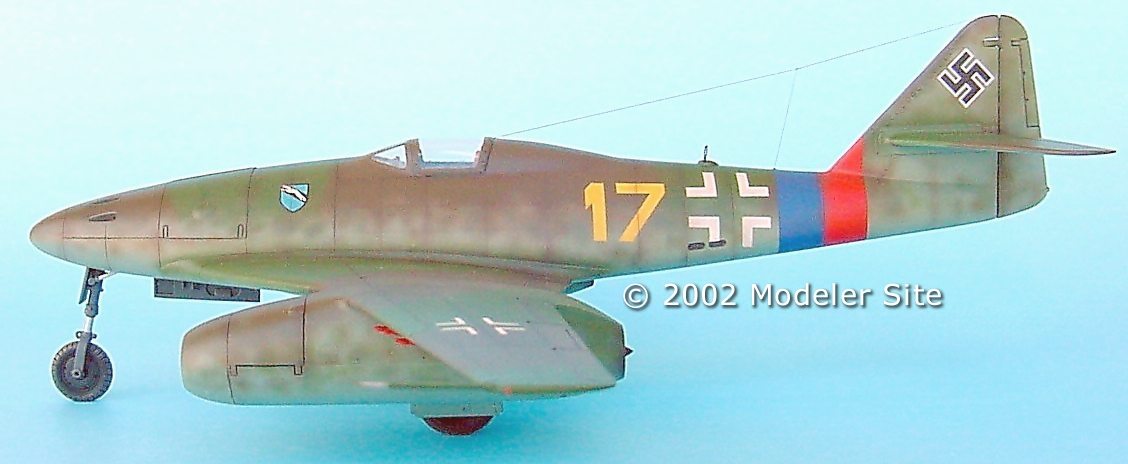
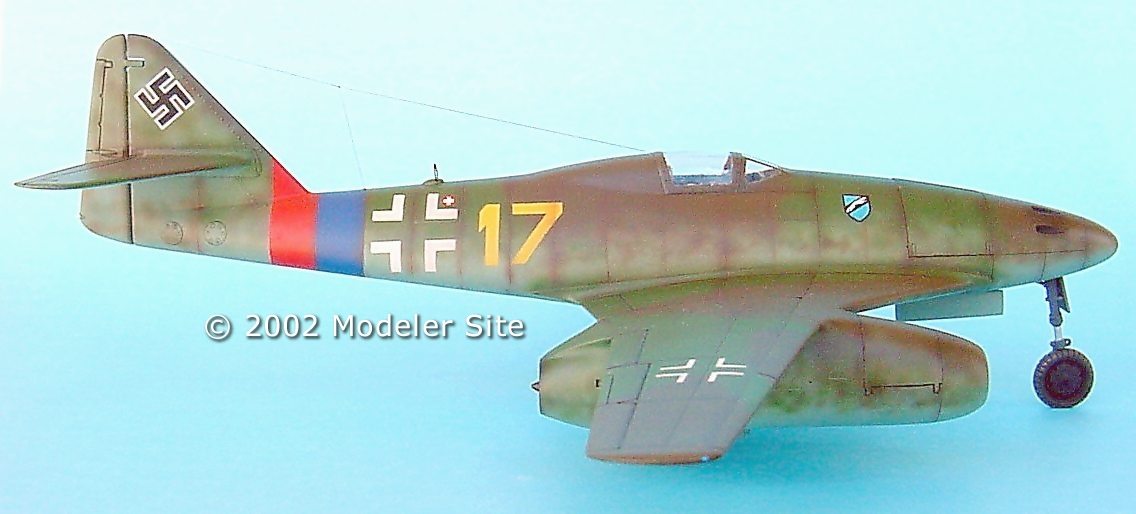
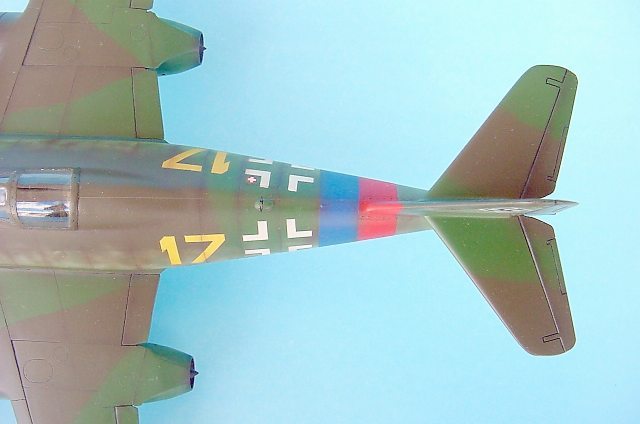
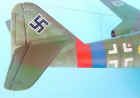
I decided to finish my HG I like if it would be in service with the III/JG 7, the famous fighter group of 262. For this, I painted the characteristic blue and red rear fuselage band and a yellow aircraft number. Before applying decals, I masked the canopy and oversprayed the entire model with two coats of clear gloss.
The "running fox", emblem of this fighter group, and the others crosses, were found in my spare box. I applied a slight weathering in the joints of panels with an airbrush, using a mixture of black/brown paint thinned in a relation 1:10. Finally, two coats of semi gloss varnish finished the painting job.
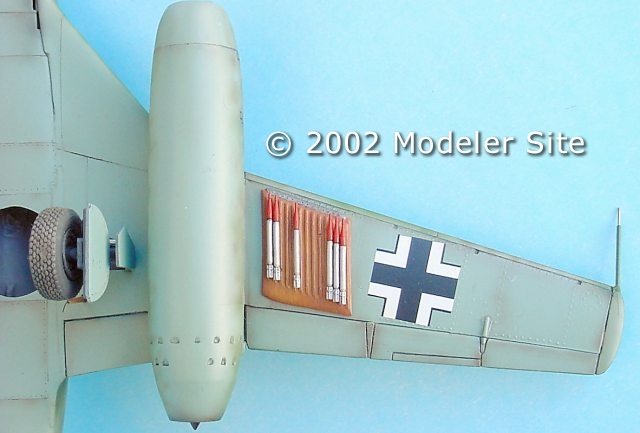
I replaced the lost parts of landing gear using a complete one from a Dragon's Me 262. The final touch was the addition of two underwings racks with its R4M rockets; the racks were painted in wood color and the rockets with metallic and red enamels. These parts were coming from a Revell's kit.
|
|
|
|
|
|
|
|
Conclusion
Simply beautiful. The end result is very pleasing and the kit looks good. With a little patience and effort this conversion set will add a very rare model in any Me 262 collection.
|