|
|
|||||||||||||||||||||||||||||||
|
Cars |
|
||||||||||||||||||||||||||||||
|
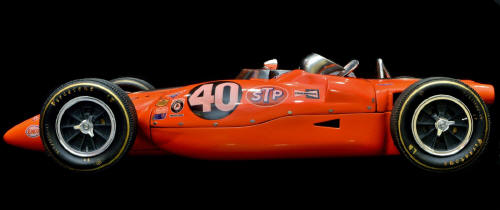
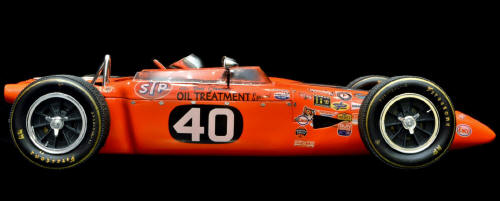
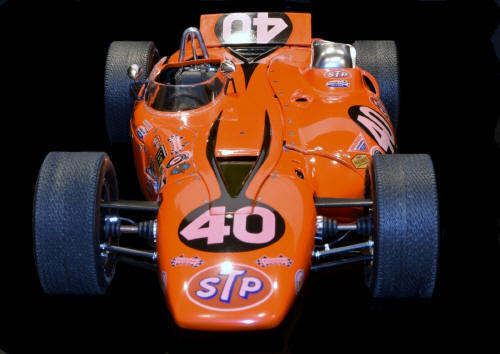
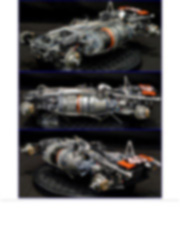
Building the Bandai STP turbine Indy car 1/12 scale |
|||||||||||||||||||||||||||||||
|
by Mark Laird © Modeler Site |
|||||||||||||||||||||||||||||||
|
Legal Notice No material from Modeler Site any Web site may be copied, reproduced, republished, uploaded, posted, transmitted, or distributed in any way, except that you may download one copy of the materials on any single computer for your personal, non-commercial home use only, provided you keep intact all copyright and other proprietary notices. Modification of the materials or use of the materials for any other purpose is a violation of copyright and other proprietary rights. Read More here > Legal notice For years I wanted to build the 1/12 Bandai STP Turbine car. It is very unique piece of Indianapolis history, but the price that they were bringing was just more than I was willing to spend. I was lucky enough to find a complete kit on eBay for 200 US dollars. It was a “Buy it Now”, so I purchased it, and waited for it to arrive.
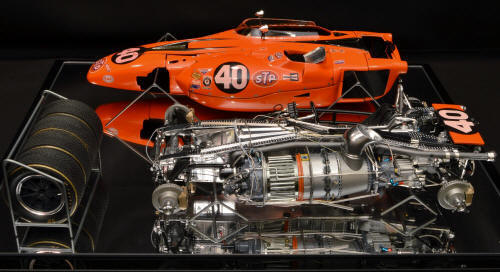
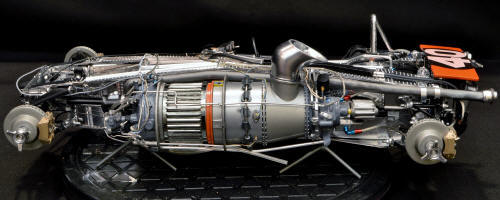
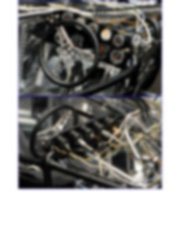
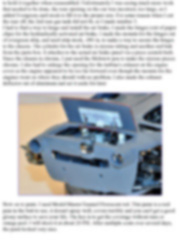
Editor note: Mark is an old Modelersite's reader and supporter. I discovered his amazing Bandai model at FB and he was so kind to share with us. I really want to thanks him for all their support and nice words he said to me. The old Bandai kit Upon its arrival, I opened it up and the first thing I noticed was that the instructions were in Japanese. I started going through the instructions and realized that although this is a big 1/12 scale kit, it lacked detail in many areas. It has no brake calipers, no rotors, no gas or brake pedal, the steering shaft went nowhere, very limited detail to the motor, no detail to the fuel pump, the fuel control unit, no fuel manifolds or external oil lines. It is an all-wheel drive car but has no drive shafts, no differential hookups, no u joints, and the only panel that was removable was the engine cover, so lots of detail work to bring this thing up to a decent 1/12 scale model. Lots of research pics to see what needs to be done, yet so few pics to be found for referencing due to it being over 50 years old.
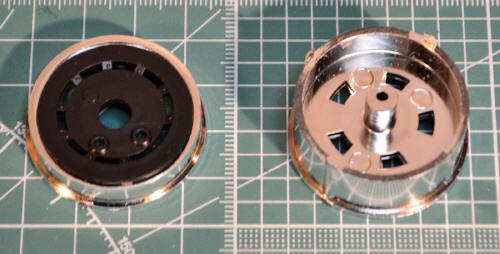
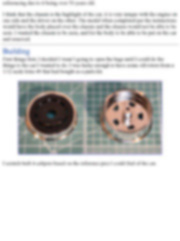
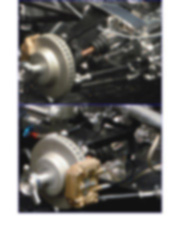
Building First things first, I decided I wasn’t going to open the bags until I could do the things to the car I wanted to do. I was lucky enough to have some old rotors from a 1/12 scale lotus 49 that had bought as a parts kit.
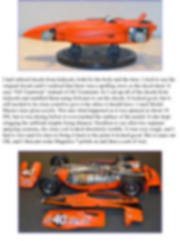
I scratch built 4 calipers based on the reference pics I could find of the car. This tutorial is offered in PDF format to be read or printed using Acrobat reader, contact our webmaster > Here Includes more than 37 pics, here we show only the text pages.
Esta Nota es ofrecida en formato PDF, el cual puede ser leído o impreso usando el Acrobat reader, contacte a nuestro webmaster > Aquí Incluye más de 37 imágenes, aquí solo mostramos las paginas de texto.
Big size photos are only available in our PDF format. Support us ordering our notes in PDF > Here |
|||||||||||||||||||||||||||||||