|
|
||||||||||||||||||||||||||||||||||||||||||||||||||||||||||||||||||||
|
Armor |
|
|||||||||||||||||||||||||||||||||||||||||||||||||||||||||||||||||||
|
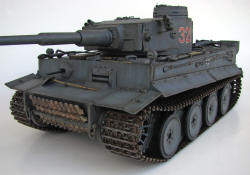
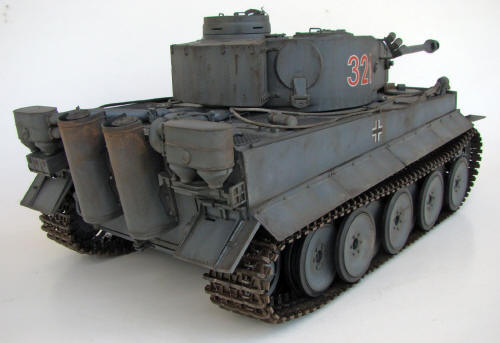
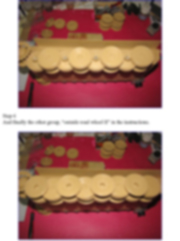
Building the Tiger I early from the Hobby Boss kit - for novices 1/16 scale |
||||||||||||||||||||||||||||||||||||||||||||||||||||||||||||||||||||
|
by Mario Covalski © Modeler Site |
||||||||||||||||||||||||||||||||||||||||||||||||||||||||||||||||||||
|
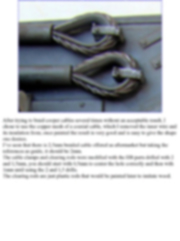
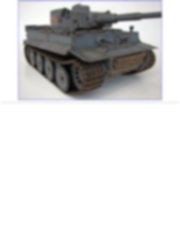
Legal Notice No material from Modeler Site any Web site may be copied, reproduced, republished, uploaded, posted, transmitted, or distributed in any way, except that you may download one copy of the materials on any single computer for your personal, non-commercial home use only, provided you keep intact all copyright and other proprietary notices. Modification of the materials or use of the materials for any other purpose is a violation of copyright and other proprietary rights. Read More here > Legal notice The Tiger I is a WWII icon, and its history is very well known. This tank has never fascinated me regarding its aesthetic due to its bizarre shapes compared with others from the same period, but the barrel with shield and the solid and heavy aspect attracted me the first time I saw the Tamiya 1/16 Tiger I.
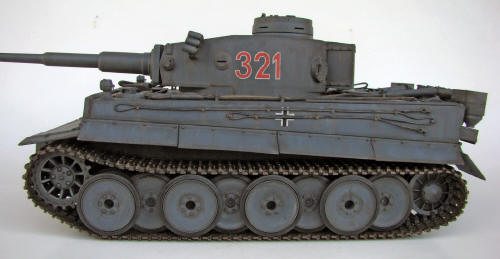
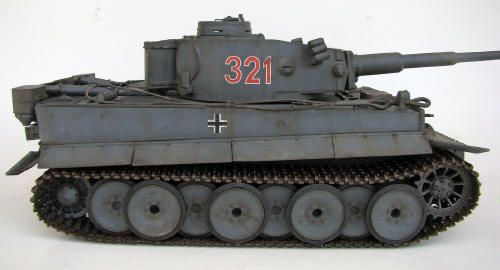
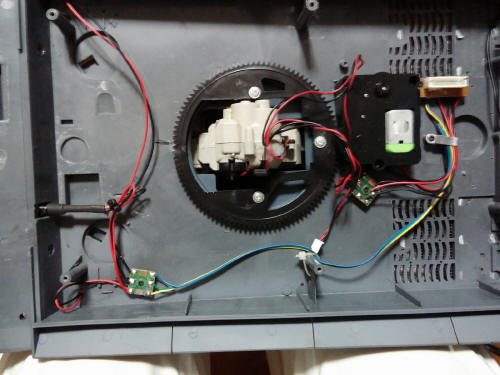
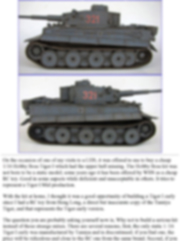
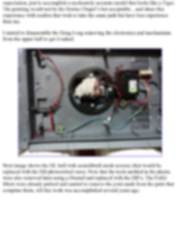
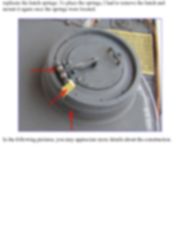
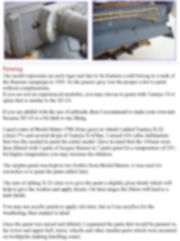
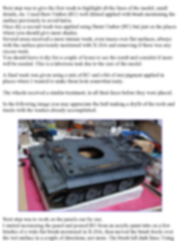
On the occasion of one of my visits to a LHS, it was offered to me to buy a cheap 1/16 Hobby Boss Tiger I which had the upper hull missing. The Hobby Boss kit was not born to be a static model; some years ago it has been offered by WSN as a cheap RC toy. Good in some aspects while deficient and unacceptable in others. It tries to represent a Tiger I Mid production. With the kit at home, I thought it was a good opportunity of building a Tiger I early since I had a RC toy from Heng Long, a direct but inaccurate copy of the Tamiya Tiger, and that represents the Tiger early version. The question you are probably asking yourself now is, Why not to build a serious kit instead of those strange mixes. There are several reasons, first, the only static 1 /16 Tiger I early was manufactured by Tamiya and is discontinued; if you find one, the price will be ridiculous and close to the RC one from the same brand. Second, if you go for the RC, you’ll be willing to spend over U$600 and even you’ll have to face with the shortcomings of the Tamiya kit. Third, if you decide to use the Heng Long’s and converting it in an acceptable static model, you’ll have to replace the lower hull plus the suspension and wheels with an expensive aftermarket and even full of inaccuracies. Fourth, my idea was to build a Tiger I early that looked like a Tiger, knowing that some things would not be accurate and with a self-imposed limitation: only using what I had at home. The Hobby Boss kit and the Heng Long’s hull Not mentioning the upper hull, which was missing, I have to say that the best of the Hobby Boss kit is the running gear, though the sprocket doesn’t belong to the Mid version it tries to represent, is perfect for the early. The wheels are well designed very detailed with a tread made of real rubber. On the other hand, and in my particular case, it offered me many parts that would help me to detail even more the Heng Long’s hull such as best tools, PE for the vent grilles (that anyway have very small square holes)…etc. Besides, as I said beforehand Heng Long are basically chinese-made and assembled copies of Tamiya, several things are bad copies because they have been wrongly designed in the Tamiya kit and others were wrongly molded just for simplification. Having good references to accomplish this project was crucial, you cannot build a Tiger using only the parts provided with the kit, because there are lots of things that are wrong or need some modification, perhaps some of them can be solved, others not but you will always need good references, books and some article you may find around the net. The are several articles on the web about 1/16 static Tigers that use a great amount of PE and other aftermarket, at a higher cost, at times more than a Tamiya RC kit. This article aims at showing the construction of a Tiger I early in 1/16 scale, focused on beginners, making the necessary modifications so that it looks like a Tiger, but without many complications and at a low cost, using the things we have at home. I can’t say that is OOB since it received modifications and several parts added, but almost all the of them were plastic ones and parts from my spare box. Construction I’m not a beginner considering I’ve been building scale models for more than 46 years, nevertheless, regarding armored vehicles, only recently, I’ve been taking this matter seriously. This is why I tried to represent a Tiger without much ambition or expectation, just to accomplish a moderately accurate model that looks like a Tiger. The painting would not be the Sistine Chapel’s but acceptable…and share this experience with readers that wish to take the same path but have less experience than me. I started to disassemble the Heng Long removing the electronics and mechanisms from the upper hull to get it naked.
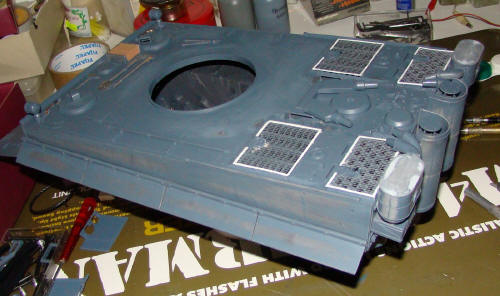
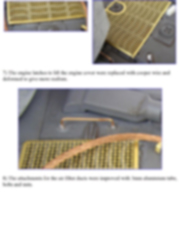
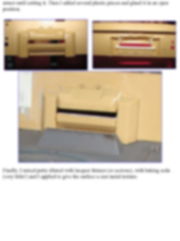
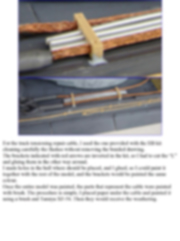
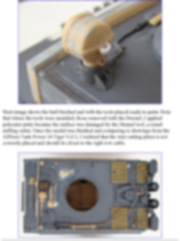
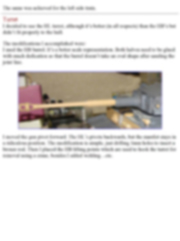
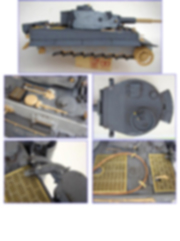
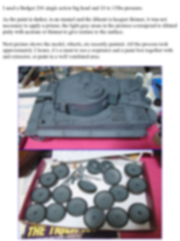
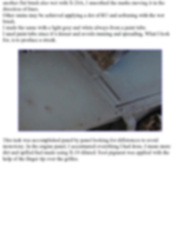
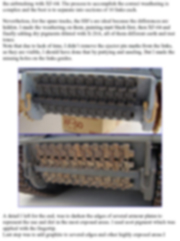
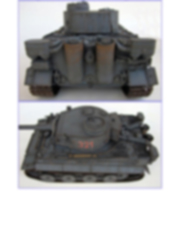
Next image shows the HL hull with scratchbuilt mesh screens (that would be replaced with the HB photoetched ones). Note that the tools molded in the plastic were also removed later using a Dremel and replaced with the HB’s. The Feifel filters were already puttied and sanded to remove the joint mark from the parts that comprise them. All this work was accomplished several years ago.
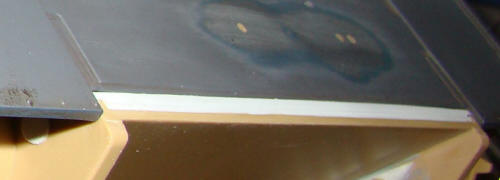
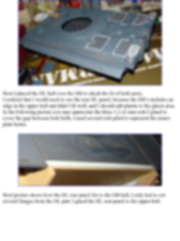
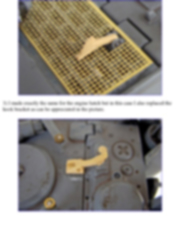
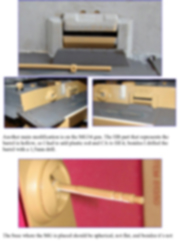
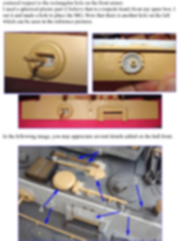
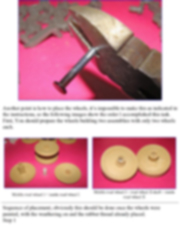
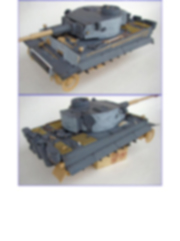
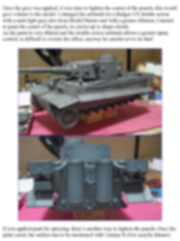
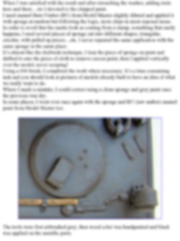
Next I placed the HL hull over the HB to check the fit of both parts. I realized that I would need to use the rear HL panel, because the HB’s includes an edge in the upper hull and didn’t fit well; and I should add plastic to the glacis area. In the following picture you may appreciate the three 1,2 x2 mm rods I glued to cover the gap between both hulls. I used several rods piled to represent the armor plate better.
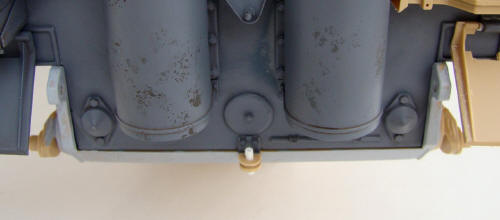
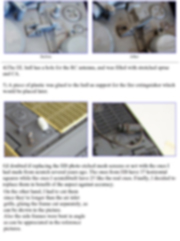
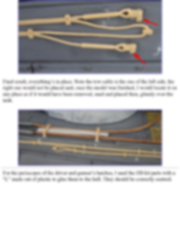
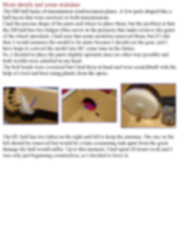
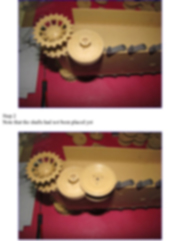
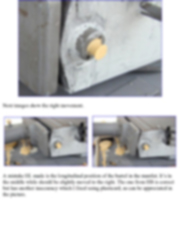
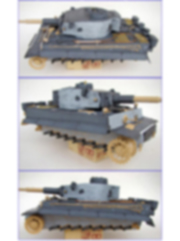
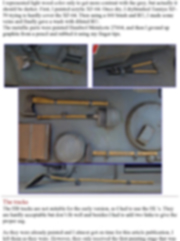
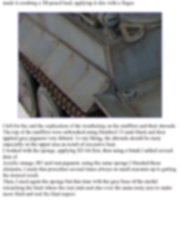
Next picture shows how the HL rear panel fits to the HB hull, I only had to cut several flanges from the HL part. I glued the HL rear panel to the upper hull.
This article is offered in PDF format to be read or printed using Acrobat reader, contact our webmaster > Here Includes more than 118 pics, here we show only the text pages.
Esta Nota es ofrecida en formato PDF, el cual puede ser leído o impreso usando el Acrobat reader, contacte a nuestro webmaster > Aquí Incluye más de 118 imágenes, aquí solo mostramos las paginas de texto.
Big size photos are only available in our PDF format. Support us ordering our notes in PDF > Here |
||||||||||||||||||||||||||||||||||||||||||||||||||||||||||||||||||||