|
|
|||||||||||||||||
|
Motorcycles/Techniques |
|
||||||||||||||||
|
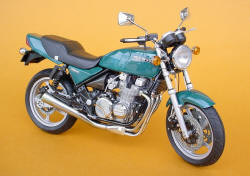
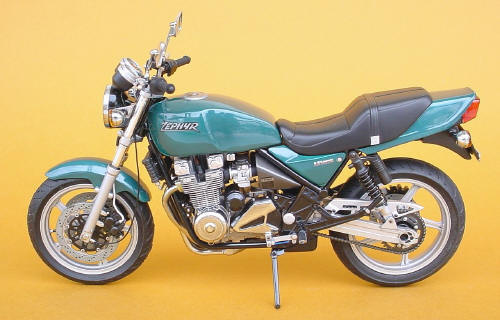
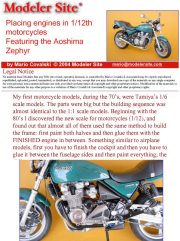
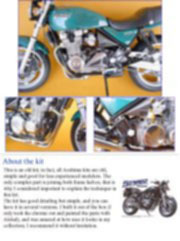
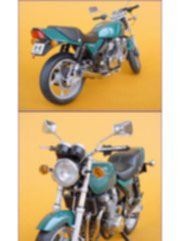
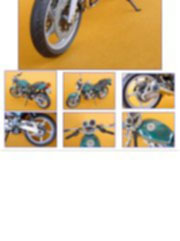
Placing engines in 1/12th motorcycles Featuring the Aoshima Zephyr |
|||||||||||||||||
|
by Mario Covalski © Modeler Site |
|||||||||||||||||
|
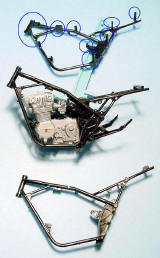
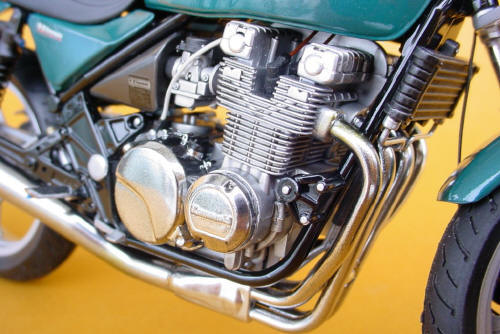
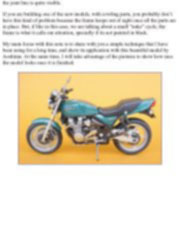
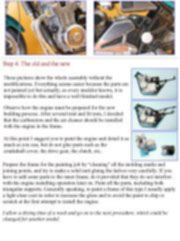
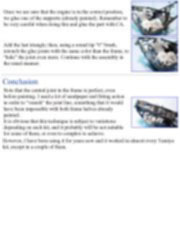
Legal Notice No material from Modeler Site any Web site owned, operated, licensed, or controlled by Mario Covalski & Associated may be copied, reproduced, republished, uploaded, posted, transmitted, or distributed in any way, except that you may download one copy of the materials on any single computer for your personal, non-commercial home use only, provided you keep intact all copyright and other proprietary notices. Modification of the materials or use of the materials for any other purpose is a violation of Mario Covalski & Associated's copyright and other proprietary rights. Read More here > Legal notice My first motorcycle models, during the 70’s, were Tamiya’s 1/6 scale models. The parts were big but the building sequence was almost identical to the 1:1 scale models. Beginning with the 80’s I discovered the new scale for motorcycles (1/12), and found out that almost all of them used the same method to build the frame: first paint both halves and then glue them with the FINISHED engine in between. Something similar to airplane models, first you have to finish the cockpit and then you have to glue it between the fuselage sides and then paint everything; the difference here is that in our case (motorcycles) we paint the frame halves before gluing them. Have you ever tried to glue two gloss painted parts, not fitting well, with a “seam line” that shouldn’t be noticed? The final result is not very clean and makes a nightmare out of an otherwise simple operation. All motorcycle frames have crosspieces which, generally speaking, are too small due to the scale and the fit is less tan good. Moreover, the center frame which holds the front fork is in plain sight and difficult to hide in a tourism cycle so, the joint line is quite visible. If you are building one of the new models, with cowling parts, you probably don’t have this kind of problem because the frame keeps out of sight once all the parts are in place. But, if like in this case, we are talking about a small “nuke” cycle, the frame is what it calls our attention, specially if its not painted in black. My main focus with this note is to share with you a simple technique that I have been using for a long time, and show its application with this beautiful model by Aoshima. At the same time, I will take advantage of the pictures to show how nice the model looks once it is finished.
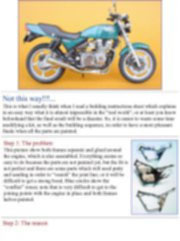
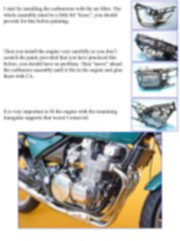
Not this way!!!... This is what I usually think when I read a building instructions sheet which explains in an easy way what it is almost impossible in the “real world”, or at least you know beforehand that the final result will be a disaster. So, it is easier to waste some time modifying a kit, as well as the building sequence, in order to have a more pleasant finale when all the parts are painted.
This note is offered in PDF format to be read or printed using Acrobat reader, contact our webmaster > Here Includes more than 50 pics, here we show only the text pages.
Esta Nota es ofrecida en formato PDF, el cual puede ser leído o impreso usando el Acrobat reader, contacte a nuestro webmaster > Aquí Incluye más de 50 imágenes, aquí solo mostramos las paginas de texto.
Big size photos are only available in our PDF format. Support us ordering our notes in PDF > Here |
|||||||||||||||||