|
|
||||||||
|
Cars |
|
|||||||
|
Building the Austin Healey Sprite MK1 Gunze Sangyo - 1/24 scale |
||||||||
|
by Geoff Brown © Modeler Site |
||||||||
|
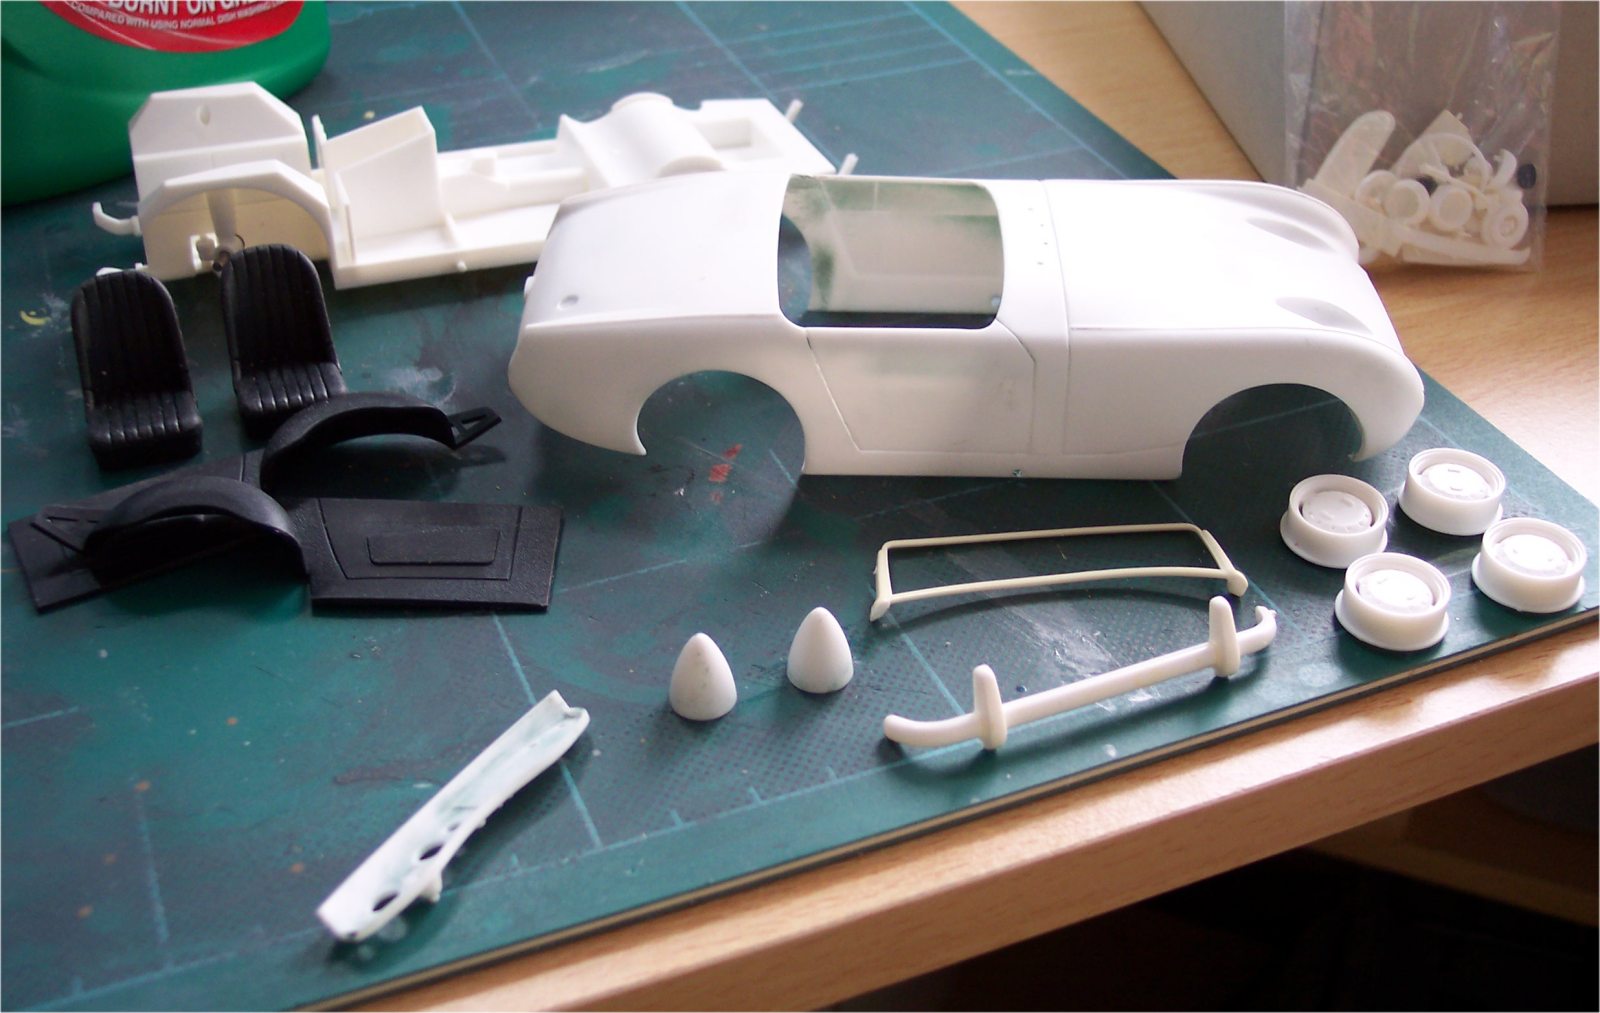
Legal Notice No material from Modeler Site any Web site owned, operated, licensed, or controlled by Damian Covalski may be copied, reproduced, republished, uploaded, posted, transmitted, or distributed in any way, except that you may download one copy of the materials on any single computer for your personal, non-commercial home use only, provided you keep intact all copyright and other proprietary notices. Modification of the materials or use of the materials for any other purpose is a violation of Damian Covalski's copyright and other proprietary rights. Read More here > Legal notice This model is the very first model kit made by Gunze Sangyo, (Now Mr Hobby), that I have built, I'm not really sure why, but I wish I had built some of these earlier, some of the there Hi tech series kits did have engine detail, but this kit is a simply curbside model, i.e no engine or gearbox detail, but the way the model looks at the end of the build makes up for it.
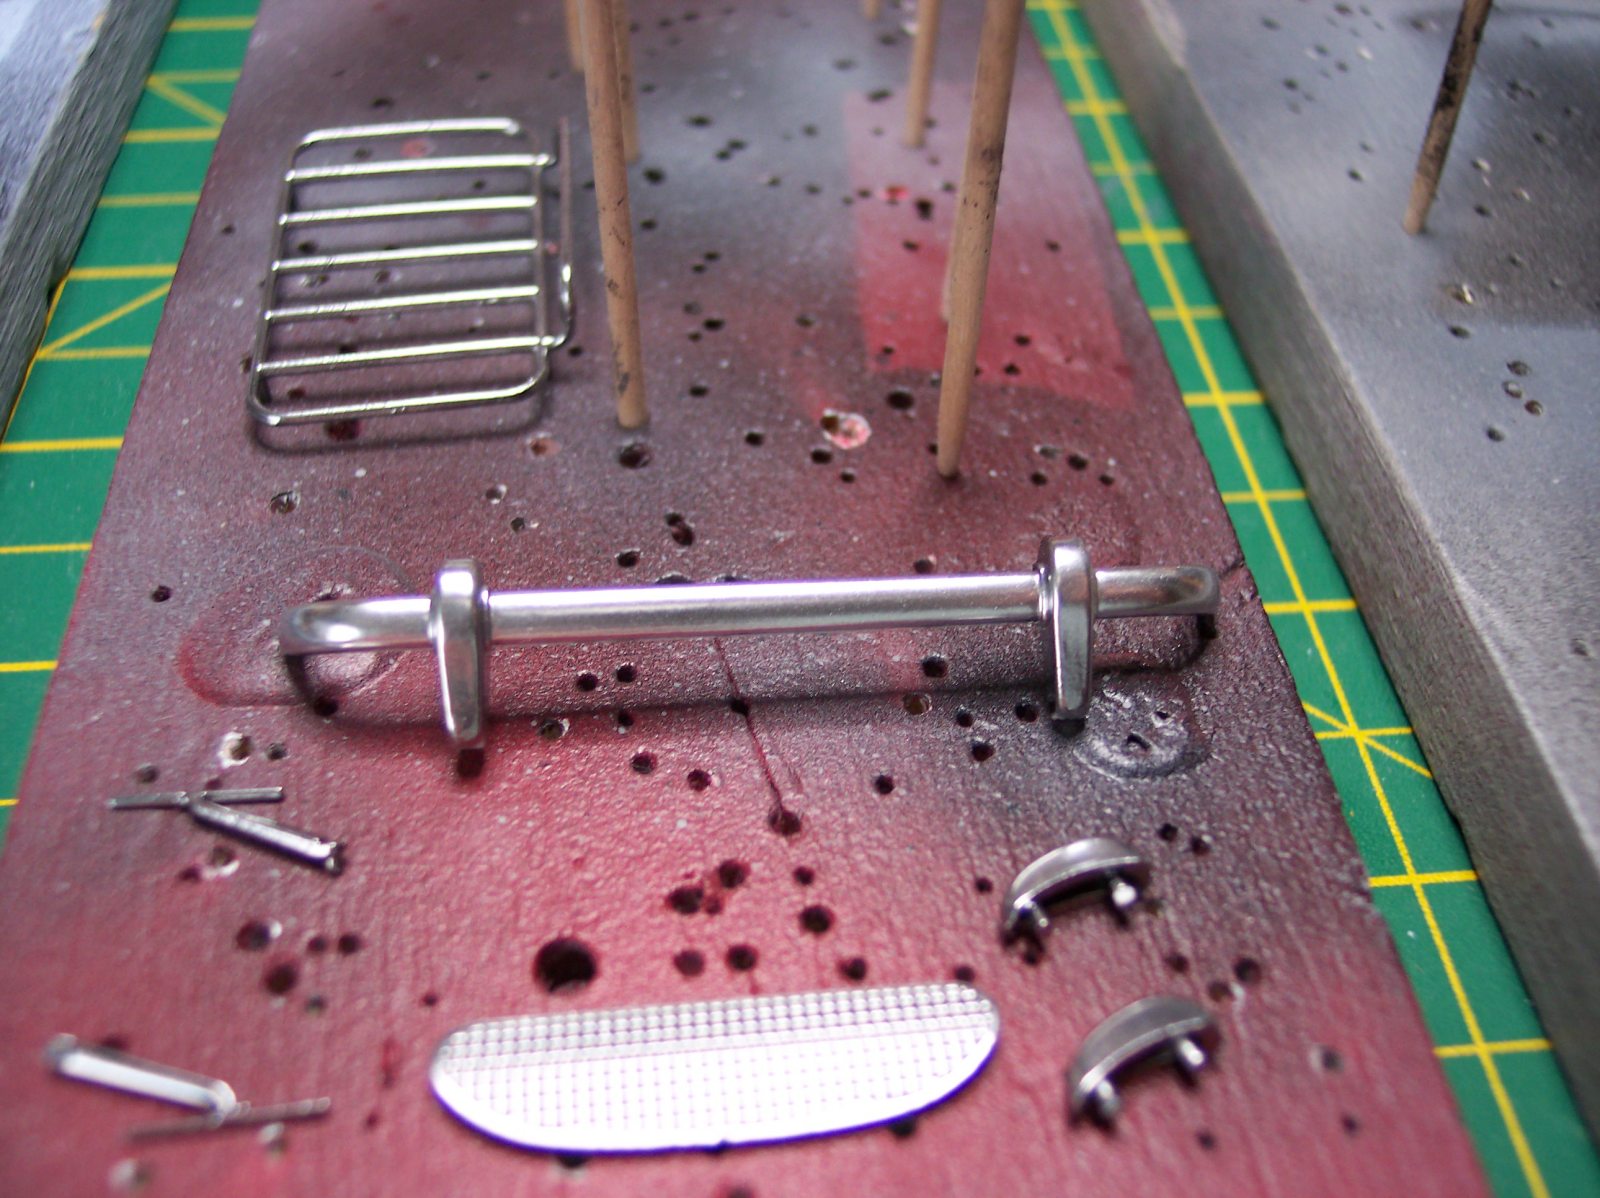
The first thing I did was to strip all the chrome off the tree that came chrome plated, as I find a lot of model kits look way too shiny and toy like with the high gloss chrome plating, a soak in some household bleach soon has the chrome removed, a good wash in warm soapy water removes and bleach residue and can be set aside to dry off before painting.
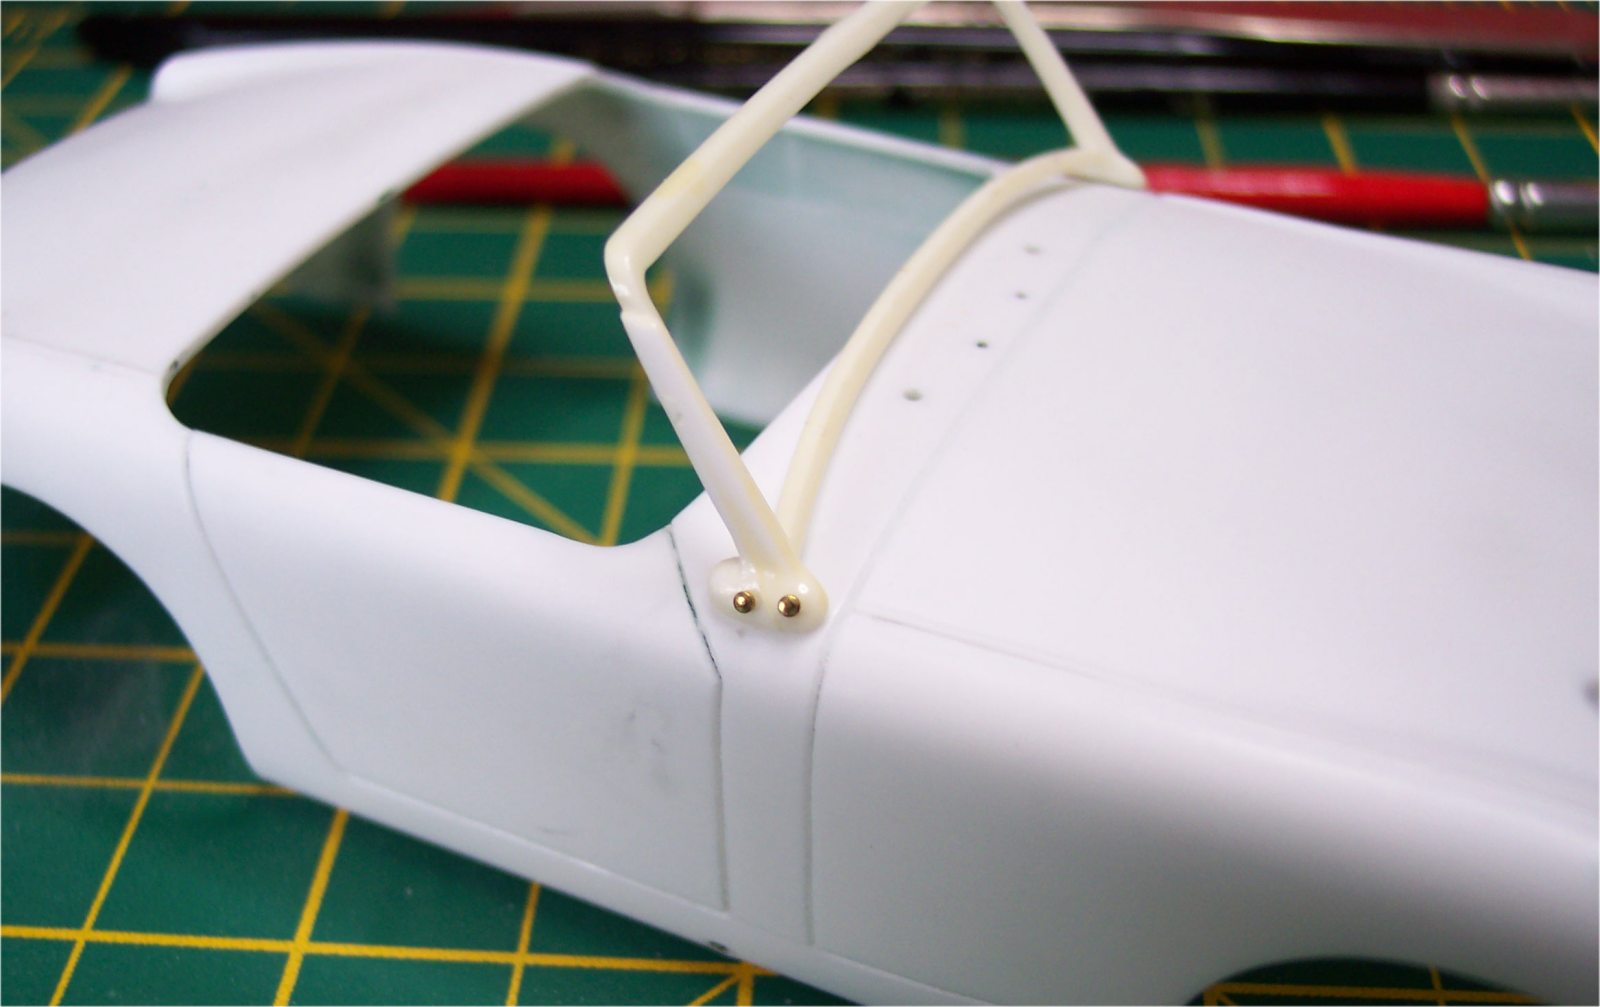
I always start the build with the bodyshell and parts that need to be painted body colour. The bodyshell on this one was well molded and only a few mould lines to remove, one thing that I modified before painting was the windshield frame, which is installed at the end of the build, on the real car the windshield is fixed onto the body with two screws on each side. To replicate this I simply drilled two holes in each side and replicated the screws with brass pins, this was me being a stickler for detail and not a problem with the kit itself.
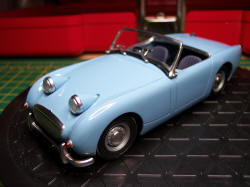
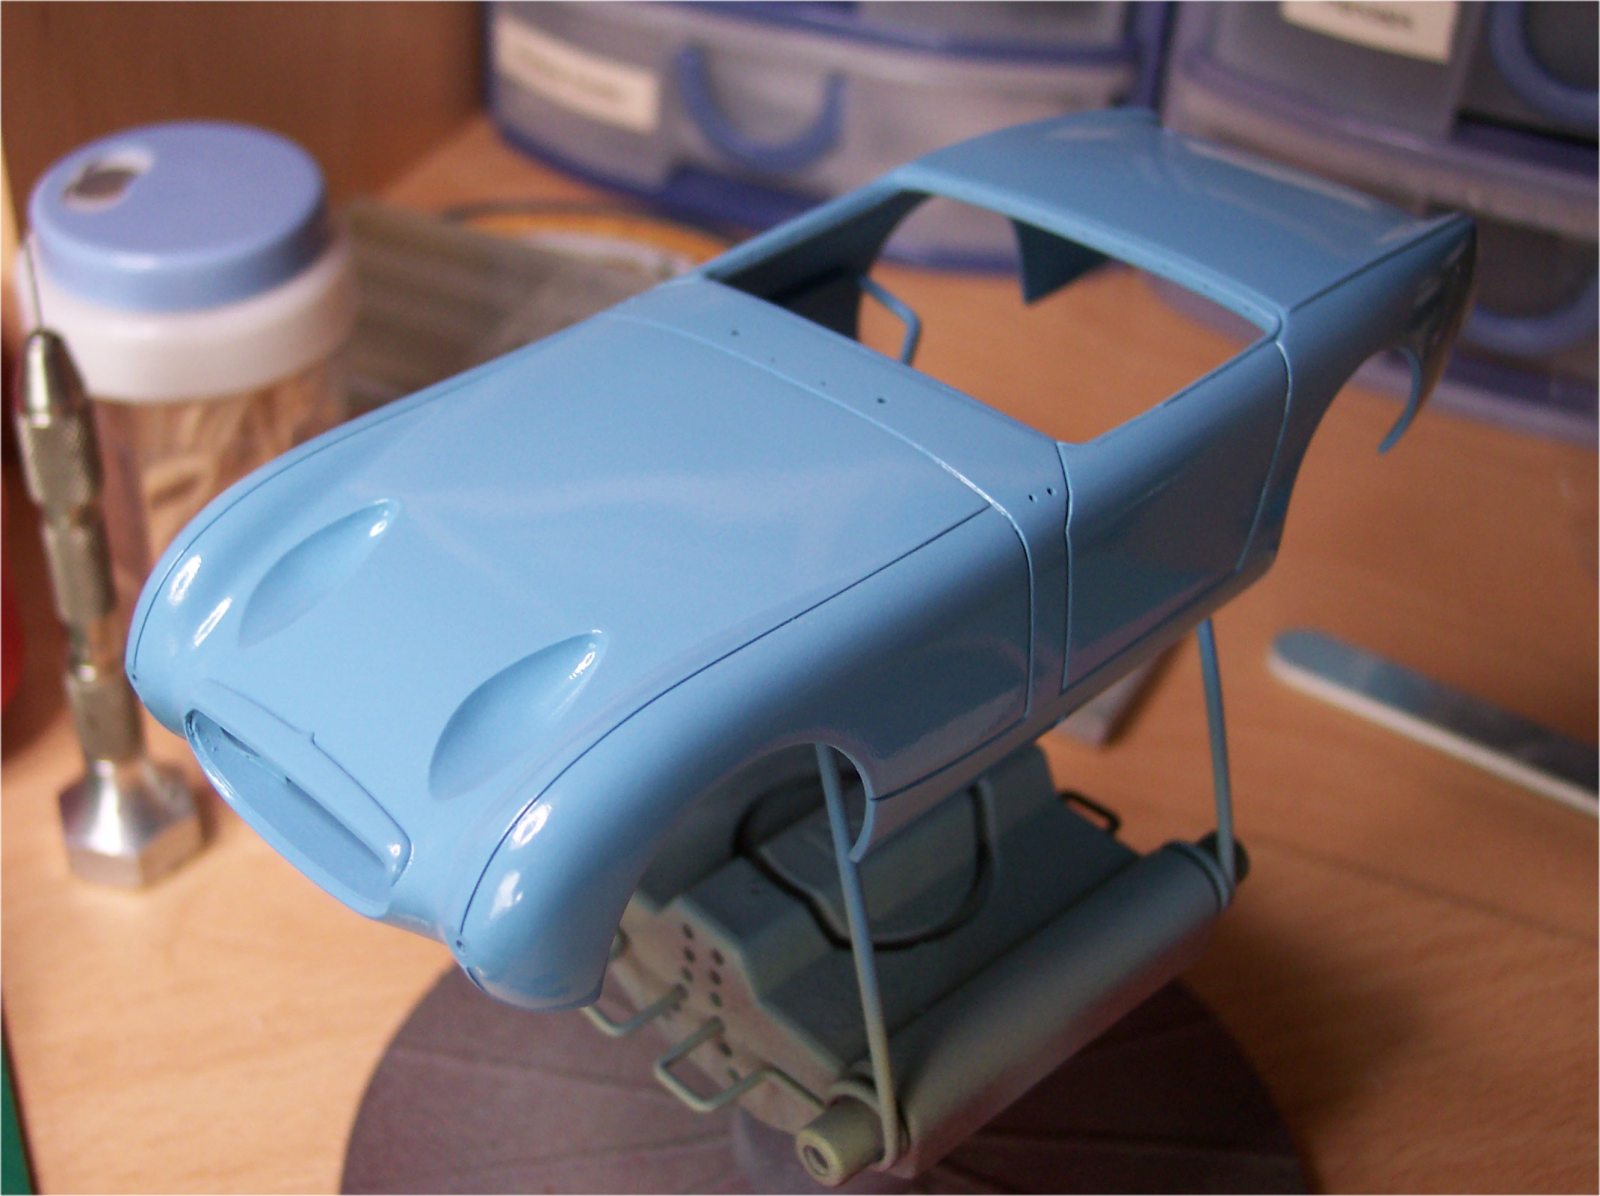
With the modifications done to the windshield frame it was time to prepare the body ready for painting. For this build I decided it would be painted in a genuine BMC (Austin) colour, so I chose a nice Iris Blue.
The body was given a good soak in warm soapy water, I use washing up liquid, as this removed any mould release agent and grease from fingers, followed by a good scrub with tooth powder as this removed the shine from the plastic and gives a good base for the primer coat to adhere to. I decided the fix some of the previously stripped chrome parts onto the bodyshell as I would later pick these out with chrome and aluminium Bare Metal Foil after it was painted. The front grille trim and the trim around the drivers cockpit were held in place and fixed using Tamiya extra thin cement.
The primer coat was done using Hycote grey plastic primer,
which after left to dry was flatted down before another coat was applied. Left for another 24 hours the first of the top coat were applied, starting with a mist coat and working up to the final wet coat, with the paint finished it was left for a week to harden off. I always leave painted parts in a sealed plastic container which stops any dust settling on the parts why they dry off, while this was drying I could start work on the rest of the model.
The chassis and interior tub is molded as one part, with the bulkhead and propshaft tunnel supplied as separate parts. These parts were glued in place then the whole part was given a couple of coats of grey plastic primer, some masking had to be done, as the chassis needed to be done in satin black, while the interior tub needed to be done in flat dark blue. For the interior I used Humbrol enamel thinned with lacquer thinners, this gives the paint a much shorter drying time, the dashboard was given a coat of the dark blue as this needs to be the same colour as the interior. Before I put the paint on, I used a small piece of chrome Bare Metal foil to replicate the chrome dial surrounds, after the paint had dried out I took a small Tamiya cotton swab and dipped it into lacquer thinners and gently wiped away the paint that had gone over the chrome foil leaving the chrome to show through and replicating the chrome around the dial that the real car has. You can also use this technique for scripts and emblems that are molded into bodyshells or other parts, you only need to get the cotton swab damp and not too wet.
One thing that is different in the kit that I haven't seen in others, is the use of a softer rubbery material that the seats and the interior side panels are molded in, I wasn't sure if the would take lacquer based paints or not, but a coat of plastic primer followed by the Humbrol blue thinned again with lacquer thinners went on and dried without any problems. Once dried I gave all the parts a coat of satin varnish to make the parts look more like vinyl, for this I used Windsor & Newton artists acrylic varnish, thinned with Acrylic thinners it airbrushes really nice and dries to a nice satin sheen. With the body and the interior parts painted and left to dry off, it was time to start work on the previously stripped chrome parts. For these parts I used Aclad2 lacquer, as it's the best paint I have found that replicates chrome and stays looking good after the paint has dried. On this model, there really isn't too many chrome parts that need to be chrome, the front window frame, front and rear bumper and front grille and grille surround, and the fuel filler cap. The grille surround as it was fitted onto the bodyshell before it was painted, was the only part covered in chrome Bare Metal Foil, the rest of the parts were first given a shiny coat of gloss black, with Alclad you really do have to get the best and shiniest black basecoat you can, otherwise the Alclad chrome just won't turn out looking like chrome. You can buy the black basecoat
from Alclad, but I have been using Revell's gloss black enamel thinned using lacquer thinners, not only does this give the paint a much shorter drying time, I also find it gives the black a much deeper and glossier shine.
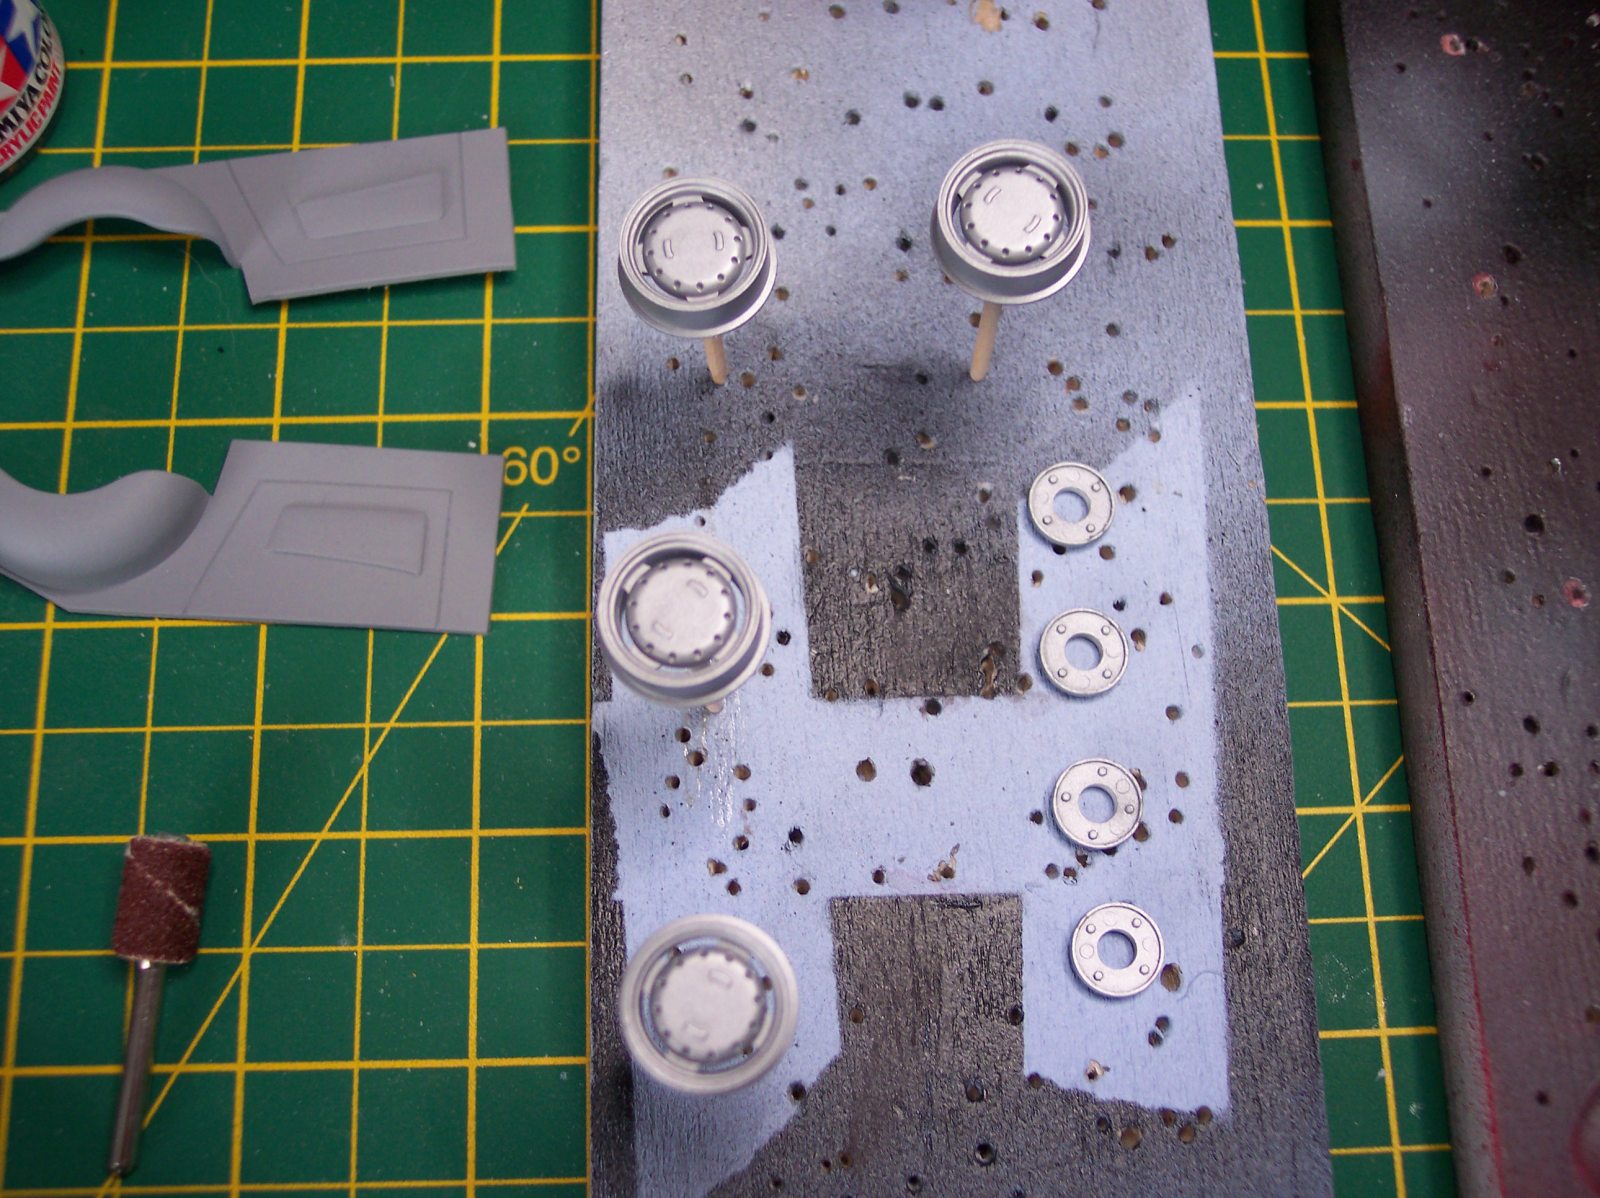
With the interior tub finished the running gear can now be fitted. The front suspension and steering was fitted as describes in section one, some parts don't need gluing, and these parts are pointed out in the instructions, doing it this was makes the steering functional, the wheels are part of the chrome parts, and as I mentioned at the beginning of the article I stripped the chrome off. The wheels were sprayed wheel silver, with the hubcaps sprayed using Alclad 2. Section two of the build shows the rear axle, exhaust and wheels being fitted, again the wheels were stripped of there chrome and painted to match the front one's.
The interior panels aren't correct for this car, as the real car has a hollow door, but in this scale it might have been a bit hard to mold them correct, but once painted were fixed inside the bodyshell using 5 minute epoxy glued and clamped into place and left to dry. I skipped the next few sections, as they detail how to fix all the small parts onto the body, but I left them all off and went straight to section 8 and fixed the seats onto the interior tub before fixing the body onto the chassis, and fixed all the small parts (Fuel cap, steering wheel, rear lamps and number plate) on afterwards, doing it this way makes it a lot less easy to knock them off while handling the body. The windshield frame was added now and the four pins I had made up and painted were fitted at the same time, not only do they make the frame look more prototypical, they
also aid in getting the frame to fit to body more securely. The small rear bumpers can now be fixed on, as they attach to the body and to the bumper brackets, which are part of the chassis, the front bumper simple attaches to the brackets which again are part of the chassis. I don't usually build Curbside models, but I really enjoyed this build, it went together without any problems, parts fit was very good, and when finished looks a very good realistic model of the real car. I'm not sure if these models will be re-issued or not, but they do pop up on eBay from time to time. If you like British cars from the 50's and 60's, this model will be right up your street. Support us ordering our notes in PDF > Here |
||||||||