|
|
|
|
Armor/Techniques |
|
|
Placing tracks in the Tamiya's T-55 |
|
|
by Patricio Delfosse © 2003 Modeler Site |
|
|
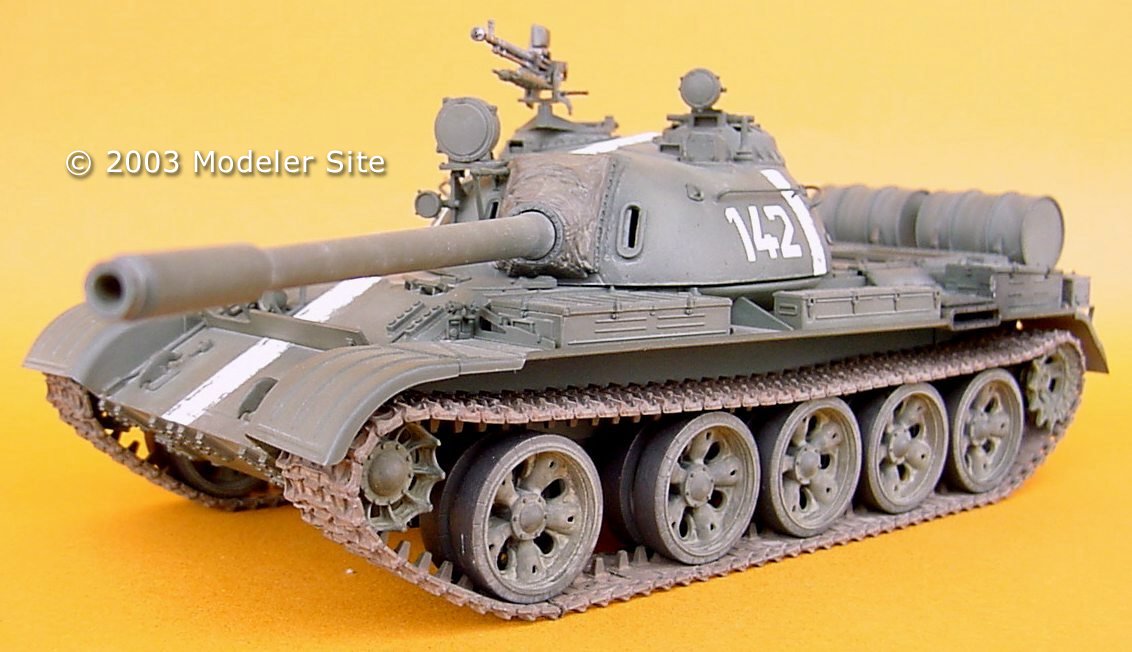
Legal Notice No material from Modeler Site any Web site owned, operated, licensed, or controlled by Mario Covalski & Associated may be copied, reproduced, republished, uploaded, posted, transmitted, or distributed in any way, except that you may download one copy of the materials on any single computer for your personal, non-commercial home use only, provided you keep intact all copyright and other proprietary notices. Modification of the materials or use of the materials for any other purpose is a violation of Mario Covalski & Associated's copyright and other proprietary rights. Read More here > Legal notice The T-55s have in their tracks a characteristic sag, since they don't use return rollers. Those who want to spend double money to represent this sag easily, may buy link by link tracks from Fruilmodel (ATL-01) to replace them, but I think it's not necessary, because with little extra work, this characteristic can be represented using the tracks the kit provides, they are excellent, very ductile and good detailed by themselves. Once the tracks were painted, I mounted them on the hull, which already had the road wheels mounted and painted. For the typical soviet green, I used Tamiya acrylic XF-61 dark green. Using the same color I had painted the tracks in, I applied a very slight filter all over the hull and wheels to standardize the whole. With the tacks mounted, I fastened in a needle in the hull, pressing the track firmly against the drive sprocket, forcing in this way the track to follow the drive sprocket's course. The same technique was used in the idler wheel. This procedure aims at inducing the tracks to trace the outline of the sprocket and idler wheels, and in this way we'll get the characteristic sag. Finally, I glued the track to the central wheel and to the one behind it. It worked!!!....I've saved U$S 30 in aftermarket tracks!!!. Tamiya's instructions suggest us to glue the track to the second wheel too, but if we use the needle's trick, it's enough to glue the tracks to the third and fourth wheels respectively. To fasten in the needles, it's convenient to remove the tracks for a moment to mark the exact place by drilling a hole using a 5mm drill. Then mounting the tracks again, I fastened the needle in that hole. From the interior of the hull, we may place a rest to the needle. to let it fixed in that position. I gave a wash in ochre to all over the area in order to hide the needle which before being placed, had to be sanded until the chrome was removed, otherwise, it would have been impossible to paint it. Once painted, and with the mudguards placed, it was not visible. The full article of the T-55 > Here Support us ordering our notes in PDF > Here |
|