|
|
||||||||||||||||||
|
Airplanes |
|
|||||||||||||||||
|
T-33 Mexican Air Force 1/48 scale |
||||||||||||||||||
|
by Mike Parr © 2004 Modeler Site |
||||||||||||||||||
|
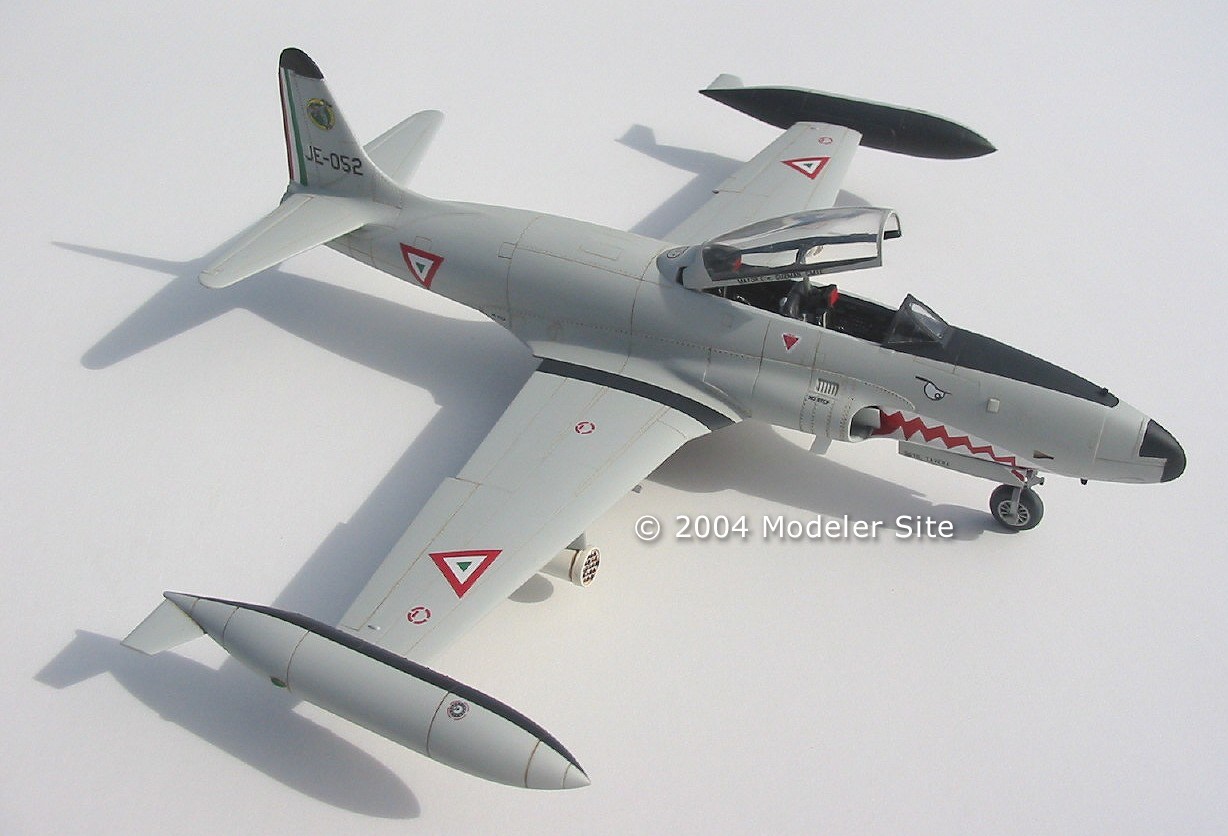
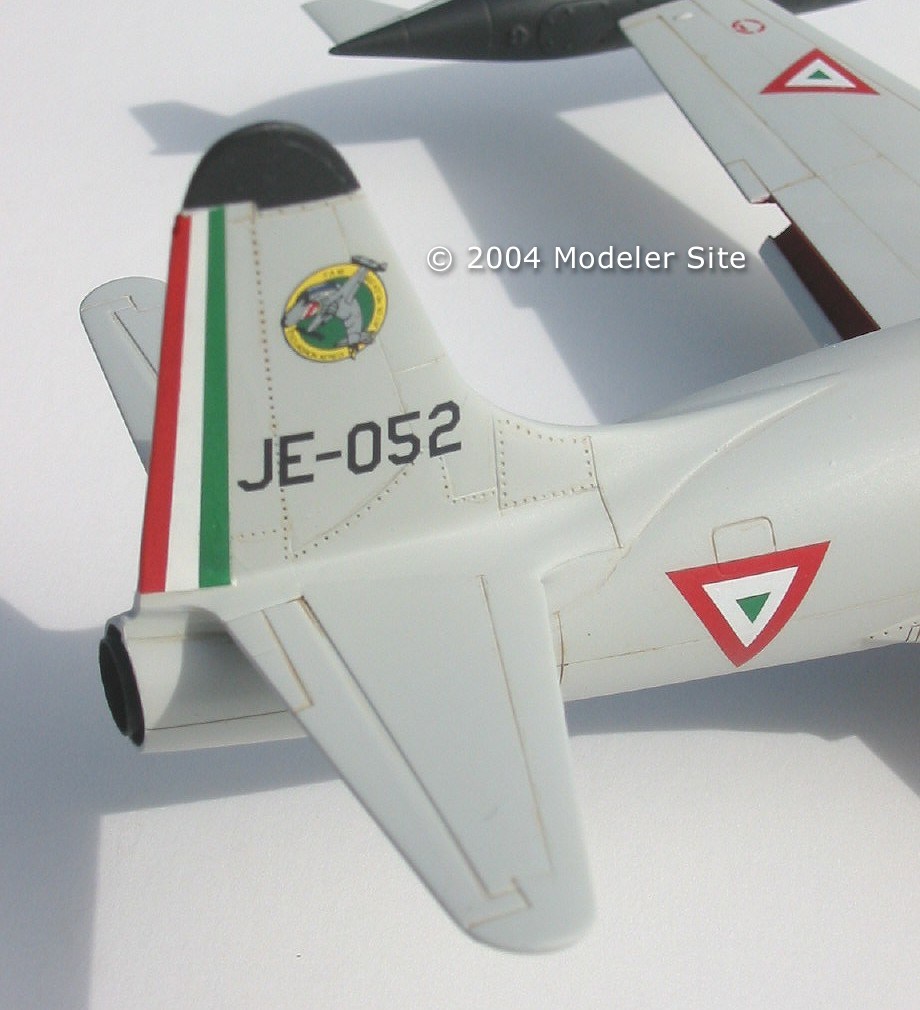
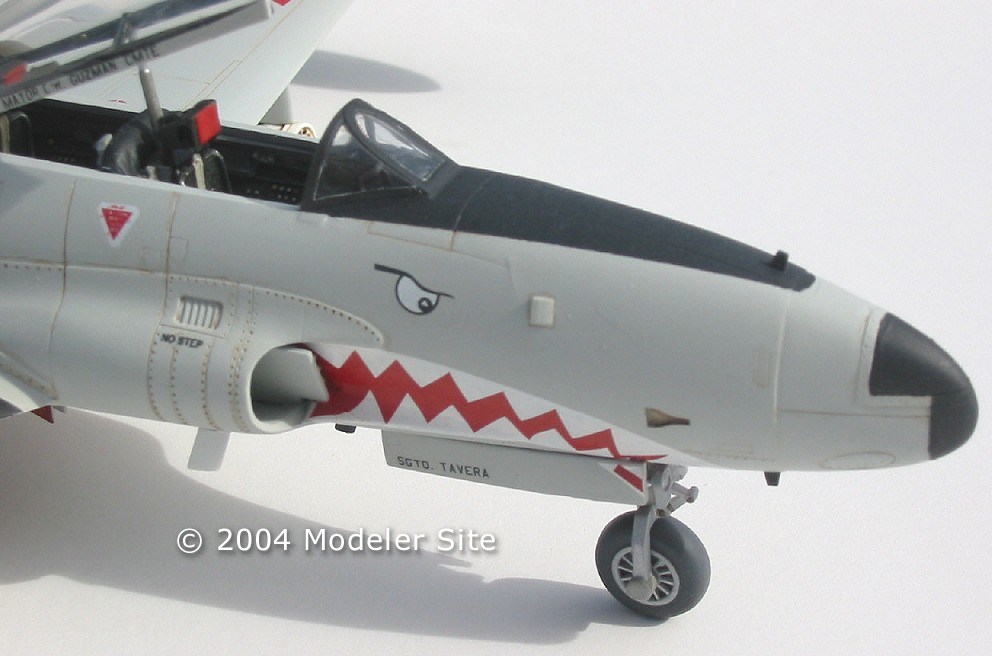
Aviso legal Ningún material de MS puede ser copiado, reproducido total o parcialmente, republicado, descargado de la red, trasmitido, anunciado, o distribuido de forma alguna, por ningún medio existente y o por inventar. A sola excepción de que usted descargue de la red una copia de los materiales en una sola computadora para su uso personal familiar, no-comercial, a condición de que usted mantenga intactos los derechos de propiedad literaria y otros avisos de propiedad. La modificación de los materiales o uso de los materiales para cualquier otro propósito es una violación de los derechos de autor y otros derechos de propiedad de Mario Covalski & Asociados . Para los fines de estos términos, el uso de cualquier material perteneciente a MS en cualquier otro sitio WEB o computadora conectada a una red distinta de Internet esta terminantemente prohibida. Lea más aquí > Aviso legal The T-Bird has been a part of many airforces since the 1950’s and was one of the most used jet trainers/light attack aircraft in the western world. It continues in service today with several operators. F.A.M.’s (Fuerza Aerea Mexicana) use of the T-33 began in 1961 and continues to this day. The aircraft have seen several different paint schemes during their service lives and I chose to model one seen in 1989,with the EAJP 202 Squadron.
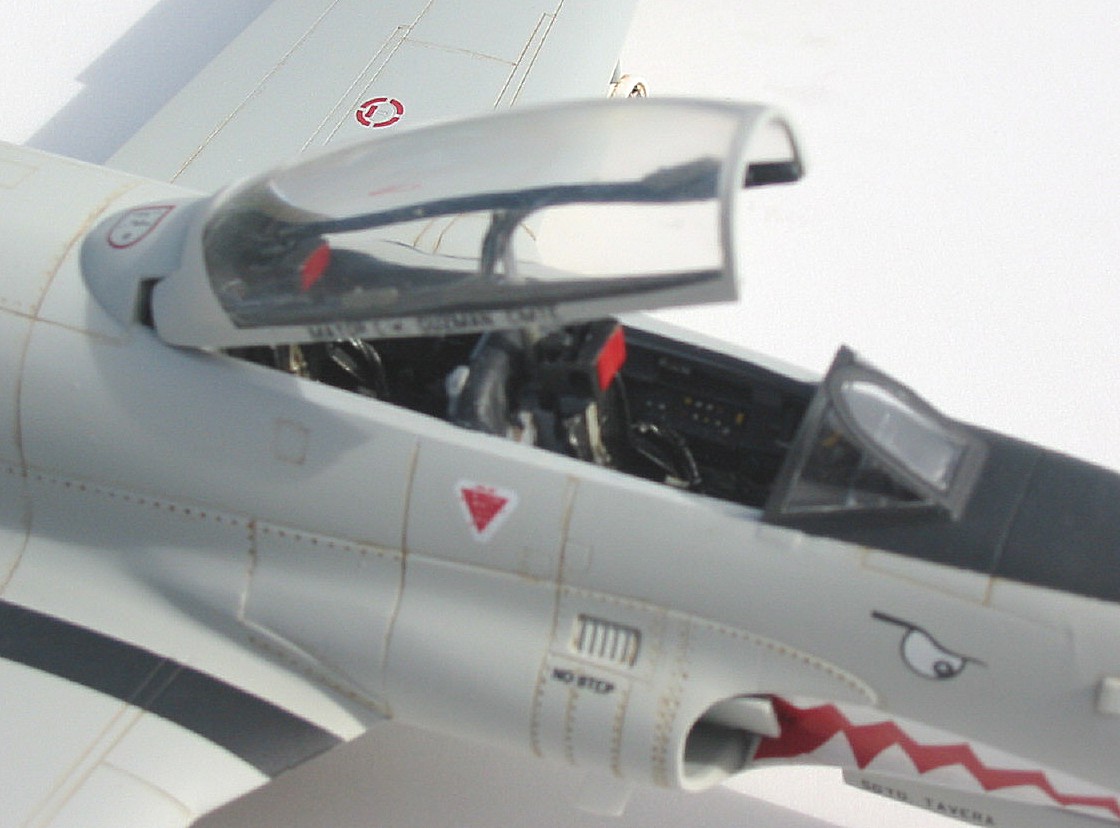
The kit The model is the 1-48 Academy kit with a Black Box cockpit set added. Overall the fit of the model is good although some trouble was encountered on the underside where the wing is attached. Modifications to the kit included adding some blanking sheet plastic to close off the flap wells, removing the interior detail before adding the BB set and scratch-building various antennas particular to the F.A.M. aircraft. The cockpit Construction started as usual with one of these sets with removing the resin blocks from the various small parts. I use a dremel tool fitted with a sanding disc for this otherwise tedious task. I take the parts outside and wear a dust mask and old cloths as a huge amount of resin dust is created and this dust is bad for the lungs. Once cleaned up painting can begin. The basic interior color of F.A.M. T-33’s is black and light grey. I use a combination of Model Master and Floquil paints on my models and an Aztech airbrush. At this point I would like to thank my friend Fabian Nevarez for advice and photo’s of F.A.M. T-33 interiors. Since Canada uses the T-33 and I have had the chance to examine many Canadian machines over the years I wrongly assumed the interiors would be similar. Fortunately they corrected my mistakes in time.
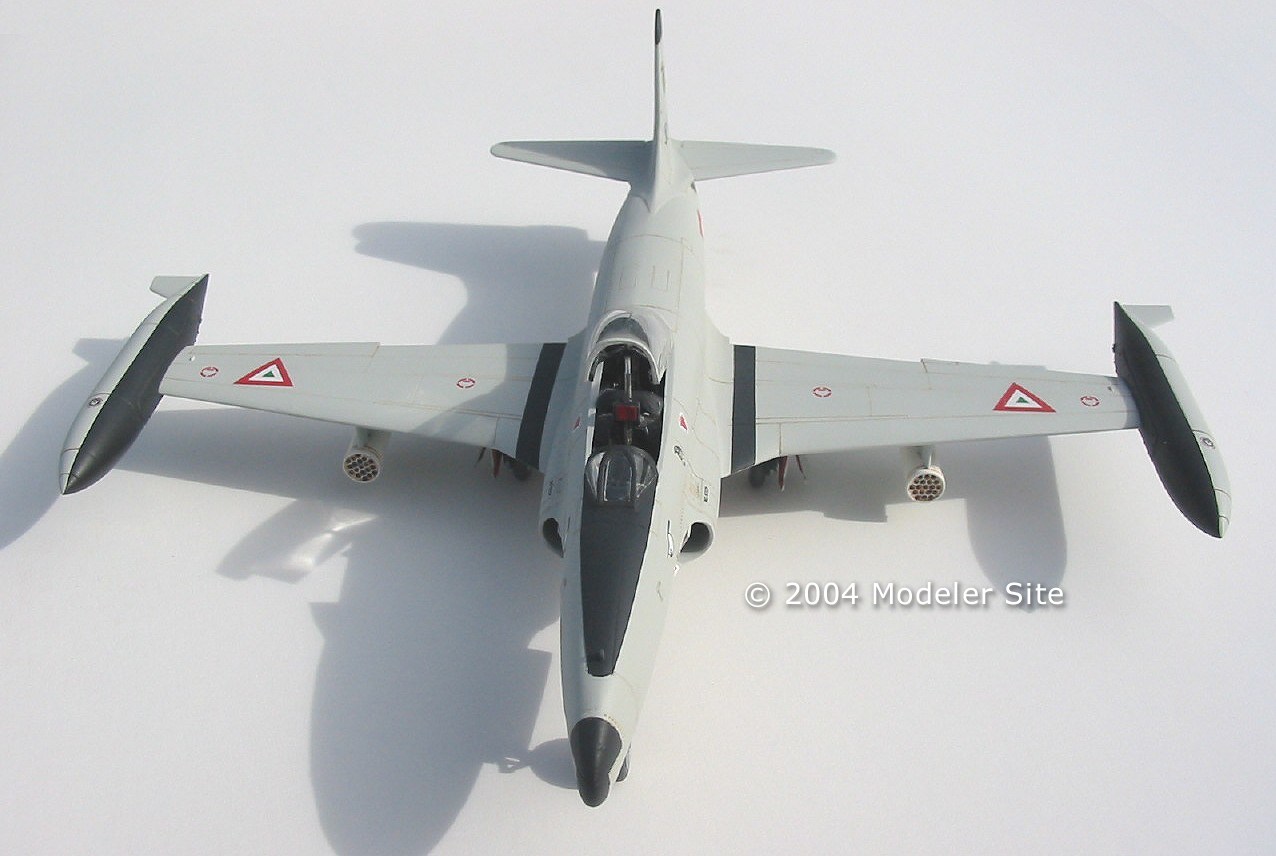
Construction I spent a lot of time and effort in getting the interior set to fit correctly into the fuselage. This is not unusual for a resin interior set and requires patience and plenty of dry fitting. The nose wheel well, nose weight and the tailpipe are also added at this time. I wanted to have the flaps down, as the interiors are red and would add some color to the light grey paint job of the aircraft. This required the construction of some plastic card pieces to close off the bottom of the wings. The wings were added and as stated earlier required some putty and sanding on the underside area. I left the tip tanks off the model at this point as they have flat black inside halves and this made painting easier later. The rest of the construction went smoothly and I was ready to move on to the painting. Painting
Decals and weathering Once all the paint was really dry (about a week) I started the decals, the sheet is by Aztec. All decals went on very well with the only tricky part being the sharkmouth. You need to get it right up into the air intake area, as the fit, if properly applied is perfect. Weathering is fairly simple, as photos I have of this aircraft show a very clean machine, as are all F.A.M. aircraft. I use a wash of Burnt umber which is water based not oil. It is applied with a fine brush and the nicely recessed panel lines of the academy kit really help here, this is a trademark of Academy kits by the way. Excess is wiped off with moistened cotton swabs, and areas are easily redone. One thing is not to get too far ahead of yourself as even the water based wash will pretty much permanently stain an area if left too long. All panel lines on the aircraft were treated in this way as well as gear doors, wheel hubs etc.
Final assembly Now with all weathering done the landing gear, doors, flaps and various antennae were added. I wanted this sharkmouth machine to have some real teeth, so I added a pair of 19-shot rocket pods. F.A.M. uses the T-33 in an attack roll not just as a trainer. Finally the canopy area was unmasked and finished. Here I had some fit problems with the rear seat interfering with the fit of the open canopy, fortunately I hadn’t glues the seats in and was able to “finesse” the fit. Conclusion This was a fairly simple kit to do and the overall quality of the model and the added cockpit set was very good.
Support us ordering our notes in PDF > Here |
||||||||||||||||||