|
|
||||||||||||||||||
|
Armor |
|
|||||||||||||||||
|
Converting the Tamiya M3 Stuart to an M1A1 Light Tank 1/35 scale |
||||||||||||||||||
|
by Michael Boyd |
||||||||||||||||||
|
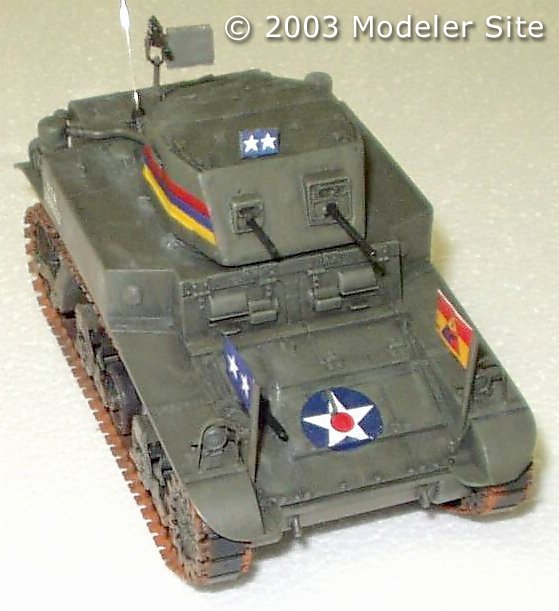
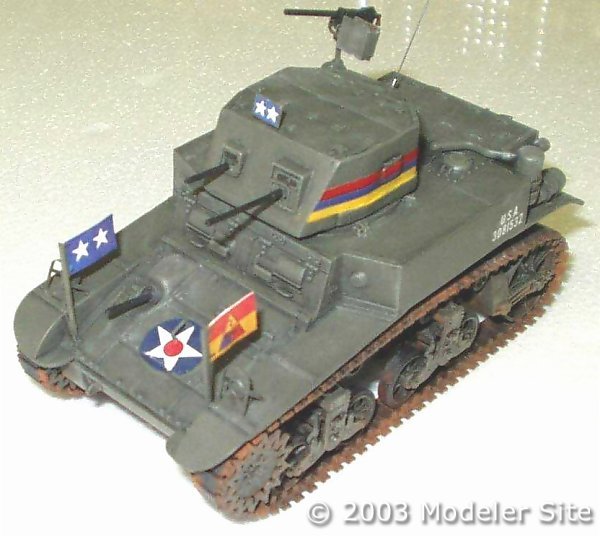
In early 2002 I saw an illustration in "Armored Fighting Vehicles In Profile" Volume 4 (American AFV's of World War II), page 11, that showed an M1A1 Light Tank (formerly Combat Car M2) assigned as Maj. Gen. George Patton's command vehicle when he commanded the 2nd Armored Division in 1940. For an American tank, it was very colorful and I thought that this would make an easy conversion project. I bought a Tamiya M3 Stuart kit (#35042) and started work.
I omitted the storage boxes (parts A20, A21, A35 & A36), trimmed off their support brackets on the rear skirts, filled the remaining holes and sanded the rear skirts smooth. I then removed the two rear lights from part A-25 and attached them to the same positions on the revised hull.
The rear skirt extensions (part B19) and sponson machine gun barrels (parts A2 & A16) were omitted. The hardest part (in my opinion) of the whole project came when I removed all of the rivets on the hull (the M1A1 had a welded hull). I didn't think it would take soooooo long.
The rest of the hull structure was assembled following the kit instructions with the following exceptions:
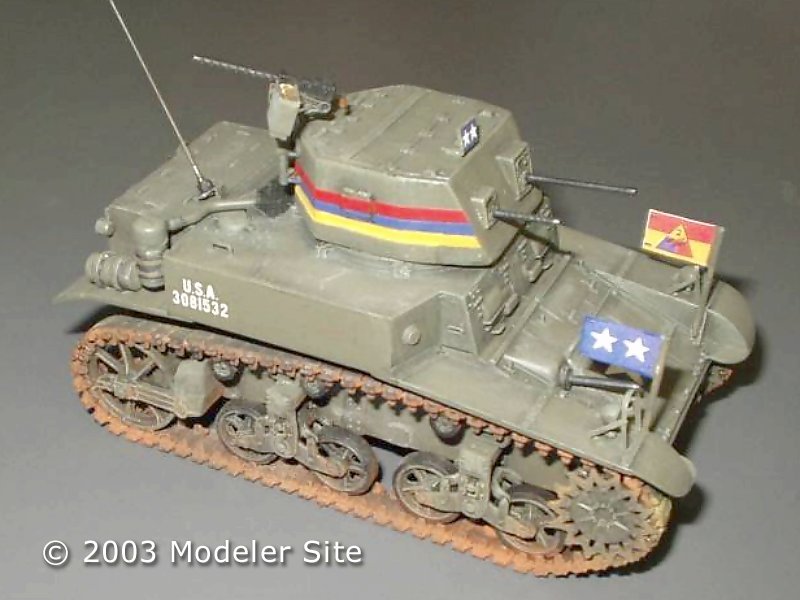
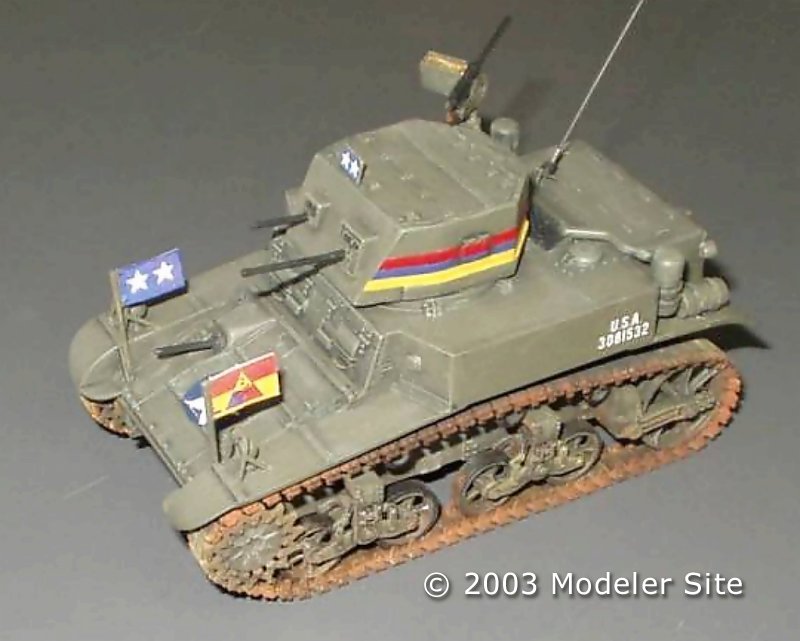
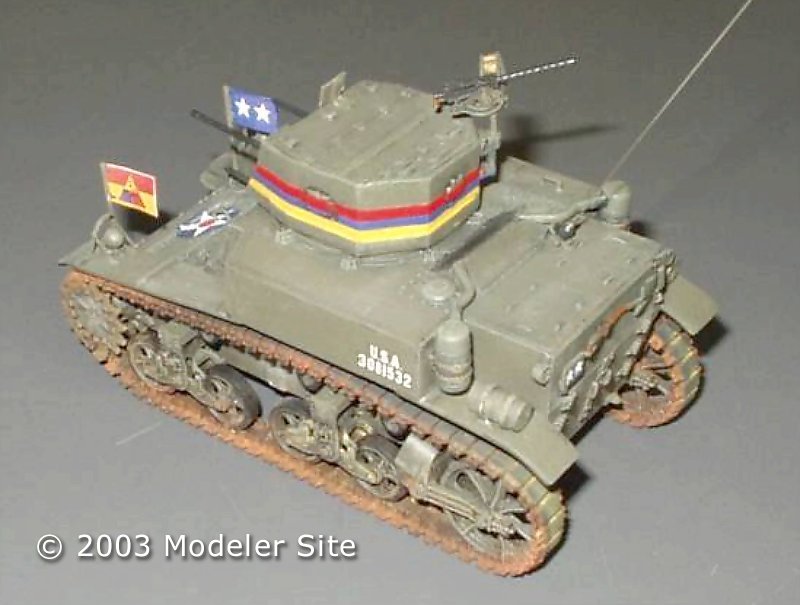
The turret had a rounded shape, but the turret front and roof sections matched the illustrations in the book. I sawed off the outside of the rounded section to provide an octagonal shape and added panels of .040 Evergreen plastic sheet to build up the outer section of the turret. I added side and rear hatches with Evergreen strip and rod, added a strip along the bottom of the turret and added kit Parts A9 & A13 on the right rear quarter panel to complete the turret structure. I added .30 and .50 cal. Guns to the turret front. I then removed the gun mount from the .30 cal. Commander's gun (part A14) and replaced it with a mount from the Pacific Monograph detail set and added an ammo box from the spares box.
The kit drive train parts were now assembled and added to the hull. Treads were added and the tank was painted, washed, dry-brushed and weathered with pastels. I masked and painted the stripes on the turret. The star insignia on the forward hull came from an aircraft insignia decal sheet. I made 2 color photocopies of the illustration in the book and cut out the 2-star and 2nd Armored Division flags . I pasted them back-to-back and affixed them to posts that were then glued to the front hull. I then cut out the 2-star placards for the top of the turret and rear hull and affixed them. Lastly I added a serial number to the hull sides (I know it's the wrong serial number and it will be replaced soon- I found an excellent sheet for US Light Tanks 1922-1942 by Decalcomaniacs). Conclusion Overall I'm happy with the results. I plan on making another one in the future based on the new Academy Stuart kit and any new information that crops up. Any feedback or suggestions (especially reference materials) on this tank would be greatly appreciated.
|
||||||||||||||||||