|
|
||||||||||||||||||
|
Airplanes |
|
|||||||||||||||||
|
Building the B25C - Accurate Miniatures 1/48 scale |
||||||||||||||||||
|
by Giulio Marrucci © Modeler Site |
||||||||||||||||||
|
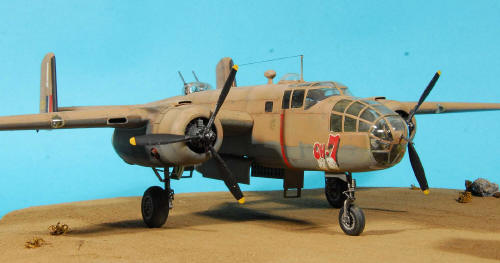
Legal Notice No material from Modeler Site any Web site owned, operated, licensed, or controlled by Damian Covalski may be copied, reproduced, republished, uploaded, posted, transmitted, or distributed in any way, except that you may download one copy of the materials on any single computer for your personal, non-commercial home use only, provided you keep intact all copyright and other proprietary notices. Modification of the materials or use of the materials for any other purpose is a violation of Damian Covalski's copyright and other proprietary rights. Read More here > Legal notice The “C” version of this glorious American medium bomber was the first to go into mass production with a number of modifications dictated by combat experience, following the “B”, famous for the Tokyo raid. The kit is the Accurate Miniature, dedicated to the B25 B’s belonging to the squadron of Doolittle Riders.
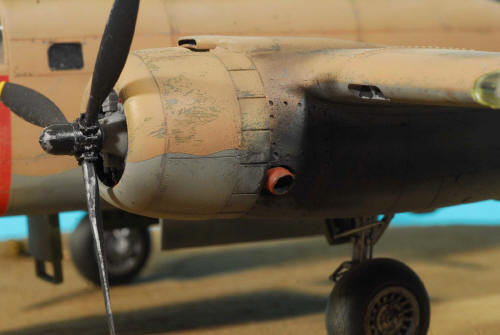
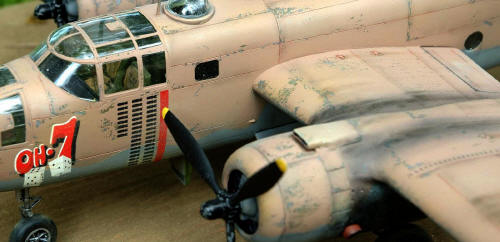
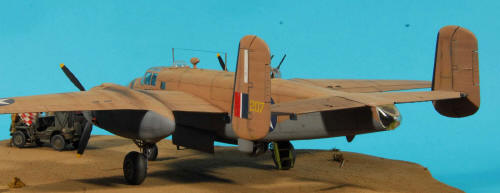
As I found a beautiful decal sheet for a “C” operating in the Mediterranean theatre in 1942/43 issued years ago by Super Scale , I decided to operate the conversion. Actually it wasn’t too hard. There were just minor external differences between the two versions. The most evident is the difference in shape and number of the exhaust pipes, the B had a single one, the C had a multiple pipes.
I was really surprised discovering on pictorial references in my possess that the subject I chose, had the single pipe exhaust system. With further research I found that the first C production Mitchell’s retained the former single pipe exhaust, even if shorter than the B version on the right nacelle.
Anyway I decided to replace the one supplied by the kit with a much more realistic scratch-built one, made of aluminium pipe. Better in size and thickness.
The others differences are
The first two had been an easy task, using metal rod and plastic strips from Evergreen. The astrodome cupola was present in the box as part not to be used, like the glazed nose supplied in three different versions!
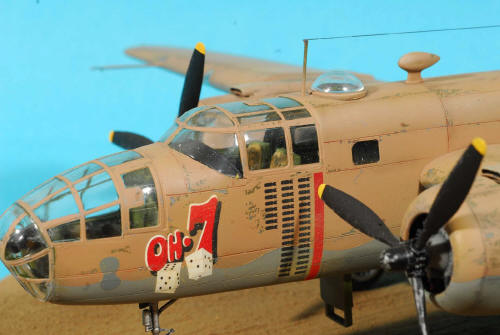
The only trouble was to drill a hole where to install the cupola and find another .30 cal. Gun, found in a box dedicated to American airborne guns by Verlinden. The “Ho-7” had the deicers removed, likely because he operated mainly from Morocco.
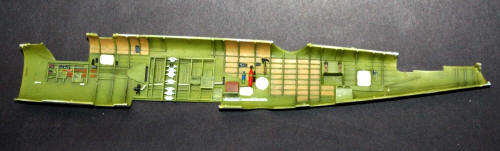
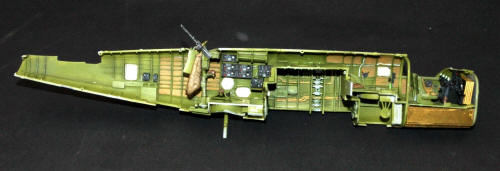
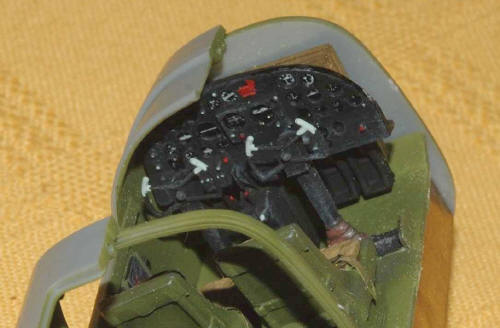
The interior’s kit is very well detailed. The extra work requested was just the installation of a few more cables, cushions seat and belts. The rest of the job is painting and weathering. Unlikely most of the detail won’t be visible once the two fuselage halves will be joined together.
The weathering job is not a demanding one, but is important not to overdo. So I applied a light layer of wash using very diluted Vallejo Cavalry Brown, then a delicate dry brushing using various tones of Tamiya Pastels from darker to lighter. Set A and E. The only method I use applying these pastels, is checking the visual effect during application until the general appearance is satisfactory. In the recessed area I generally apply a dark powder like the Mig Production Dark Gray in order to reproduce credible shadows. I found this method working well as you can easily blend the powder with a brush, adding and removing it, until you reach a credible result, before fix the entire work with transparent varnish.
Another little trouble is to find the proper allocation for the nose weights provided by the manufacturer. There is no enough room for all of them between the instrument panel and the front bulkhead. The only other place is inside the nose wheel well, behind the side wall. Part of the weights can be set there with a little work.
The remaining assembly work is easy, the Instruction sheet is exhaustive and clear. The painting job is the real challenge of this model.
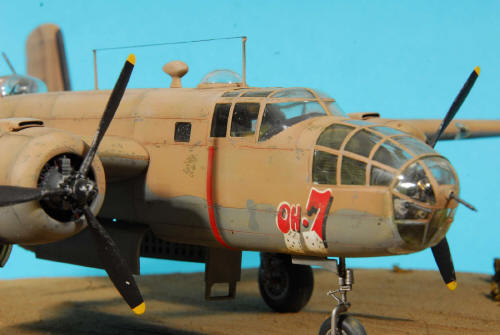
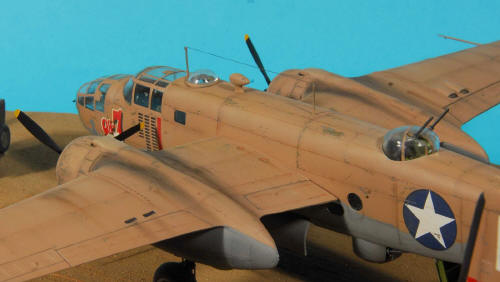
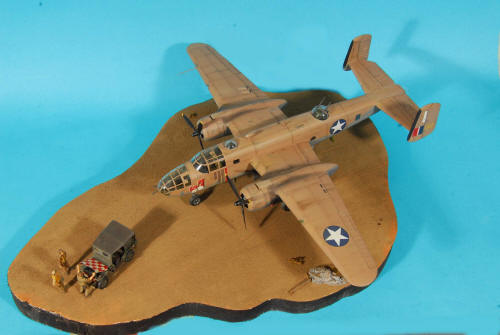
The version I chose show an interesting mix of American and British national insignia, adopted when US aircraft appears for the first time in the Mediterranean skies: the US stars in the four standard positions and the British tail flag on fins. Plus the never missed “nose art”. According the available pictures, the aircrafts operating in North Africa were heavy worn due to the sun exposition and the ever present sand on runways, taxiways and…in the air!
The Pink Yellow was directly applied on the standard factory Olive Green and tended to peel off very easily and to turn the original Sand Yellow tone to pink. So, as a first step, I painted the model with the standard USAF colors: Olive Green over Medium Gray, using Model Master enamels. Once dry, I put little drops of Maskol of different shape in the area more subject to the wearing referring to the photographic references, then I sprayed a thin layer of Desert Pink from Humbrol over the green areas. After about twenty four hours, when I was sure the entire paint job was dry, I started removing the pink paint from the areas where the Maskol was present using a wooden toothpick letting the green paint appears from below the pink one.
At this point I’ve accomplished the first step of the weathering job.
The following step was the decals setting, operation carried on as usually applying a generous coat of glossy varnish (Future) in order to allow the decal film to adhere perfectly to the painted surface. I used Microset and Microsol to soften the decals for a perfect accommodation using a cotton swab and a toothpick to help the entire process. Then I sprayed another coat of Future. A this point was possible start again with the weathering process, emphasizing all the recessed parts with heavy thinned Vallejo colors. Generally I use a reddish brown and dark gray of various tones, depending on the surface color to be weathered.
On this model I decided to use German Gray for the biggest gap like the joint between fixed and mobile surface and a combination of both for the remaining surface, with a little darker tone around the engine nacelles. Making the process on a glossy surface helps the liquid paint flow easily in the recessed panels and allows to remove the excess with a dump cloth without problem. An heavy coat of matt varnish complete the second weathering step.
After not less than a day I carried on the job, focusing my attention on the ruined pink paint. Using a sharp blade I gently removed the yellow-pink layer on specific points giving the scratches and peeled areas a realistic shape according to the pictorial reference of the real ship. For the smaller part, like rivets, I used a small pointed brush (triple O) picking the Olive Green and dark aluminum where required.
In the following step I want giving you my personal point of view about how to make a credible and realistic different color shade on the entire model, in order to adhere as much as possible to the original, considering the scale effect. I avoid the pre-shading techniques as I don’t like lighten each panel from center to the edge. In my opinion, the final result, is incorrect. A sort of chess- board effect, far away from can be seen real aircrafts. Panels can have different color shade, depending from the light source and the observer point of view. Furthermore the surface more exposed to sunlight have the paint most altered. Must be also take into account the field repairs, with many areas freshly repainted or changed cannibalizing other airship. For all these reasons I prefer apply shadows not with regular pattern, mainly following the airflow direction, using inks (gray or light gray) applied with the airbrush or using weathering powder s (Mr. Hobby or Mig Pastel). A close look to the real aircraft pictures can give you a better idea about what I mean. The paint can be faded away with a dry brushing basically using the main color lighted with some white / yellow and pastels. Then I added fuel, smoke and oil stains always in accordance with the relative airflow investing the aircraft in flight and on ground (the propellers flush). Even for these I use pastels and liquid wash. Sprayed enamels or inks only for major areas like the exhaust strakes. All will be fixed with a coat of matt varnish.
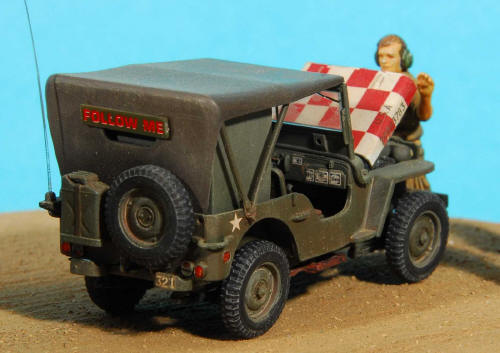
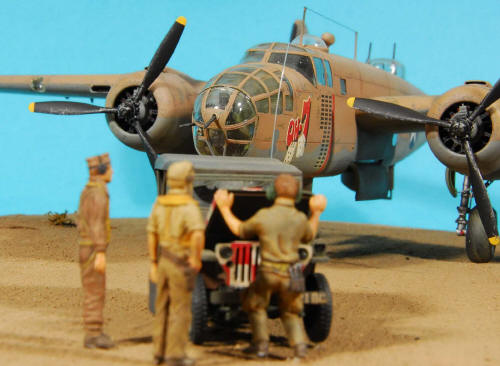
As I decided to reproduce a scene from everyday life somewhere in Africa during winter 1942/43 I had to decide what to put beside the main subject, interesting but not “heavy” like the bomber for a “good balance”. What’s better than a Follow Me?
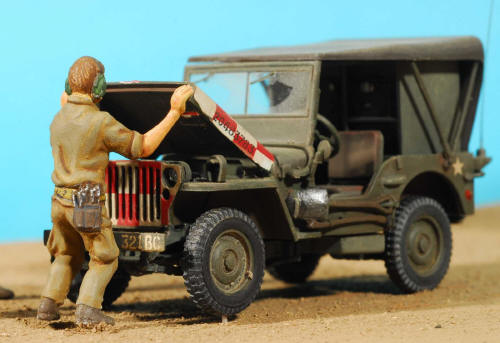
The Jeep from Hasegawa in Follow Me “uniform” is a piece of cake. So highly detailed even in such a small scale that was a pity not to reproduce the engine hood open. How could I justified an open hood? Adding a little touch of humour I imagined a mechanic trying to fix the problem surrounded by a disappointed pilot and co-pilot for the unscheduled stop.
The decals in the box are provided to reproduce a wrap-around red and white check body, painting solution adopted mainly in motherland airport or in England but hard to be seen in other operative environments , where the USAAF used standard vehicles for these purposes. For this reason, playing a little bit with my imagination, I decided to paint my Jeep in olive green with the exception of the hood and the front.
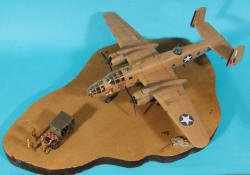
Weathering is standard. A brownish wash followed by dry brushing with Tamiya “A set” weathering Powders. Leather parts were painted with Vallejo acrylic. The figures are the classic Monogram, from my spare box, also them painted with Vallejo colors. The base is a very simple, cut from a foam insulator panel. Strong, light, easy to work and…cheap! The surface was overspread with plaster putty over which I’ve engraved the marks left by the vehicles, when still fresh and added same stones.
Then I painted the entire surface in sand yellow using ceramic colors. When dry, after adding some little stuff like wood and grass, I spread a coat of sand fixed with white glue. At this point the model was ready to take his place in my showcase.
Big size photos are only available in our PDF format. Support us ordering our notes in PDF > Here |
||||||||||||||||||
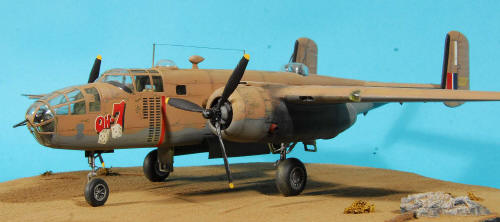
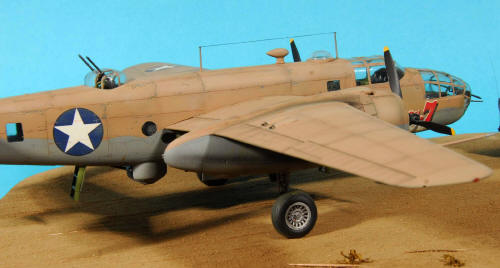
 Fuel vent tubes added at the end of each engine nacelle.