|
In January 1937, the Army Air Corps issued some specifications for the US air industry on a future fighter of high altitude and speed. Clarence "Kelly" Johnson, chief engineer at Lockheed and his team took the challenge and started working on what would be the P-38.
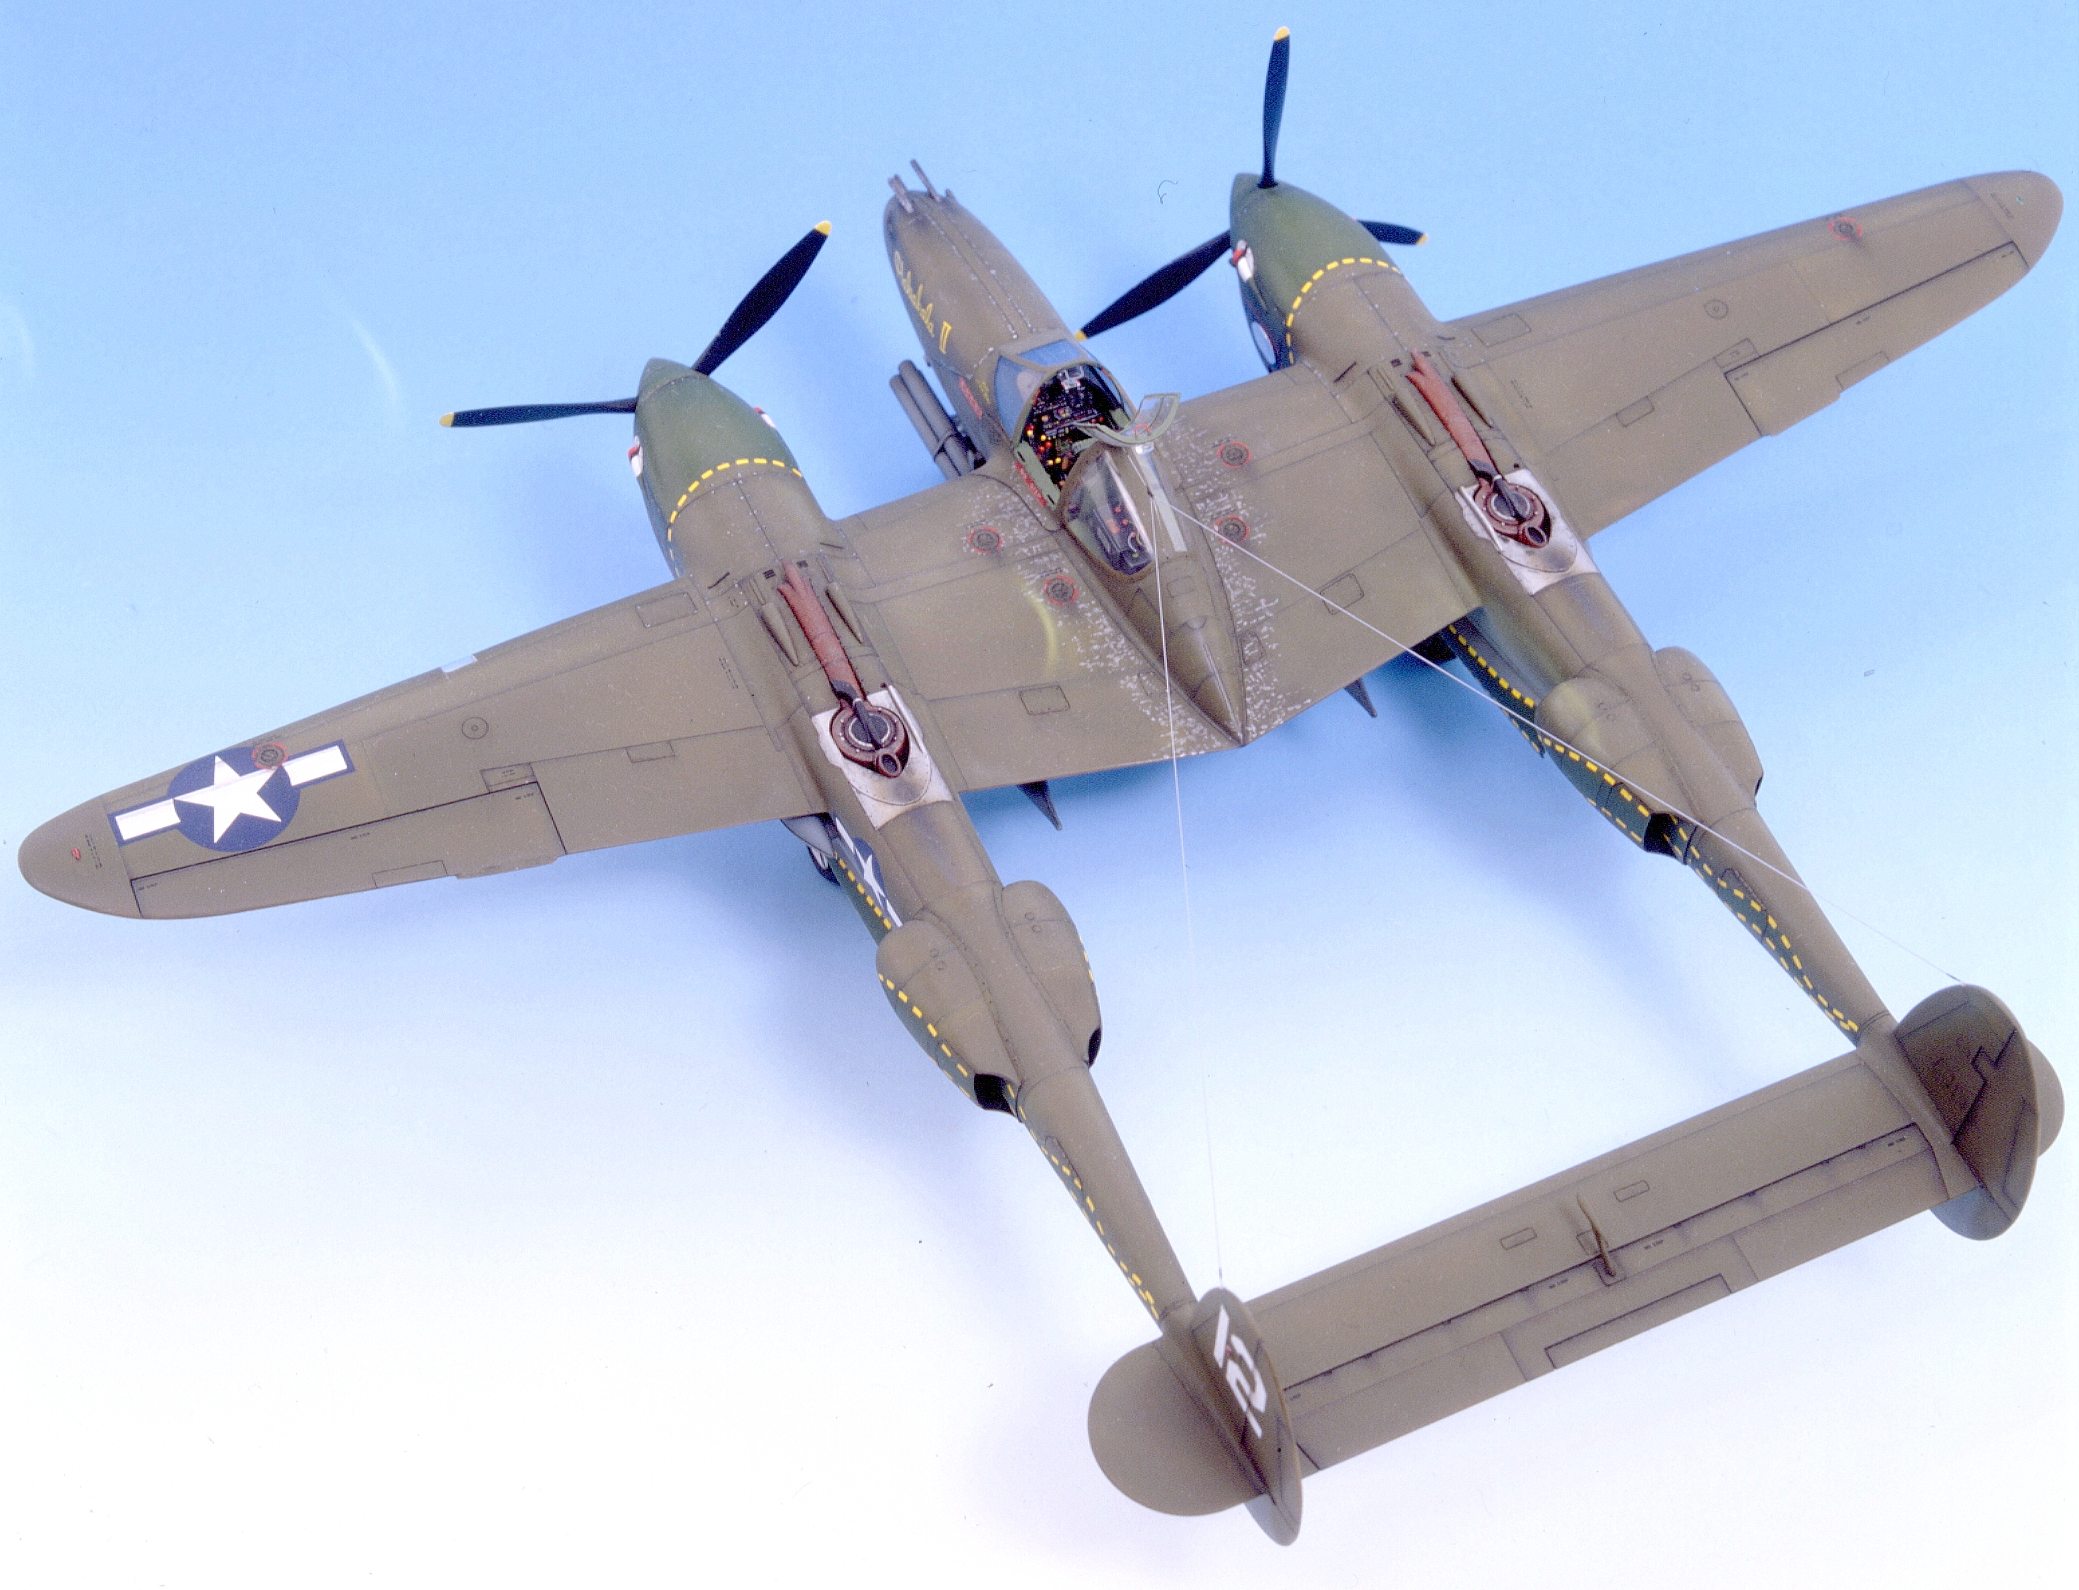
The result of this work was a two-engine, two-fuselage plane with room enough for the new turbocompressors and their attachments with the new Allison engines (subsidiary of General Motors), which propellers rotated in opposite directions. The proposed armament was amazing: four 12,70 mm machine guns and one 20 mm gun (Hispano, manufactured under license), all of them located in a central gondola.
|
|
The prototype made its inaugural flight on January 27, 1939. Its performance exceeded the specifications issued by the army.
For its presentation to the public, the intention was to beat the transcontinental speed record (California - New York) of 7 hrs, 26 min, 25 sec, held by the millionaire pilot Howard Hughes since 1937. The P-38 flew from coast to coast in 7 hs, 37 sec, but crashed when trying to land due to an engine failure. Despite the loss of the prototype, this was considered as a great success for a military plane at that time.
However, the whole program would have failed without the support of General Henry "Hap" Arnold who gave life to a project regarded by some people as too revolutionary.
The first deliveries to the army started in March 1941. The plane was evaluated by the RAF, which did not accept it, but gave the model the nickname "Lightning".
|
The first knockdown a Lightning caused, it was on a FW200 close to Iceland. The plane was a P-38D based in the same island.
Making good use of its speed and climbing rate, the P-38 achieved great success as demonstrated by Richard Bong and Thomas McGuire who were the most famous American war pilots flying exclusively Lighting models.
The P-38 was also used as a reconnaissance plane due to its big action range, as well as in surface attack tasks due to its powerful weapons and its stability as a shooting platform.
|
Construction and Assembly
The unconventional shapes of this model can make its assembly complicated, but the excellent kit manufactured by Hasegawa makes things easy due to the accuracy of its component parts and its clear instructions.
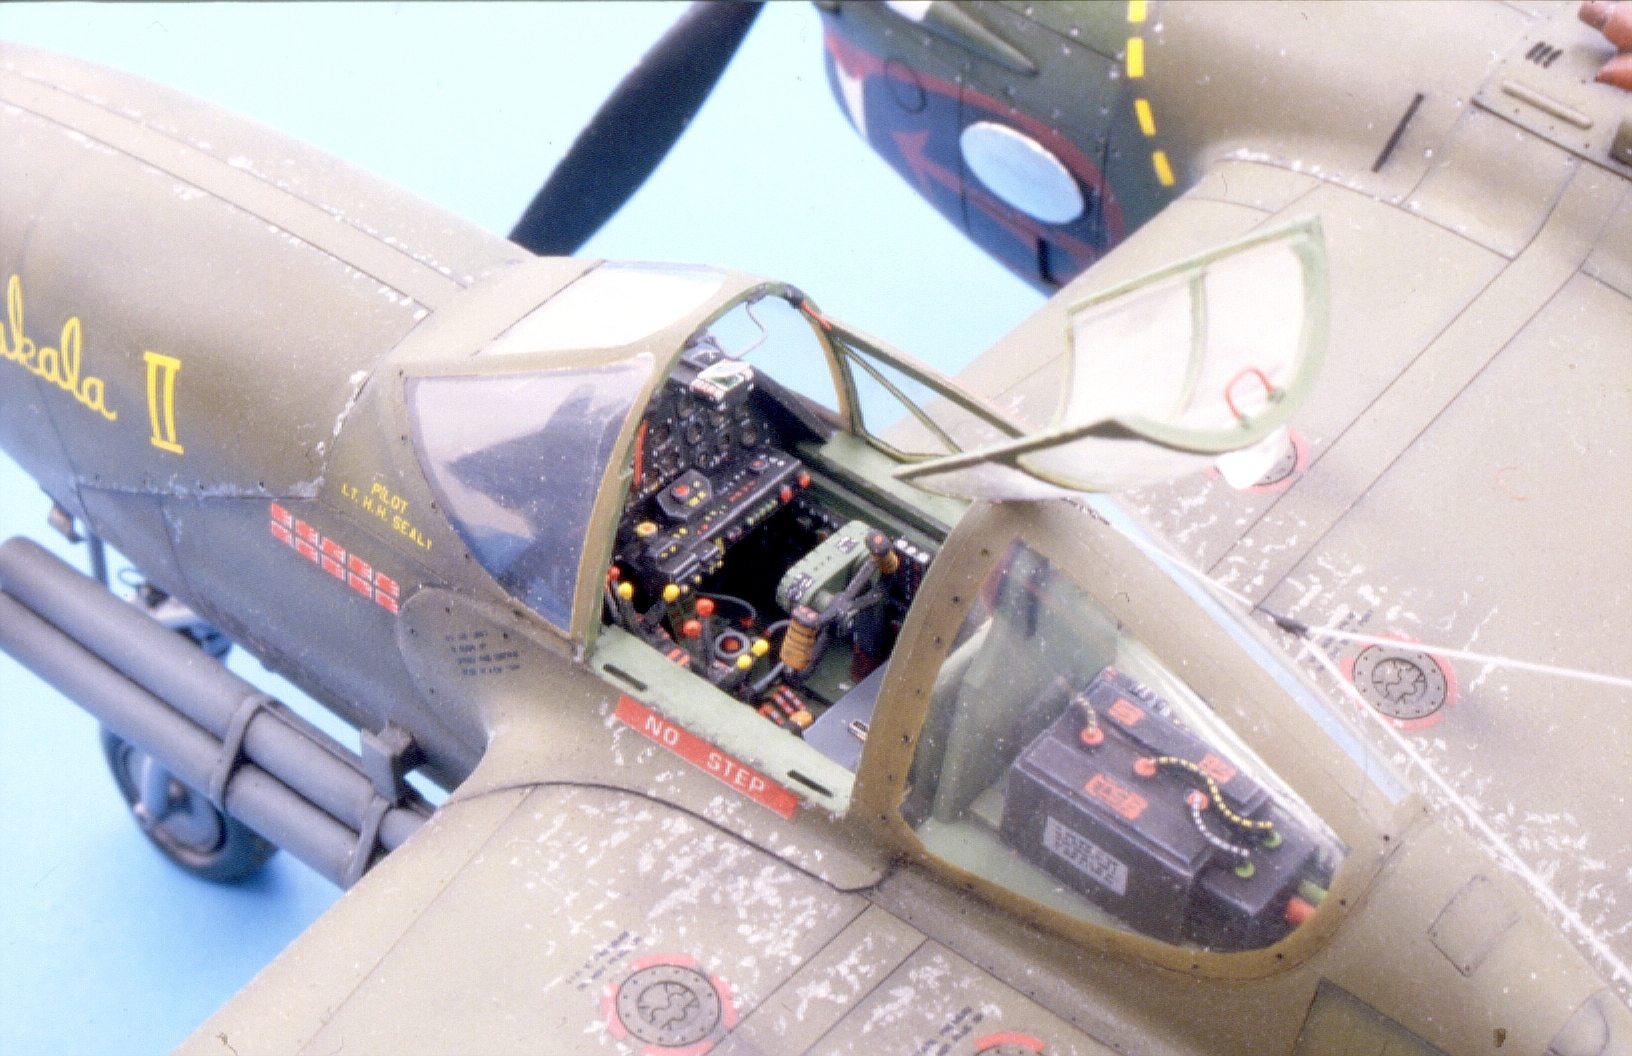
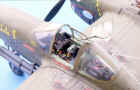
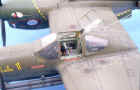
I only found a mistake in the inner cockpit; the instrument panel is located deep into the nose, which will force us to modify the sides of all the inner part.
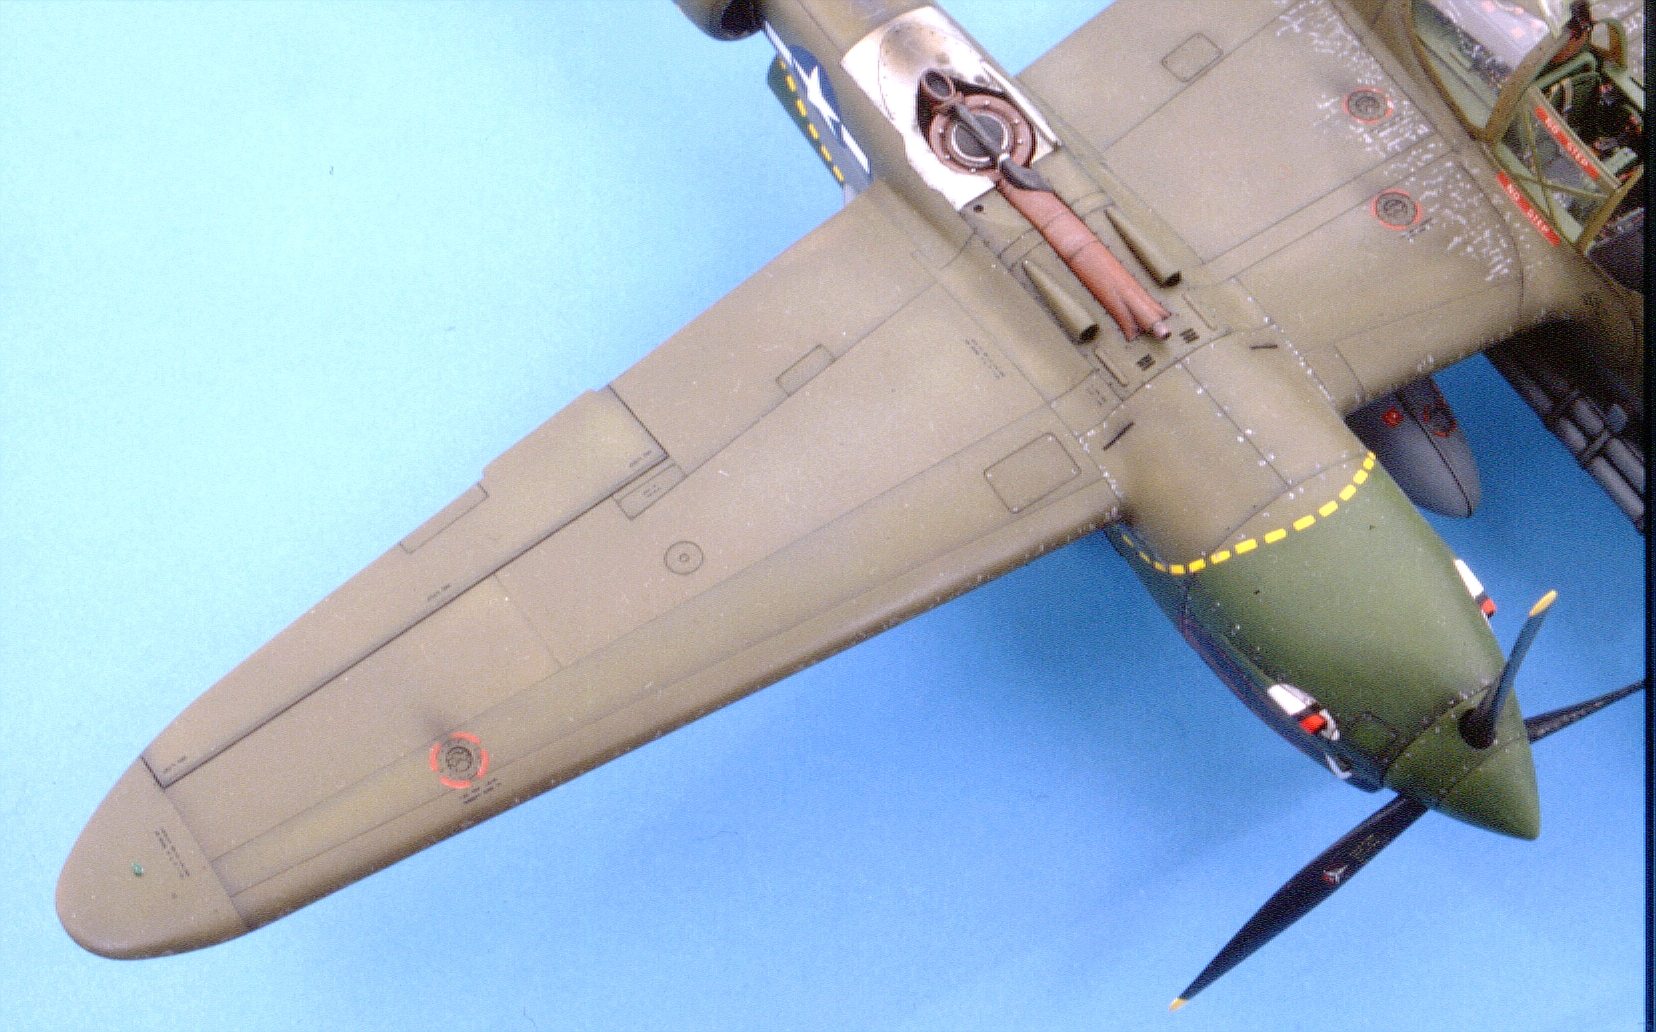
After painting and assembling the interior and undercarriage wells, we can glue the fuselage and wings. This stage of construction can be completed very quickly due to the good quality of the kit. We will just need to apply some gray filler on some joints and be careful when gluing the fuselages so that the rear stabilizer does not get crooked. Finally, before painting, we will glue and cover all transparencies and cover the undercarriage wells and what is visible from the cockpit.
If we want to add some improvements to our model, we can use the Eduard photoetched kits. I have used the 48-104.
|
|
|
|
|
Version and Painting
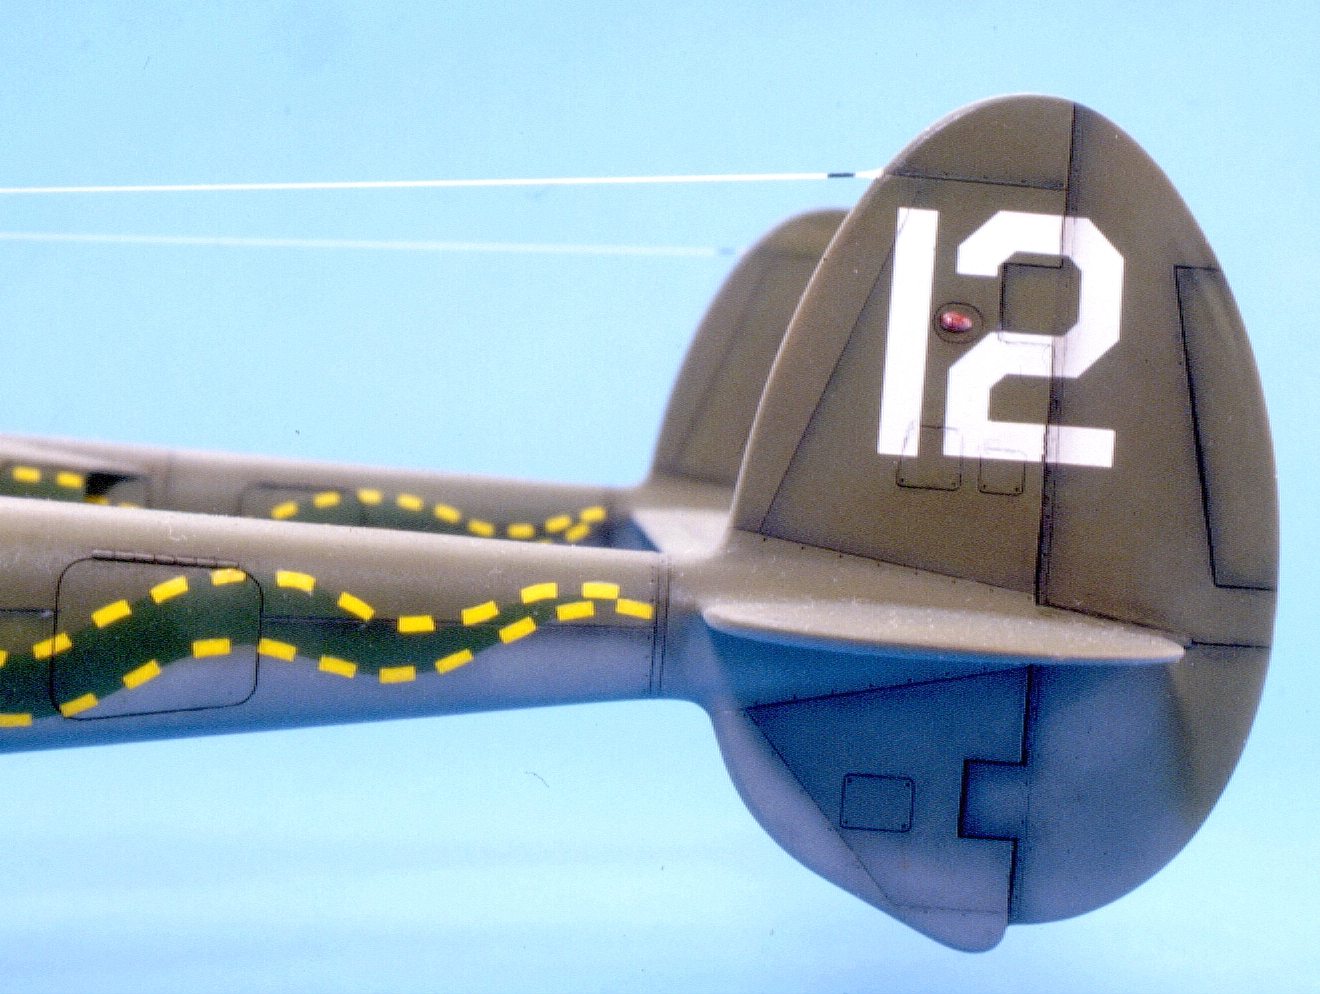
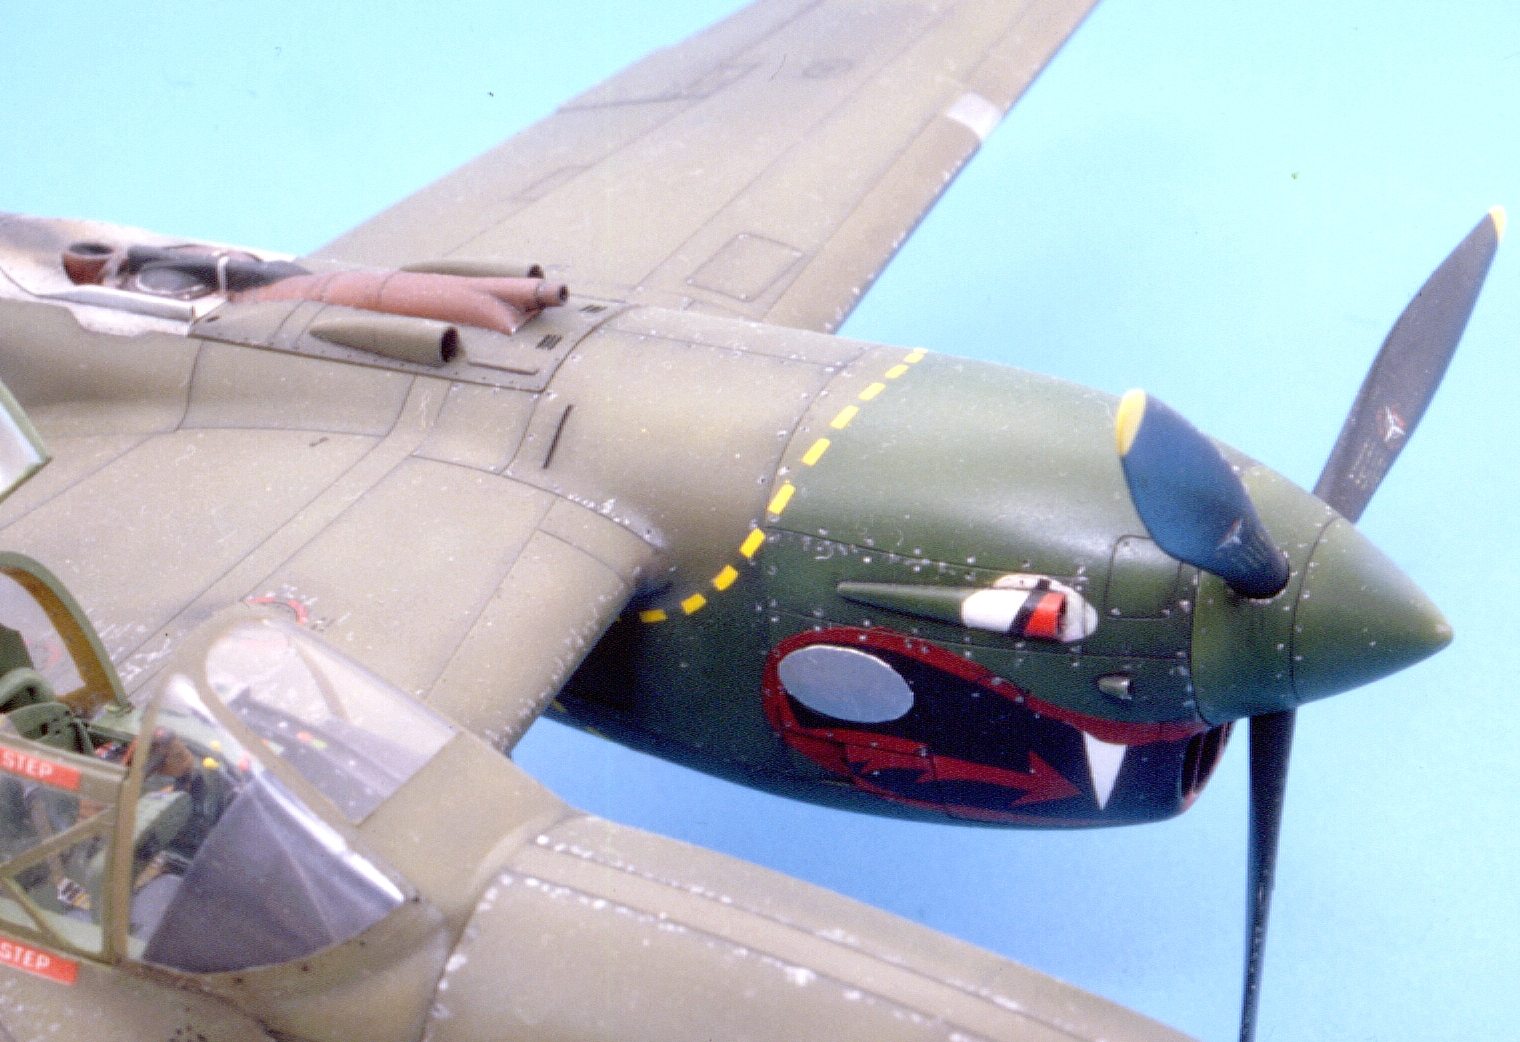
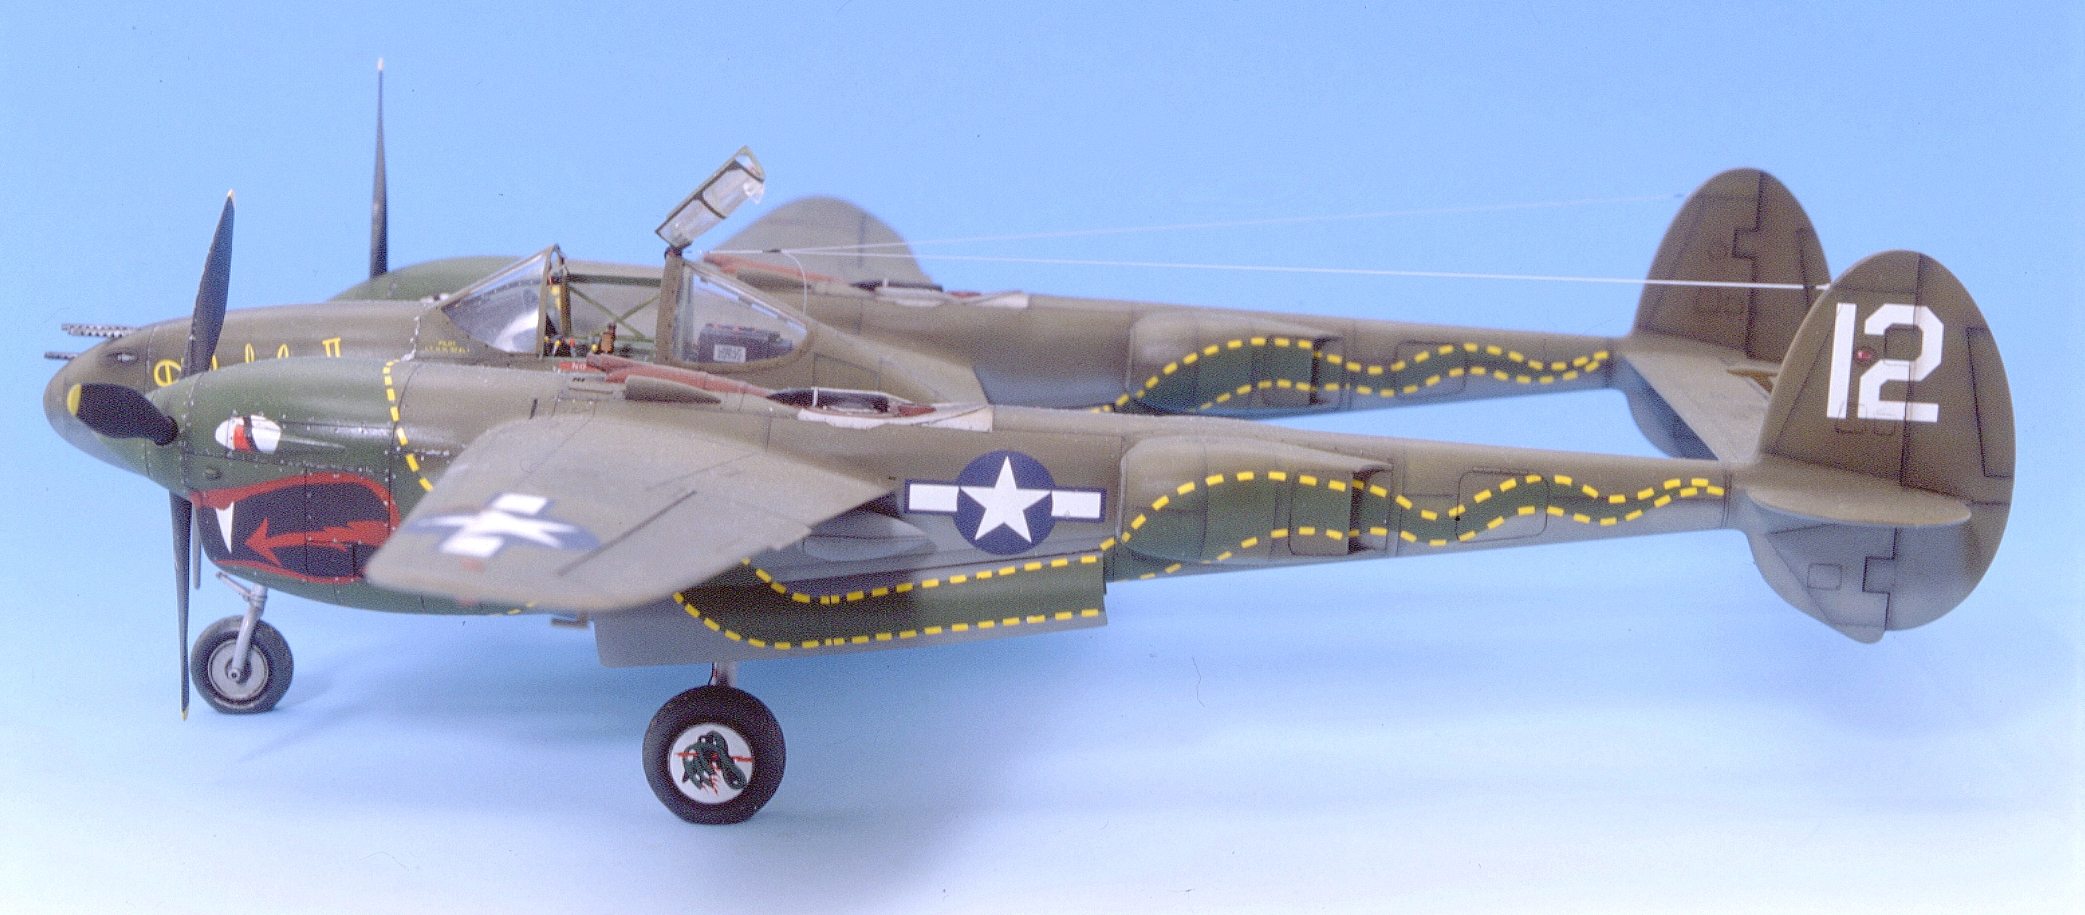
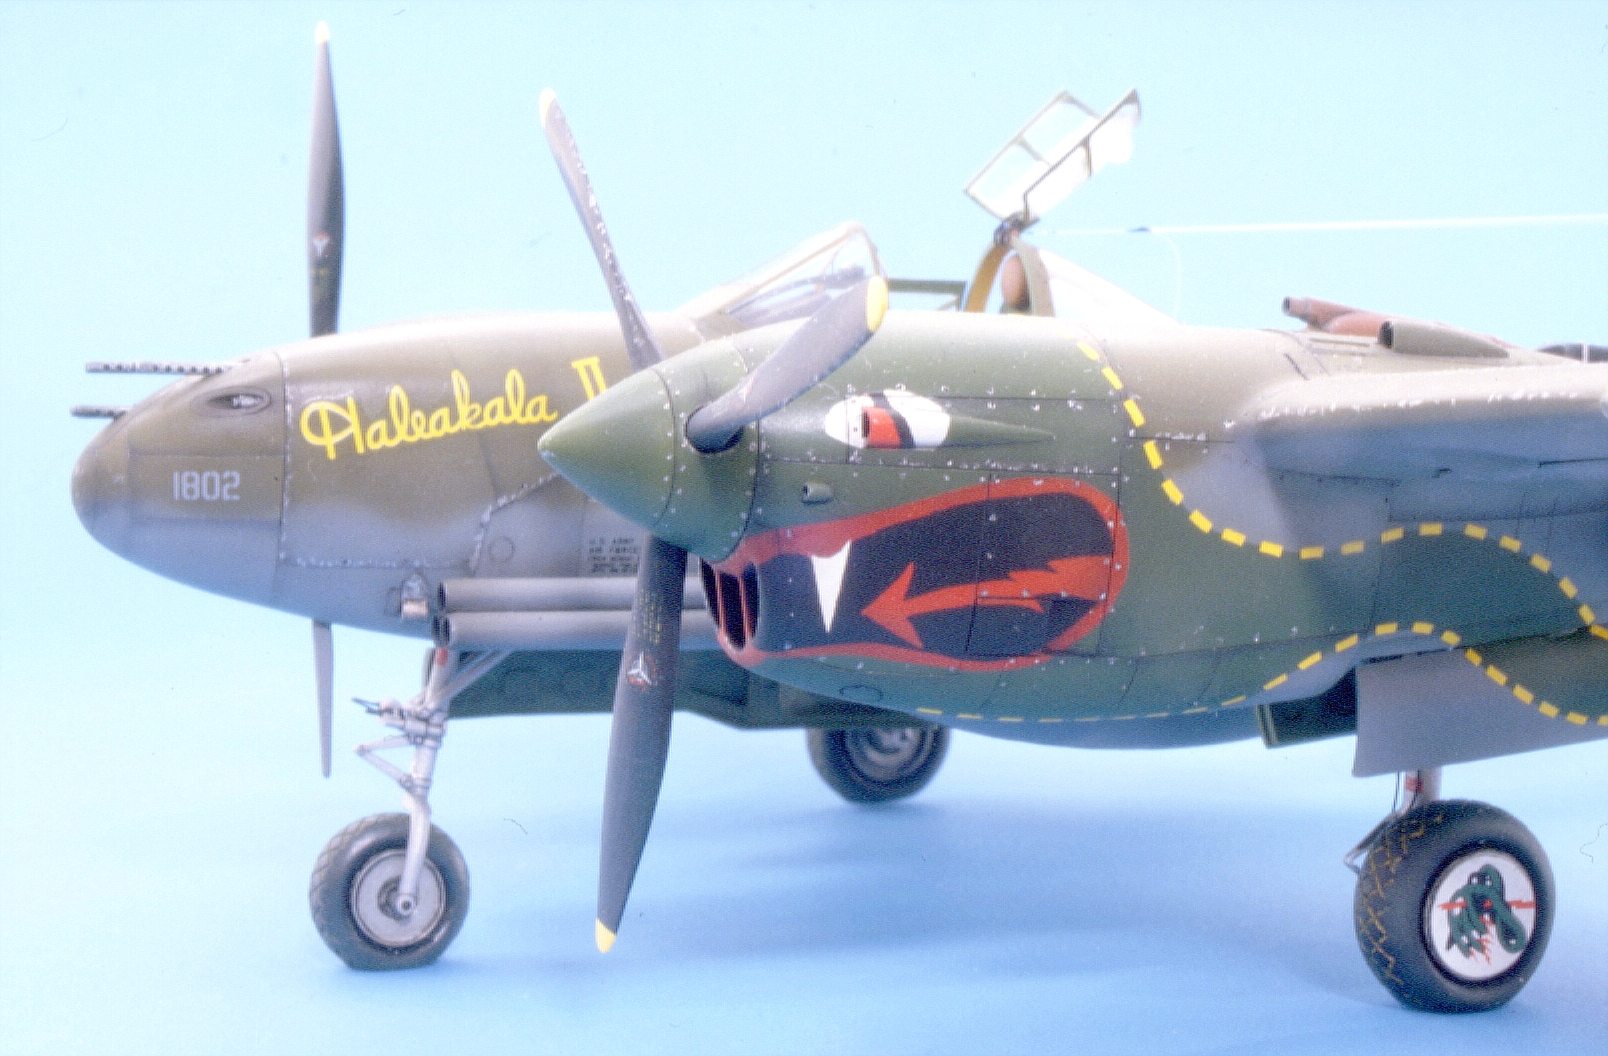
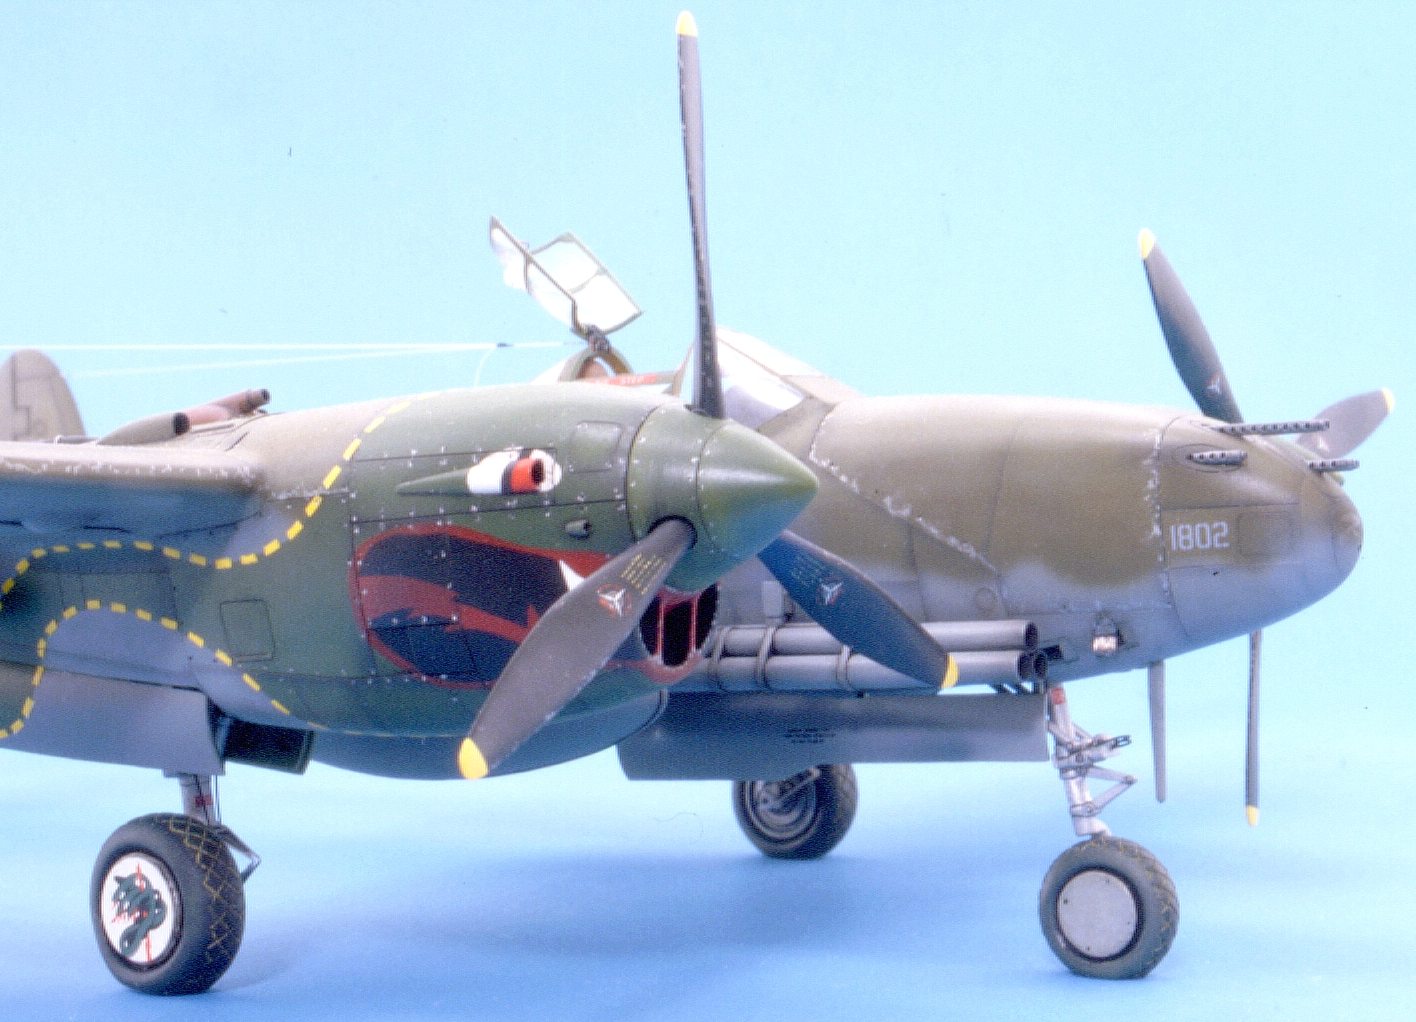
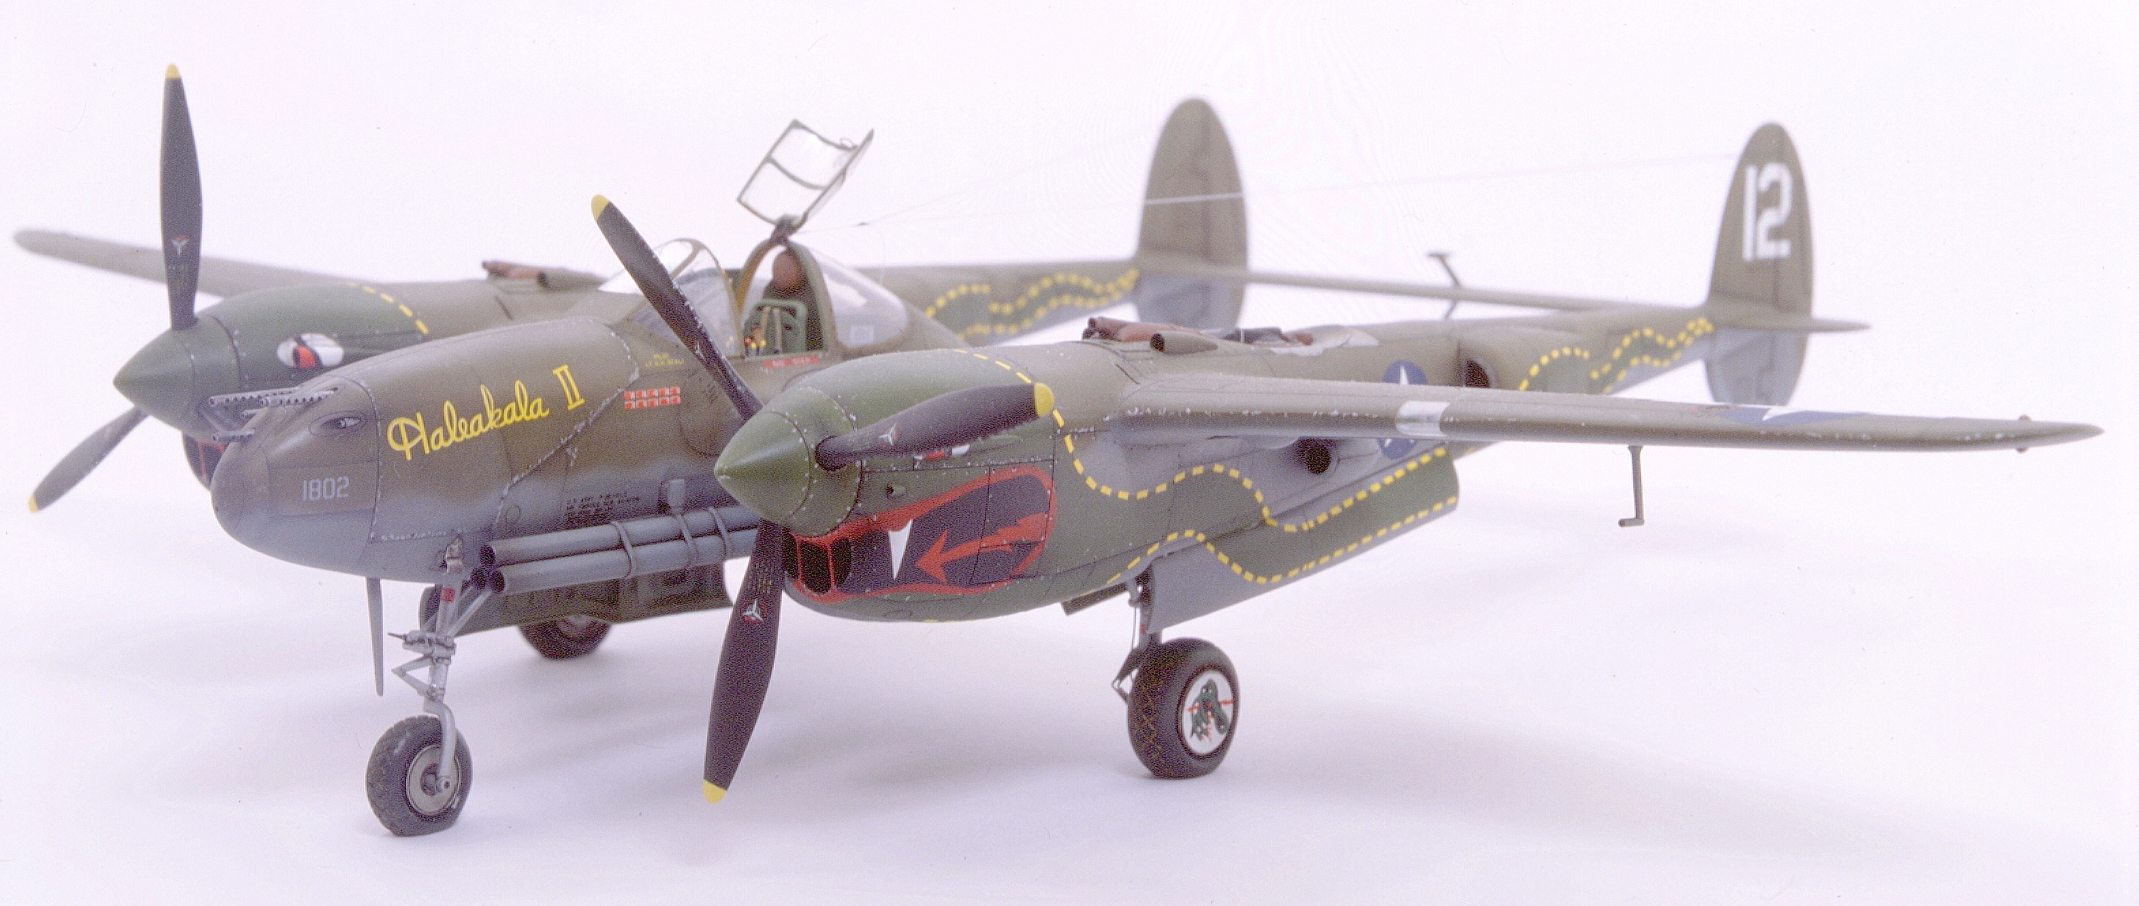
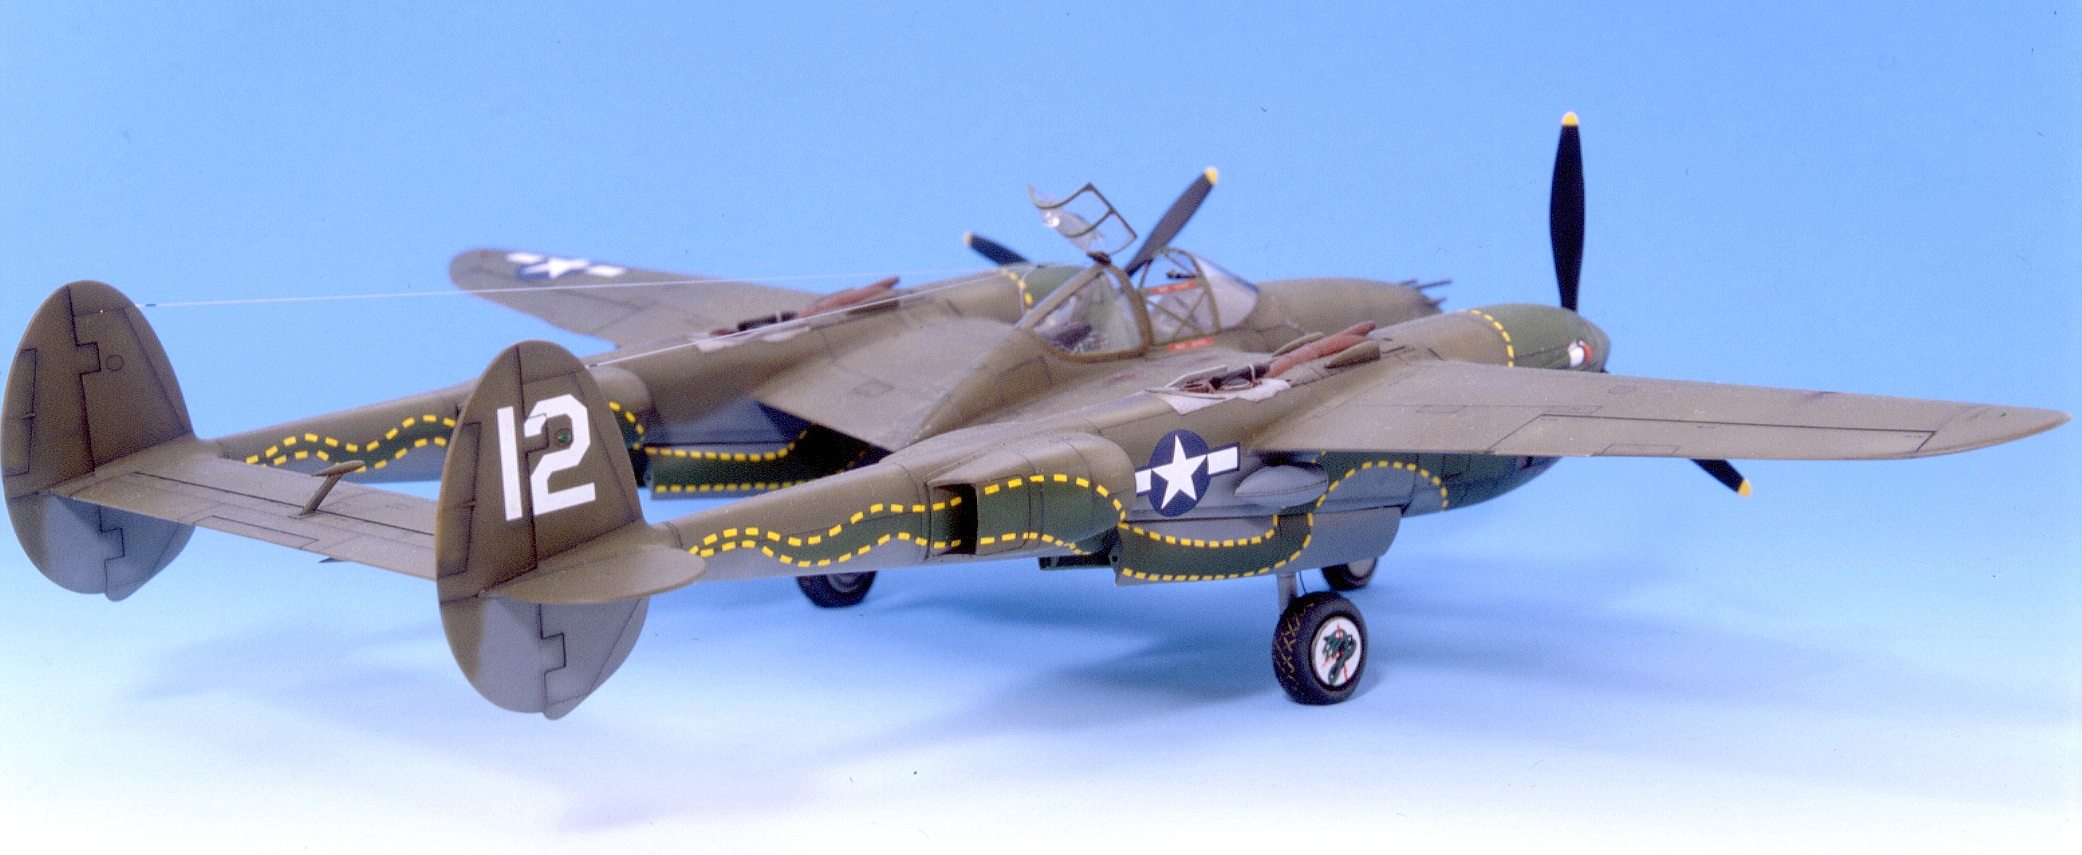
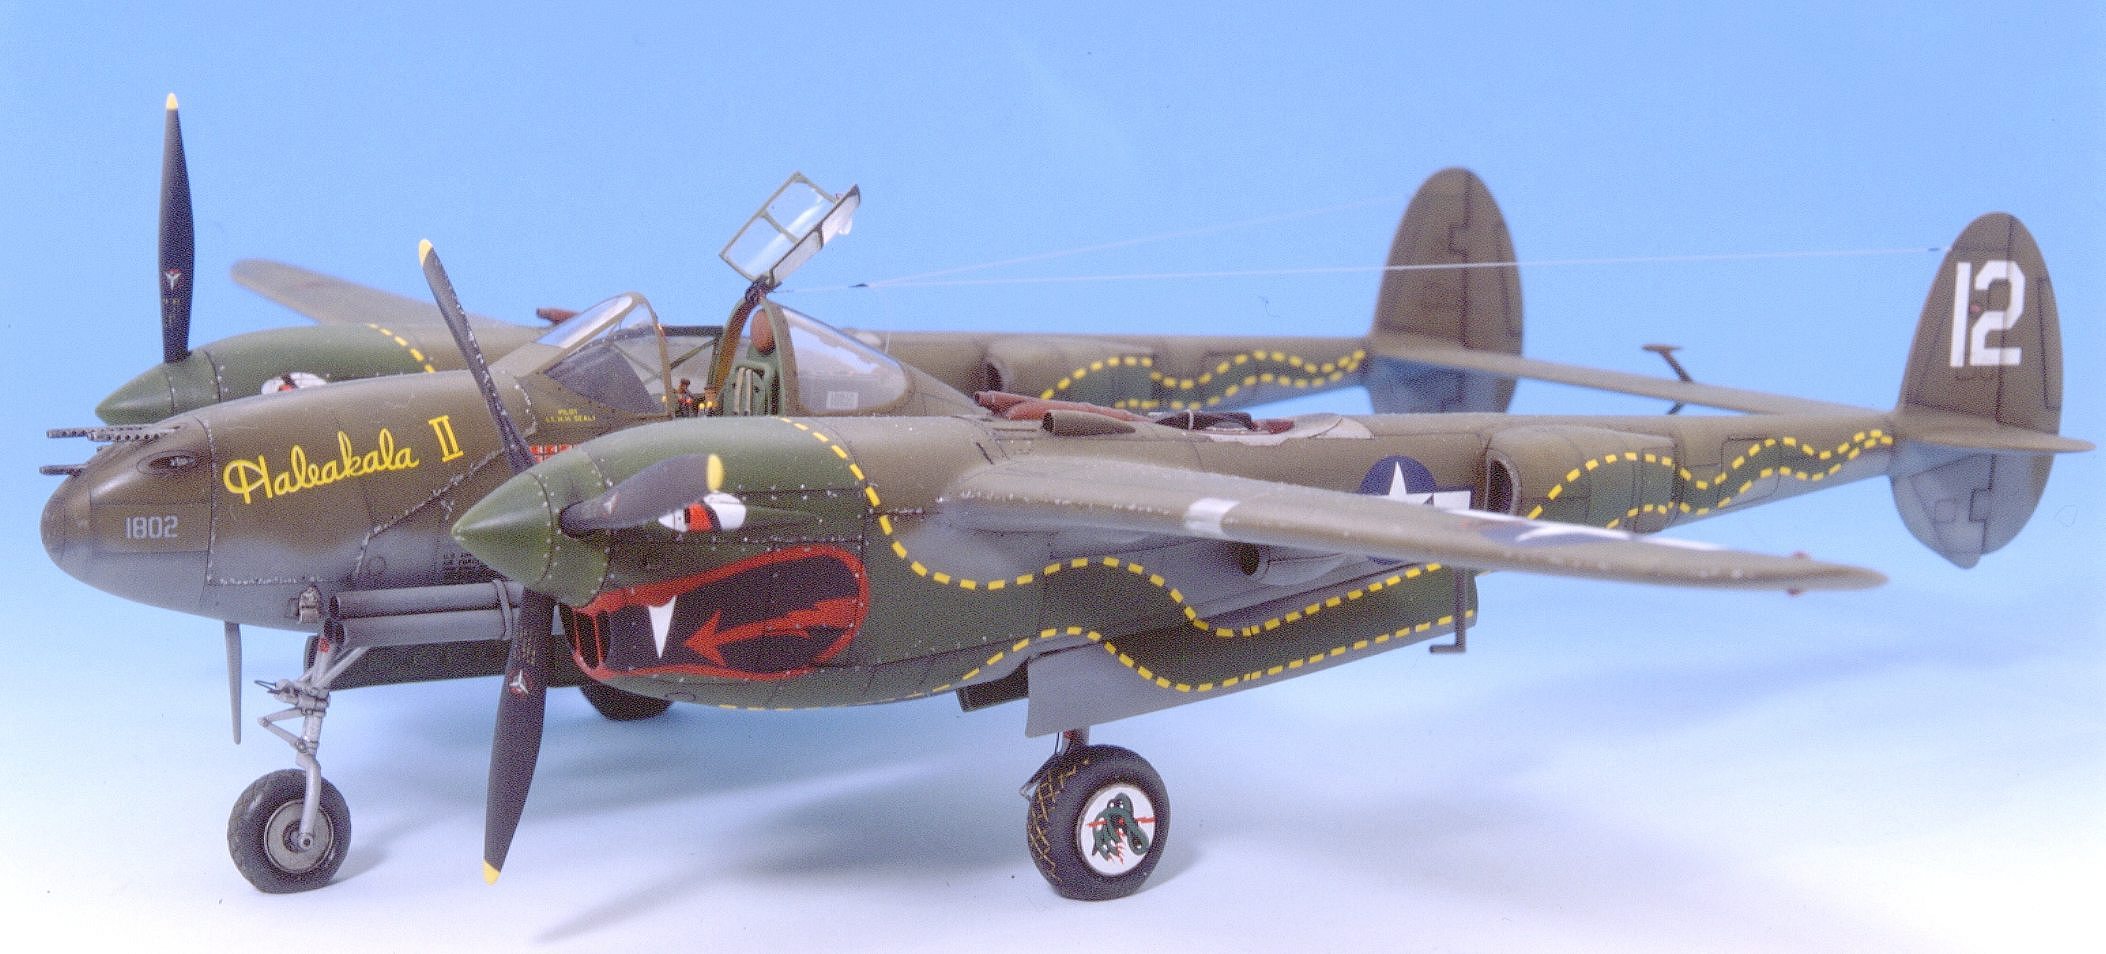
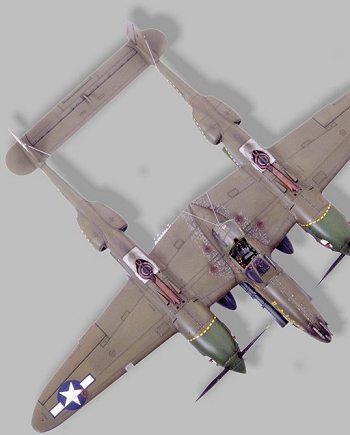
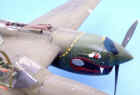
For the decoration, I chose the version that operated in India from Chittagong in 1944. It was a P-38 J-5 belonging to the 459th Fighter Squadron; 80th Fighter Group, piloted by Lieutenant H. H. Sealey and the plane was called Haleakala II (Hawaiian god of fire). The green tail with yellow borders decorated all planes belonging to this group. They were called the twin tail dragoons. Mouth, eyes and tails varied from one plane to the other.
You will notice that the Aeromaster (Ref. 48-080) decal sheet brings two different versions of "mouths".
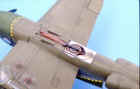
We will first paint the supplementary tanks; undercarriages with their gates, turbocompressors, air intakes, pitot tubes, transparencies and antennas. The rocket launcher pipes come from a Hasegawa Mustang and were slightly modified in their front area.
Then we will proceed to paint all lower surfaces with neutral grey (see color chart) and highlight panel lines with a very thinned down dark grey. Then we will turn the kit and airbrush it with weathered or faded olive drab. We will panel this time with a mix of brown and black very thinned down and then apply some touches on the base color with dark yellow. We will use Tamiya´s adhesive tape.
|
After several days - and once the paint is dry - we will proceed with the painting of the green tails, the mouths and the eyes. The Aeromaster decals will serve to produce self-adhesive sheets which will be cut with a triangular X.act cutter.
|

|
We will first airbrush the tails with XF-5 and then the mouths and eyes with XF-7, XF-1, XF-2. If we are still alive after this task, we can now varnish with Micro Gloss.
On the glossy varnish we will apply the decals. The yellow borders were represented with small decals previously cut out and applied one by one.
Some peelings will be painted with a brush and Humbrol 191.
Now it's time to glue all the parts that we have already painted and airbrush them with Marabu matte varnish.
We uncover the cockpit, transparencies, landing lights and undercarriage well. Then we can add the stretched plastic antennas and the pitot tube and glue all missing transparencies. Now it's time to paint the position lights and finally, check if it is necessary to make some "touches" somewhere.
Color Chart
 For all inner parts, cockpit and undercarriage I always used a brush with the wide variety of Vallejo's acrylic paints. The silver touches were made with Humbrol 56 y 191. For all inner parts, cockpit and undercarriage I always used a brush with the wide variety of Vallejo's acrylic paints. The silver touches were made with Humbrol 56 y 191.
External surfaces: Tamiya´s acrylic paint was applied with an airbrush with the exception of the silver peelings and the black oil washes.
Olive drab "faded" = 60% XF-62 olive drab + 40% XF-60 dark yellow.
Neutral grey = XF-53.
Dragoon = XF-5 matte green, XF-7 red, XF-1 black, XF-2 white.
Paneling: Upper area; XF-10+XF-1 at 50%. Lower area; XF-24 dark grey.
For contrasts on olive drab, I used XF-60, very well thinned down.
Additions.
Eduard photoetched set - ref. 48.104
True Details wheels - ref. 48.007
Aeromaster decals - ref. 48.080.
Verlinden 1/72 transfers - ref. 0172
Bibliography
Lockheed P-38 Lightning. Aeroseries Vol. 19.
Lockheed P-38 Lightning. Model Press.
Lockheed P-38 Lightning. Aces of the Pacific and CBI. Osprey nº14.
P-38 Lightning in action nº25 and nº109. Squadron Signal
Text and kit by Alfonso Martínez Berlana.
Pictures and Bibliography by Aurelio Gimeno Ruiz
|