|
|
||||||||||||||||||||||||||||||||||||
|
Armor |
|
|||||||||||||||||||||||||||||||||||
|
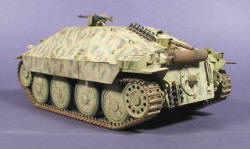
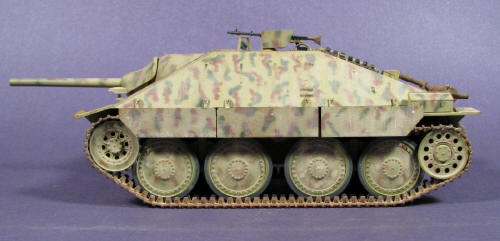
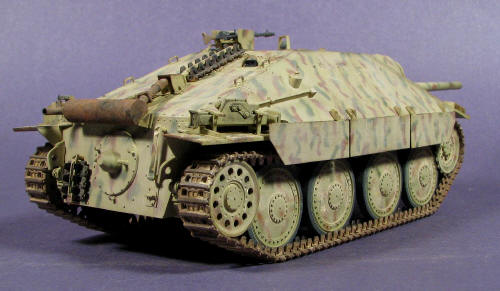
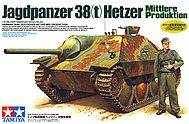
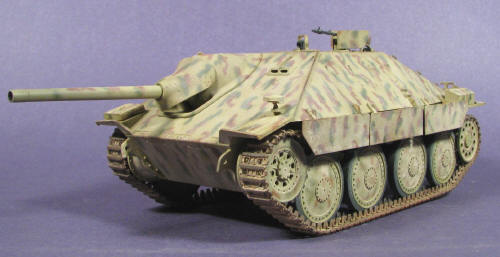
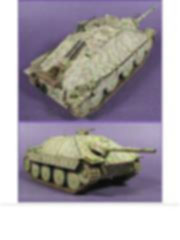
Building the Hetzer Tamiya #35285 1/35 scale |
||||||||||||||||||||||||||||||||||||
|
by Patricio Delfosse © Modeler Site |
||||||||||||||||||||||||||||||||||||
|
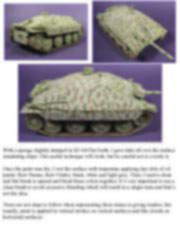
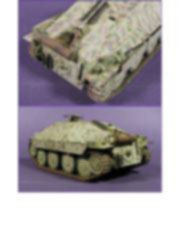
Legal Notice No material from Modeler Site any Web site owned, operated, licensed, or controlled by Damian Covalski may be copied, reproduced, republished, uploaded, posted, transmitted, or distributed in any way, except that you may download one copy of the materials on any single computer for your personal, non-commercial home use only, provided you keep intact all copyright and other proprietary notices. Modification of the materials or use of the materials for any other purpose is a violation of Damian Covalski's copyright and other proprietary rights. Read More here > Legal notice Until this Tamiya release, other companies offered us the Hetzer in 1/35 scale. The oldest mold comes from Italeri and leaves much to be desired Later Dragon flooded the market with different early and late versions among them the flamethrower and command ones which though they were a step ahead of Italeri, they still had details to be corrected. A few years ago, Eduard offered us a kit with complete interiors, but excessively pricey considering its quality. Now, I can say without a doubt that this new Tamiya kit in the ever popular 1/35 scale, is far superior to them all, a fantastic kit which includes many additional parts and markings to make it quite special.
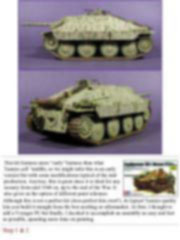
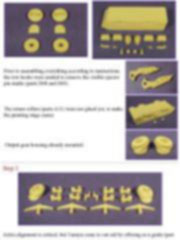
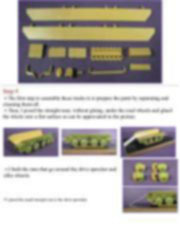
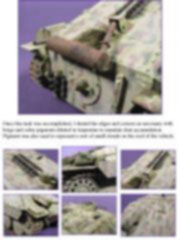
Although this is not a perfect kit (does perfect kits exist?), its typical Tamiya quality lets you build it straight from the box needing no aftermarket. At first, I thought to add a Voyager PE but finally, I decided to accomplish an assembly as easy and fast as possible, spending more time on painting. Step 1 & 2
This article is offered in PDF format to be read or printed using Acrobat reader, contact our webmaster > Here Includes more than 77 pics, here we show only the text pages.
Esta Nota es ofrecida en formato PDF, el cual puede ser leído o impreso usando el Acrobat reader, contacte a nuestro webmaster > Aquí Incluye más de 77 imágenes, aquí solo mostramos las paginas de texto.
Big size photos are only available in our PDF format. Support us ordering our notes in PDF > Here |
||||||||||||||||||||||||||||||||||||