|
|
||||||||||||||||||||||||||||||||
|
Armor |
|
|||||||||||||||||||||||||||||||
|
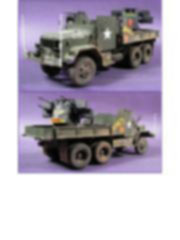
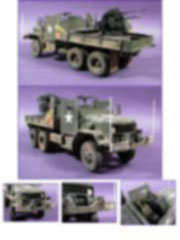
Building the M35A1 Quad GunTruck AFV Club #35034 1/35 scale |
||||||||||||||||||||||||||||||||
|
by Eduardo Andreoli © Modeler Site |
||||||||||||||||||||||||||||||||
|
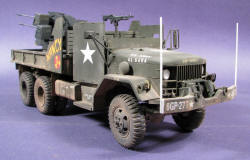
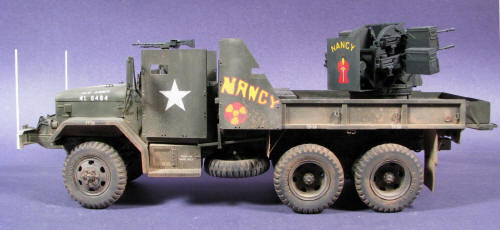
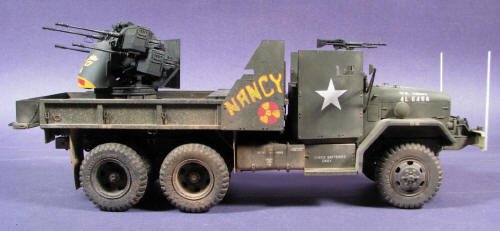
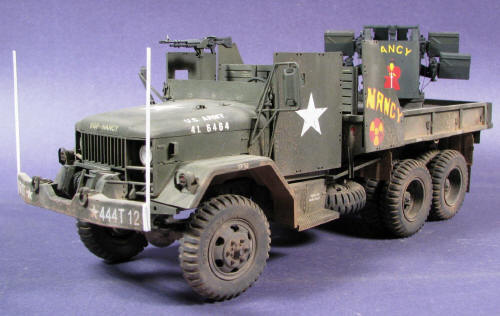
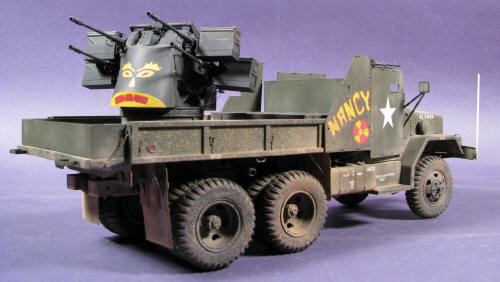
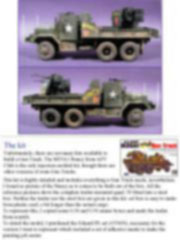
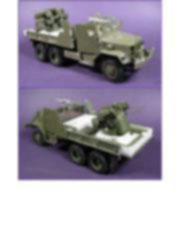
Legal Notice No material from Modeler Site any Web site owned, operated, licensed, or controlled by Damian Covalski may be copied, reproduced, republished, uploaded, posted, transmitted, or distributed in any way, except that you may download one copy of the materials on any single computer for your personal, non-commercial home use only, provided you keep intact all copyright and other proprietary notices. Modification of the materials or use of the materials for any other purpose is a violation of Damian Covalski's copyright and other proprietary rights. Read More here > Legal notice The Vietnam war was a different experience to the kind of combat, US troops were accustomed to. The had never fought against the millions of guerrilla fighters in North Vietnam. After suffering repeated ambushes, they realized they needed a very fast vehicle with high firepower. It was then when the Guntrucks were born, different vehicles armed with different guns (even carrying anti aircraft guns) and armored cabin and cargo box. One of the most well known is the Nancy, a M35A1 armed with the devastating firepower of the M55 anti-aircraft weapon system, with quad 12.7mm machine guns mounted on the rear flat bed.
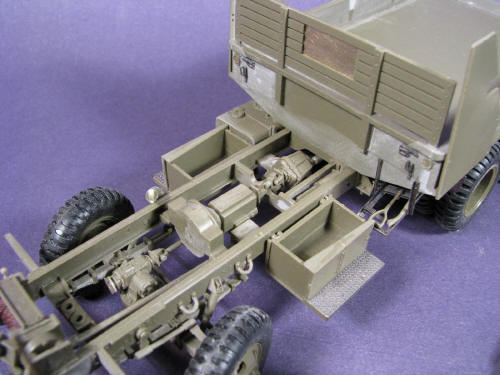
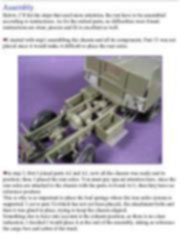
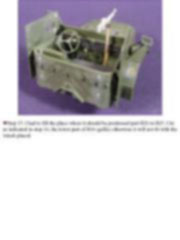
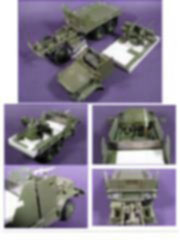
This kit is highly detailed and includes everything a Gun Truck needs, nevertheless, I found no picture of the Nancy as it comes to be built out of the box. All the reference pictures show the complete trailer-mounted quad .50 fitted into a steel box. Neither the trailer nor the steel box are given in this kit. eel box is easy to make from plastic card, a bit longer than the actual cargo. To represent this, I copied some 0.30 and 0.50 ammo boxes and made the trailer from scratch. Assembly Below, I’ll list the steps that need more attention, the rest have to be assembled according to instructions. As for the etched parts, no difficulties were found; instructions are clear, precise and fit is excellent as well.
Esta Nota es ofrecida en formato PDF, el cual puede ser leído o impreso usando el Acrobat reader, contacte a nuestro webmaster > Aquí Incluye más de 58 imágenes, aquí solo mostramos las paginas de texto.
This article is offered in PDF format to be read or printed using Acrobat reader, contact our webmaster > Here Includes more than 58 pics, here we show only the text pages.
Support us ordering our notes in PDF > Here |
||||||||||||||||||||||||||||||||