|
|
|||||||||||||||||||||||||||||||||||||||
|
Cars |
|
||||||||||||||||||||||||||||||||||||||
|
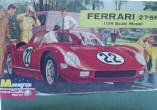
Building the Ferrari 275P from a Monogram slot kit 1/24 scale |
|||||||||||||||||||||||||||||||||||||||
|
by Rene Espinosa © Modeler Site |
|||||||||||||||||||||||||||||||||||||||
|
Legal Notice No material from Modeler Site any Web site owned, operated, licensed, or controlled by Damian Covalski may be copied, reproduced, republished, uploaded, posted, transmitted, or distributed in any way, except that you may download one copy of the materials on any single computer for your personal, non-commercial home use only, provided you keep intact all copyright and other proprietary notices. Modification of the materials or use of the materials for any other purpose is a violation of Damian Covalski's copyright and other proprietary rights. Read More here > Legal notice One of the most rewarding aspects of modeling is the possibility of building our favourite cars, unfortunately not always available in kit form; this presents the extraordinary opportunity to use some existing kits or parts of to modify or build the car of our choice.
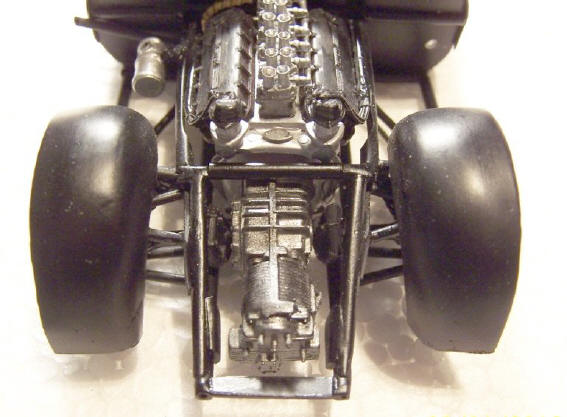
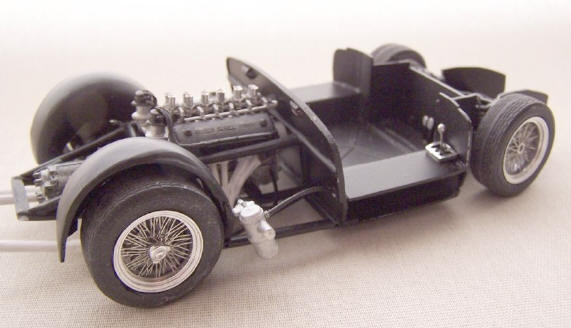
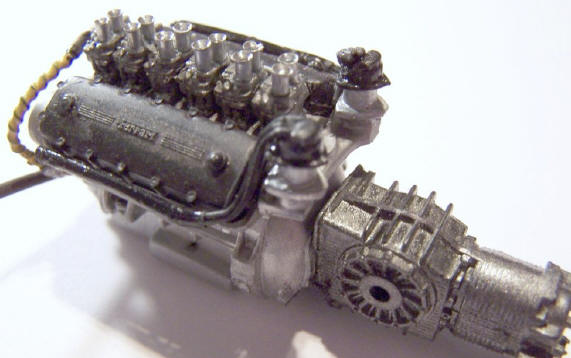
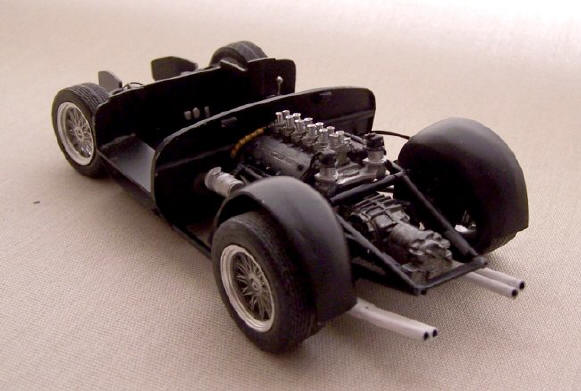
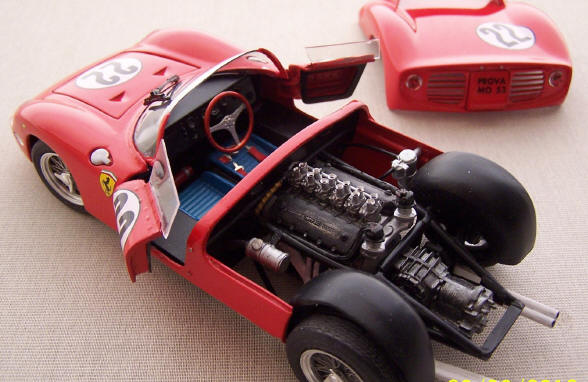
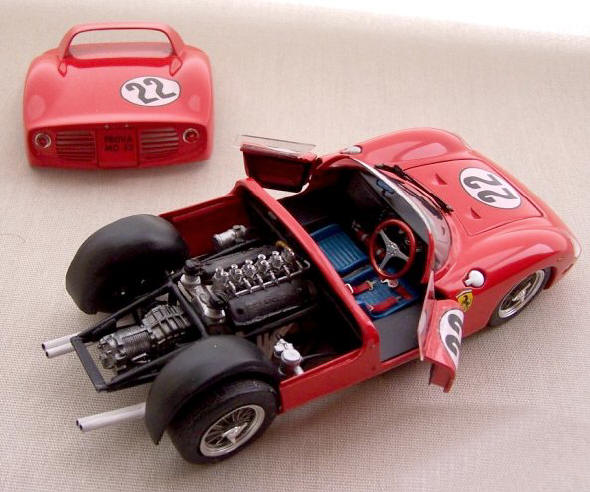
Ferrari Colombo V12 engines are wonderful aesthetic pieces, so with the engine of a Ferrari 250 GTO, of a Revell Kit, I decided to adapt it to the Ferrari 275 P; Although the 275 engine was an evolution of the previous engine, changes were made in the mechanical attributes of the engine (increase of valves, changes in displacement etc.), while externally they are virtually identical. The modification of the model of the 275P involves modifying the engine to add the correct gearbox, the rear axles; reproduce the visible part of the tubular chassis of these cars, the rear fenders and the mechanical detail visible. Armed with styrene plate and tube and some reference photographs I began to reproduce the above-mentioned elements.
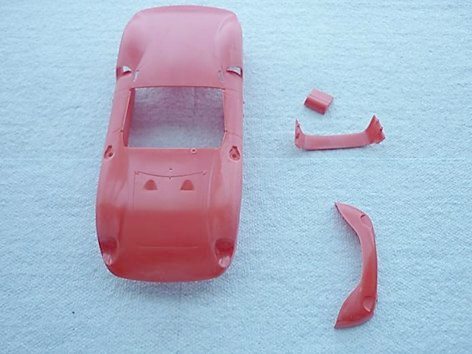
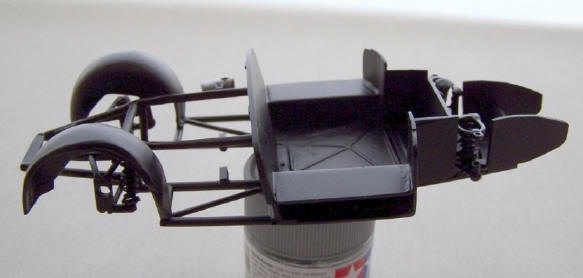
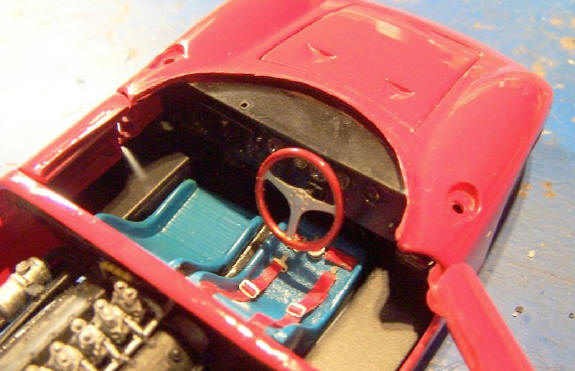
In addition, and given that the kit came with a casting defect I had to build the missing part of the pilot seat, visible repair in the previous picture. For the construction of the suspension I turned to the "box of leftovers" use the "A" arms of another old kit, and scratch built with styrene tube the shock absorbers and the springs with wire.
Thus achieved a chassis quite realistic.
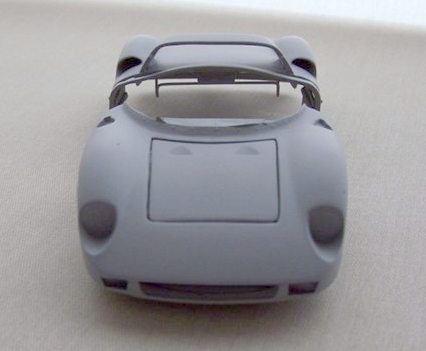
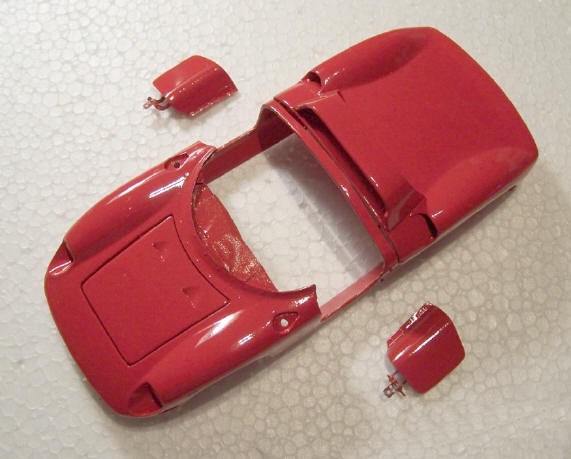
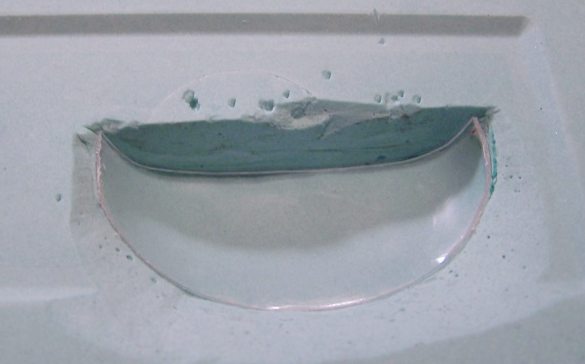
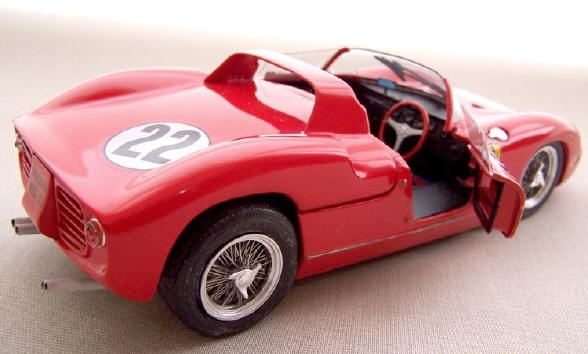
On the other hand, the inclusion of the engine also carries the modification of the body, starting with the opening of the hood; for greater realism I decided to open the doors and the front hood and add a strip of styrene which completes the bodywork. I also added the "lip" of the windshield and doors, detail that omits the kit and reproduced the rivets that held the windshield and side glass, with the use of Cyanoacrylate droplets applied with a sewing needle.
The bodywork with the first coat of paint, that latter will be sanded and polished.
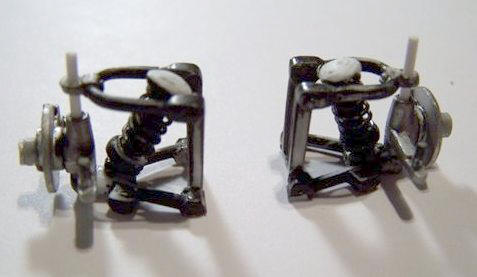
The discs and “A”arms already installed in the chassis.
For the rear suspension I also used “A” arms and discs from “leftovers" box, as well as, rear axles which should be adjusted to fit the chassis.
For this it was necessary to temporarily mount the engine to the chassis to take the necessary measurements for the adaptation. The engine finally installed, it was necessary to cut each axis in three millimetres, and then proceeded to paint them.
The wheels installed temporarily, the shift lever made of a pin, and the selector plate from the Revell kit. One of the visible tanks, scratch built with tube and sheet styrene.
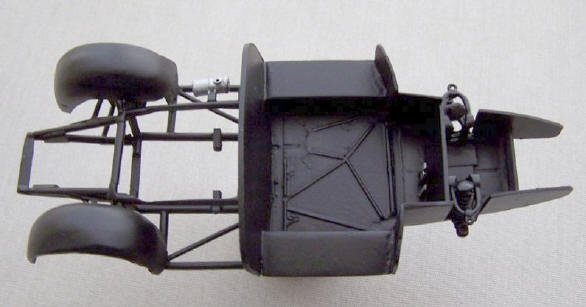
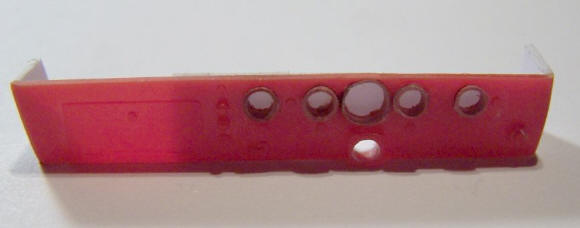
Once completed the modifications to the chassis, I started with the interiors, dashboard panel, as it is to be expected in a competition car is very simple, the kit comes only with instrument decals, so I decided to improve some details. I drilled the instruments and use shrink tube to do the bevels; fitting the decals more deeply gives greater realism to the dashboard. On the sides I added panels of styrene, which are now visible when you open the doors.
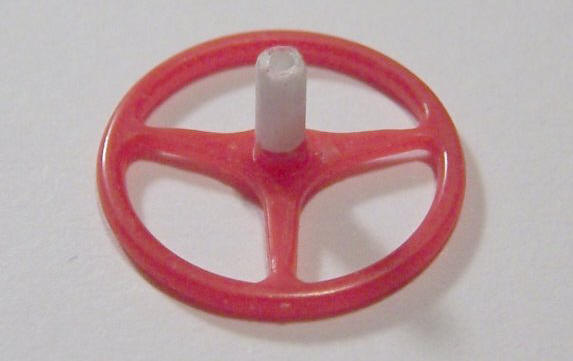
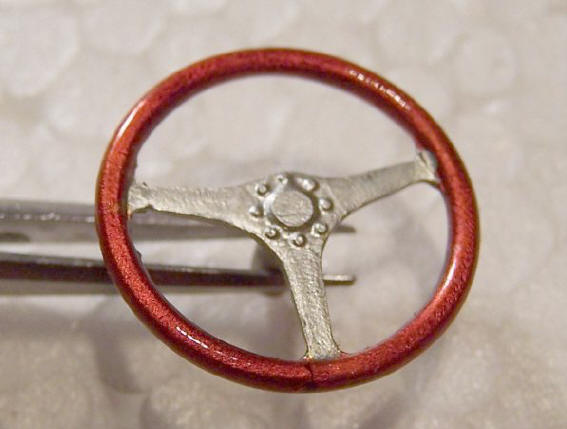
The steering wheel in the original kit comes to close to the dashboard, what is wrong, so I corrected it adding a small piece of styrene tube.
As mentioned, the engine was taken from a Kit thus it was already assembled and wired, for this project I simply cutted the original gearbox and glued in place a new gearbox with transaxles, also taken from the "leftovers box".
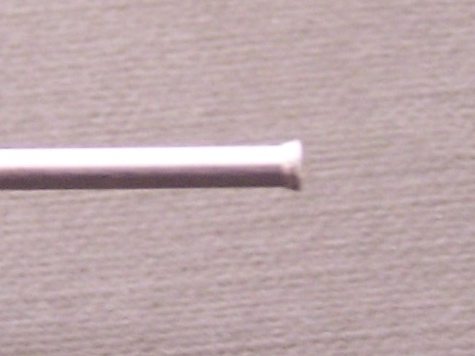
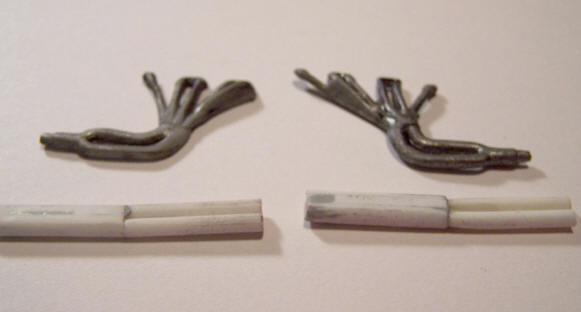
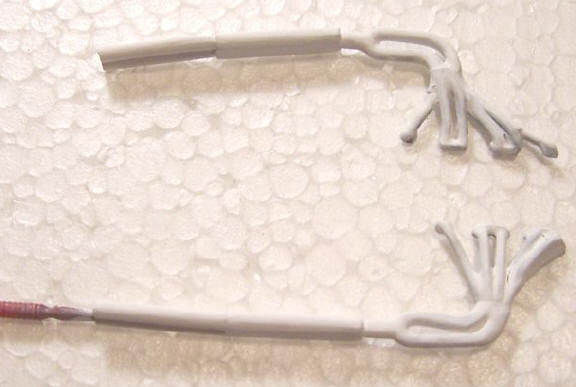
For the headers I used parts of the Revell kit and scratchbuilt silencers and pipes, from styrene tube.
The headers already placed on the rolling chassis.
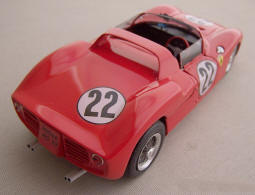
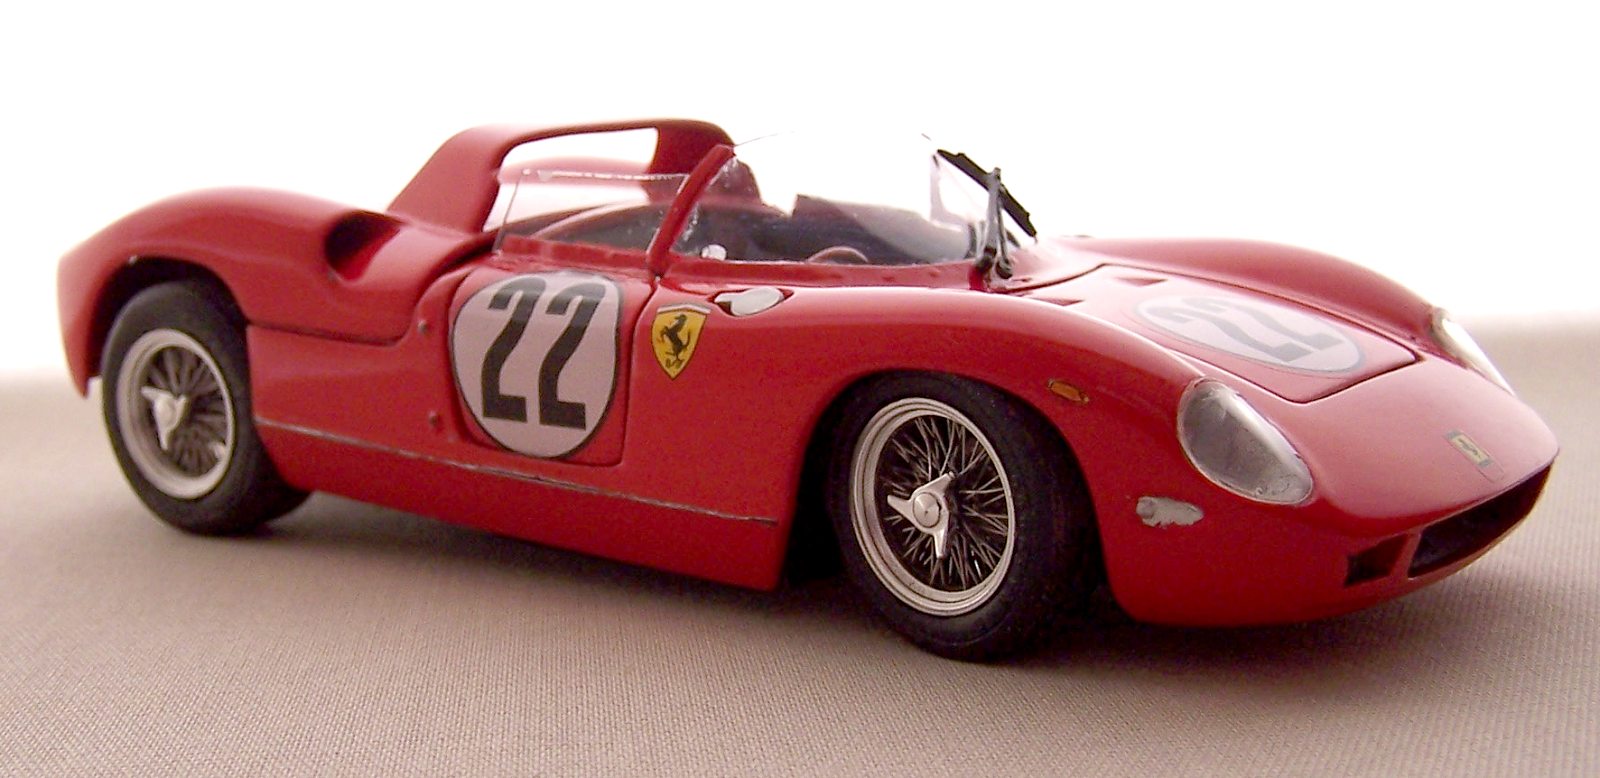
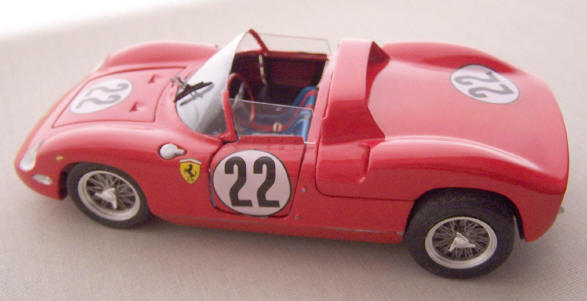
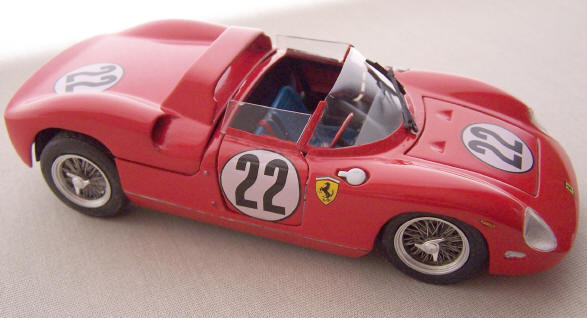
The windshield with its correct size lateral supports in place. That done I started decoration using the kits decals and a windshield wiper made out of two old wipers from other kits. Lastly I waxed the model, this is the end result, hope you like it.
Support us ordering our notes in PDF > Here |
|||||||||||||||||||||||||||||||||||||||