|
|
||||||||||
|
Airplanes |
|
|||||||||
|
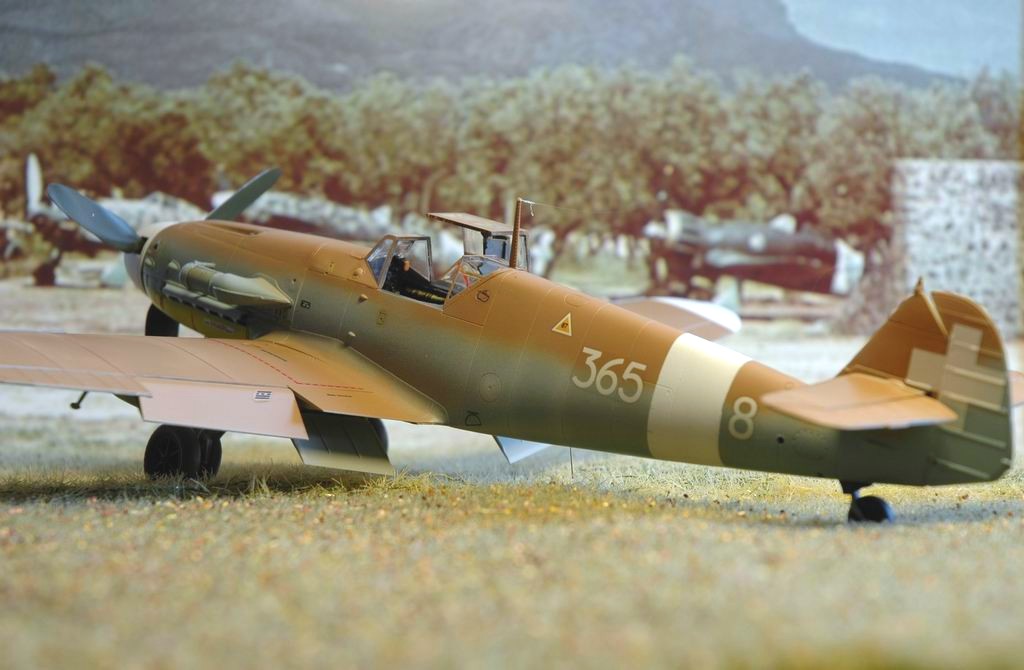
The Messerschmitt Bf 109 G-2 in the “Regia Aeronautica” Hasegawa 1/32 scale |
||||||||||
|
by Luigi Cavazza © 2005 Modeler Site |
||||||||||
|
Legal Notice No material from Modeler Site any Web site owned, operated, licensed, or controlled by Damian Covalski may be copied, reproduced, republished, uploaded, posted, transmitted, or distributed in any way, except that you may download one copy of the materials on any single computer for your personal, non-commercial home use only, provided you keep intact all copyright and other proprietary notices. Modification of the materials or use of the materials for any other purpose is a violation of Damian Covalski's copyright and other proprietary rights. Read More here > Legal notice When I was presented the big Hasegawa kit as a Christmas gift I had to hide a sense of disappointment. I mainly model to 1/72 scale and I prefer modern subjects (US Navy, RAF and AMI). What I could possibly do with a 1/32 scale kit of a WW II fighter? However, in opening the box I was stunned by the quality of the kit. Also, in my memory there were still the voices from friends and reviewers spelling marvels of the kit. So I postponed once more the completion of my F-4 (the production line includes a the moment a total of five F-4!) and went on for a venture in a new domain. And a good choice it was.
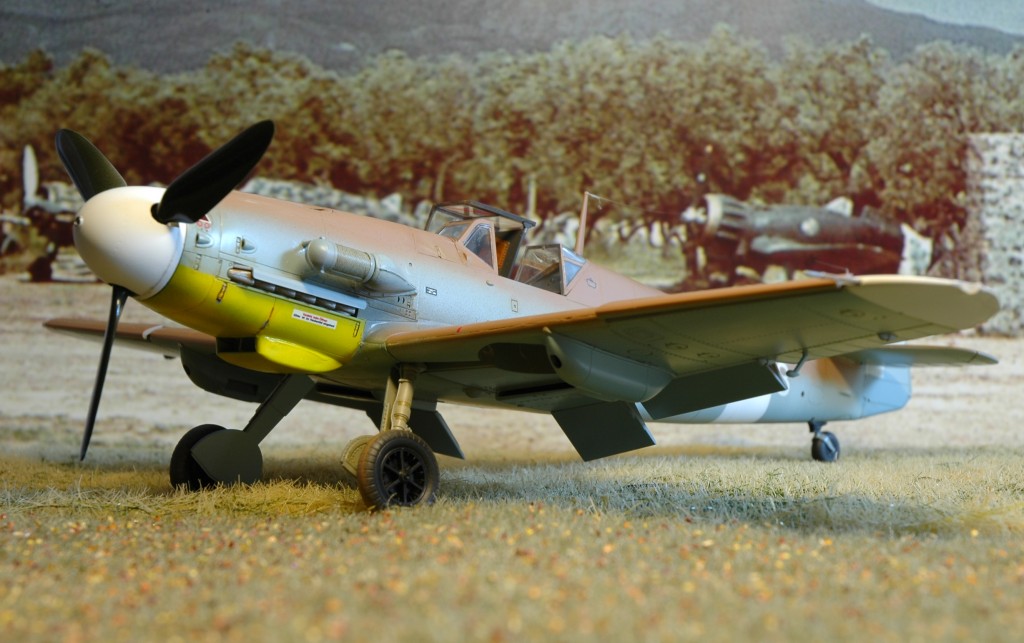
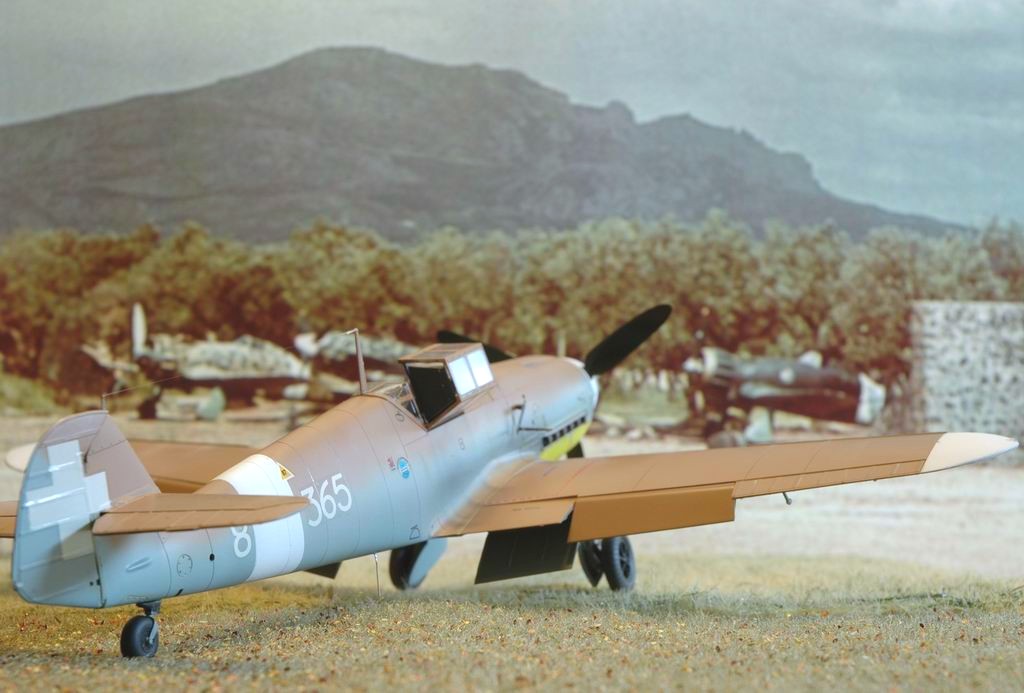
This particular edition focus on the Me 109 of “Regia Aeronautica”, the Italian air force of WWII. The Regia had several “squadriglie” (squadron) equipped with the 109 from early months of 43. The first samples were F model, followed by G-2, G-4 and G-6. The latter version was the most numerous one with more than hundred machines delivered to the Regia. The G-6 was to be the backbone of 150 gruppo autonomo (the independent unit that was equipped with 109). Hasegawa however went for a more refined choice and proposed two samples of the less common G-4 mark, both from 365 squadriglia of 150 gruppo. The use of 109 in the Regia and later in the Northern Italy Repubblica Sociale is now fairly well documented, and in particular the first machines of the Regia. From [1] I learned that the sample in desert camouflage is actually a G-2. This particular plane is pictured in one fotocolor shot taken at Sciacca airport (Sicily) in spring 1943. Though small, the fotocolor gives away a lot of details of the actual machine and made it irresistible to me the choice of the G-2 version. Editor note: There are comments at the bottom referred to [1], [2]...etc
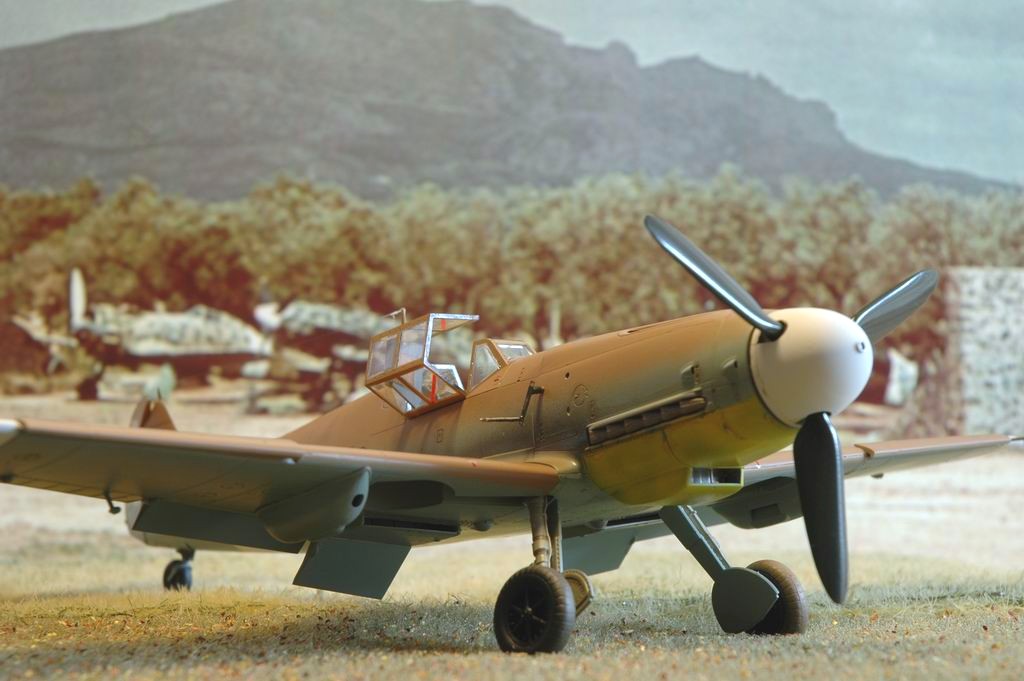
I put the kit together generally as per instructions, starting from the cockpit. This one is very good indeed and only minor items need to be added. Surprisingly, the kit does not offer any form of safety belts, which on this scale are very visible. This is perhaps because of the pilot included in the kit that one is supposed to put in the seat. I had to purchase the set offered by Eduard, but I got it when the kit was already in an advanced state. Please pay attention to a number of details peculiar to G-2 or that are noticeable on the photo:
I completed the model with very few extra details, for the kit offers already all you need:
In terms of colours, the subject was in standard desert camouflage RML79 sandgelb over RML78 light blue (the instructions report the lower surfaces colour as RML76: all it could be but the [1] document and the hue visible on the fotocolor let me think that 78 is more likely to be appropriate). Again from the photo, it is evident the German marking were painted out, possibly with Italian paints (that were fairly similar, albeit not an exact match). I duly followed the same course, though to my disappointment, the final result is barely discernible. So modellers are advised to exaggerate the difference in hue to make it more visible. A layer of RML02 was sprayed on the whole model as a primer. The interior is RLM66 that I applied also to the internal side of the cockpit frames. For all painting I used airbrushed Gunze acrylics.
Contrary to what stated in the instructions, the “fasci” insignia were not painted under the wings and is my assumption that were missing also on the upper surface. This was quite a common occurrence in other types obtained from the Germans, in example the Stuka. This aeroplane must have been re painted or re touched a number of times, particularly on the fuselage. Hence, I applied only a selection of the available stencils. I also added the thin red stripe to both sides of the cockpit hood. Another period photocolor shows them clearly on another 109 in desert camouflage at Sciacca, and it is likely that were there also on our G-2. I retouched the lower surfaces with a burnt sienna earth oil colour, suitably diluted with turpentine and finally I completed the weathering with a crayon of light sand hue, passed over the upper surfaces. Conclusions I thoroughly enjoyed modelling this kit and I eagerly went on photographing it. I thought that some period flavour could be conveyed if a suitable background was available: what best of a picture with Macchi fighters among the olive trees of Sciacca airport? I photocopied the image (with a suitable enlargement), stuck it on the wall and braced my new Nikon D70: and there you are….. Bibliography [1] Ali straniere in Italia-Bf109-La bancarella aeronautica [2] Air Kit News, N.16, (Bf 109 G-2 photoscope) [3] Bf 109 In action (part 2) no 57 [4] Replic N126, Bf 109 G-6 [5] Notiziario di plastimodellismo CMPR 3/98 [6] AA.VV. Nei cieli di Guerra-la Regia Aeronautica a colori 1940-45 - Giorgio Apostolo editore Support us ordering our notes in PDF > Here Apóyenos ordenando nuestras notas en PDF > Aquí |
||||||||||