|
Legal Notice
No material from Modeler Site any Web site owned, operated, licensed, or controlled by Mario Covalski & Associated may be copied, reproduced, republished, uploaded, posted, transmitted, or distributed in any way, except that you may download one copy of the materials on any single computer for your personal, non-commercial home use only, provided you keep intact all copyright and other proprietary notices. Modification of the materials or use of the materials for any other purpose is a violation of Mario Covalski & Associated's copyright and other proprietary rights.
Read More here > Legal notice
The Eva-01 is perhaps the main protagonist of the EVANGELION history, since it can be seen almost in all its chapters, and also in the motion picture "The end of Evangelion".
The 01 as well as the 00 are test types, it enters in action during the first chapters with the appearance of the third ANGEL called SACHIEL.
|
The 01 is controlled by Shinji Ikari, a pilot of 14 years old who has no experience in piloting these kind of machine, however on his first attempt to control this Eva, he achieves a very high synchronization compared with the obtained in any of the previous tests at the laboratory. In spite that Shinji has no experience, he is appointed to fight the ANGEL, since the army had already done their best efforts trying to fight him.
|
|
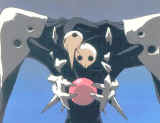
After the EVA receives a terrible wallop on the part of the ANGEL (Sachiel), he stays completely stiff or paralyzed due to the lack of the supply of electric power, and when it seems that the EVA is going to be destroyed by the ANGEL, he comes to life and rushing over the Angel with actual violence, tears his body as if it were paper.
The kit
|
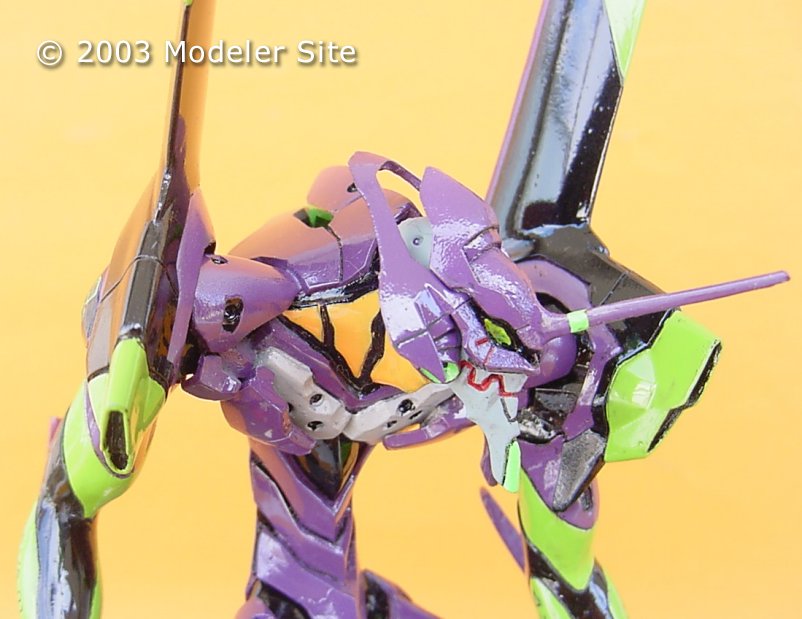
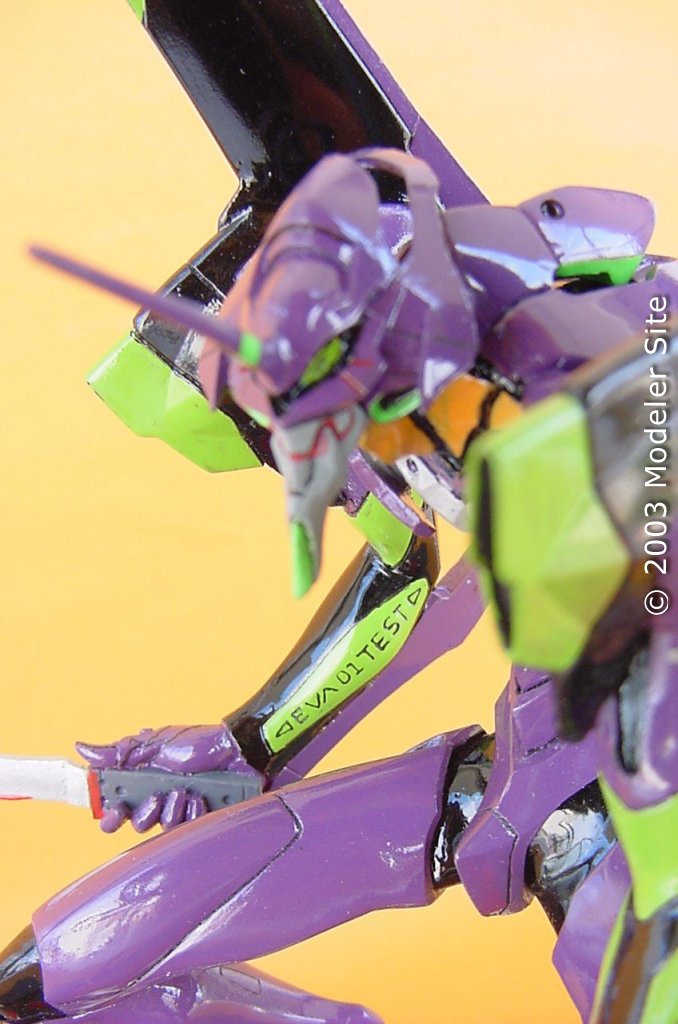
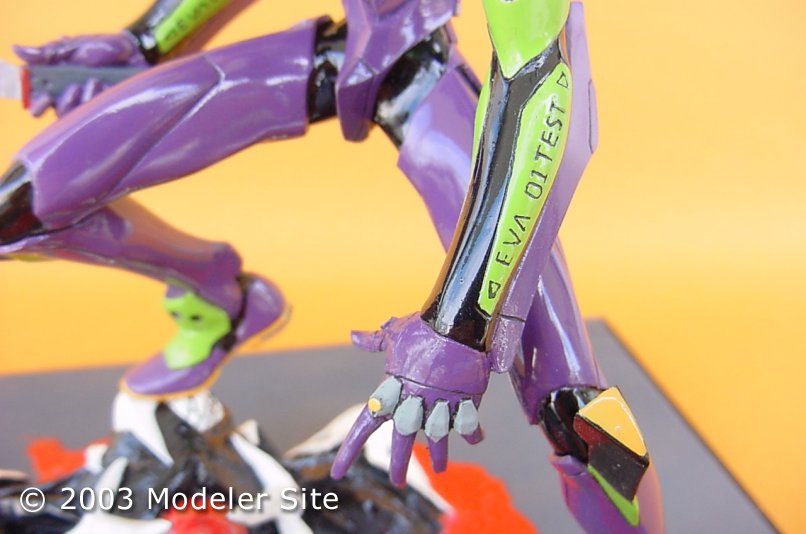
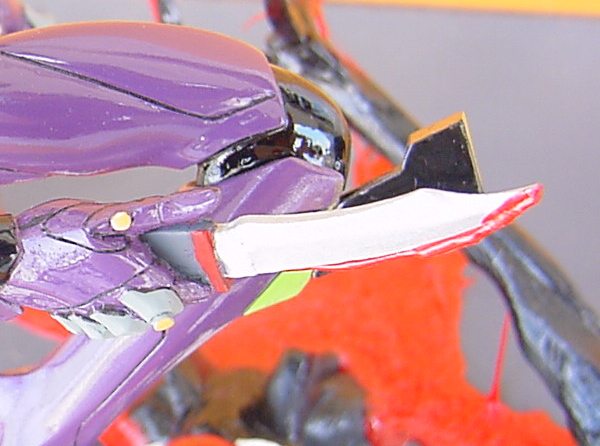
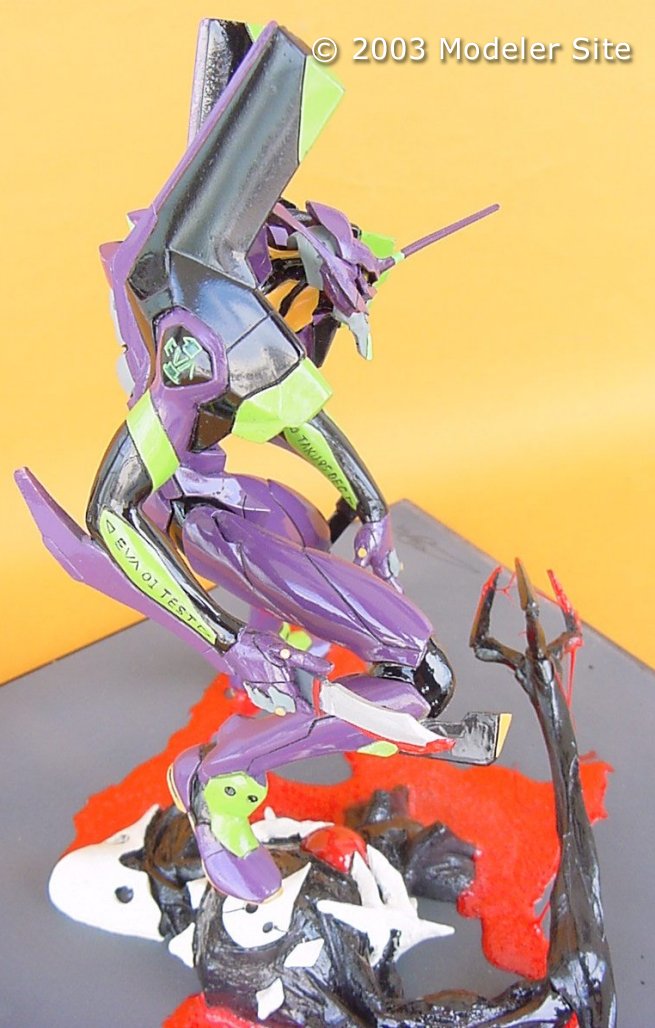
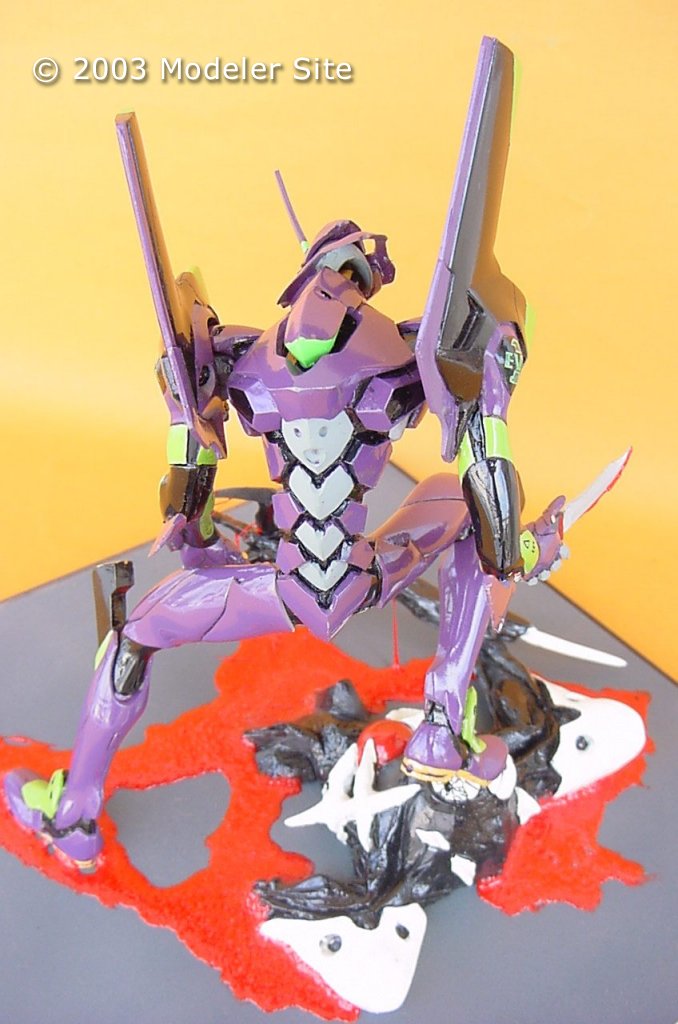
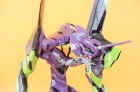
This is a resin kit from Kaiyodo. Besides of its incredible quality, full of details, its figure has been exquisitely modelled by the best sculptors who work for Kaiyodo. This figure captures the EVA-01 essence, with a diabolical appearance and a pose very well achieved in which the EVA-01 shows its prey, and also shows in a challenging way the weapon with which it defeated and destroyed its enemy.
|
|
This scene represents the first combat of the EVA-01 in the first chapter of the series. The construction of this kit is quite easy, since the parts fit perfectly and the resin neither has too much or very big bubbles nor flashes, what simplifies the previous work before painting.
Building
|
I recommend you to read the article about the EVA-02 which was previously published in Modeler Site (> Here) as I'm going to follow, in this case, the same steps of construction and painting, except for some extra details, in regard to the finishing and to the presentation of this marvelous kit.
|
|
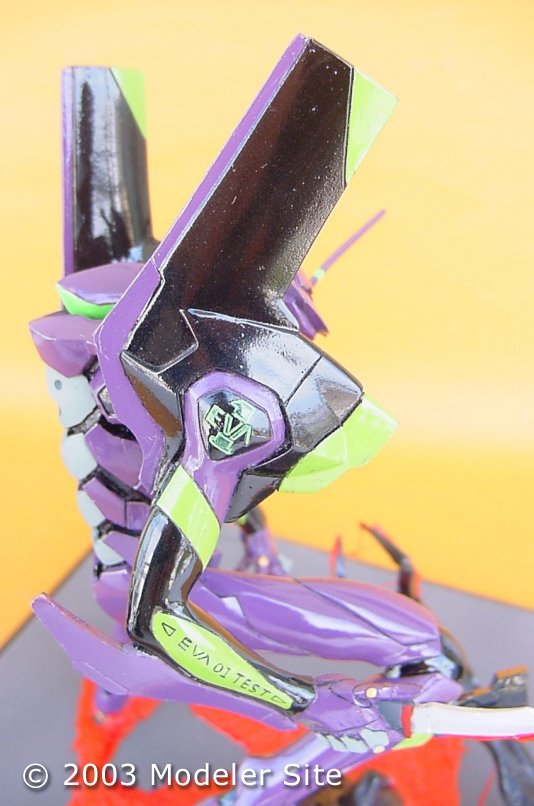
Speaking about the resin preparation, construction and priming, this kit is identical with the EVA-02, the main difference is in the colors, that are specially the purple, black, green and grey; but the way of masking and painting is the same.
|
Here I will list the main colors that were used to paint the EVA-01
|
|
Humbrol purple (90%+ white)
|
|
Humbrol gloss black
|
|
Tamiya acrylic gloss green
|
|
Tamiya acrylic J.N, gray
|
To paint the third Angel (Sachiel), It's necessary to use black and gloss white, and for the sphere on the torso a dark red is right. I mixed Tamiya acrylic red X-7 with a bit of brown to darken it.
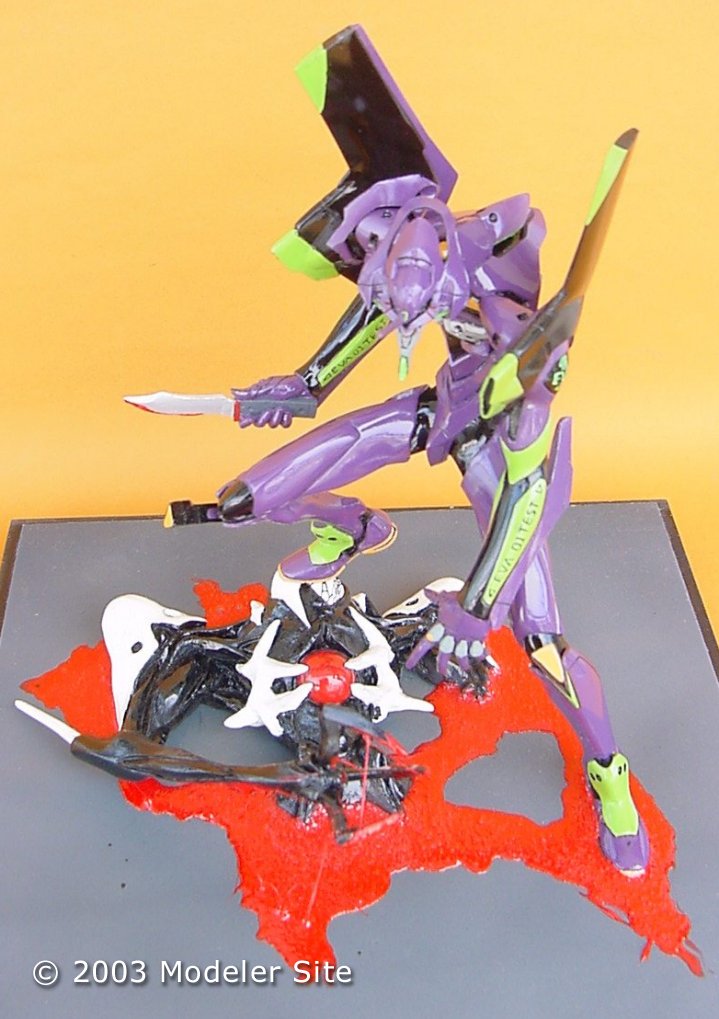
Once the EVA and the Angel are built and painted, they have to be put together as they're provided separately, and is here, where we've to take the decision about the way we want to present the kit.
We could just pose the Angel and the EVA on a wooden base, or give them a showy atmosphere representing a scene of any of the chapters seen on T.V. I chose the second option, but I didn't want anything very complicated.
Building an easy diorama
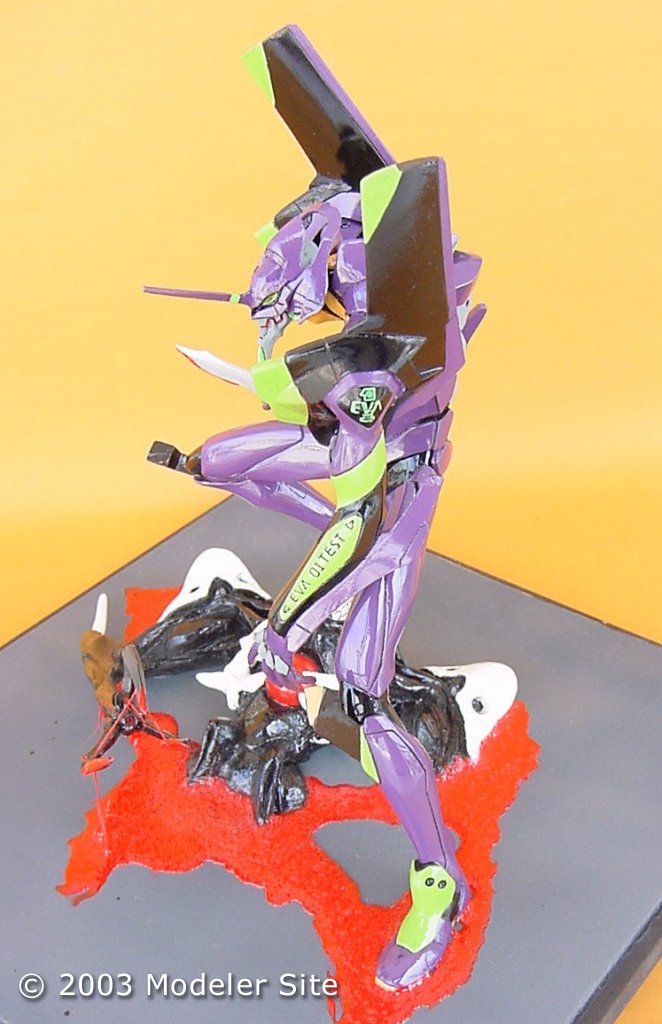
Firstly, I had to get a wooden base in order to pose first, the Angel, and then over him, the EVA.
The base is 20x20 cm. After it was very well sanded and given a coat of shellac to be sealed, I applied another coat of acrylic white, which I let drying very well to be able to apply then, a good layer of acrylic grey.
The grey is similar to the color of the asphalt of the Evangelion series, since the EVA-01 defeats and kills the Angel in the city, and is knocked down on the asphalt.
Once the base was painted grey, you've to pose the Angel and then the EVA to see the definitive position in which they're going to be glued.
|
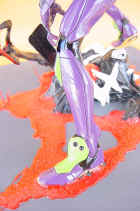
Before gluing the figures definitively, it's convenient to use a piece of wire to hold them, not only in the left foot of the EVA, but in the Angel base, and matched them against the base. Both of them will stay firmly attached to the wood, then a good amount of epoxy to the Angel´s bottom, and a bit of glue to the EVA´s foot, have to be added to achieve the final work.
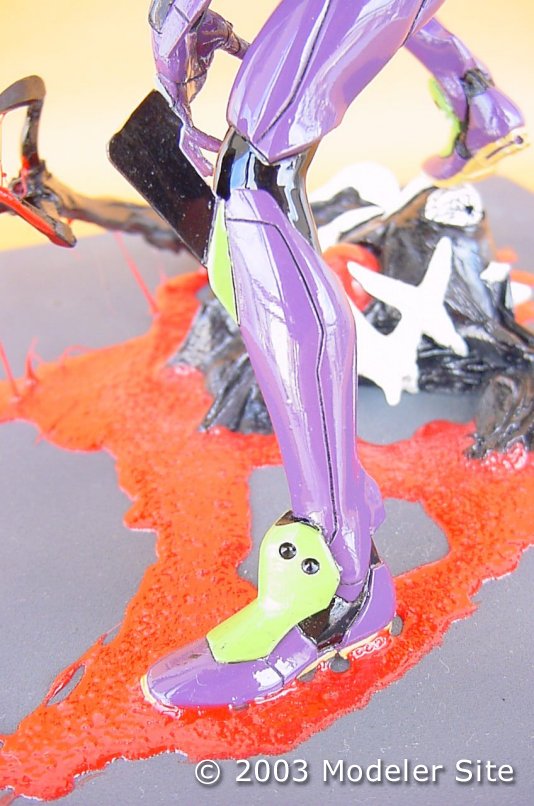
Having this step concluded, I realized it could be more attractive to add something more, the Angel´s blood, spread all over the asphalt.
|
|
A very thin coat of paint to simulate the blood, would not give to the whole a realistic look, so we've to use a heavy material, which can be colored in order to achieve that appearance.
Different materials can be used, to represent blood, I chose a simple and cheap one, a cellulosic glue from UHU, it's very clear and can be colored with Tamiya acrylics without losing its adhesive characteristics.
This glue has a sticky consistence but fluid enough to work with it properly.
The best way to spread this "blood" is with the help of a very big syringe (as used for blood withdrawal), which will be filled with UHU, and with the red color that must be added immediately.
|
Before filling the syringe with UHU, I mixed 8 drops of Tamiya acrylic red X-7, and a BIT (less than a drop) of green. This glue becomes hard almost instantly, so it's necessary to have this mix ready to be used.
To mix the glue and the paint, we can use a piece of wire, a toothpick or any other tool that works, from the back of the syringe.
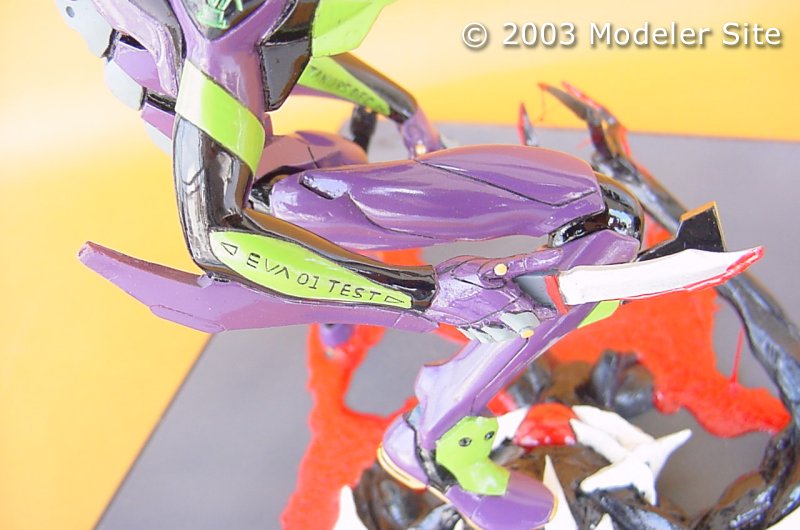
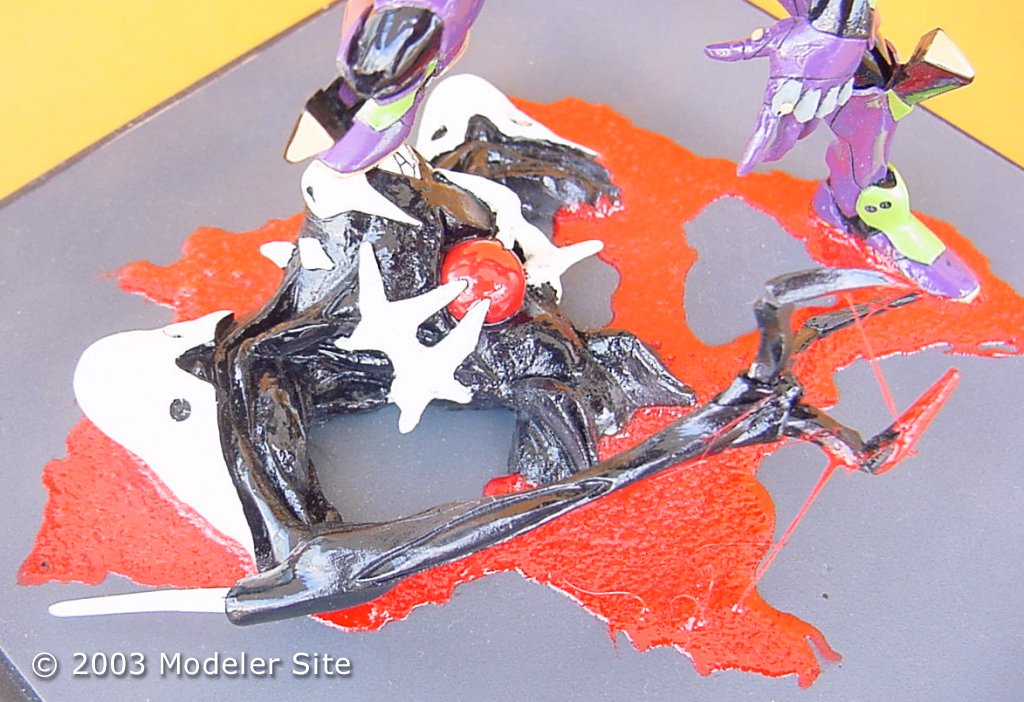
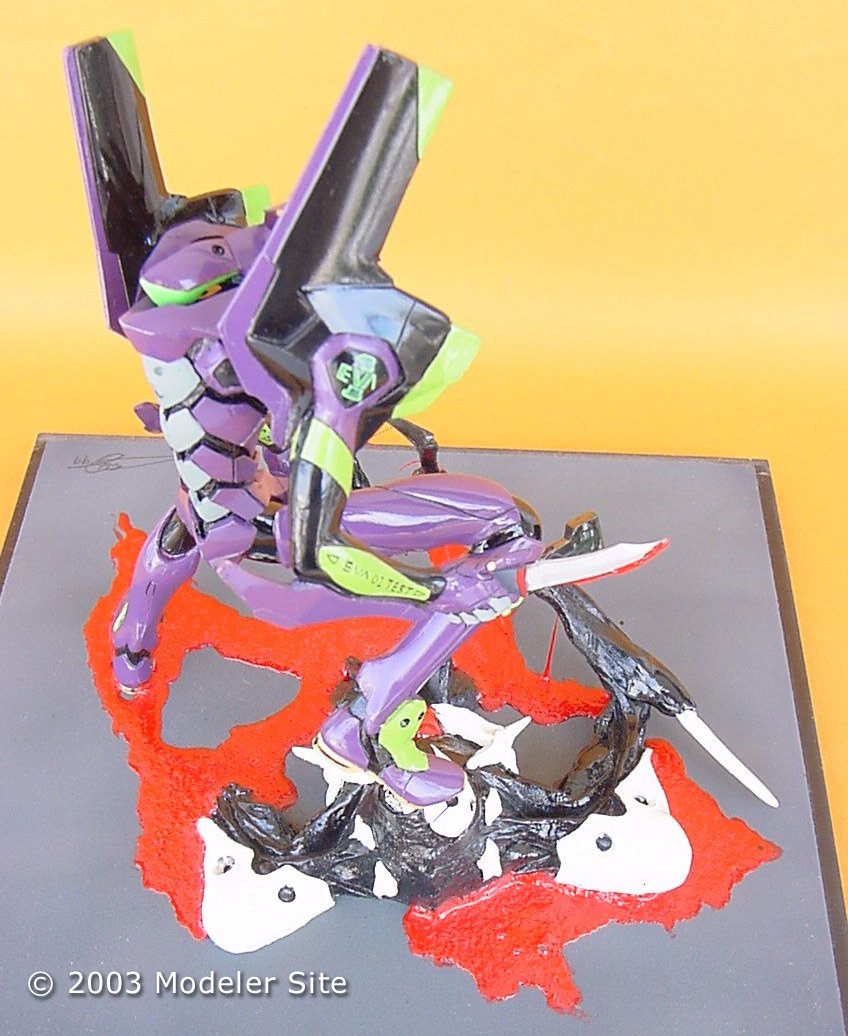
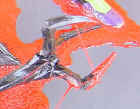
At once, this artificial blood has to be applied in the way you like and think it will seem more real. This glue can be well handled, so I could also simulate some "threads" dripping from the Angel´s claws.
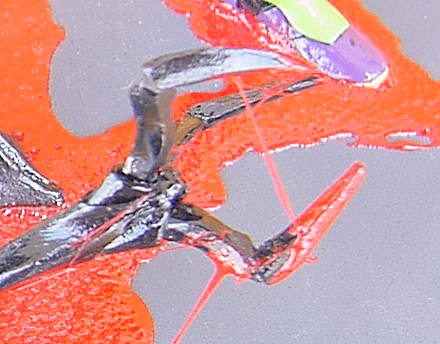
As last detail, I finished adding some of this" blood", to the cutting edge of the EVA-01, and........the finished diorama is topped off, we've already our figures in action.
|
|
|

|
Conclusion
More extra details could have been added such as tiny trees or fallen light posts, or destroyed cars covered with rubbish....etc
This kit doesn't have a well defined scale, but in case of building a more complete diorama, with the details I mentioned above, have in mind that an EVA measures 40 meters high.
Well, this is the result I got with this great kit and I hope the techniques here shown, can be also useful for other kits, specially about the artificial blood that is a very good technique for those who build medieval figures or to represent a bloody scene as this of the Evangelion.
|