|
|
|||||||||||||||||||
|
Armor/Techniques |
|
||||||||||||||||||
|
Weathering |
|||||||||||||||||||
|
by Hugo Huertas |
|||||||||||||||||||
|
Well, after all our effort and patience, we've finished building and painting our model, according to the version we've chosen. We should say that depending on the experience and ability of each modeler, the finished product will show different grades of detailing and/or modifications to the original kit, but I'm sure that all of us will surely be satisfied with the final results. We now have reached the stage in which our job could be enhanced and our effort rewarded by success, or we can ruin all the careful work that we have put on the model. As many of you may have already deduced, I am talking about the "weathering" process
The "weathering" I know that this is not a new topic in modelling, it is easy to find a certain number of references about the most common and well known techniques. In fact, you can read about that on the Web, as well as in printed publications, it's one of the most widely used techniques modelers worldwide. In spite of this, it is also one of the most dynamic, rich and creative techniques in our hobby. It has been changing during the last years, from washes and drybrushing to extremes of superdetailing, although the current tendencies is to almost completely avoid them.
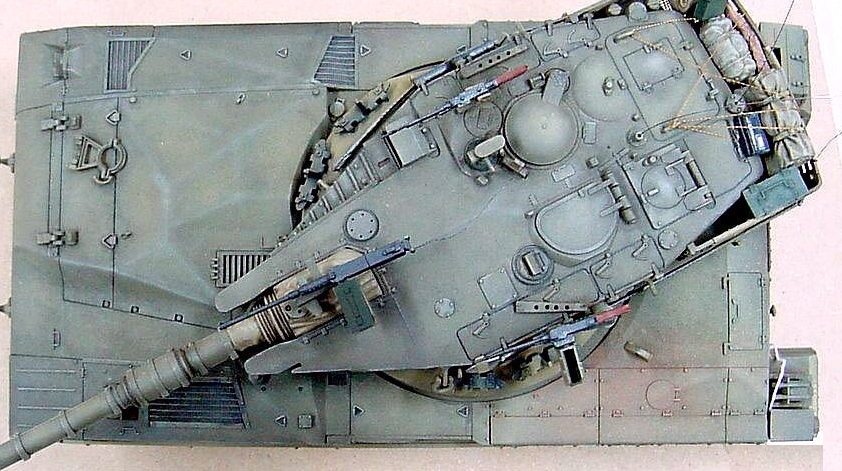
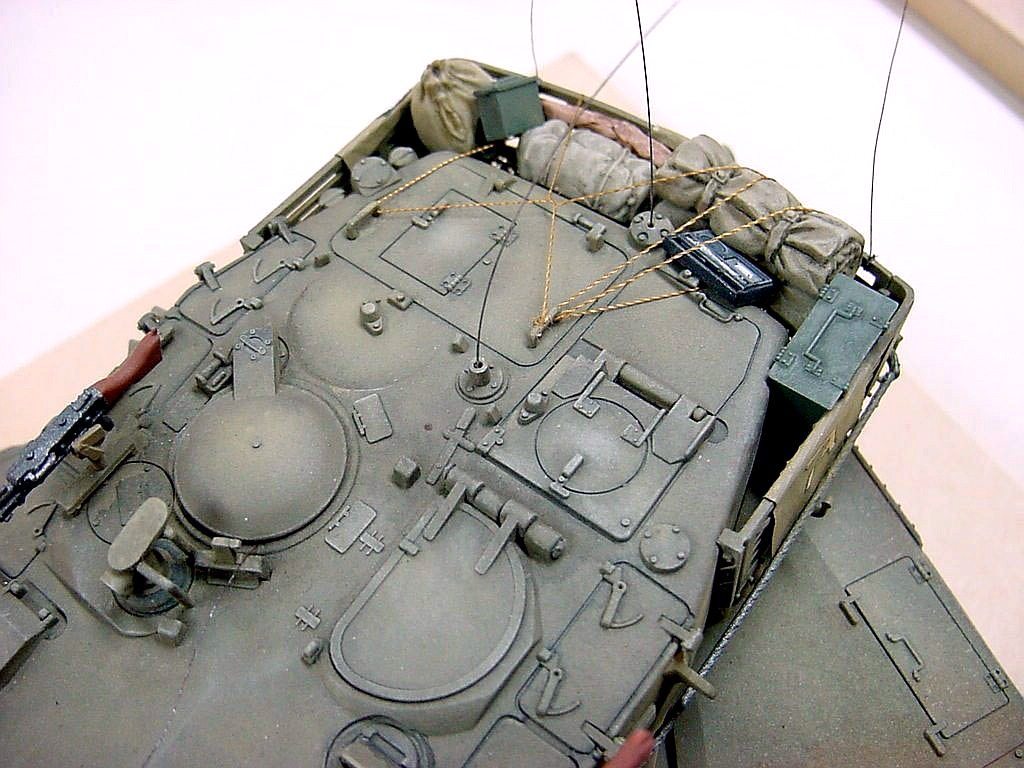
After finishing painting the vehicle, we can choose one or more of the following techniques: Washes The main purpose of washes is to emphasize the details enhancing the "shadow" effect in engraved panels, nuts, bolts, hatches and so on. To achieve this, we have to gently "wash" the model with a mixture of dark colored paint (usually chocolate, black or a combination of both) and thinner. The paint thinner ratio would change depending on the modeler's choice, but an adequate ratio to start with, would be 70 or 80% of turpentine or thinner and 30 or 20% of paint. This will give a mixture with a dirty-thinner appearance. We'll then start to apply this mixture with a #6 or #8 brush, preferable round and soft, covering the whole model but aiming our main effort to the above mentioned areas. The idea is accumulate this mixture around these areas, giving a darker tone to the recessed parts, thus enhancing the shadow appearance.
Drybrushing This technique complements the previous ones, it highlights the raised details of the model, to increase the three-dimensional sensation. As its name clearly states, it is done by the use of a flat, very soft bristled brush; taking some base paint slightly lighter in color, removing almost all paint with a dry clean cloth, and leaving hardly a bit of paint on the bristles. Then we proceed to gently "brush" the raised details, enhancing this way the sensation of light reflecting on them.
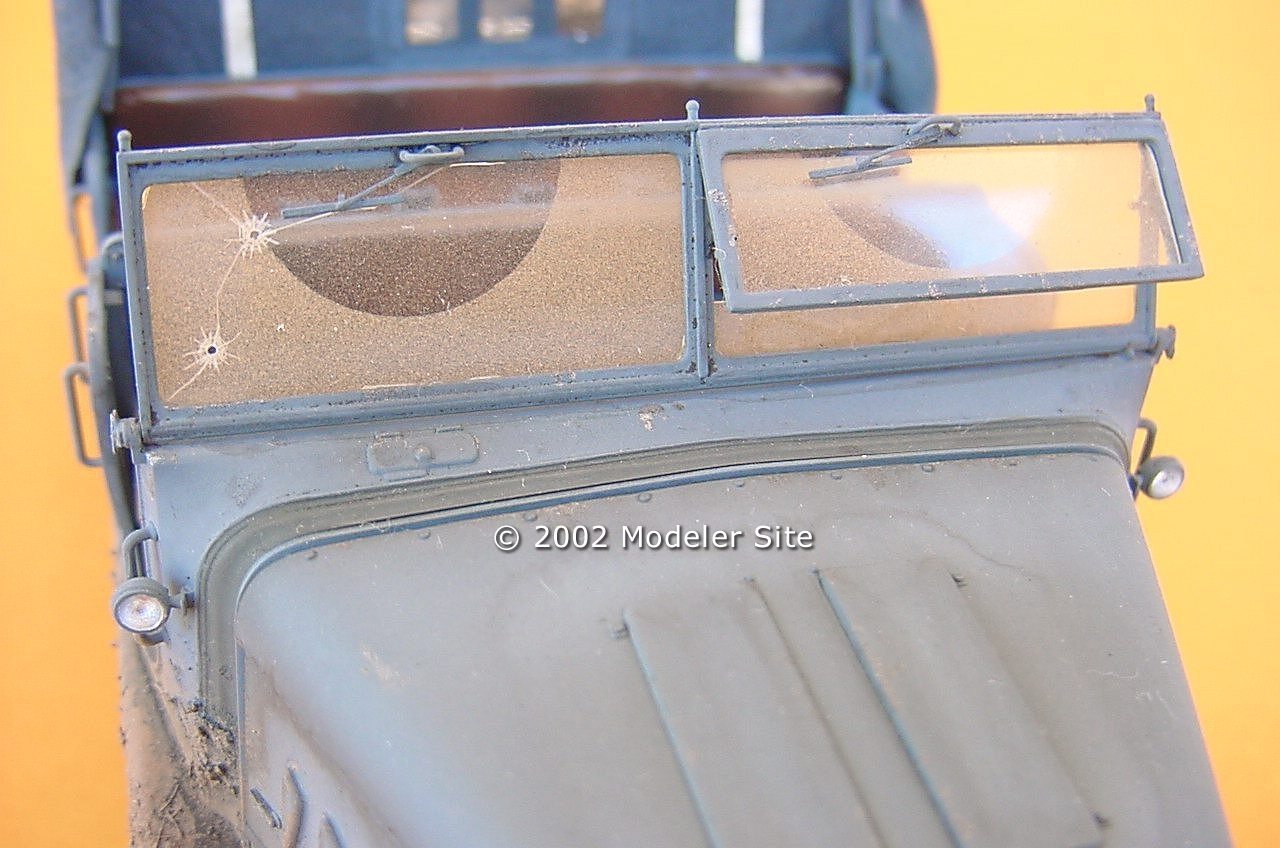
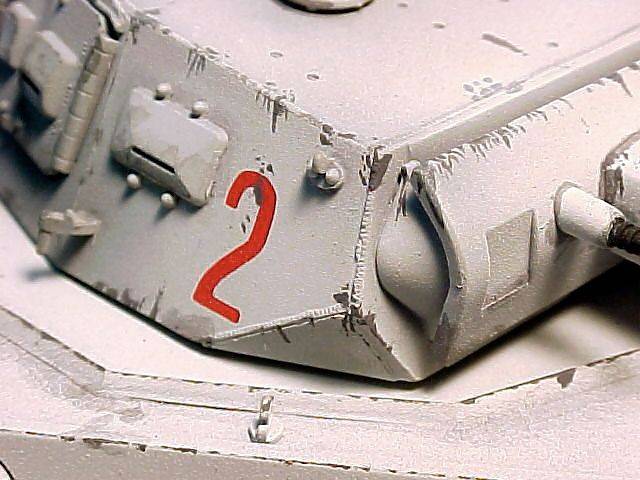
Chipped paint
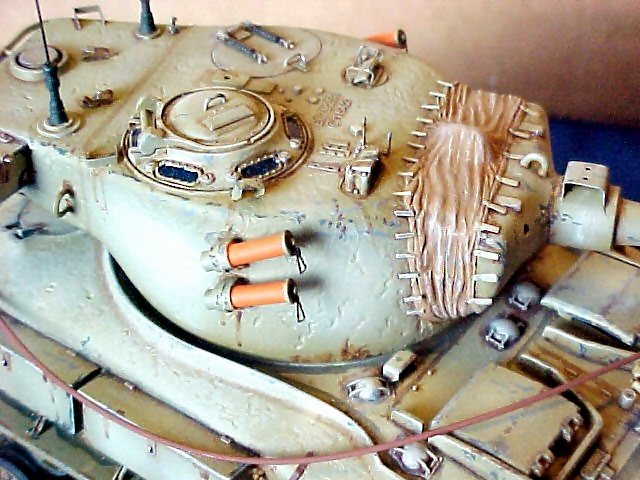
Besides providing a highly accurate reproduction, this method is very tedious and not easy to achieve. When you want to reproduce tiny chips or "RASPONES", as we call them in Spanish, you reproduce them with a pencil, applying it directly over the base color where you want to simulate the effect. If you use a soft pencil lead you'll obtain a darker metal color, like gun metal; if you use a harder one, you'll get a silver appearance. The final result depends on each one's preference. Dust effect This step tries to reproduce the overall dust layer, common to all the vehicles after a brief period on the field. The two most commonly used techniques to achieve this are: spraying the model with an aerograph, using a kakhi or light earth color, until you achieve the desired result; or by applying artist chalk pastels, after sanding them to obtain a very fine "dust", and apply it on the model at will, with a soft brush. If you decide to use the pastel chalk technique, you must take care not to touch the "dusted" areas because it surely will remove the fine dust previously applied, or leave finger marks on them. Complementary techniques Besides the described ones, which are the tools we will use more frequently in our models, according to historical and geographical background, we would use one or more of the following.
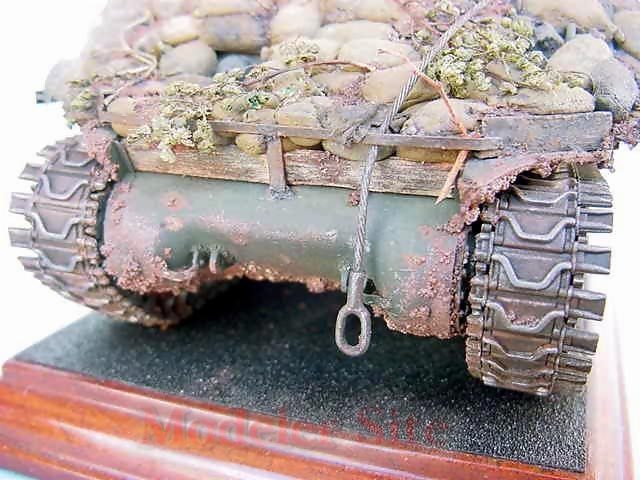
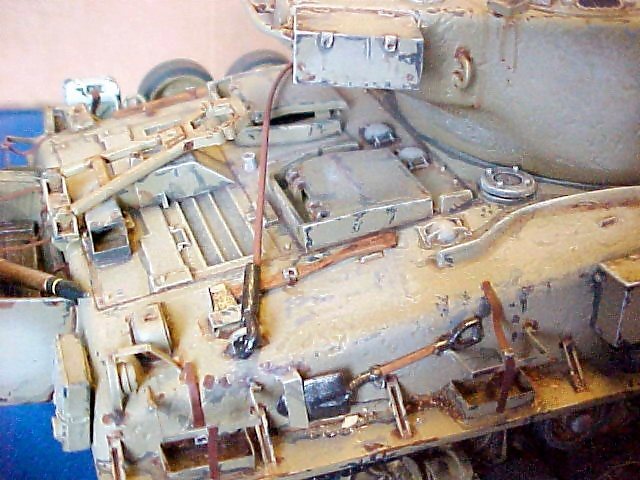
Rust This is one of the effects that you must aplly with great care. Being one of the most visually attractive and eye-catching effecs, we must take into consideration that, apart from tracks or around nuts, bolts, rivets, etc., the presence of rust streaks in noticeable proportions, will only appear when the vehicles are exposed to rainy and wet climate conditions during long periods (even weeks).
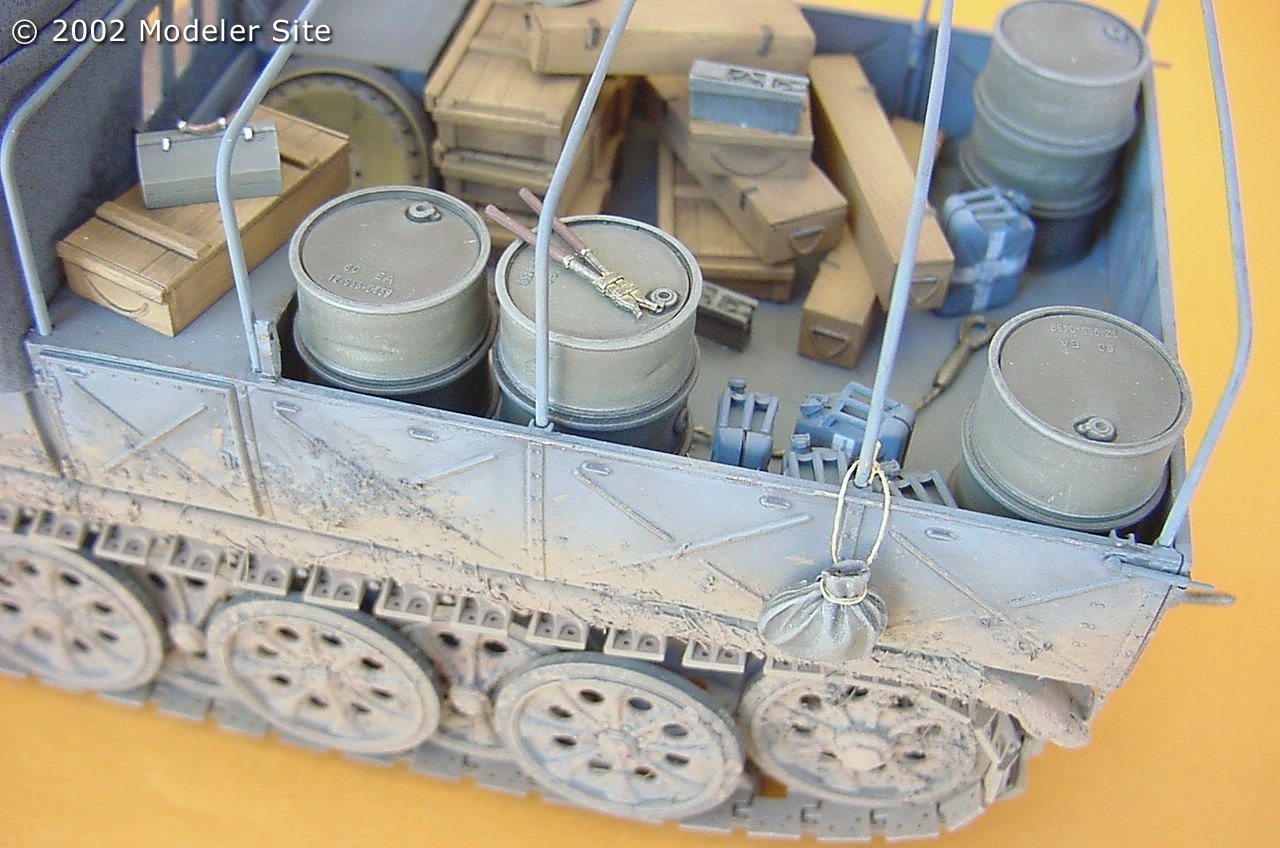
Oil and fuel stains Once again, placement of this kind of stains has to be done accordingly to a logical criteria, so they will be found around fuel and oil filler caps, as well as in heavy maintenance areas. An adequate way to reproduce them is to apply a heavier wash made out of flat black paint with a grey, or eventually a brown tint, such as burnt sienna. Practice will let you find the mixture that best satisfies your own preferences. I strongly suggest to try this technique after the whole weathering process, so it will remove dust and cover the other effects, just as it happens in real life.
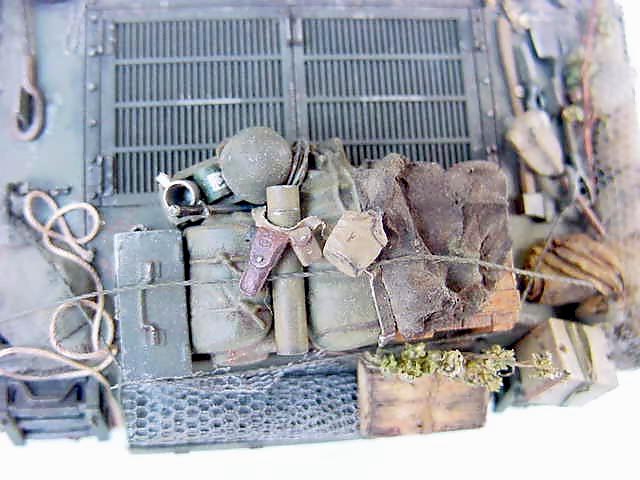
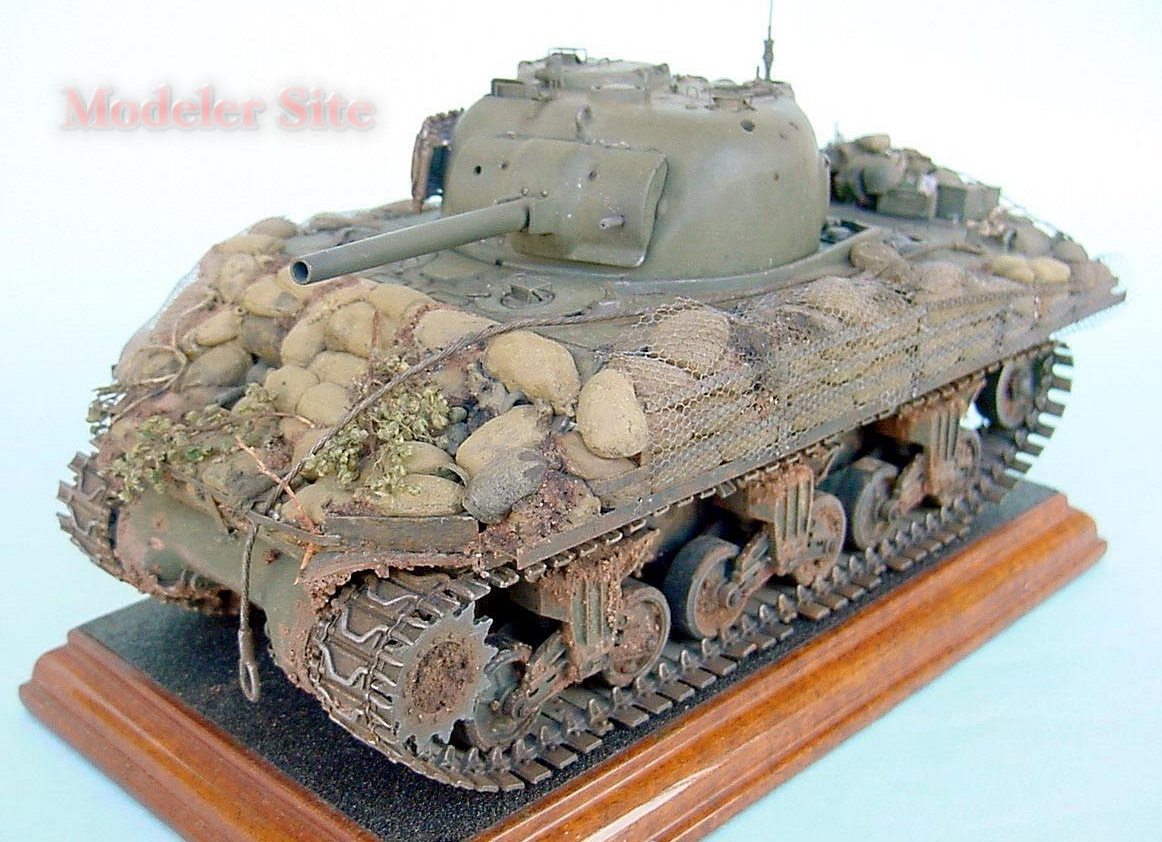
Here again, we must overcome the temptation to overdo the effect, and make it look real. Replicating the mud in scale A good way to replicate mud in scale is preparing a mixture of the following:
We'll apply this mixture with a brush, on the areas to be covered with mud, always having at hand some visual reference to get the best effect. Once we finish applying this mixture, we can further enrich the appearance adding more dry static grass and chalk pastels powder. As for the paint thinning techniques, we've been referring to turpentine, but you can also use other kinds of thinner (here, you should do some trying and testing, in order to find the best brand and quality choice, always looking for the less greasy type), as well as lighter-fluid (this leaves less shiny lines than thinner). The best paints for washes, filters, etc., would be enamels, or oils, taking into account that these ones need a longer (and I mean really longer) time to dry, which would delay the weathering process, but they allow to take advantage of other techniques such as "merge" and "blend" colors, etc. Summing up In fact, there are as many "weathering schools" as modelers, but we can assure you that currently there are at least two prevailing tendencies with different and even opposed criteria when it comes to weathering. The most recent ones are a full 180° apart from the described techniques, which can be considered more traditional and widely known, and favors a more visual attractive aesthetic, like light-and-shades. The aim is to reproduce with more fidelity, the effects produced by the climatic agents, as well as the chronological way in which they occur.
There are other complementary techniques that may enrich the final appearance of the model, but generally speaking, they variations of those described in this note.
As we already said, in future issues we will tackle more deeply, and in a detailed way, these and other methods to enhance the appearance of our model accordingly to the right environment for the version we chose. Some models shown belong to Pablo Scordo, Carlos Massu and Nicolas Fiorentini, we thanks they to let use their photos for this note.
|
|||||||||||||||||||