|
In 1935, a group of engineers from the newly created Bell Aircraft Corporation attended the demonstration of a new modern 37-mm automatic gun designed by Oldsmobile.
Impressed by its power, they decided to create a new and original combat plane equipped with this gun. This was the birth of the Bell P-39 Airacobra, which prototype made its first flight on April 6, 1938. Manufactured with the latest state-of-the-art technology, it presented a variety of inner and outer innovations, in addition to having excellent aerodynamics. The final result was a great structural strength and high firepower but its performance was quite poor.
Despite this fact, it was widely used in the Pacific front for two years until the introduction of the P-51 and P-47, especially because there were no other planes available (talking about the USAF). It also participated in combat in Northern Africa, Italy and Russia where it was highly appreciated due to its surface attack capacities. A total number of 9585 Airacobras were manufactured, many of which were sent to the Soviet Union in accordance with the terms of the "lend and lease" law.
Assembly
This is a kit designed in 1969. Despite its age, the mold is correct but you will have to make some modifications to update it.
|
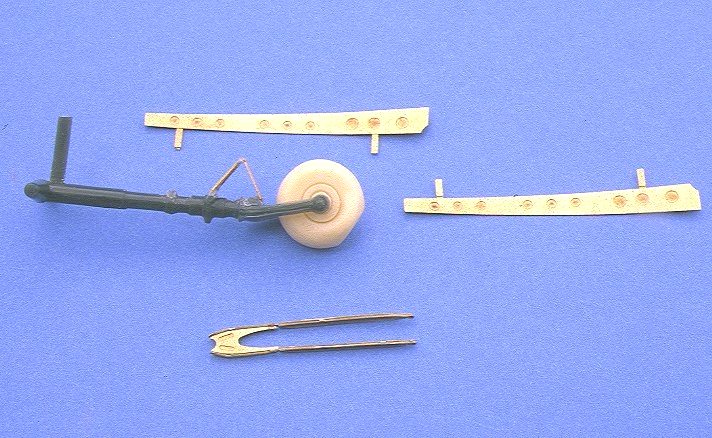
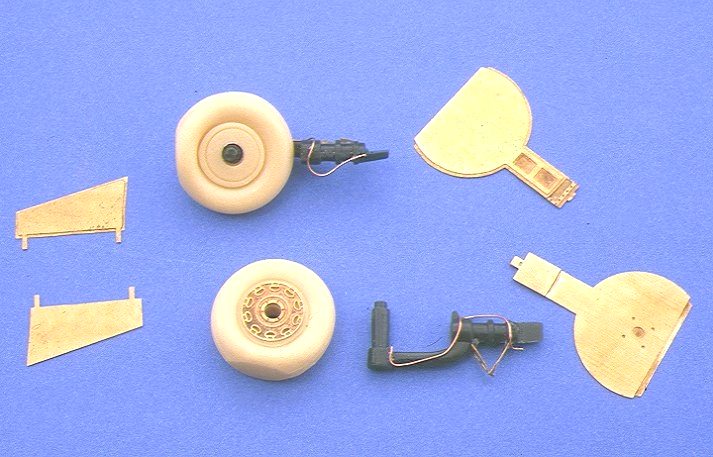
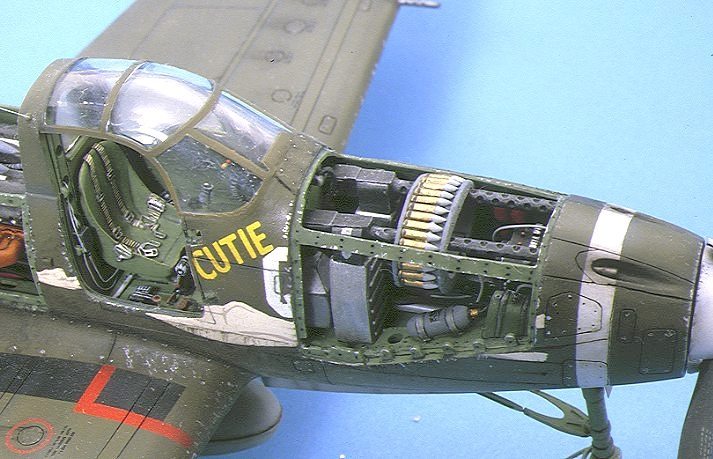
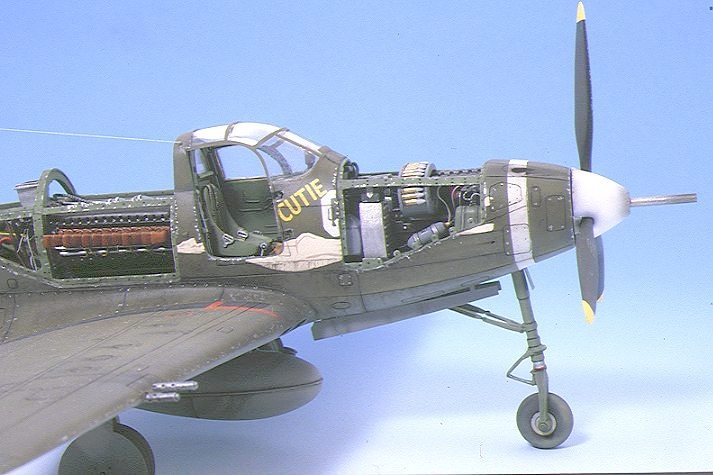
The excellent detail set marketed by Edward will help us detail the interior of the cockpit, undercarriages and flaps. Before starting to glue all parts, we will have to highlight all panel lines in the fuselage and wing assemblies with scribers and files.
|
|
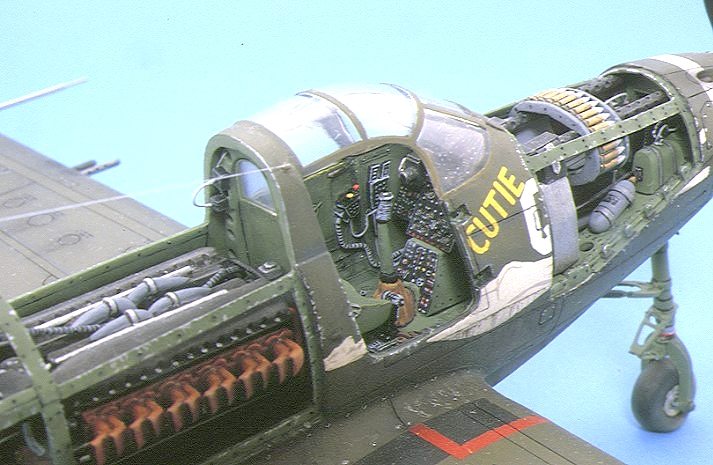
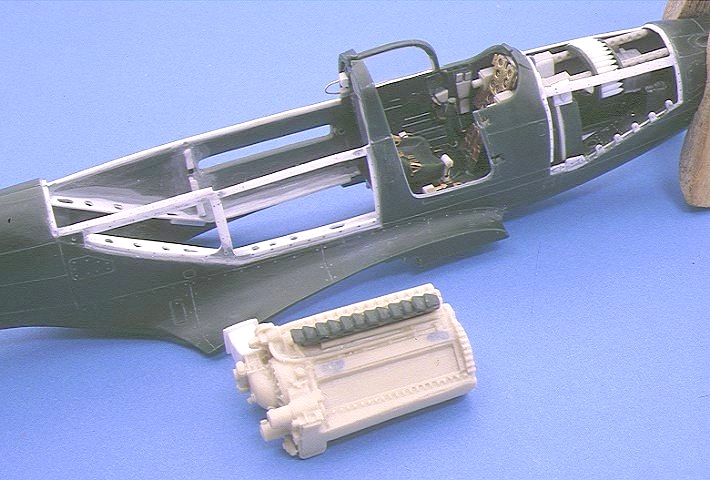
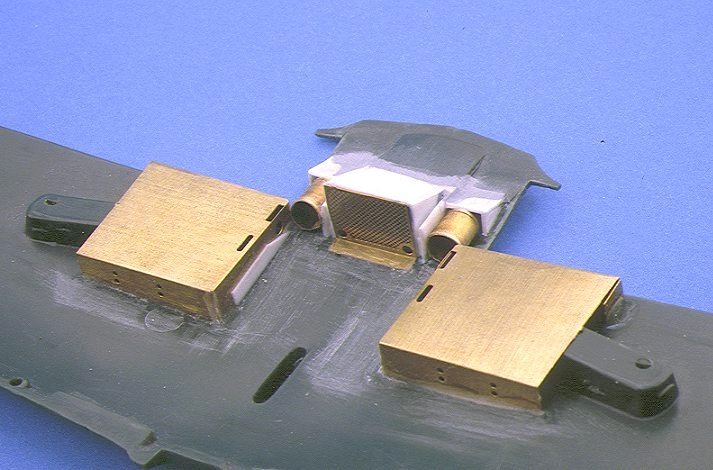
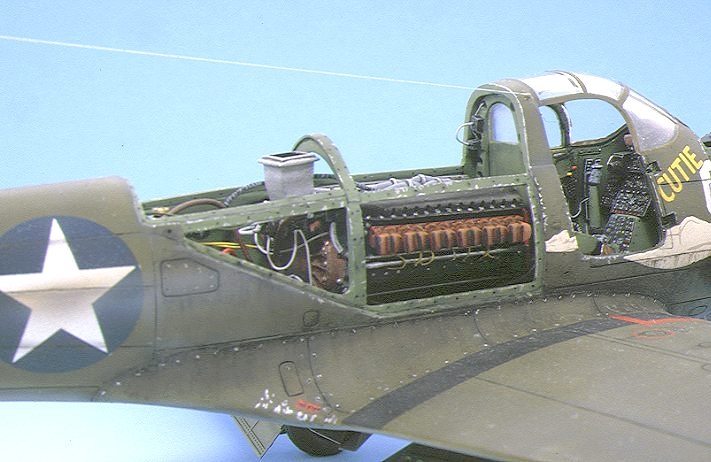
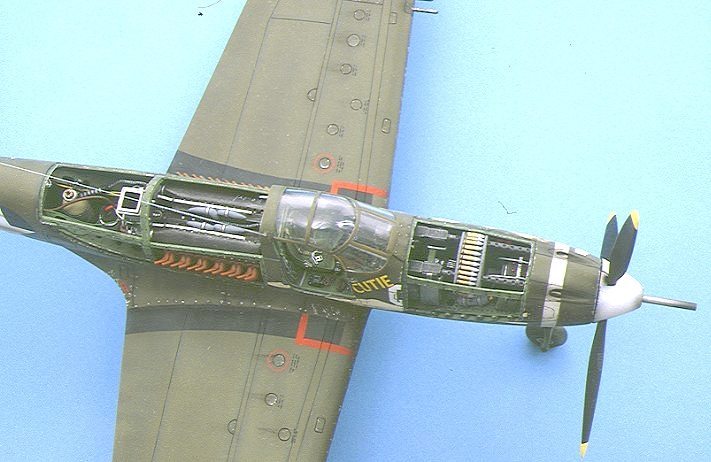
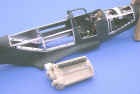
I decided to open the fuselage so that the engine, the armament on the nose, the radio and other inner areas can be seen. On the wings I cut the ailerons, the flaps and the elevators. I also drilled a hole for the undercarriage light and some others for the inlet and outlet of the water and oil radiators. The fuselage is quite complete and most of the job is already done, especially on the right side, where most of the panels will be open. I tried not to destroy those parts that I cut, in order to be able to use them is necessary.
|
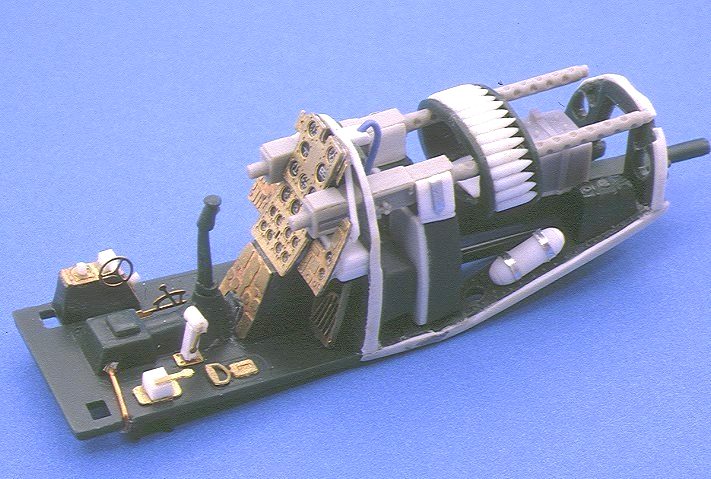
Once all the cuts and modifications were already made, I started building the interiors with small pieces of plastic, taking bibliography and pictures as a reference.
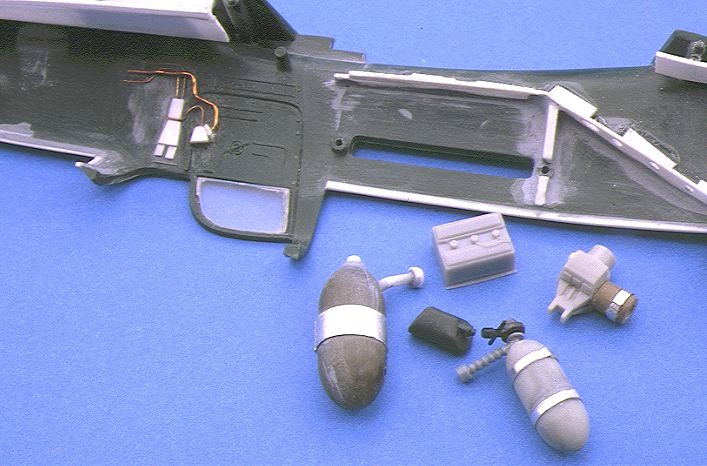
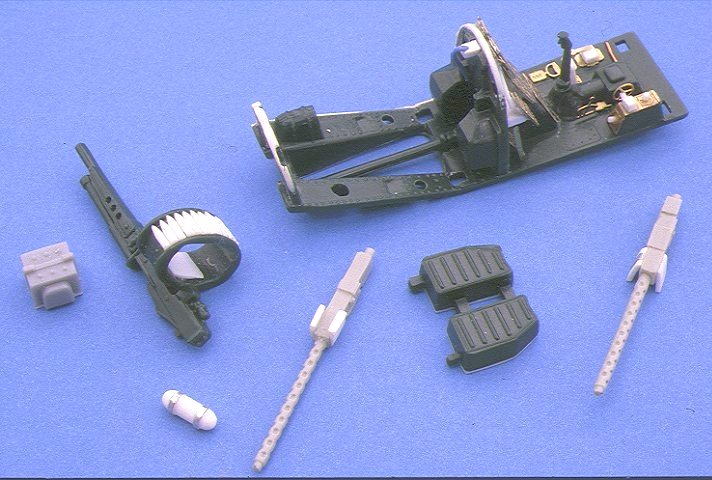
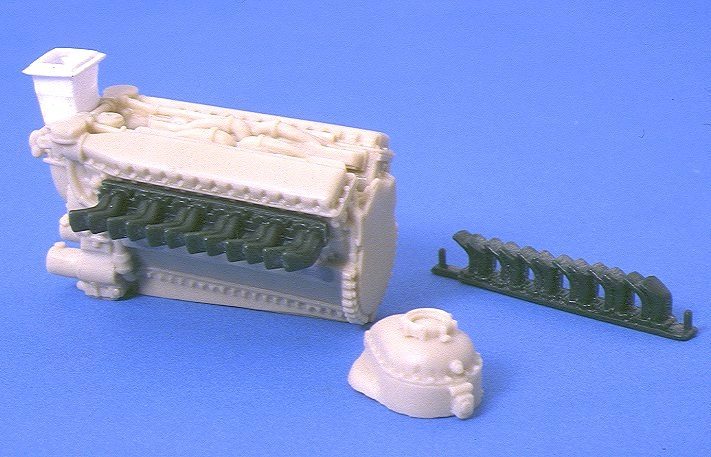
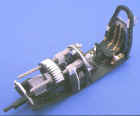
All pieces of plastic were glued with Revell needle liquid glue. Then I added the parts taken from the detail kit, like the engine, the machine guns, the photoetched parts and all parts produced in scratch.
The ammunition of the gun are pieces of plastic rod cut and filed one by one, the radio is taken form a Hasegawa's Mustang, the machine guns are Verlinden, wires are made of copper or PVC of different colors and glued with white glue or CA.
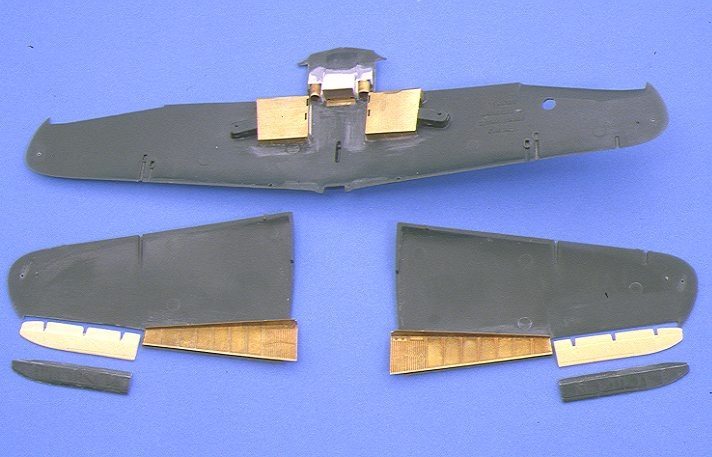
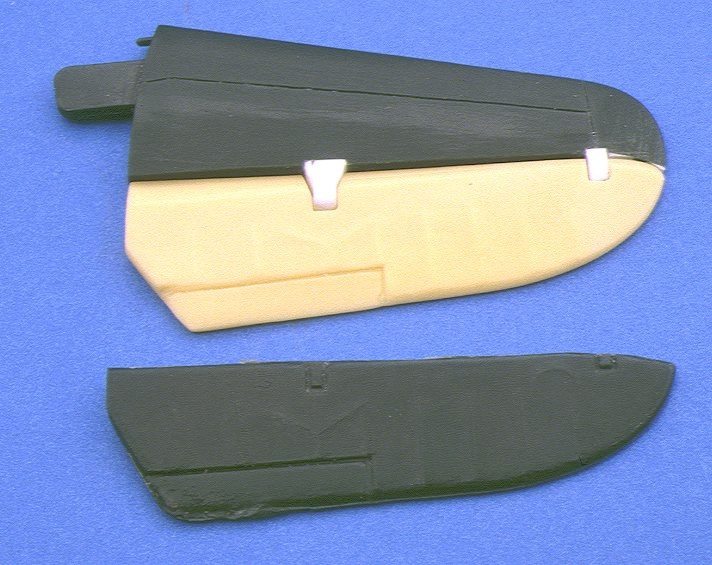
On the wings I inserted the undercarriage wheel wells as well as the flap wells, taken from the excellent Edward photoecthed set. Afterwards, I added the water and oil radiators.
I painted all interior panels before gluing both parts of the fuselage and the two semi wings.
The big cuts made on the two halves of the fuselage may slightly warp these parts, therefore they will probably not fit when you try to glue them together. For which reason I had to spend some time trying to join the fuselage properly and avoid misalignments.
The next step was the union of the wings to the fuselage, and this is the step where you will find some difficulties. The front and rear areas of the joint did not fit and it was necessary to fill and sand very carefully before adding plastic sheets (quite thick, especially on the rear lower part).
I glued all clear parts to the cockpit with Revell needle liquid glue. Once the glue was dry I sanded the joint between the fuselage and the clear plastic very carefully, trying no t to make any scratches. I produced the supports of the supplementary container with plastic rods.
I masked all inner parts with Tamiya's adhesive tape, Maskol and pieces of tissue paper, including the clear parts of the cockpit, with the exception of the frames. At this point, the model was ready for the exterior painting.
|
|

|

|
|
|
Painting
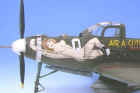
At this step all interior areas were already painted and masked. I started painting the lower areas with neutral grey, then I paneled with very well thinned grey and made some touches with neutral grey where necessary.
Paneling was made with the same mix of thinned dark grey used for the lower areas. Where necessary, I made some touches with olive drab. At last, I applied a light coat of Micro Gloss glossy varnish.
Then I went on painting the upper part with a cleared olive drab and some touches of olive drab to represent volume.
I used the brush technique to represent weathering with black oil, thinned in heptane in order to represent dirt and liquid leakage. The weathering of panel lines was made using Tamiya'' masking tape.
|
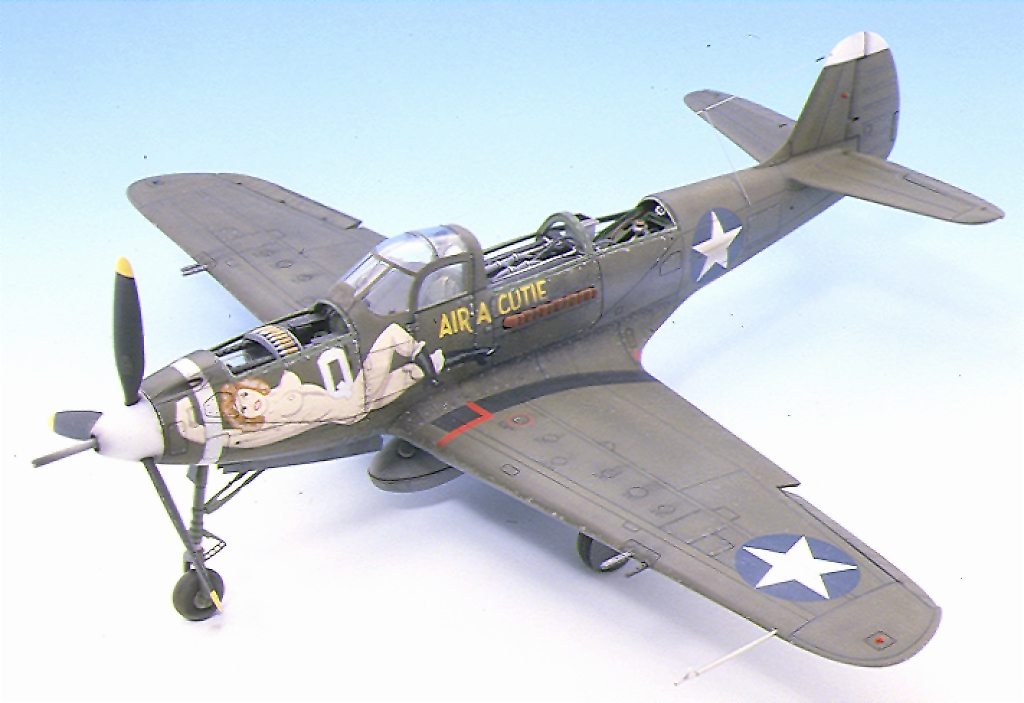
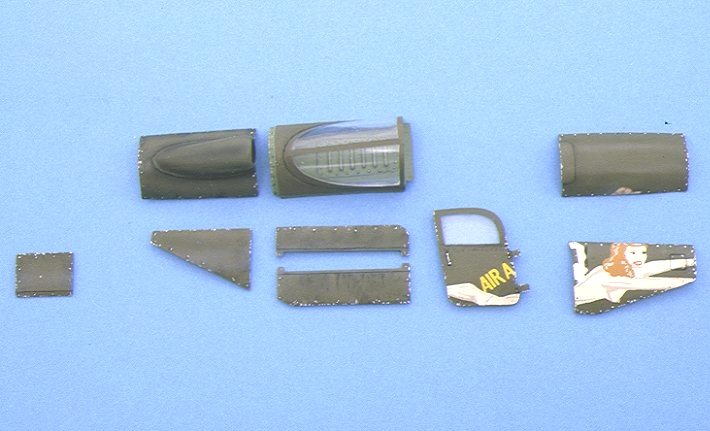
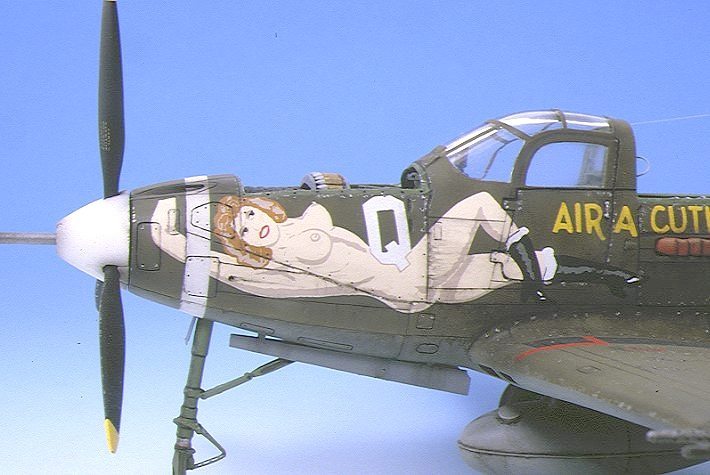
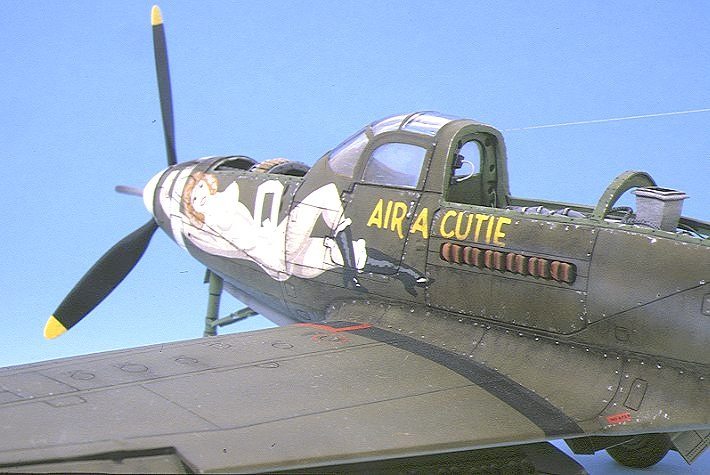
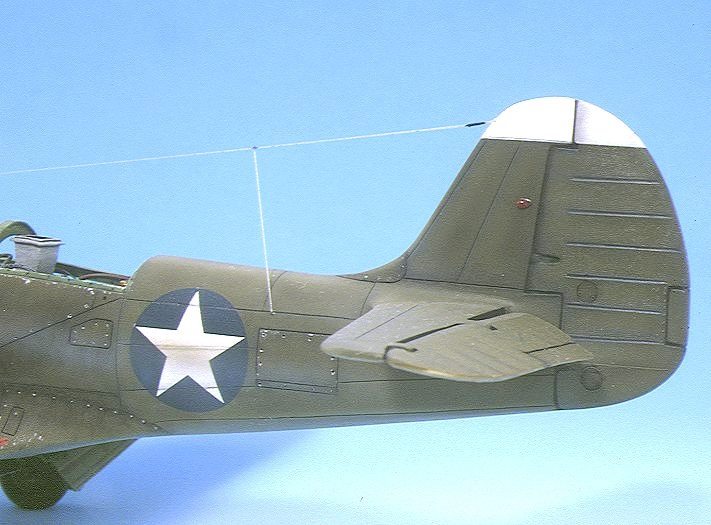
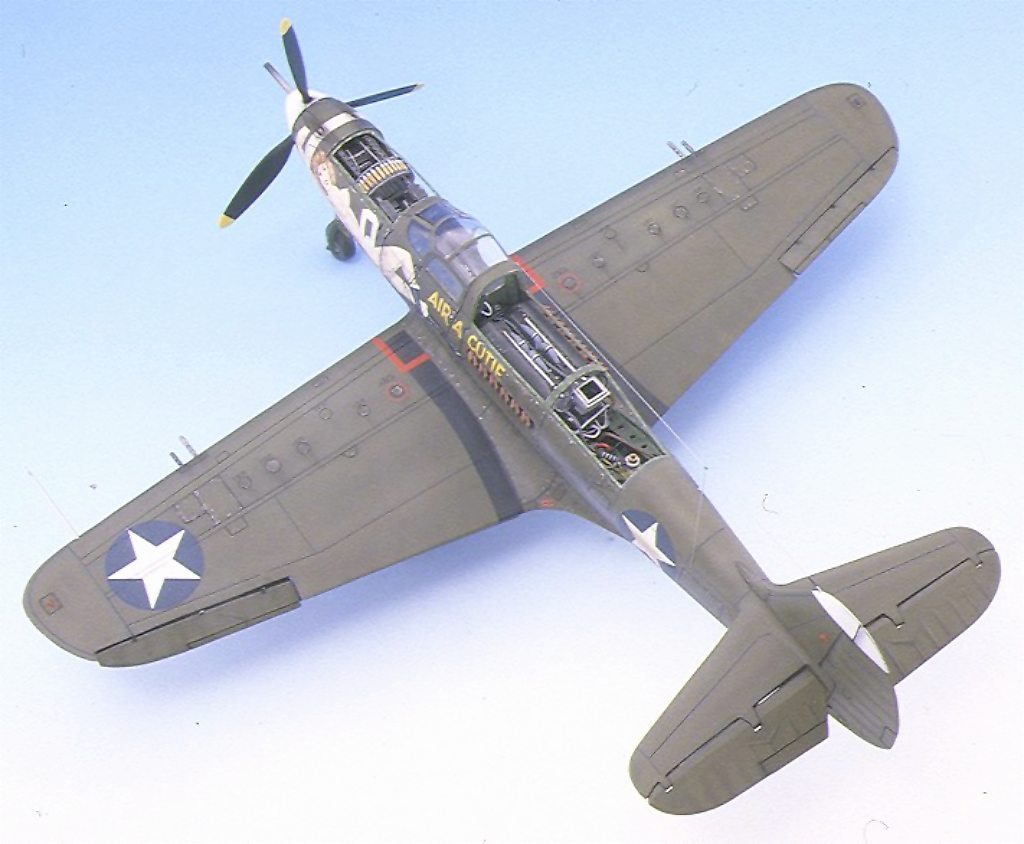
The decoration applied to this model represents a P-39F, belonging to the 36th squadron of the "Fighter Group 8", based in Guadalcanal during 1943. The decals with their spectacular design are Superscale, ref. 48-499.
|
|
|
Once finished with the oil I applied the decals which had been previously cut in order to eliminate as much clear carrier film as possible. One day later I applied a new coat of Micro gloss.
I applied again black oil to represent weathering on the areas where the decals had been applied, then I painted the leading edges as well as other areas with Humbrol silver applied with a brush.
The smoke coming from the exhausts and the machine guns was painted with an airbrush and then applied some transfers from Verlinden that very well represent the small data.
|
|
After having thoroughly checked for errors I applied a coat of mate clear Marabú, thinned with thinner for airbrushes Model master. Once the varnish was completely dry, I removed all masking.
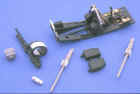
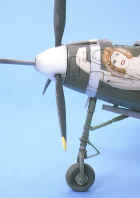
At last, I glued all parts that had been produced and painted separately. The undercarriage and its component parts (all photoetched parts), the flaps, the undercarriage light, the gun, the propeller with its spinner, the pitot tube (two hypodermic needles and a small piece of aluminum), the front lights and the antenna of the radio equipment. With the exception of the antenna, that was glued with CA, all the above mentioned parts were glued with white glue.
Detail sets
 Edward photoetched parts #48-17 Edward photoetched parts #48-17
Superscale Decals #48-499
Verlinden Resin engine Verlinden from P-51A #1260
Verlinden #1267 machine guns
Wheels - True details #48-012
Control surfaces KMC #48-5034
Transfers Verlinden (rub down decals) 1/72 #0172
Color Chart
Bibliography
Famous airplanes of the world. Issues 36 & 34. Editorial Burin-do
US Army airforces WWII volume 1
Flight manual for P-39 Airacobra. Aviation publications.
US Army airforce Fighters. Part I. McDonald & Jane´s
P-39 in action. Squadron signal publications. Issue # 1043
Air international - January 1982
Air enthusiast - August 1971
|