|
|
|||||||||||||||||||||||||||
|
Formula one |
|
||||||||||||||||||||||||||
|
The Italian job - Tamiya 1:20 McLaren MP 4/7 |
|||||||||||||||||||||||||||
|
by Allan Nielsen |
|||||||||||||||||||||||||||
|
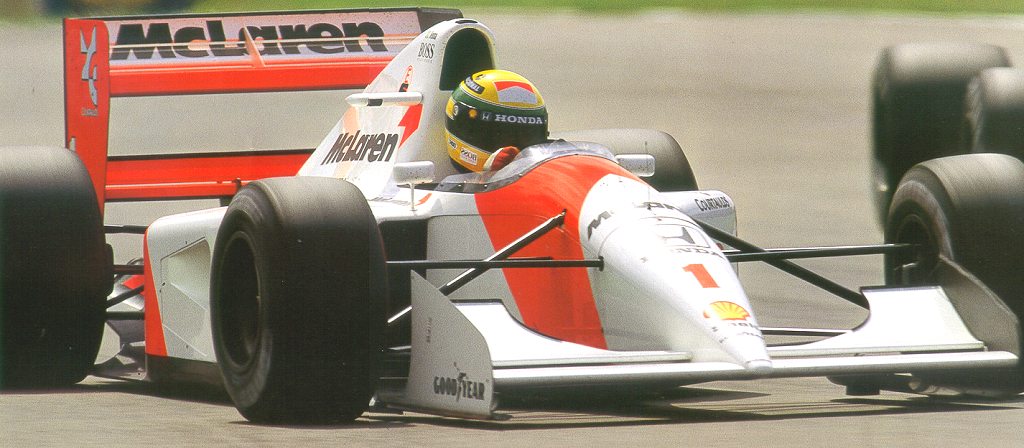
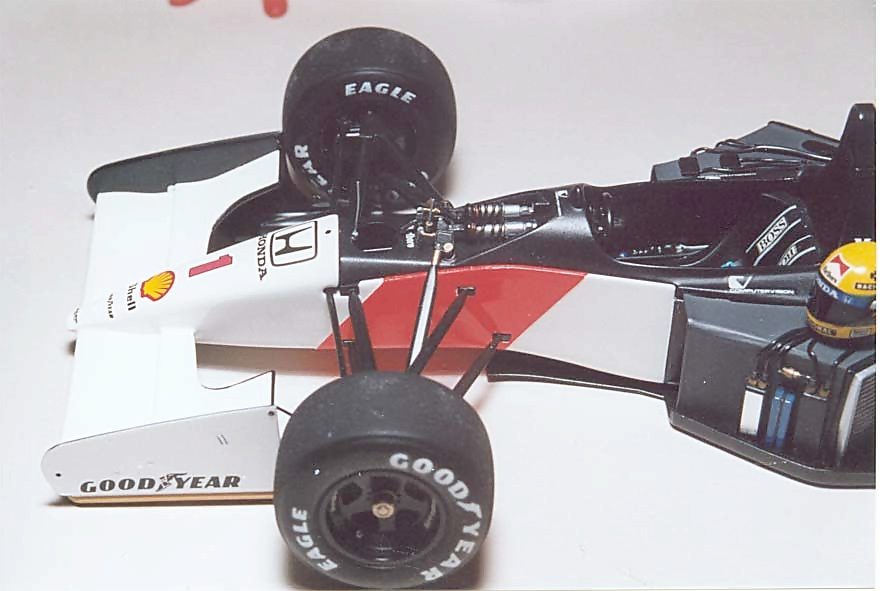
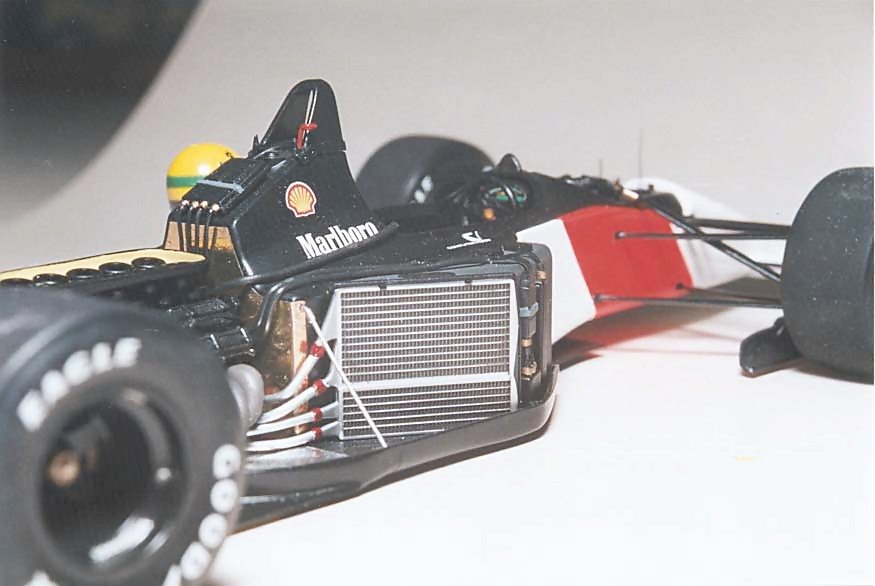
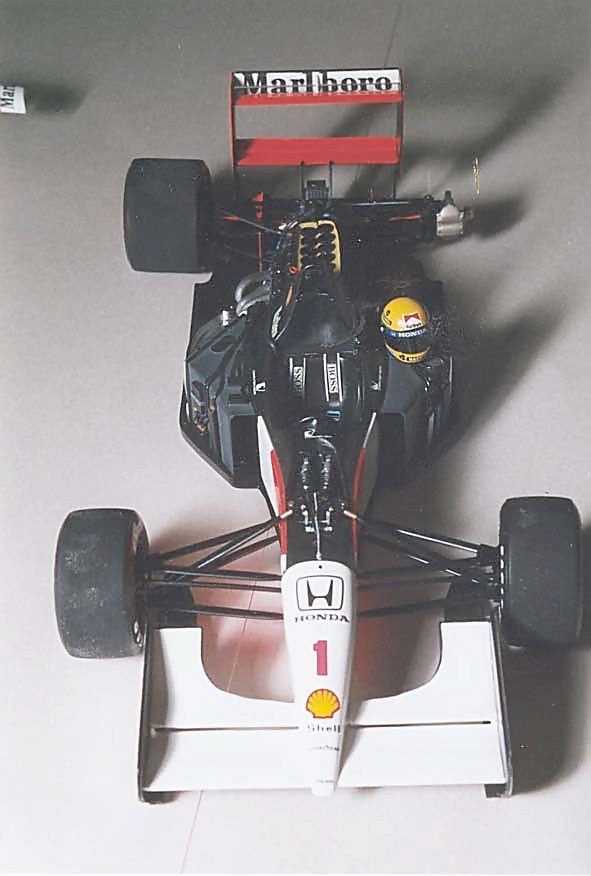
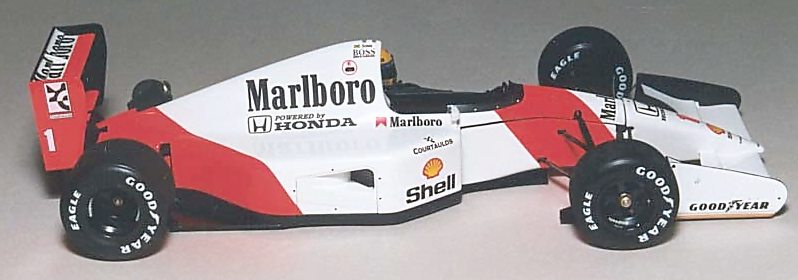
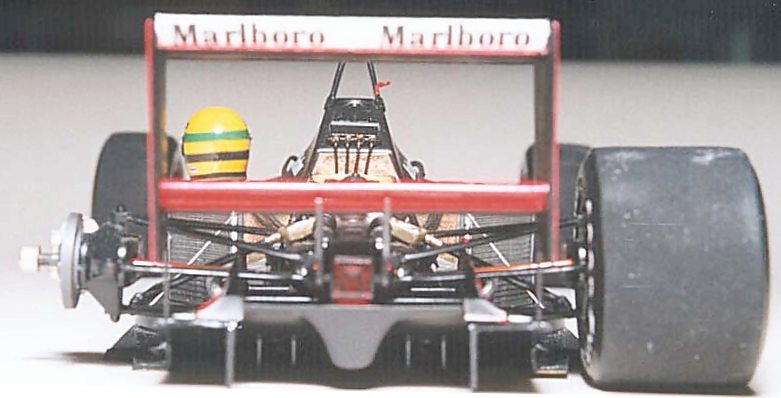
This is the famous McLaren Honda MP 4/7, driven by the superstars Senna and Berger in the 1992 season. The season was very much dominated by the FW14 Williams Renault with their fantastic active suspension, making it impossible for Senna (the best driver this season) to stop Mansell and Patrese from winning most of the races. But Senna never gave up and still won 5 times, including the Italian GP at Monza.
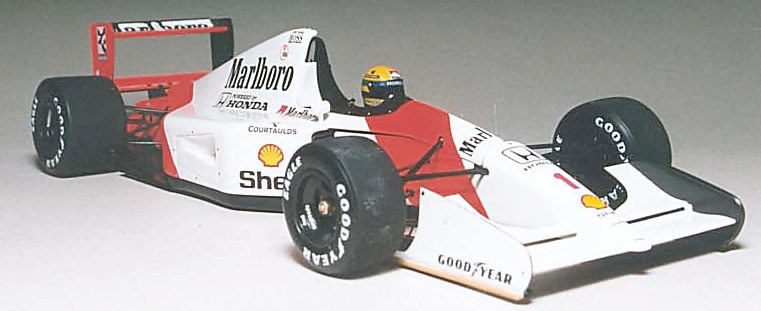
The conversion The car Tamiya has done is the German GP, but it can easily be converted to Senna's Italian GP race car by adding Marlboro's + removing the middle section semi-black wing on the rear wing + some minor details like antennas etc. The paint job Now be warned - you can NOT trust the pictures. The Marlboro McLaren's are NOT white/red, but white/fluorescent red. The problem is, that fluorescent red always looks "normal" red on pictures unless they are shoot in rainy conditions. I was very amassed the first time a saw the car in "real life". The easy solution is to use the "fluorescent red" decals supplied. This will be an "option" for the beginner, but be warned. It does not look convincing at all and much worse - they will turn completely pale after some time. About the Tamiya TS36 can Well, lets instead use the Tamiya TS36, which is a very close match. WARNING number 2 - this TS spray can NOT be recommended. Why ? Well, I found out about that the hard way. First disaster was the classic one. As you properly know shall you always use a white primer as "basic" before using a fluorescent colour. But TS36 does not like that. I found out that even though the paint job looks spot on the first couple of weeks, after some months it "converts" into wine red non-fluorescent red.
Total disaster. Well, now we know this hurdle and I made a new attempt - spraying the TS 36 directly on the white plastic. This solved the problem. I did not "seal" the TS 36 with clear coat, since it was very shiny. The disaster stroke after about one year. What had looked wonderful and glass smooth in the beginning had now "reacted" with the air or light (even though is was behind glasses) - the result was terrible.
I have also tried another "trick". First you spray the gloss white area and then a couple of days later you spray the TS 36 area. Now in order to seal you use the Tamiya TS clear coat. It looks promising the first couple of minutes, then the red starts to "migrate" into the gloss white spoiling days of work. Well, my conclusion was simple. The TS 36 is not up to the job.
You shall always use a white primer and you shall always give it a top clear coat. It is also possible to polish the RAL 3024 before you give it the clear coat. Just perfect. And one litre will cover an endless number of scale models. The nightmare
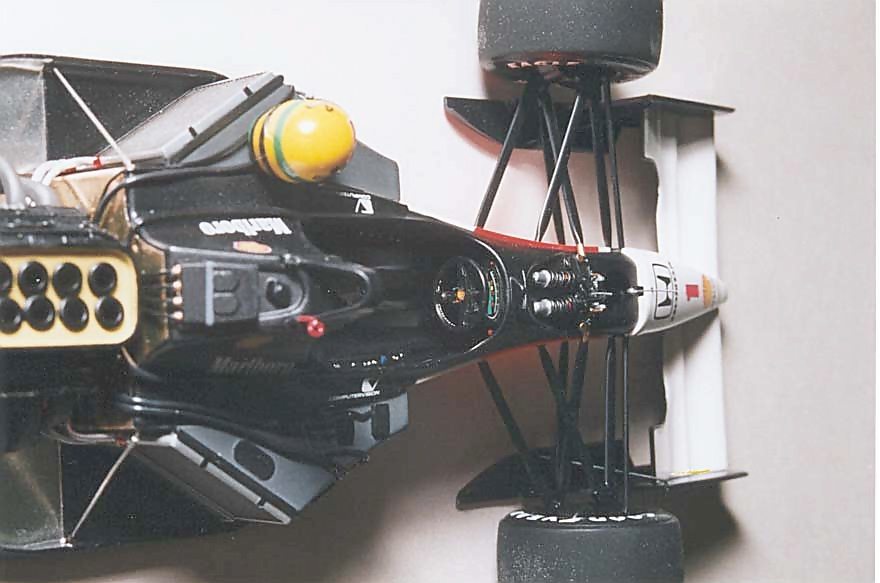
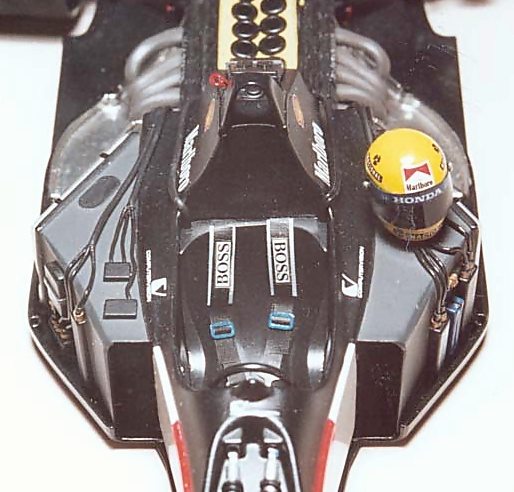
This sounds like a good idea, but just wait until you have to paint it. It is a 3-colour scheme and the worst part is the "upper deck" wing. After several desperate attempts did I found a solution that works - use a very fine saw and "split" the wing. This makes it possible to paint each part separately and now you "only" need to rebuild the wing using cyano glue. This is a new nightmare to make all those parts line-up, but at the end did it (almost) work out for me. The grade-up parts The most recommended item to buy is the Studio 27 High-Tech decal. At first did I not quite understand the reason to invest money in those decals, but I soon found out. You just put on the decals like normal decals, waits up to 24 hours and then you can remove the carriage film. The end result is fantastic. The decal looks 100 % like watching the real car - highly recommended. The only weak point about the decals is the fact, that they are much more fragile than normal decals - but Studio 27 has thought about that and have included a lot of "spare" decals to give us a second change.
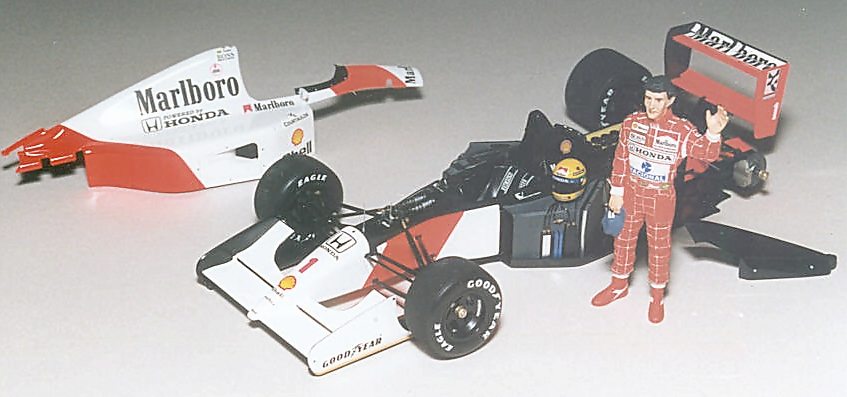
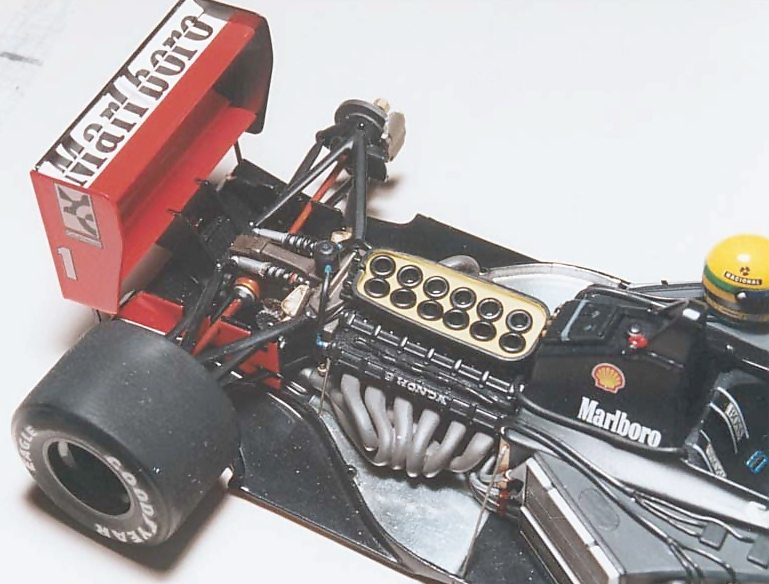
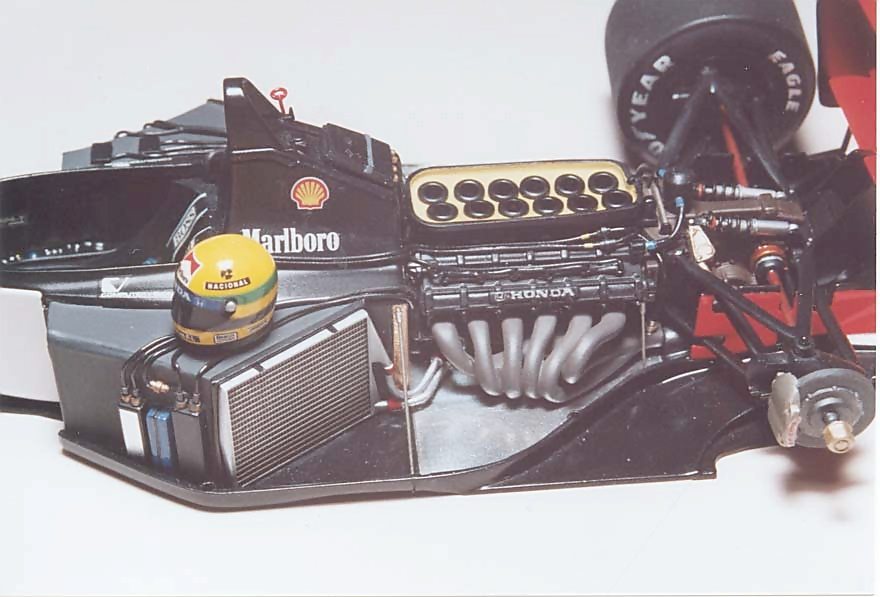
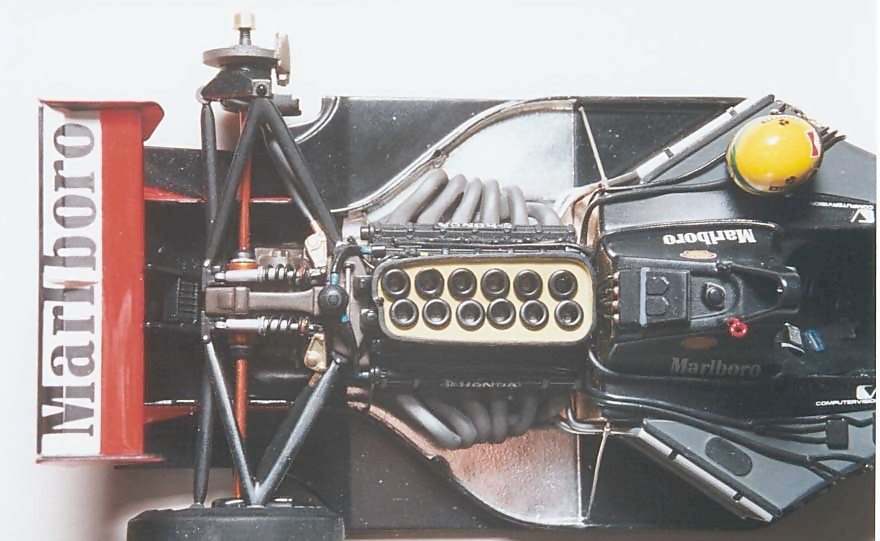
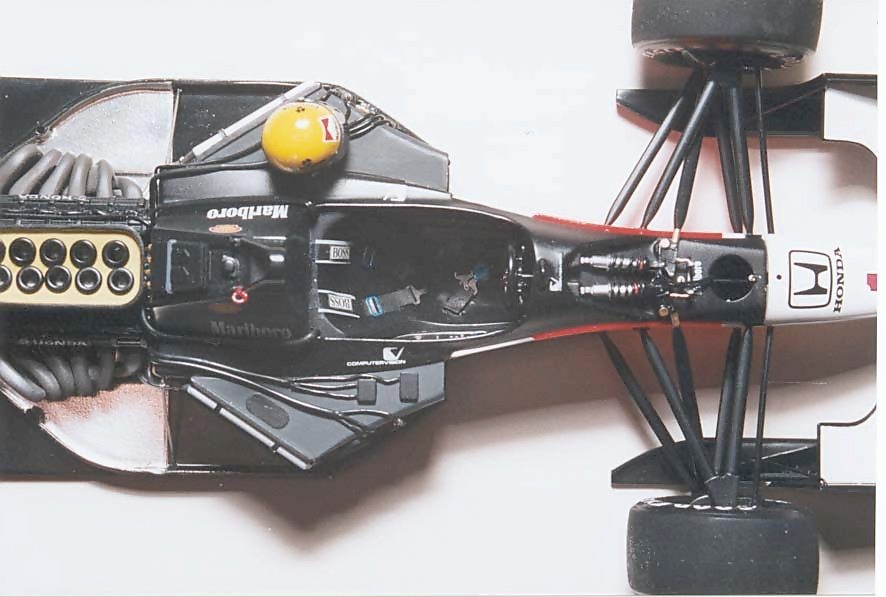
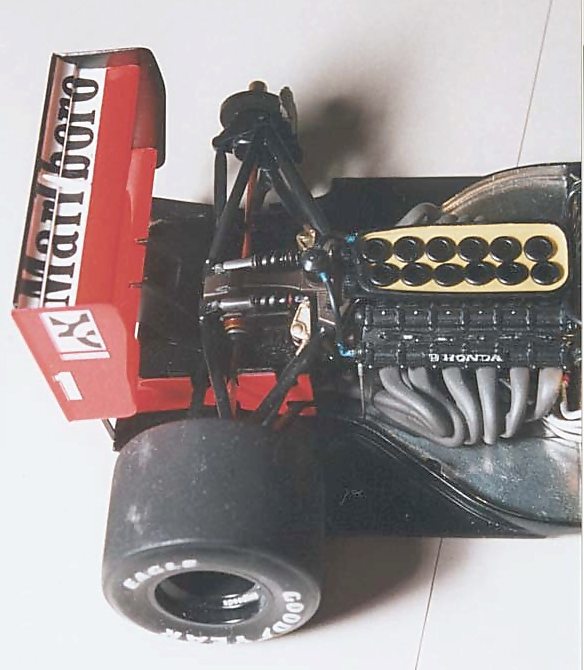
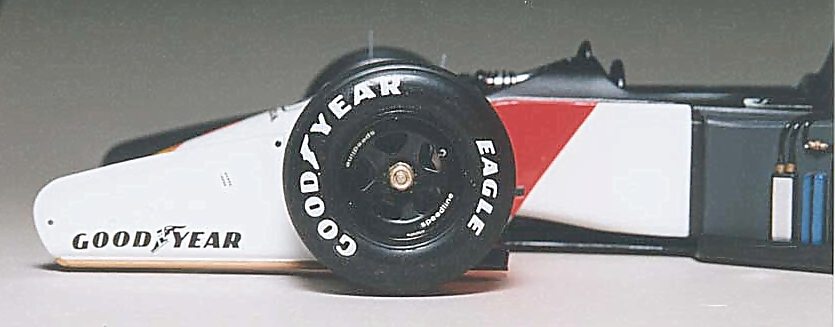
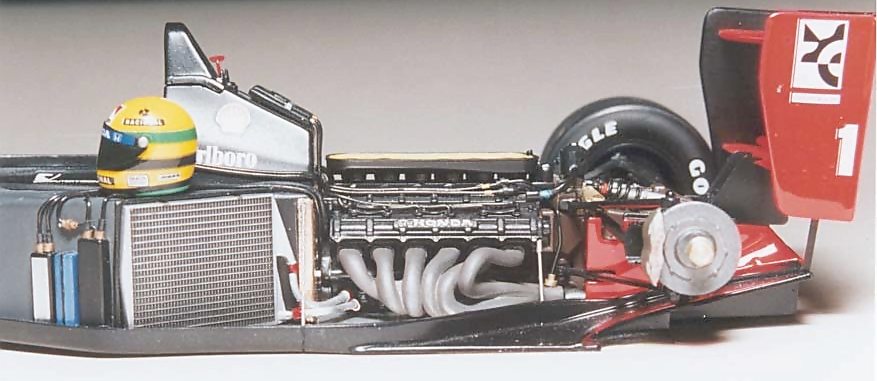
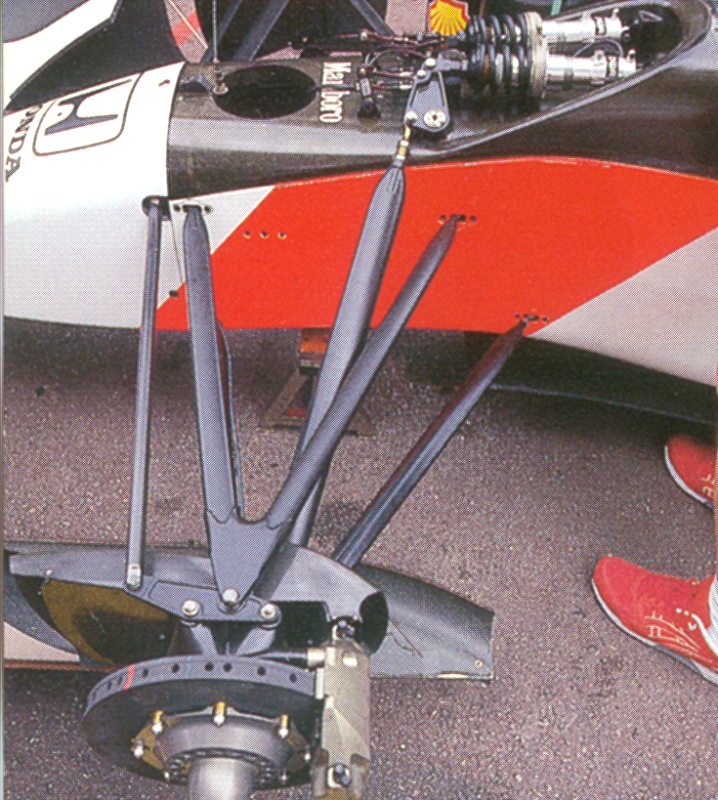
I also used 2 items from F1s. The first big improvement is the wheel enhancement set with screws and hexagon nuts. It looks much better than what is supplied by Tamiya. The other item is the detail set for MP 4/7 (PE 47-2) including the velocity stacks. The velocity stacks made by Tamiya are "to short" - this problem can be fixed using those items.
The PE 47-2 also includes front and rear end plates, but I do not see that as any big improvement. As you can see from the pictures did I also add many, many other improvements to the kit, but they were all "home-made". One of the most tricky home-made improvements was the missing front roll-bar - at first did I not believe it was possible to scratch it, but it showed up not to be as difficult as I thought or maybe I was just lucky.
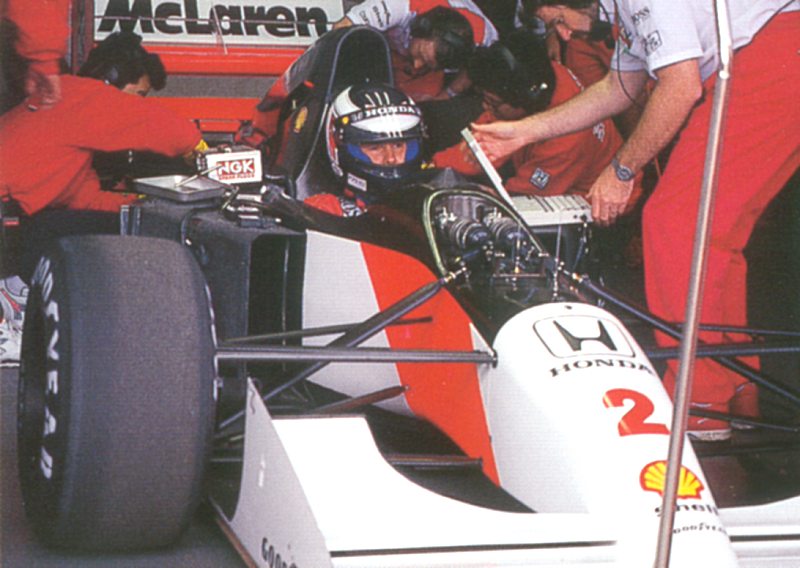
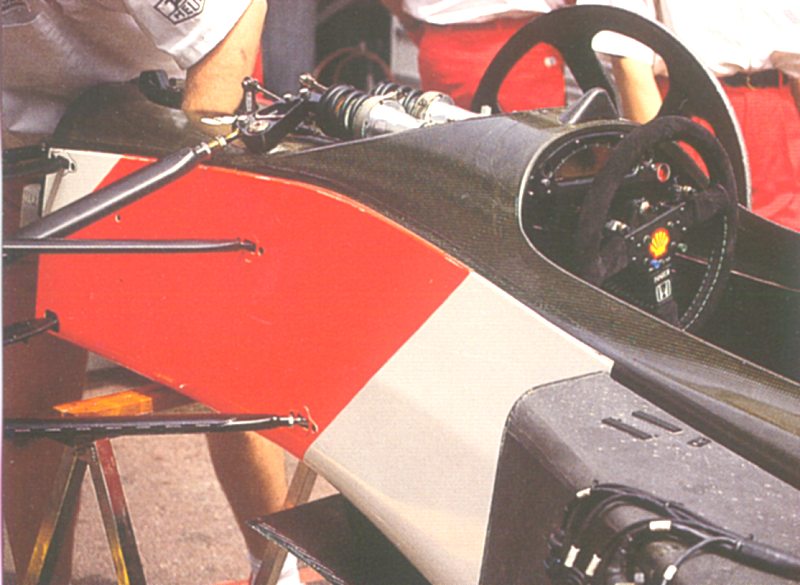
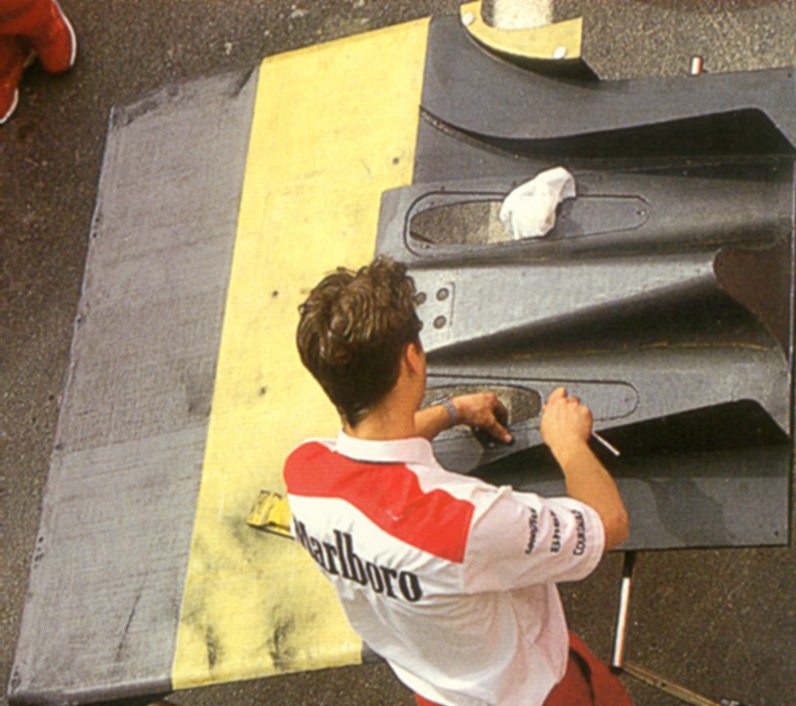
The documentation In order to improve a kit a lot do you of course need a lot of documentation. It is getting more and more impossible to get just near the cars, but in 1992 was it not quite as difficult (except for the FW 14). I found many good pictures on the internet and another very good source is those wonderful Japanese F1 modeling magazines. But the greatest gold mine in my eyes is still the Goodwood festival of speed - I must admit I have not seen the Mp 4/7 there, but there are always many, many highly interesting 1:1 scale cars at display and you normally have the possibility to get close to the cars and get a lot of technical photos. Next year have they already announced a Ken Tyrrell F1 collection (Jackie Stewart will drive the 003), a JPS Lotus F1 collection (Emerson Fittipaldi will drive one of those) and a Frank Williams F1 collection. Do I need to say more. The end result Well, look at the photos. They say much more than what I can write down during a couple of hours. It took terrible many hours to complete the model, but I am happy with the end result. The model actually won the unofficial IPMS Danish championship in its class ( racing cars/bikes). I also want to thank my very good friend and keen racing car modeller Flemming Hansen for taking all those nice photos of the end result.
Reference
The images are property of Tamiya INC. |
|||||||||||||||||||||||||||