|
|
|||||||||||||||||||||||||||||||||||||
|
Airplanes |
|
||||||||||||||||||||||||||||||||||||
|
Detailing a Douglas F4D-1 Skyray "Ford", 1/48 scale Part I |
|||||||||||||||||||||||||||||||||||||
|
by Gustavo Nuñez © 2001 Modeler Site |
|||||||||||||||||||||||||||||||||||||
|
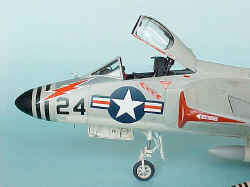
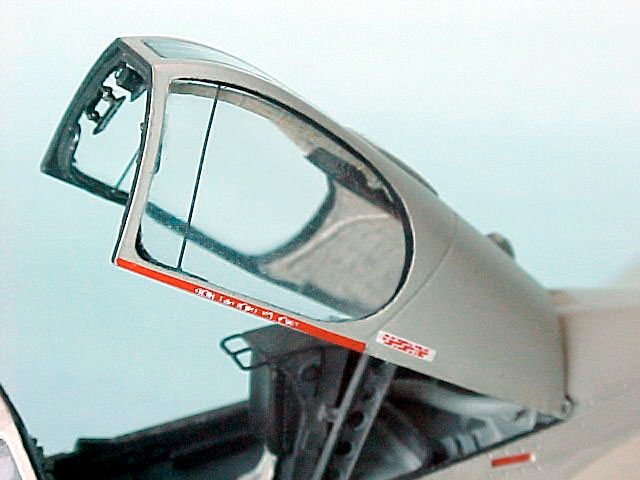
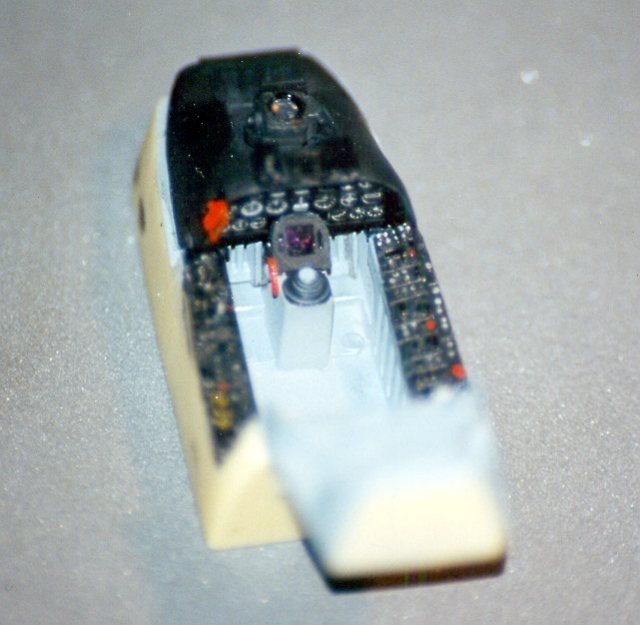
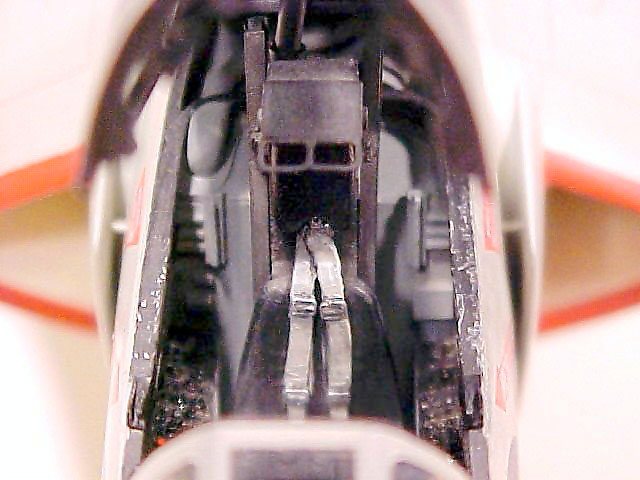
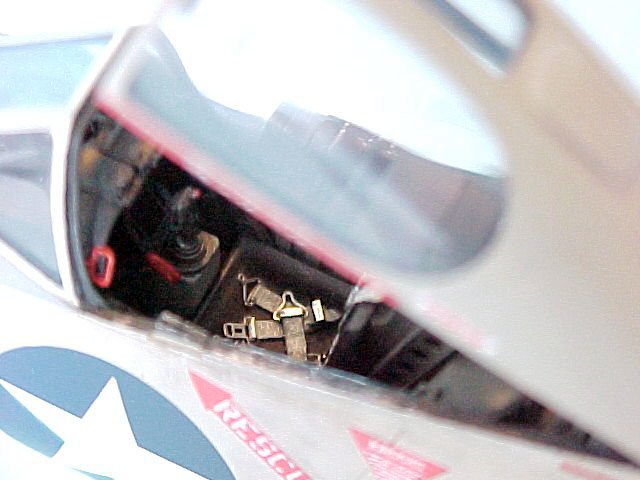
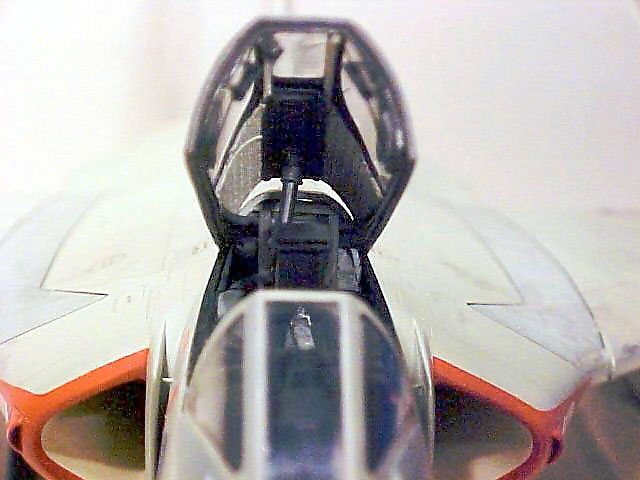
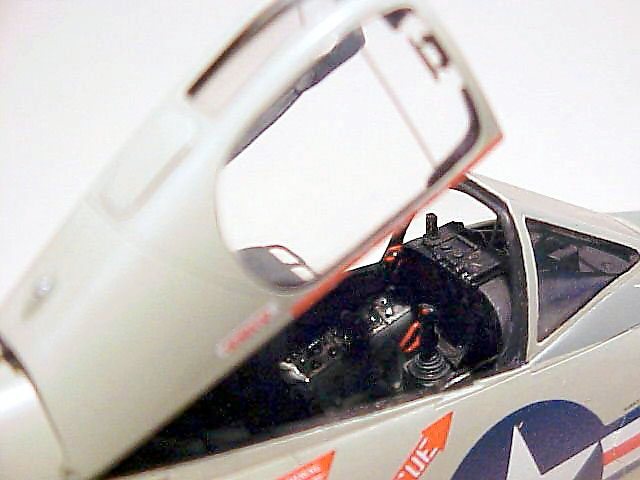
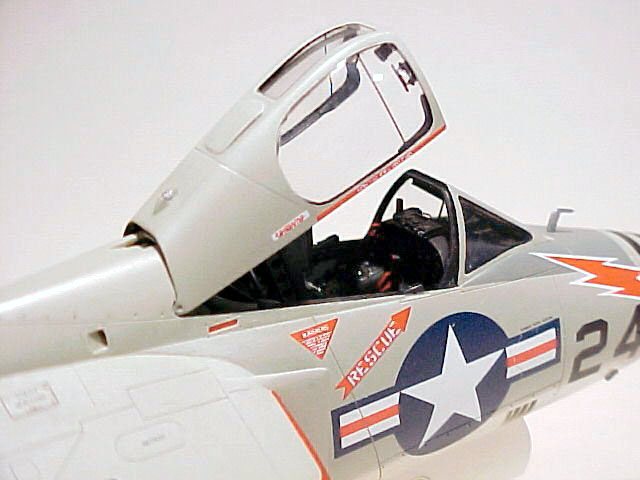
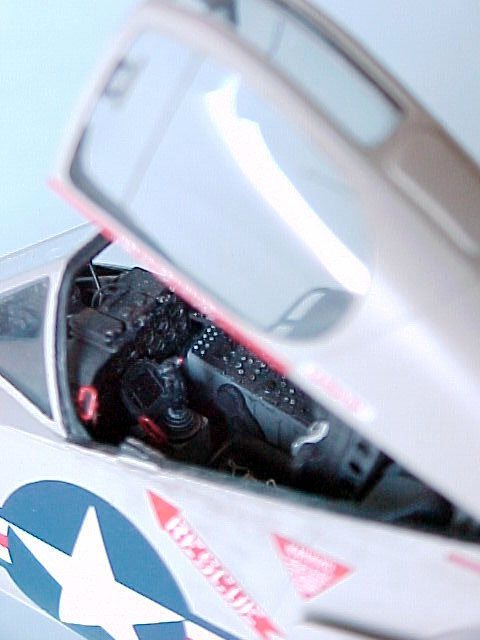
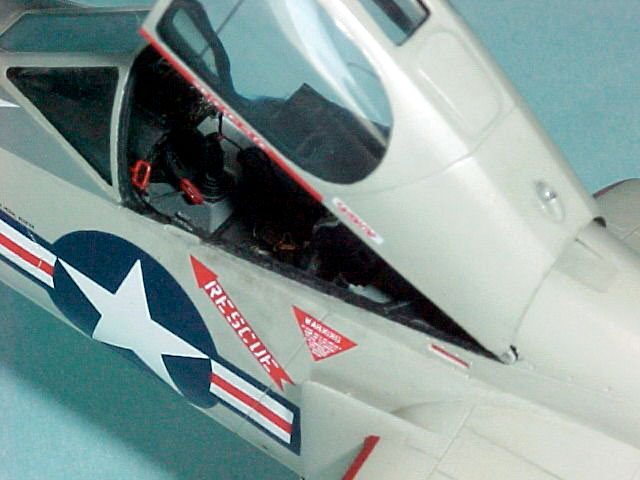
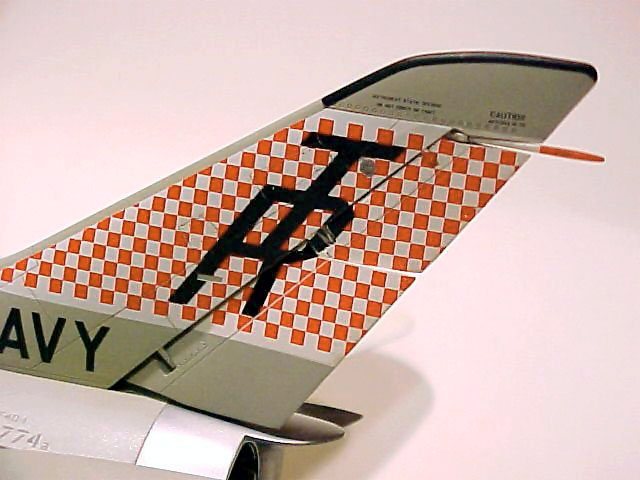
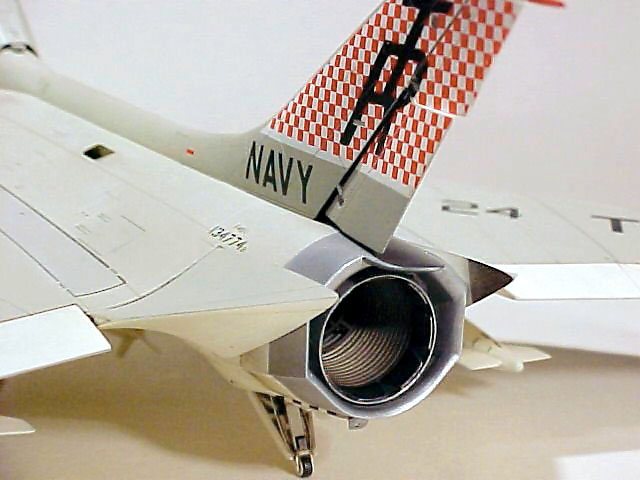
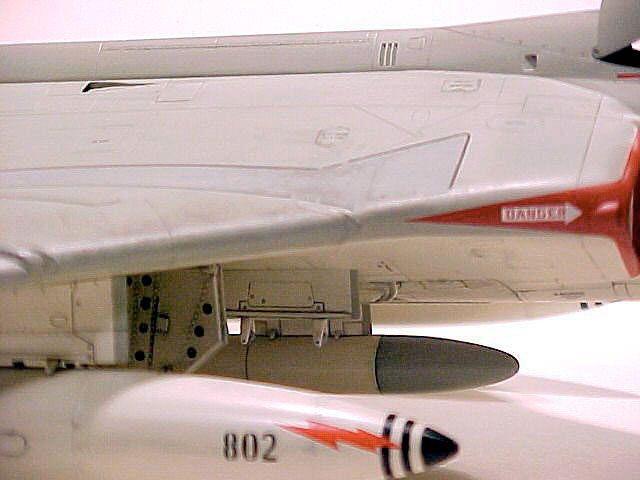
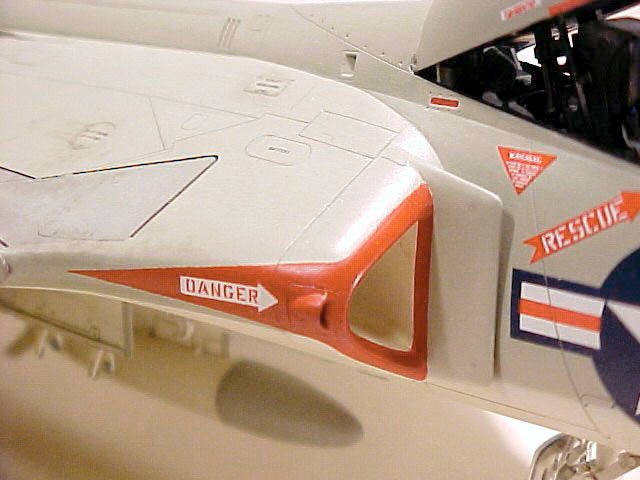
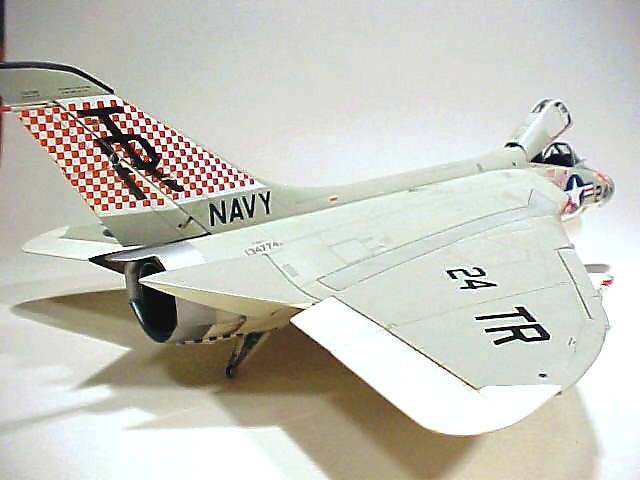
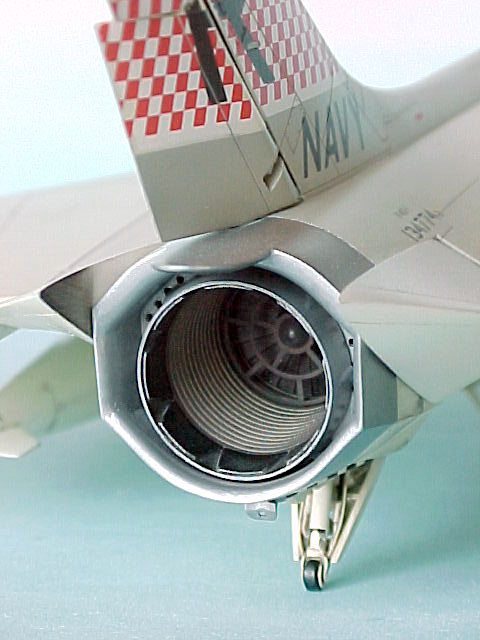
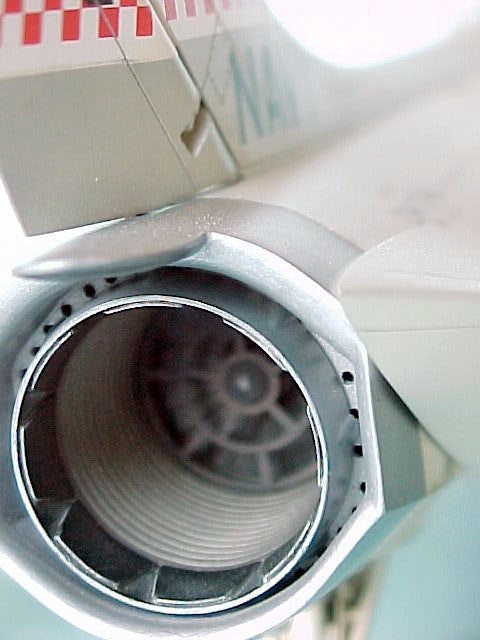
Legal Notice No material from Modeler Site any Web site owned, operated, licensed, or controlled by Damian Covalski may be copied, reproduced, republished, uploaded, posted, transmitted, or distributed in any way, except that you may download one copy of the materials on any single computer for your personal, non-commercial home use only, provided you keep intact all copyright and other proprietary notices. Modification of the materials or use of the materials for any other purpose is a violation of Damian Covalski's copyright and other proprietary rights. Read More here > Legal notice When the small Skyhawk first appeared on the flying deck of the USS Ticonderoga, in 1955, the experts predicted that this was going to be one of the greatest planes in the US Navy fighters arsenal. The truth was that all the technical solutions, some of them very evolved at that time, were the result of all the experience accumulated with the Skyray. The Skyray was the carrier based airplane that had the time-to-climb record for several years. It could reach almost Mach 1 on the flight deck and it was capable of a roll rate of 800 degrees per second!. The arrival of other important fighters, such as the F-4Phantom, and the F-8 Crusader, forced the retirement of the "Ford" Skyray, in the mid sixties, from service. I began with the Tamiya kit and had the plan of putting some extra detailing on it. This model depicts the F4D-1, TR-24 in service at the FLEET AIR GUNNERY UNIT (fagu), Pacific, in the NAAS at "El Centro", California, in April 1958. Although Tamiya provided decals for several versions, I rather used the ones by Cutting Edge, 48092 for the data, and 48089 for the version I chose for my model. Modifying the kit... Initially, my project was to build a good reproduction of the Skyray, with little modifications and adding some extra parts. As I was going on with the project, and studying the reference pictures, I realized that Tamiya made several mistakes. The conclusion is that I ended superdetailing the model and modifying many parts that I really didn't know the existance of, before beginning the building. Here is a list of the added parts, and the modifications:
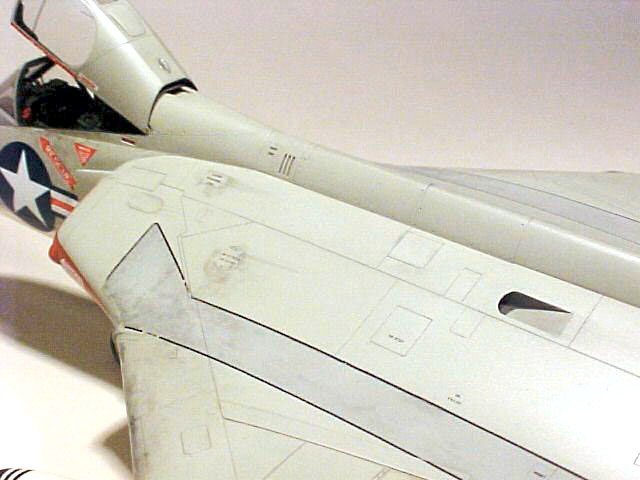
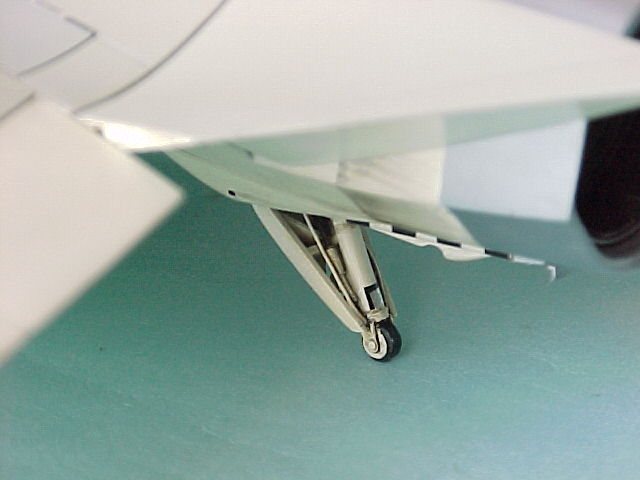
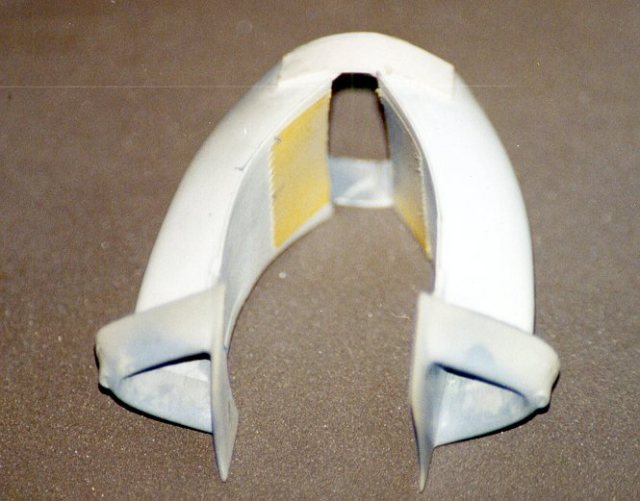
This modification left the inner part of the wing open, so I had to make them from scratch. I had to adjust the thickness and profile of the inner moving parts and give them a triangular shape, in order to put them in the adequate position. I also added the inner structure to this parts, because they are visible. As I lowered the slats positions too, I had to modify the inert shape of them.
Part II > Here Support us ordering our notes in PDF > Here |
|||||||||||||||||||||||||||||||||||||