|
|
||||||||||||||
|
Formula one |
|
|||||||||||||
|
How to build realistic wheels in 1/20 F1 scale models |
||||||||||||||
|
by Jose Antonio Solbes © 2000 Modeler Site |
||||||||||||||
|
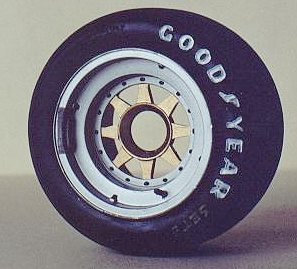
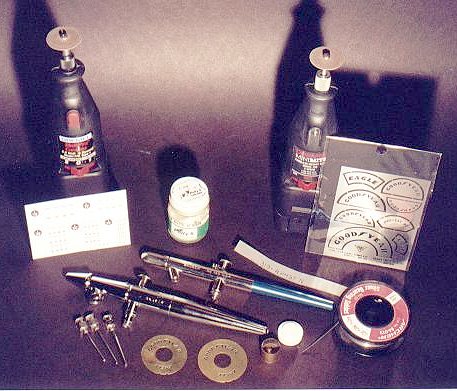
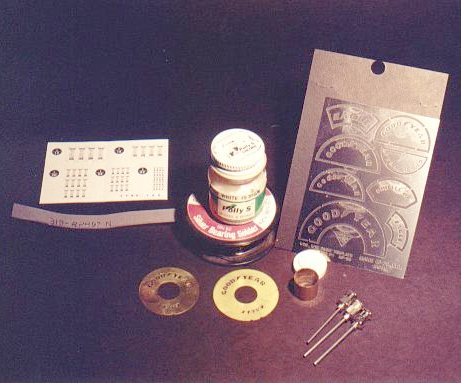
Due to its design, wheels in an F1 (or CART) racing machine are a very important component (from a visual point of view), and they are worth a good super detailing job. In order to achieve that, I'm going to divide this little article in three parts: materials, the wheel itself, and tires. Materials The materials we need are: drawing paper, paints for the wheels and tires, solder, sewing needles, some .010 brass strips (for balance weights), solder in .022 diam., 3/64" tubing (you can buy hypodermic needles in different diameters at a veterinary shop, they use them for cattle), a #00 brush, one #74 and one 3/64" drills, cyanoacrylate glue, and the "usual" tools, like an X-Acto knife with a #11 blade, an airbrush, and a good dose of patience.
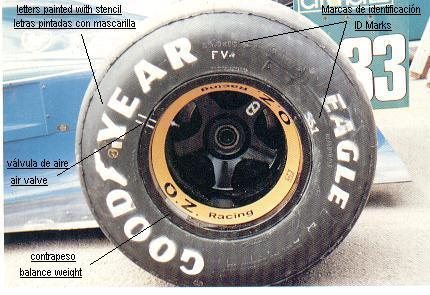
glue it with the cyano. All that's left is to put a little dab of black paint on top of the "valve", to make it look like a cap. You can cut the solder with the X-acto blade, and for the steel tubing you can use a cutting wheel in a MotoTool. To make the balance weights, cut a small strip of brass (the ones from a PE sprue is perfect), "curve2 it a little to conform to the wheel curvature and glue it to the rim using clear coat, so you don't mar the paint. Those blessed with a miniature lathe can make a lot better valves, but not every body is so lucky.
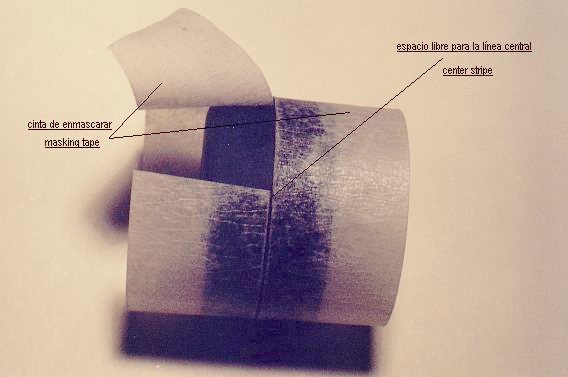
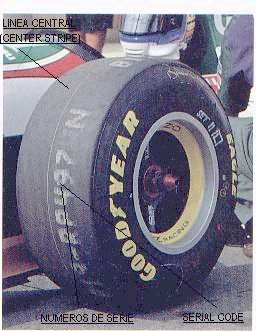
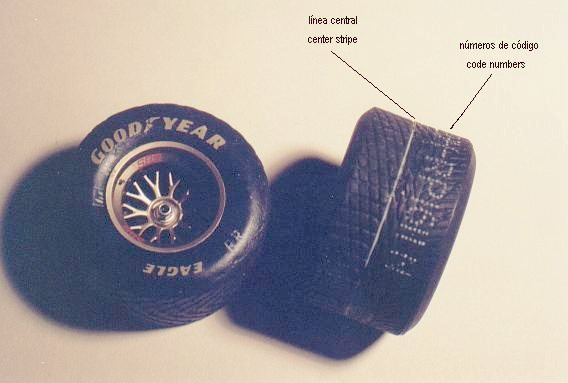
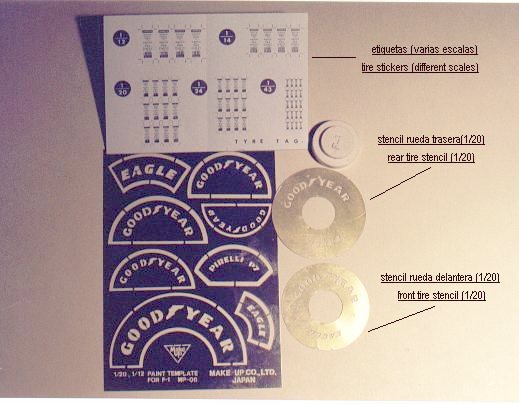
Tires Tires can take much more detail. They have a center stripe, lot codes (stencilled), and several marks on the side, beginning with the Good Year Eagle logos, everything must be painted, no decals. The ONLY paint to use with tires is white acrylic paint (water based) because it is the only one that dries over this material; you can use Tamiya, Gunze or Polly'S. After washing the tires, you have to mask both sides along the molding line that comes already in the tire (don't sand it), and paint the narrow line. Lay out code numbers in a drawing paper and "punch" dots along the letters and numbers. The full size characters are about 4" tall, so you have to "reduce" them to 3/16" for 1/20, or 5/16" for 1/12 scale. You can find some plastic letter templates, like the ones used in technical drawing, in several sizes. Use a sewing needle to punch small holes, or a #75 bit for 1/12. Codes can be different, although the ones used in '93, '94, and '95 were: RP 449 4N, B19 RP495 N.
Till next time, and happy modeling.
I started building plastic models when Tamiya put out the first 1/12 model (Honda F1) back in 1966, since then I've been buying, collecting, and trying to build all their 1/12 series up to the last one (Williams FW14B). I also have almost all of Tamiya's 1/20 scale cars, some more by Revival and a few resin kits by BBR, Studio 27, and Modeller's, (only F1 cars). I'm nuts about super detailing, that's why it Support us ordering our notes in PDF > Here |
||||||||||||||