|
Legal Notice
No material from Modeler Site any Web site owned, operated, licensed, or controlled by Damian Covalski may be copied, reproduced, republished, uploaded, posted, transmitted, or distributed in any way, except that you may download one copy of the materials on any single computer for your personal, non-commercial home use only, provided you keep intact all copyright and other proprietary notices. Modification of the materials or use of the materials for any other purpose is a violation of Damian Covalski's copyright and other proprietary rights.
Read More here > Legal notice
The new style Provence Moulage kits, with " open doors " option, offer a new challenge to many modellers. Indeed, the kits still contain the old style one-piece bodies, with closed doors, plus additional separate doors. Whilst not entirely new (this type of kit has been offered by Renaissance for many years), the more widespread use of Provence Moulage kits may introduce many a new modeller to this type of challenge ; a challenge it is, because if you want to present your model with open door(s), you will have to remove the integrally cast door(s), and replace them with the separate ones.
Now, here is one way to do this, and it's a quick and easy way too !
Go ahead!
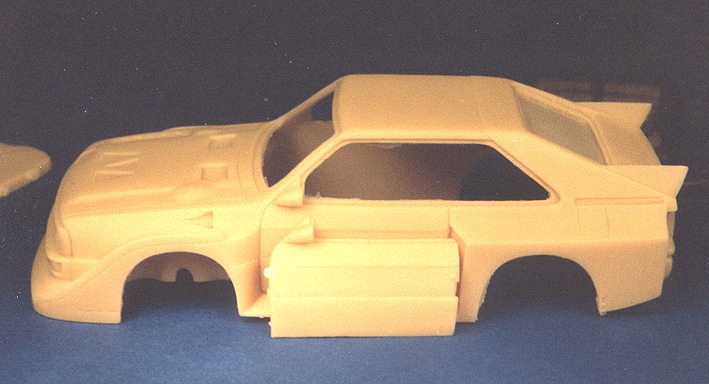
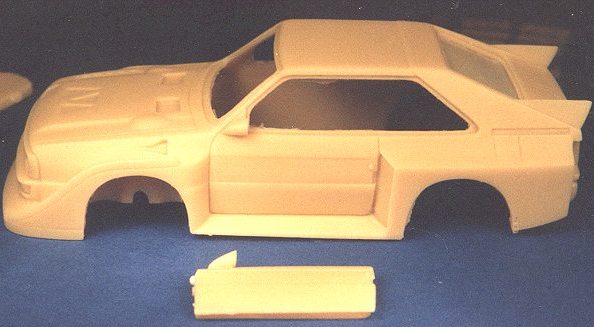
The model which we are going to use to demonstrate the technique is an Audi Quattro, Provence Moulage reference # K1791.
The open door model is achieved in a three step procedure, each of which involves standard tools and skills every 43rd scale modeller has at his (or her) disposal.
|
Step 1:
Cutting out the cast-in doors
|
|
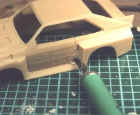
For this " how-to " article, I decided to cut one door only. It's faster, and the body will retain much more strength if one door is left closed. The technique would of course be the same for opening the two doors, but with the two doors removed, the body will become very " soft " (low torsional rigidity), and likely to break or produce cracks in the paint-job. So, be careful if you want to open both doors !
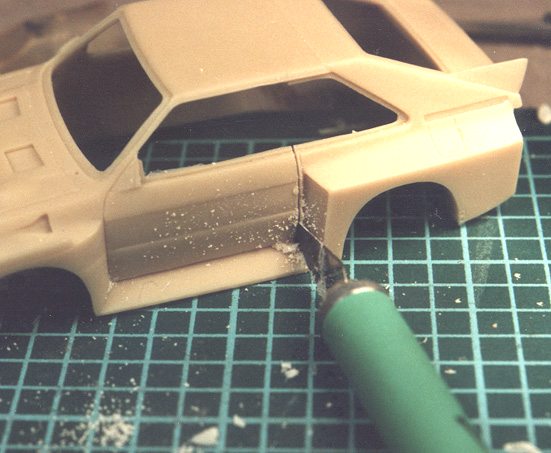
Two tools are used : A #11 X-Acto blade, and a fine toothed saw, roughly the same shape and size as the #11 blade. Both are firmly held in an X-Acto handle. These tools should be available from your usual sources ; mine came from Micro-Marc.
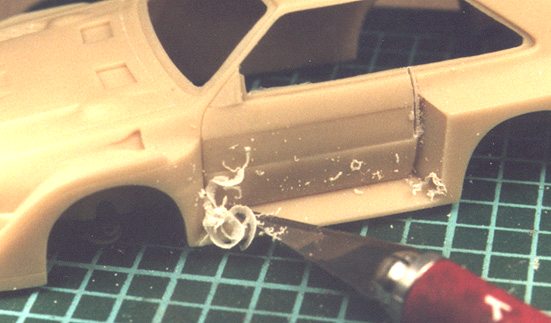
I first cut off the rear-view mirror using the #11 blade in a shaving motion. Then the vertical cut along the rear panel-line of the door was made using the fine toothed saw, leaving about 1 mm excess material on the B-pillar. Then I made the angled cut along the A pillar, at the same place where the rear-view mirror had been.
The bottom of the door was " cut " using the back of the #11 blade in a scribing motion. Thanks to Morton from the "modelcars43scale" discussion group at Yahoo groups for introducing me to this very effective technique. He says he uses it to deepen/emphasize existing panel-lines, but it obviously also works to eventually cut through. I did the same to the front vertical edge of the door, and after about 10 minutes work, the door had been removed from the body shell ! That was quick, now, what do we do with that hole?
|
|
|
|
|

|
|
|
|
Step 2:
Cleaning up the mess
|
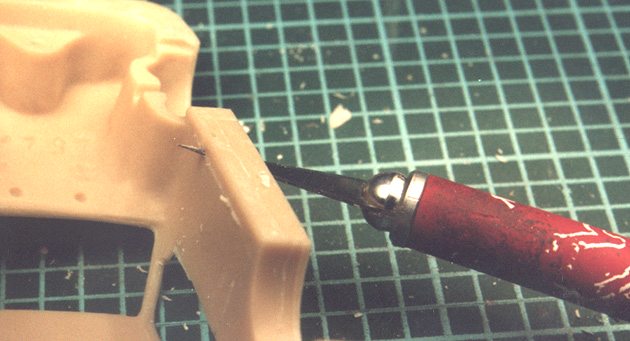
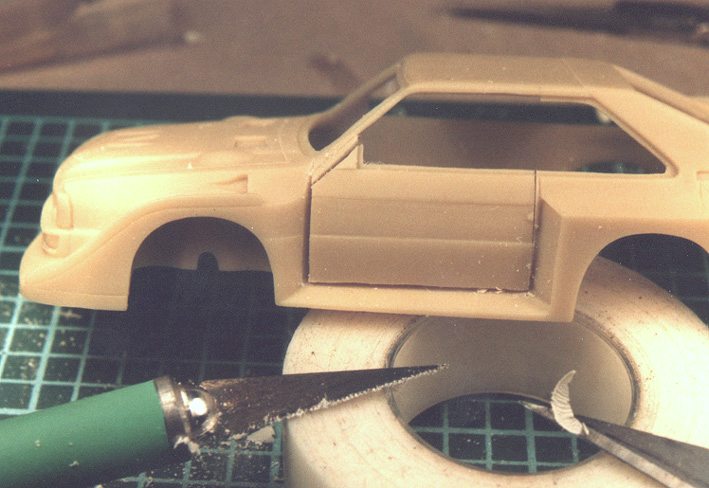
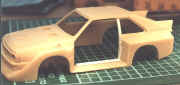
The door-sill and the jamb have to be cleaned up, using abrasive paper, files and the trusty old #11 blade, then detailed to represent the structure of the real thing. The easiest way is to start from flat surfaces, to which you add the structures and details.
If you have access to pictures showing the sill and jamb on the real car, try to figure out how to reproduce those various shapes, folds etc. Most of the time, a few pieces of plastic strip will do.
|
The jamb (front face of the B-pillar) can usually be detailed with a piece of thin plastic card whose outward contours the shape of the body. I had a look at my own car, plus several others, and found that they look more or less the same.
|
|
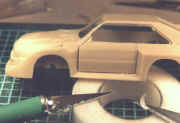
In addition, Arena has released a very high detail kit of the long Quattro, with all doors and bonnet/boot open ; a quick glance at their body shell confirmed that the basic shapes are the same. I replicated them with 3 strips of plastic (Plastruct/Evergreen strips and flat styrene), which I shaped using the #11 blade, files and abrasive paper. They were glued in place with cyano-acrylate type glue (superglue). I did in this case make a new B-pillar too, as the p-e part alone (side window trim) would look too thin in this place.
|
I did remove part of the recess (following the roof line) which is meant to serve as a bed to pose the side window onto (see pictures). That was a bad idea - so don't do it! I will have to rebuild mine at a later stage. Also, the blade had slipped a bit while "scribing" the door; I simply filled the excess groove with c-a glue, and sanded it smooth.
|

|
|
This, I will describe in the upcoming full build report. I can say as much as this for now : The door will be glued in place. Three good reasons to do this : First : A properly working and good looking hinge is very time consuming and difficult to build ; I don't have that time right now, because this review has to be ready in 2 weeks time!
|
|
Second : If the door actually opens and closes, people will want to see how it works (or maybe you think they want to see ...), and it will inevitably, one day or another, break. Third: It is very difficult to achieve a really nice fit of the closed door ; the model is prone to have that " die-cast " look when the door is closed.
Hope this has been of help to you so far!
If you have a different (better ?) technique, please share your knowledge with the other readers, and contact the editors of Modeler Site!.
Support us ordering our notes in PDF > Here
|