|
|
|||||||||||||
|
Airplanes |
|
||||||||||||
|
Otto Doppeldecker of 1914-1915 1/72 scale |
|||||||||||||
|
by Carmel J.Attard © Modeler Site |
|||||||||||||
|
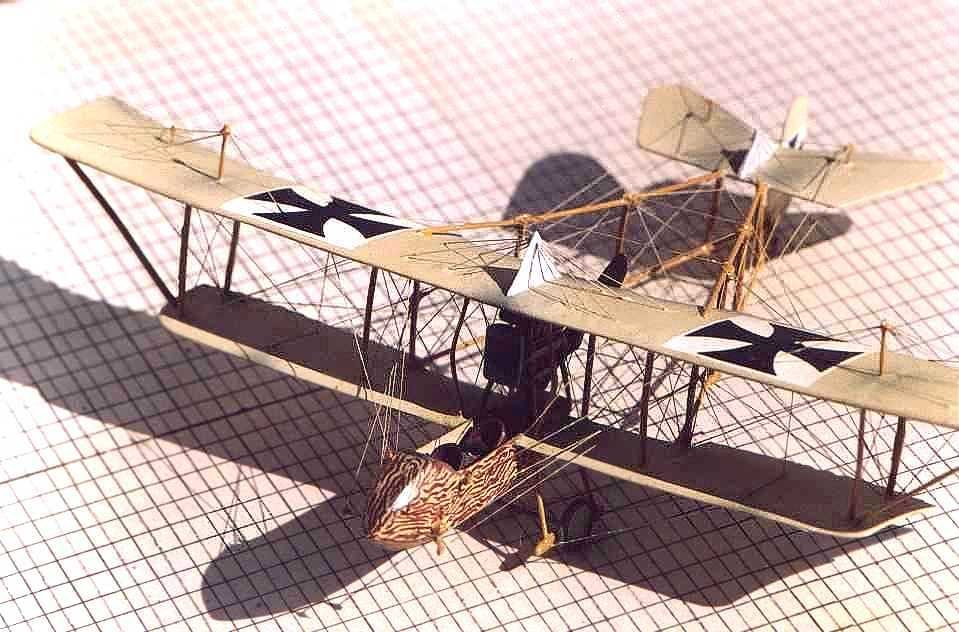
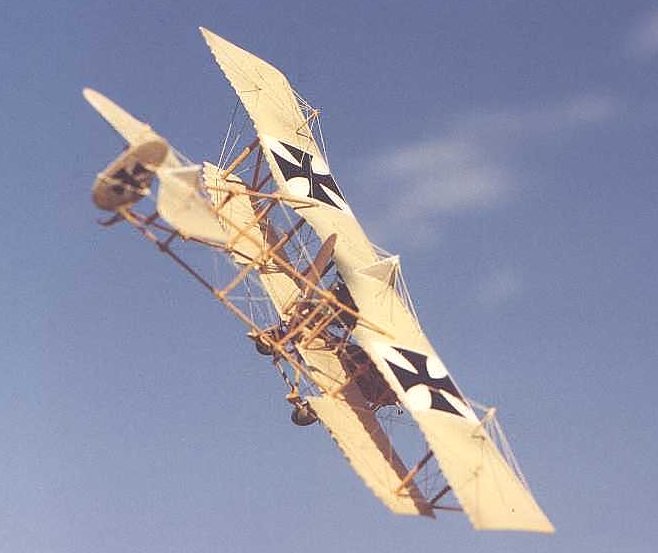
Legal Notice No material from Modeler Site any Web site owned, operated, licensed, or controlled by Damian Covalski may be copied, reproduced, republished, uploaded, posted, transmitted, or distributed in any way, except that you may download one copy of the materials on any single computer for your personal, non-commercial home use only, provided you keep intact all copyright and other proprietary notices. Modification of the materials or use of the materials for any other purpose is a violation of Damian Covalski's copyright and other proprietary rights. Read More here > Legal notice The Otto Doppeldecker was a WWI German pusher biplane. It was designed by Gustav Otto and was flown for the first time in 1913 and served with the Imperial German Air Service during the early years of WWI. The Otto Company of Munich produced several types of aircraft up until 1916. Unfortunately only scant intelligence seems to be available on the Otto firm.
The instruction sheet that is supplied with the scale model produced by the Phoenix Models gives some important details on this aircraft. Other information is available in the book German Aircraft of the First World War by Peter Gray and Owen Thetford, which is supplied by Putnam. In p.499 of this book there is a good photo from the Otto series of pusher biplanes, which is of a slight variation from the one featured in this article. The kit The 1/72 scale vacform model of the Otto Doppeldecker supplied by Phoenix Models is made of white plastic with prolific fabric. It is not however the sort of kit suitable for the beginner. In fact it is also quite a challenge to undertake to build even by the experienced modeler. There is a multitude of rigging that needs to be attached to the kit wings and to the flimsy framework. It is therefore worth spending some time trying to figure out a method to produce a sturdy boom framework.
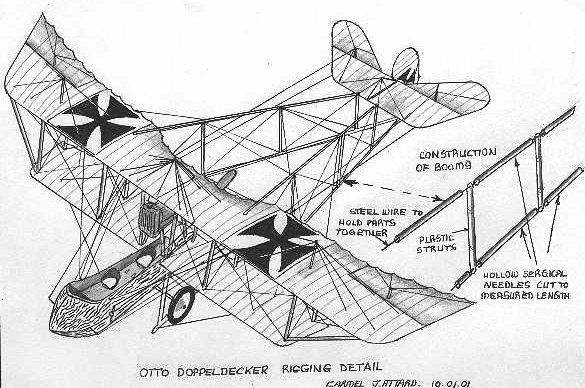
A method that I have tried and found to work is as follows. Using the scale plans provided with the kit I have measured the length of each segment of the boom construction and made a list of the pieces required which were in duplicate. These lengths were then worked out of steel surgical needles. Thus forming the horizontal pieces. The vertical struts were also measured and these were made out of Contrail plastic strips of the correct thickness and cut to the measured lengths. The figure shows how the whole arrangement is built up together and glued with superglue. Note that a thin steel wire puts the whole assembly together. Having applied this method to produce the tail booms and also the wheel assembly, the rest is a matter of applying the rigging to each and every place shown.
Painting As for color details the cockpit interior is buff, with dark leather seat cushion and cockpit coming. The instrument panel is dark natural wood or black with black-faced instruments with white numerals. All other cockpit parts were either natural metal or painted medium gray. The struts were dark varnished wood. The propeller was laminated varnished wood or painted gray on some aircraft. Tires were dark gray.
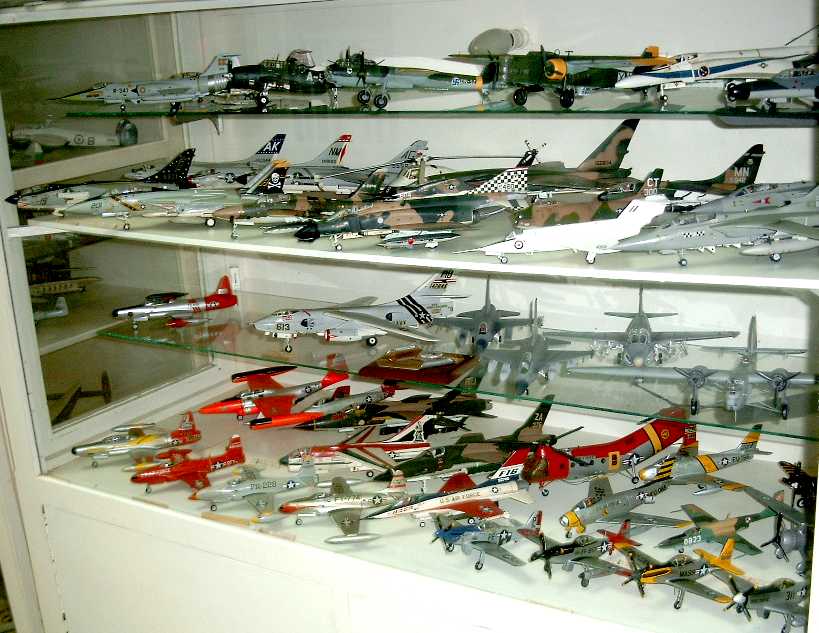
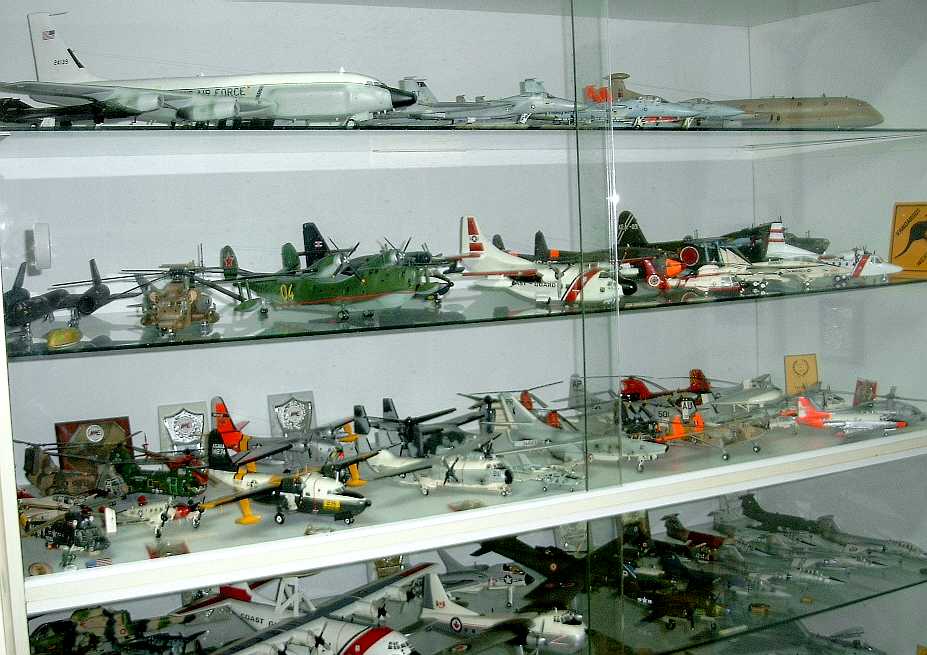
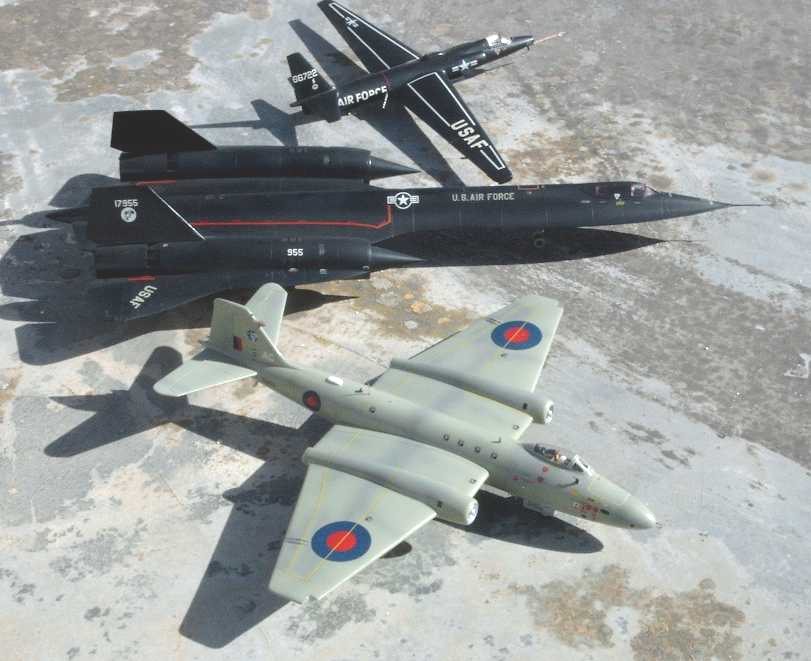
About Carmel... I come from the tiny island of Malta, in the centre of the Mediterranean sea. I spent much of my free time writing in UK model magazines and also in magazines in Bulgaria, not that I speak Bulgarian but there are modelers like us who made translation for my articles. I have been making my collection since for the past 35 years. Looking hindsight it does look long time but the hobby keeps the time clock as if it was static and there are so many more kits still to build. There are some 800 kits still in boxes many of which are vacform kits which for some reason I seem to enjoy more in building. Here below some kits from my collection
|
|||||||||||||