|
|
|||||||||||
|
Techniques |
|
||||||||||
|
Weathering Tricks for novice modelers |
|||||||||||
|
by Marcelo Scaminaci Russo |
|||||||||||
|
Those who had chance to see military aircraft, know that there is only one time when they look "brand new", when they come out from the assembly line. The passage of time and the use, deteriorate the external painting giving the airplane an aging aspect, remember that many of them fly at supersonic speed and/or are exposed to extreme environmental conditions. If you are building your first model, you will surely be doing it out the box, but you can achieve incredible results, and give them a characteristic aspect of "wear", with very few materials and a couple of simple techniques.
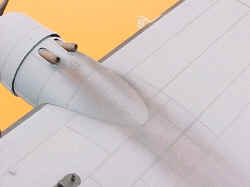
The process the seasoned modeler uses to give this look to the model is called weathering. Many times it is represented on the model by the soot of the exhaust, oil stains, chipped painting, etc., all that can really give the model an amazing authenticity.
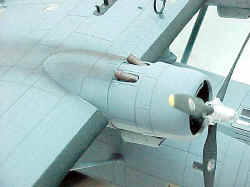
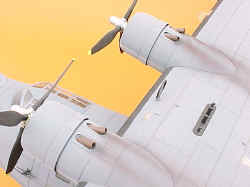
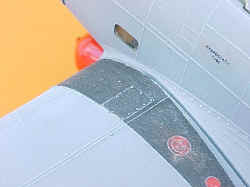
When we apply weathering techniques to a model we have to use the same logic used by mother nature. For instance, we shouldn't put smoke stains (from the exhaust) and then apply a gloss decal over the blackened surface. Usually, airplanes are well preserved, they don't show dents, but smoke stains start appearing around the exhaust exits, as well as oil drops, on some surfaces. Many times chipped paint can be seen on the wings leading edges and stabilizers, and on those places where the crew or mechanics walk. Anyway, we have to keep in mind that all airplanes with a good maintenance will show minimum amount of wear.
Two basic ways to show exhaust stains
The second method is using watercolors, crayons or chalks on the black to gray range. We begin grinding this material into a fine powder, then we will apply it on the model rubbing it with an old paintbrush. On the exhaust outlet the color should be dark and thicker. The method for application should be the same that the one used with the airbrush. The result of this technique is not permanent, so it will be necessary to apply one or two coats of dull varnish or lacquer, to prevent the stains from disappearing.
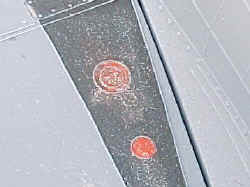
Oil stains
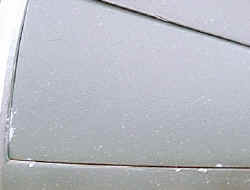
Chipped paint
Another very common technique, but for advanced modelers, consists on the double layer paint. We apply a thin layer of silver or aluminum paint, it should cover the whole model, then we use masking liquid (applied like white glue as liquid dries off, and it is easy to be removed) we cover small areas in those we want the chips appear (as we made with the silver paint in the previous technique). When all is dried we usually apply the color the model requires and after several days, we remove the masked chips using masking tape or the point of a well sharpened blade, the effect showed is very real because the silver area appears under the color, pretending to be the exposed metal.
|
|||||||||||