|
|
||||||||||||||||||||||||||||||||||||||||||||||||||||||||||||||||||||||||||||||||||||||||
|
Armor R/C |
|
|||||||||||||||||||||||||||||||||||||||||||||||||||||||||||||||||||||||||||||||||||||||
|
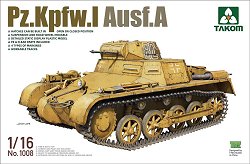
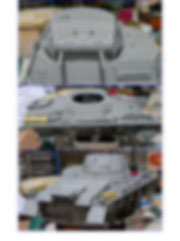
Building the Takom Panzer I (Pz.Kpfw.I) Ausf.A #1008 for R/C 1/16 scale |
||||||||||||||||||||||||||||||||||||||||||||||||||||||||||||||||||||||||||||||||||||||||
|
by Mario Covalski © Modeler Site |
||||||||||||||||||||||||||||||||||||||||||||||||||||||||||||||||||||||||||||||||||||||||
|
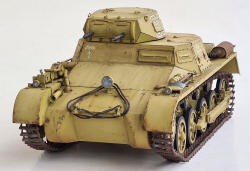
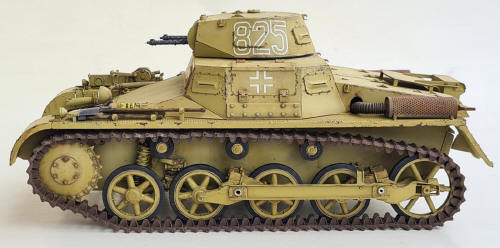
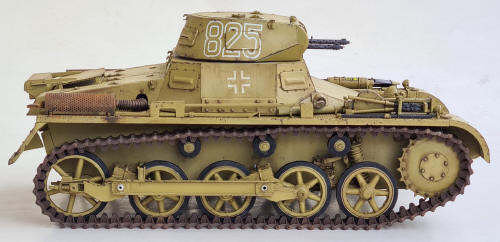
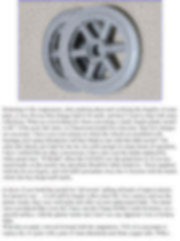
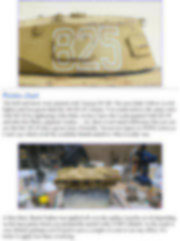
Legal Notice No material from Modeler Site any may be copied, reproduced, republished, uploaded, posted, transmitted, or distributed in any way, except that you may download one copy of the materials on any single computer for your personal, non-commercial home use only, provided you keep intact all copyright and other proprietary notices. Modification of the materials or use of the materials for any other purpose is a violation of copyright and other proprietary rights. Read More here > Legal notice The Panzer I was a small tank built before the start of WWII .This tutorial aims at sharing with the reader my experience in the construction of this model converting it to radio control, and even will be useful for those who build it as a static model, since the reviews say much about the kit but little about the problems I found.
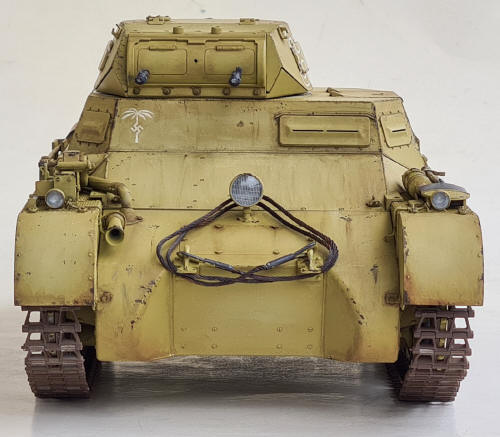
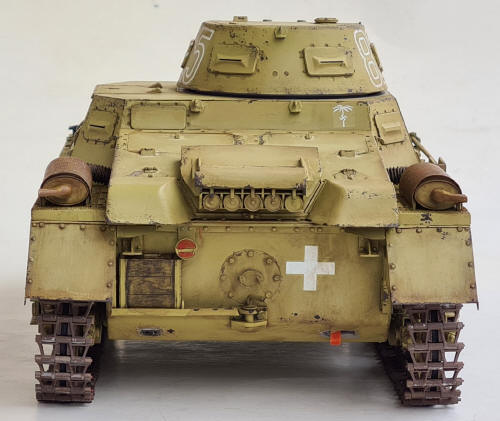
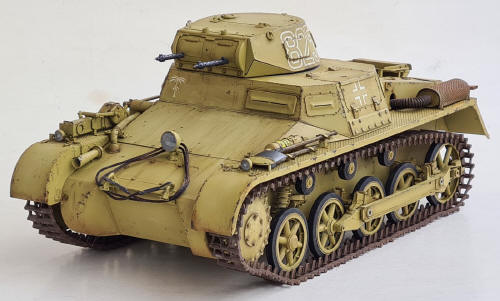
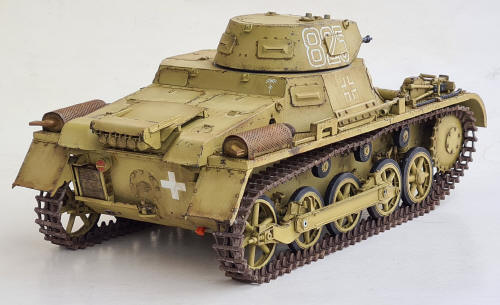
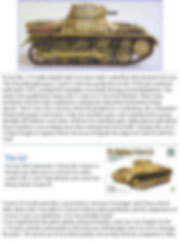
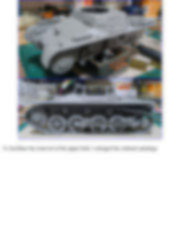
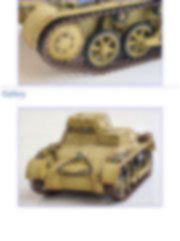
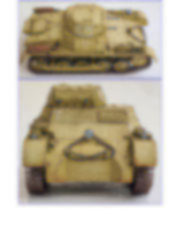
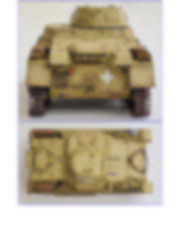
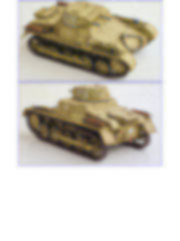
If you like 1/16 tanks models and even more radio controlled, this tutorial is for you. The Panzerkampfwagen I Ausf.A went into production in late 1934 and continued until early 1936. Around 800 examples were built, having several limitations. The armor was insufficient, being only 13 mm (0.51 in) at its thickest. There were problems with the early suspension, making the tank pitch backwards at high speeds. There were also concerns about the propulsion, overheating, the commander being both gunner and loader of the two machine guns, and communication going through old-fashion vocal tubes. With its two machine guns, light armour and speed, these machines were nothing more than training and scout tanks. Despite this, most of them fought in regular Panzer divisions alongside the improved Ausf.B until late 1941
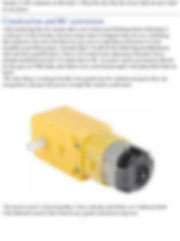
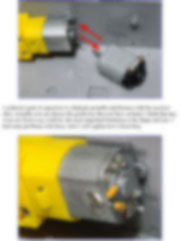
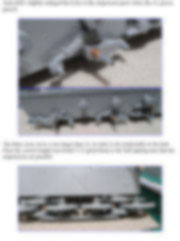
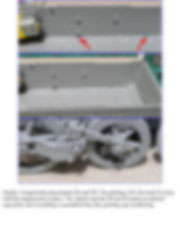
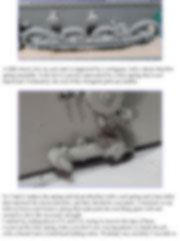
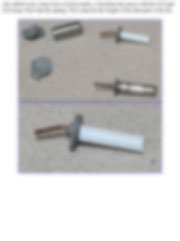
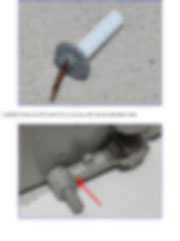
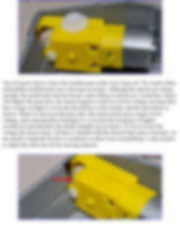
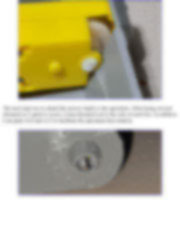
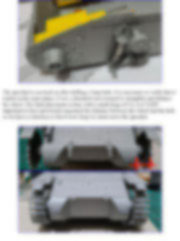
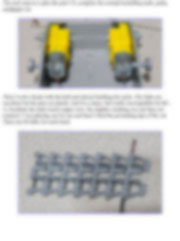
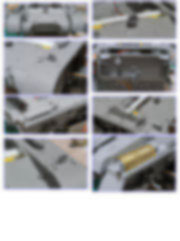
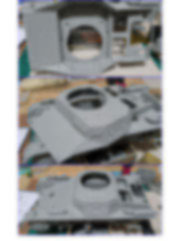
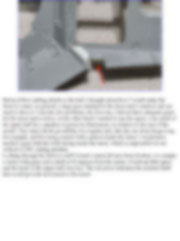
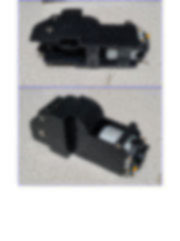
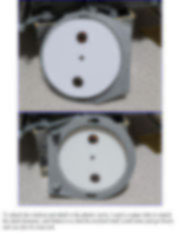
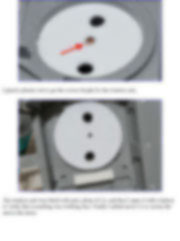
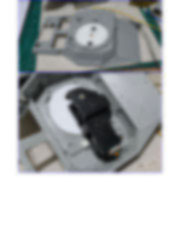
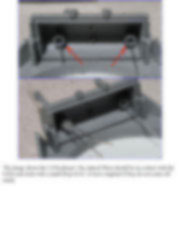
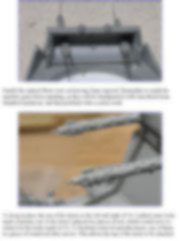
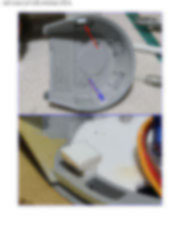
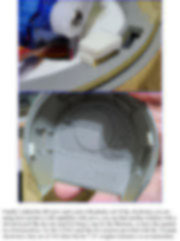
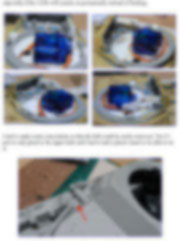
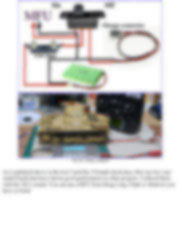
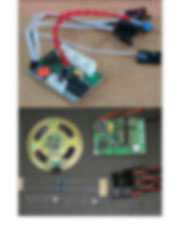
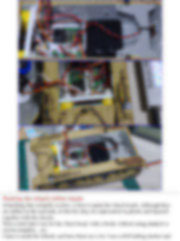
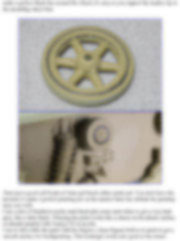
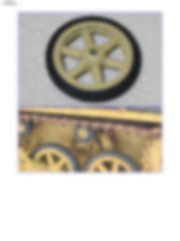
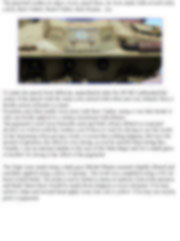
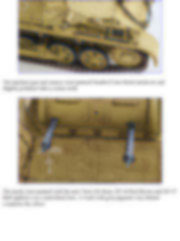
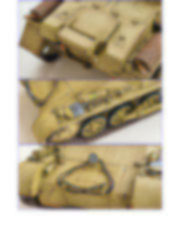
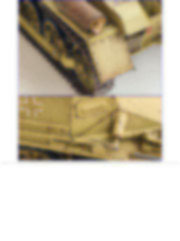
Version B would seem like a good choice, because it is longer, and It has a fixed idler wheel, but I was able to convert without space problems, and the suspension of version A gave no problems, so it was actually easier. I was surprised by the parts quality and good details, some are very fragile for the 1/16 scale, and the connections to the trees are well thought out so as not to damage the parts. The decals are of excellent quality, but terribly delicate compared to other brands, I will comment on that later. I liked the fact that the lower hull was provided in one piece. Construction and RC conversion After analyzing the kit, seeing other conversions and thinking about what parts I could get or had at home, because many times it happens that you see something that someone else does but then it is not easy to reproduce it because it is not possible to get those parts, I decided that I would do the following modifications, and each has a justification. I have a lot of previous experience because I have already modified several 1/16 static kits to RC, in some I used conversions offered by the guys at 35RCtank, and others were conversions made with parts that I had on hand. The only thing I could get locally were gearboxes for Arduino projects, they are inexpensive and provide power enough this model could need. This tutorial is offered in PDF format to be read or printed using Acrobat reader, contact our webmaster > Here Includes more than 200 pics, here we show only the text pages.
Esta Nota es ofrecida en formato PDF, el cual puede ser leído o impreso usando el Acrobat reader, contacte a nuestro webmaster > Aquí Incluye más de 200 imágenes, aquí solo mostramos las paginas de texto.
Big size photos are only available in our PDF format. Support us ordering our notes in PDF > Here |
||||||||||||||||||||||||||||||||||||||||||||||||||||||||||||||||||||||||||||||||||||||||