|
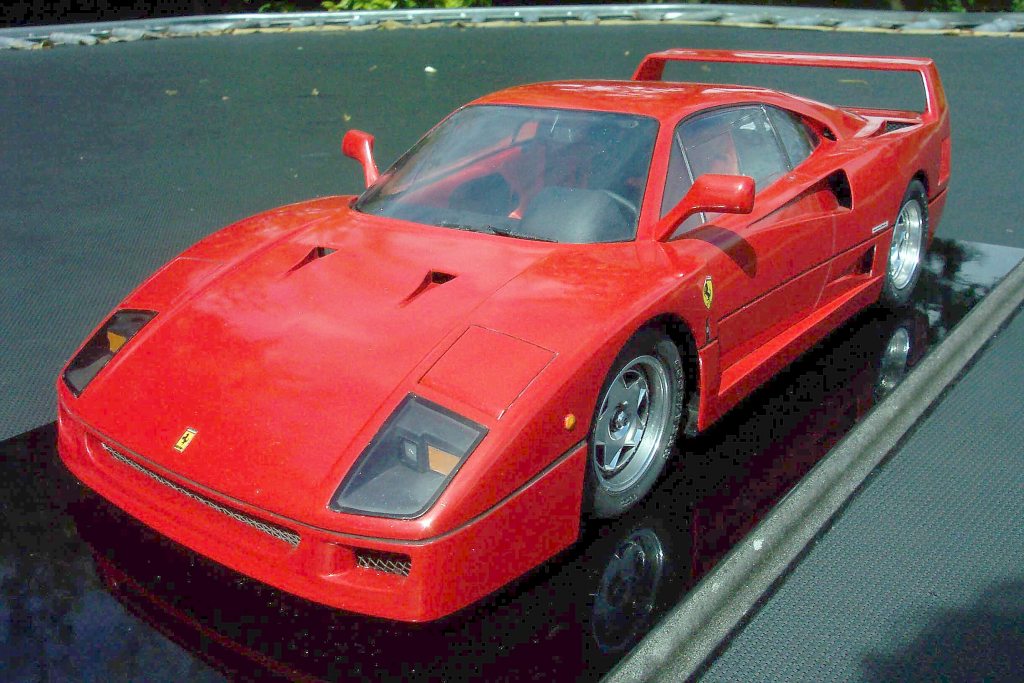
The Ferrari F40 is a car that needs little introduction. From its introduction in the late 80's it was one of the most desired cars in the sports racing scene and also a production car to the fortunate few.
Only one mainstream model manufacturer ever released a large scale F-40 kit that was in the affordable bracket, Especially in New Zealand. I purchased this monogram some 12 years ago and decided to start building it only recently.
I initially started out to build the kit straight from the box. But found that if it was to be even remotely accurate, serious modifications will need to be made to the kit.
I will set out in this article to outline how I approached the build of this kit and what references I used.
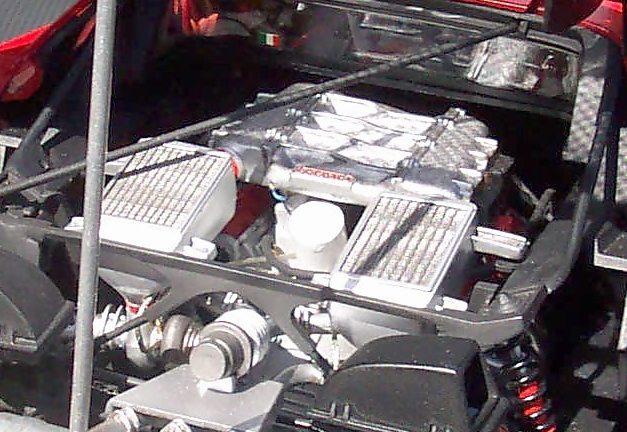
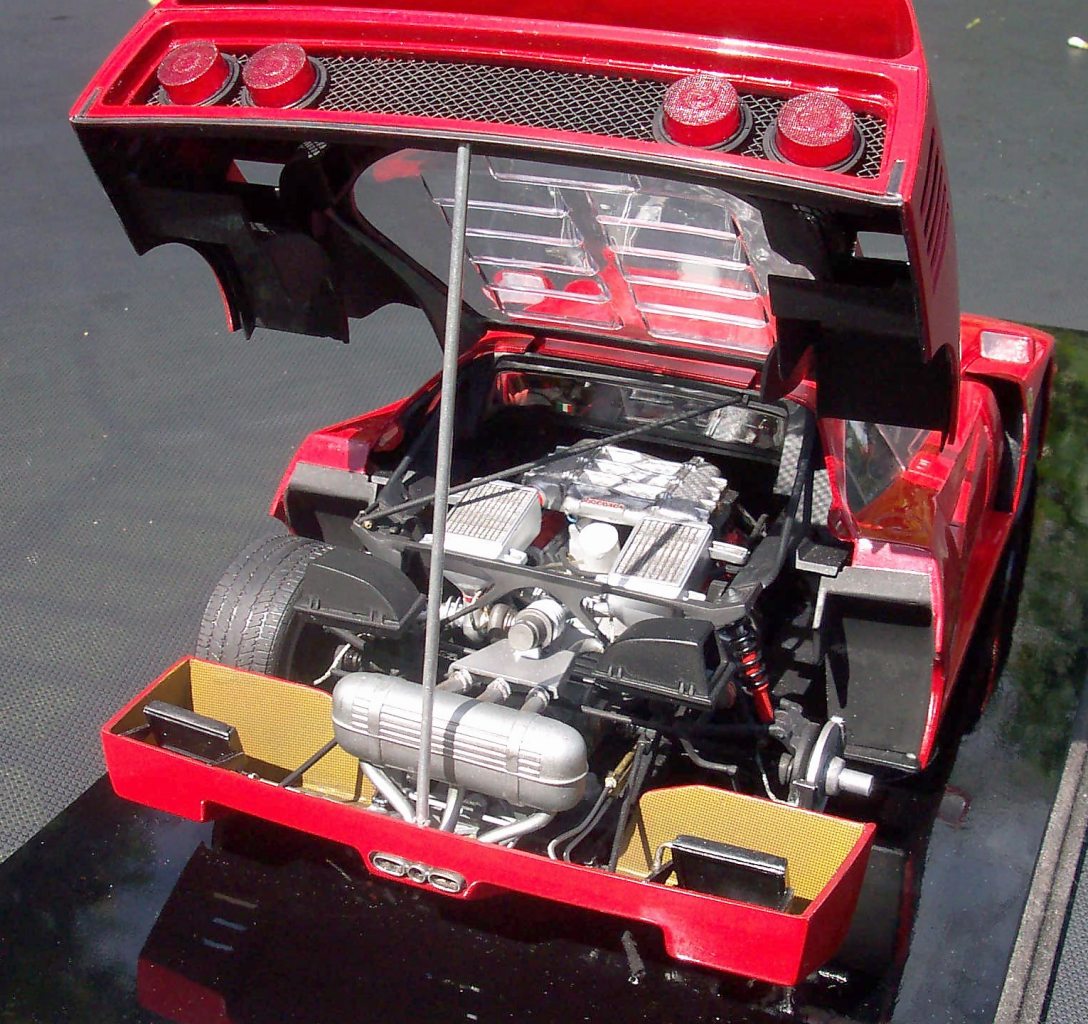
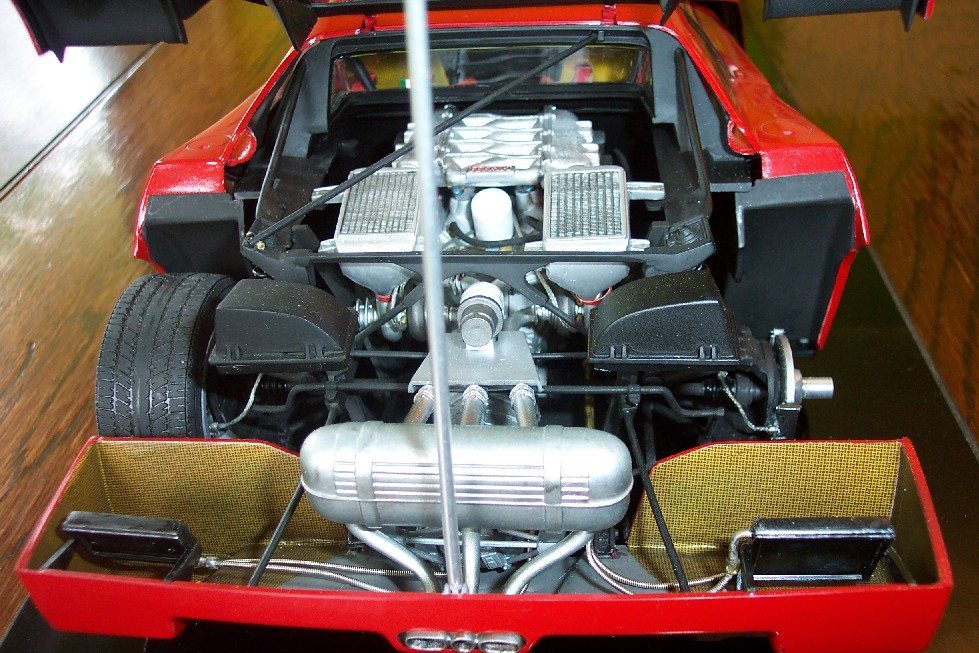
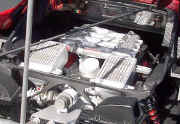
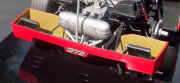
The Engine/gearbox
This was the first part of the car that was built. His was relatively straight forward.
To get the alloy effect on the intake manifold, I Airbrushed Humbrol Silver (11) mixed with a hexane based thinner. This type of thinner evaporates very quickly and gives a very even and smooth alloy finish. One dried I then ran a black wash consisting of thinned Humbrol Matt black (33). Next, a very thin spray of the Humbrol 33 over top again.
|
The exhausts and intercoolers were next and were painted with the same technique as above. Additional to the final coat was 2 other coats consisting of a copper wash then another light coat with a coat of blue along the welding seams. Although not apparently visible in the photos the blueing effect on the exhausts is there. The muffler also had a mix of flat base mixed in with the wash.
The 2 Oil coolers on the rear pod were fitted with brass tubing and hex shaped brass rod shaped into hex fittings. The pipes along the chassis were shaped using the same process. The braided hoses were made from 42' GHS boomer guitar strings.
|
|
|
|
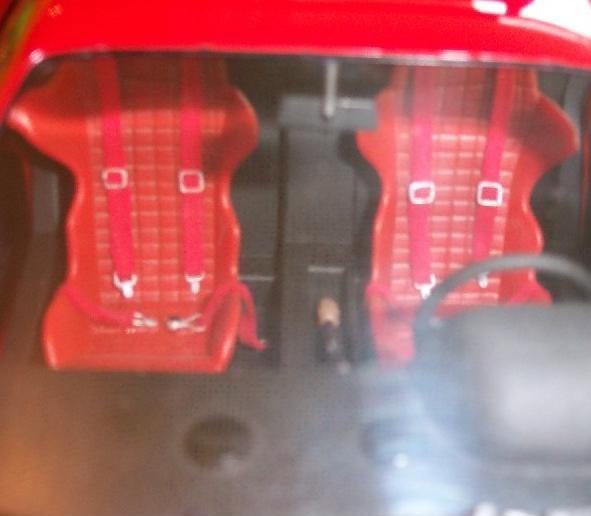
Interior
|
The interior of the car is very sparse, and depending on the model of the F40 you wish to build can change greatly. I chose the minimalist look. The seats were detailed with Fujimi's excellent Carbon/Kevlar decal sheets. The seat belts were entirely scratch built from Quilting fabric, Brass and Styrene.
Again Everything in side was airbrushed with a combination of Humbrol and Tamiya enamels.
|

|
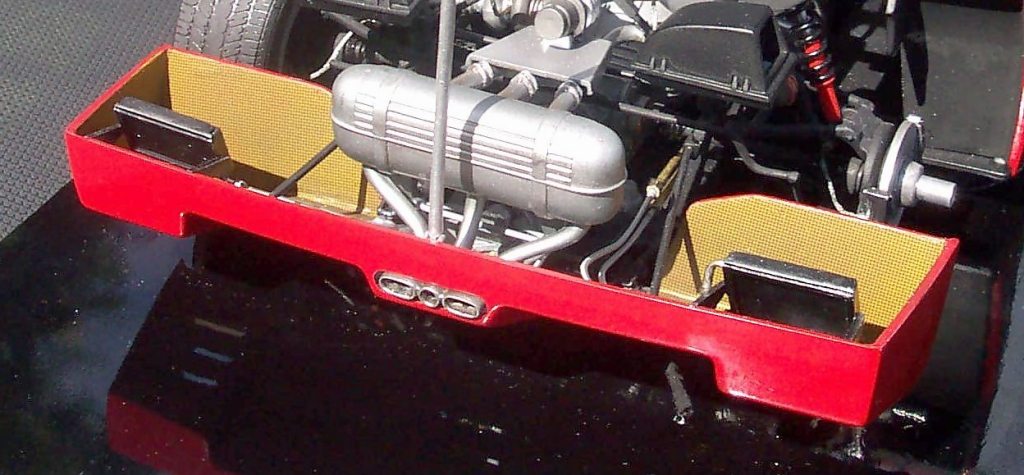
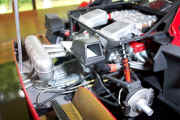
Chassis
This part of the kit was the most challenging. Most of the parts were either warped or were so poorly moulded that they didn't fit. This required major re-engineering to straighten things out. The first things that were re-engineered was the Shocks and coil springs.
|
The shocks and coils were moulded too short and did not look convincing enough. So the only viable solution was to scratch build them. The new shocks consisted of brass tubing with alloy sleves. This was all soldered together with brass and alloy pins to mount them onto the chassis.
|
|
Considerable shaping of the rear and front uprights were required to cater for the new shocks and pins. The coils were made from brass wound around left over tubing from the shocks.
The brakes were detailed with Sakatsu hex fittings and braided hose line, with the rotors drilled with .5mm holes.
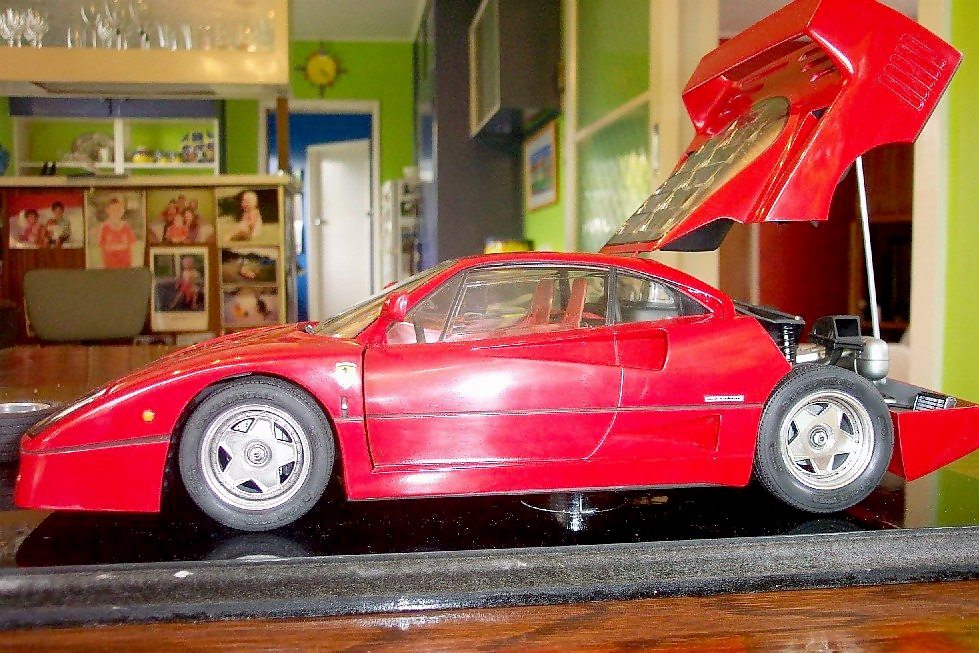
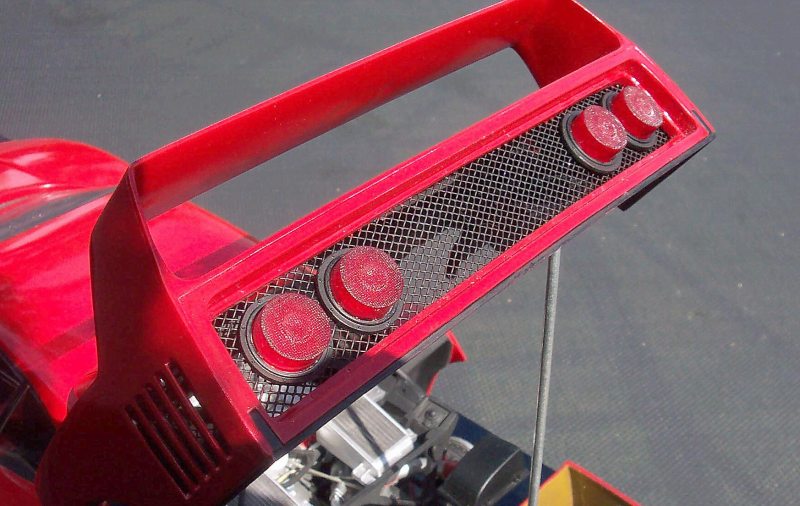
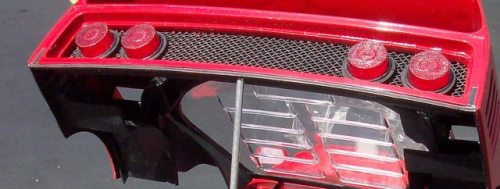
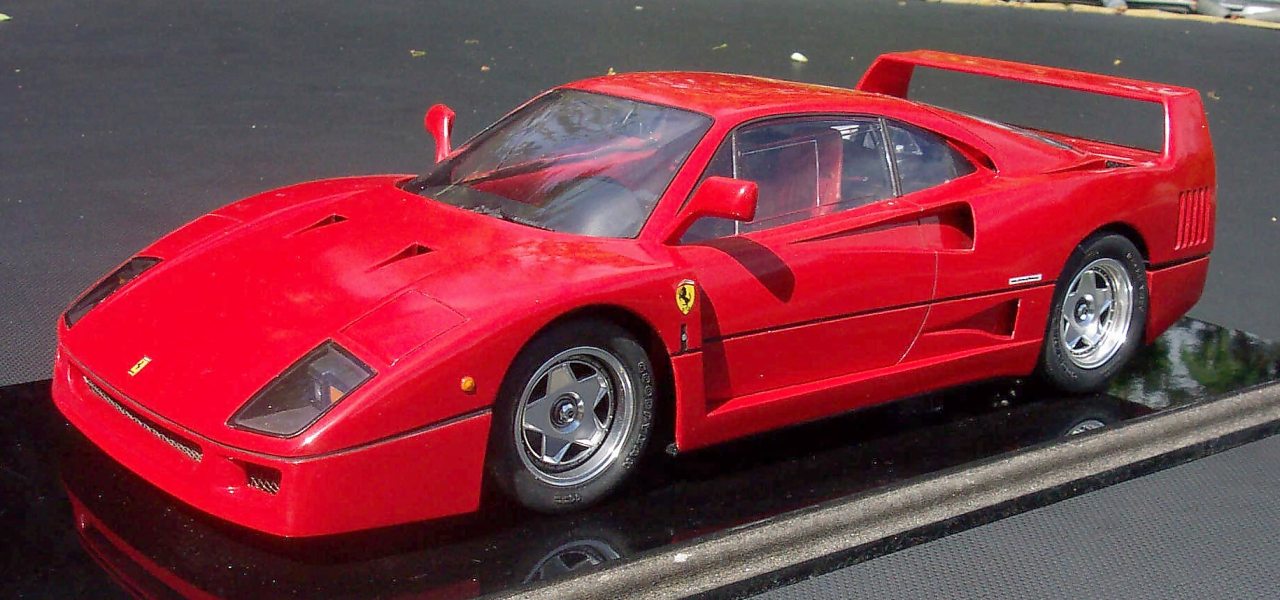
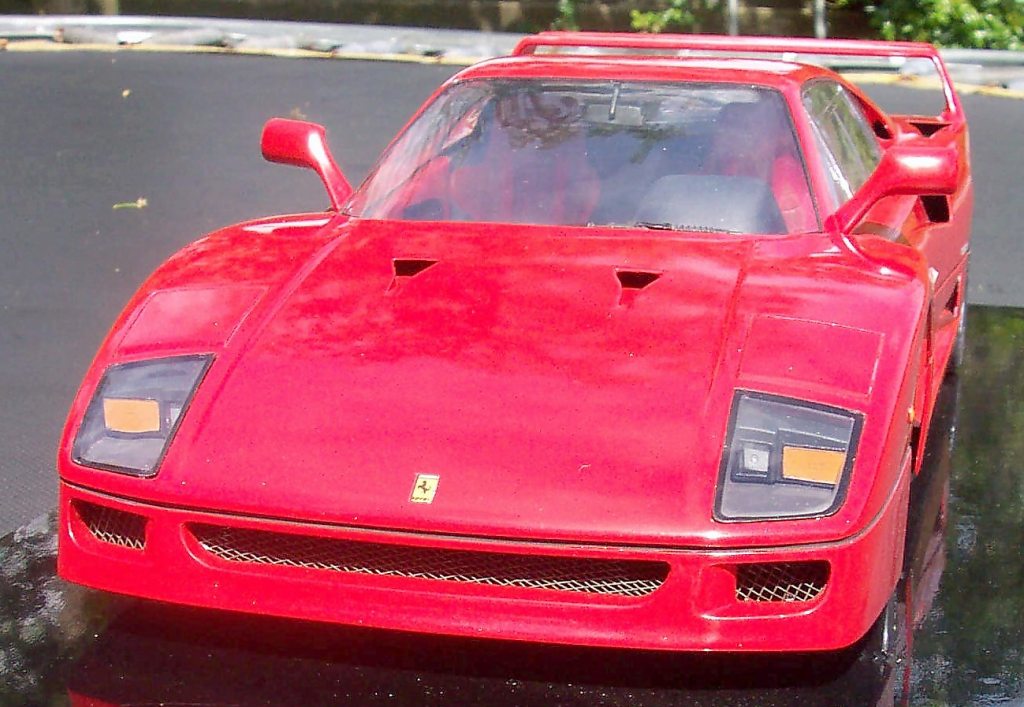
The body
The kit came standard with rather crude detailing on the hood and front vents, On the real F40 the entire rear of the car consists of a mesh screen with the rear lights mounted in them.
To achieve this I had to drill a series of holes around the moulded mesh and carefully cut it out without damaging the surrounds and the mounts for the brake lights.
The brake light mounts were then cut out and shaped using a drill press with a small grinding wheel.
Once this was all done the mesh was then fitted with styrene strips used for the moulds and internal mounting points. Filler was used to clean things up.
The same exercise was done for the 3 front vents.
Painting the massive body required a small fortune in paint allocated to achieve good results.
I first sprayed one coat of Tamiya light grey primer over the entire body then 4 coats of Tamiya Italian Red over top. The 4 coats were done over a period of a week with a light sand down between each coat. This brought out the rich deep red that Ferrari is famous for. The body was then rubbed down with Symonise rubbing compound.
Conclusion
Over all this was a real challenging kit to build. So much so that for a period of 10 months I concentrated 100% of my modelling time on it as it required major reworking to get the result I wanted.
Its still not true to the real F40 for accuracy, especially in the suspension and wheels. But given the inaccuracies of the standard kit it has come along way.
About Tony
I work as a Senior Systems Engineer for a large systems integrator. Married with 3 children I find my modelling time is mainly restricted to the evenings and only 3-4 hours a night at the most can be spent on projects. I mainly focus on building Formula cars and Ferrari's in any scale.
|