|
|
|||||||||||||||||||||||||||||||||||||||||||||||||||
|
Airplanes |
|
||||||||||||||||||||||||||||||||||||||||||||||||||
|
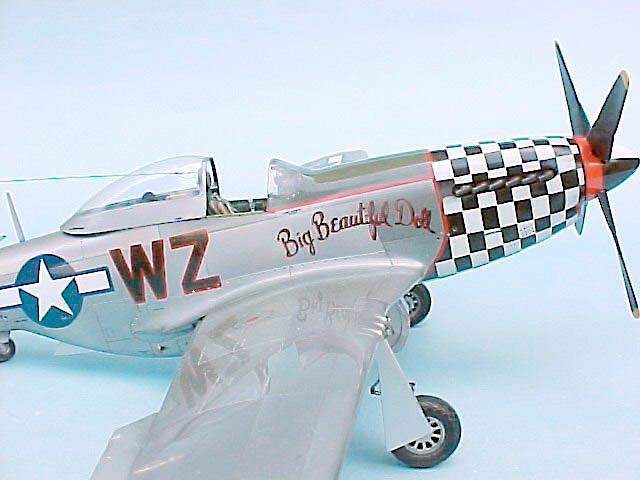
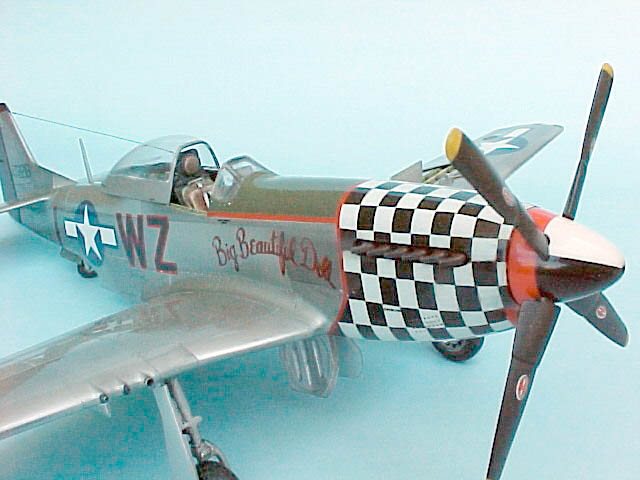
"Big Beautiful Doll" Deatiling a Tamiya's Mustang 1/48 scale
|
|||||||||||||||||||||||||||||||||||||||||||||||||||
|
by Daniel Polizzi |
|||||||||||||||||||||||||||||||||||||||||||||||||||
|
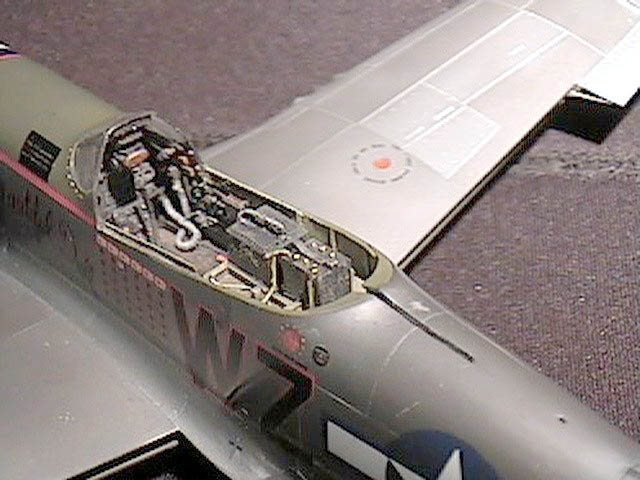
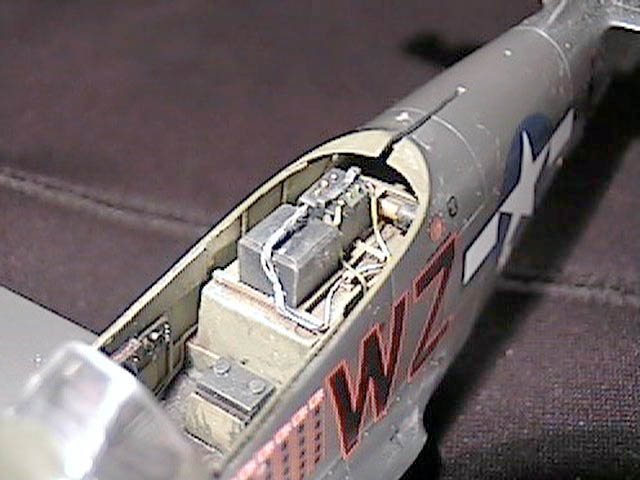
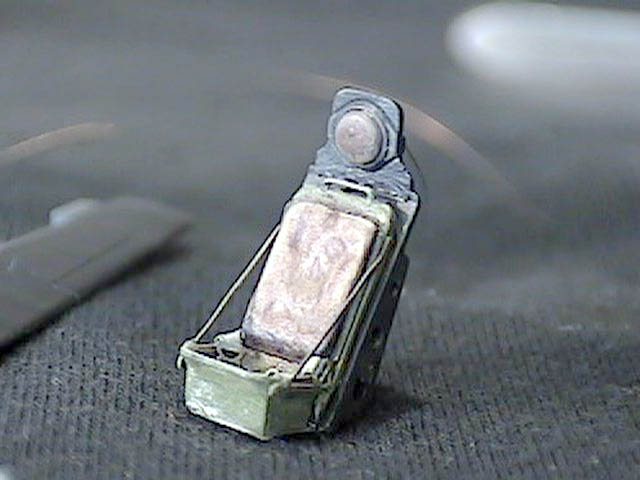
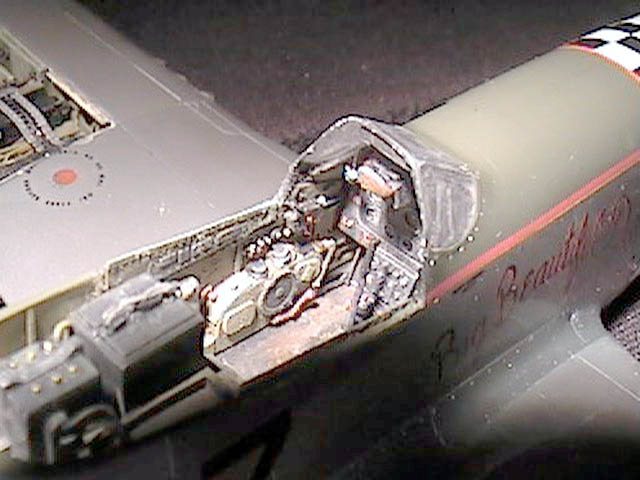
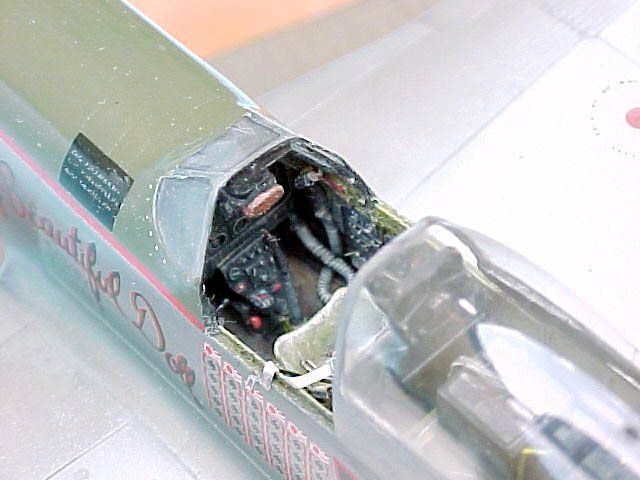
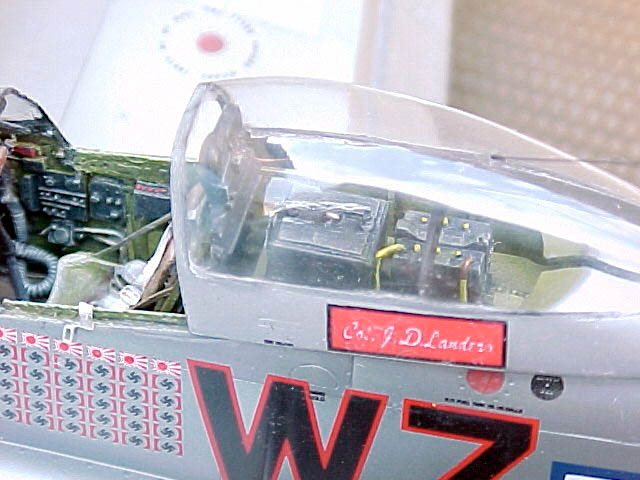
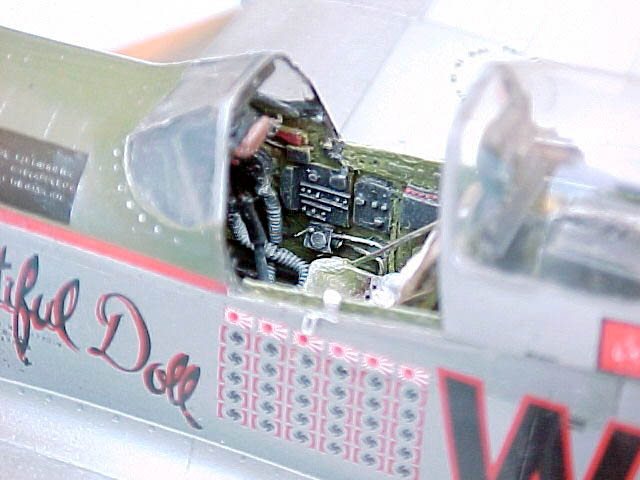
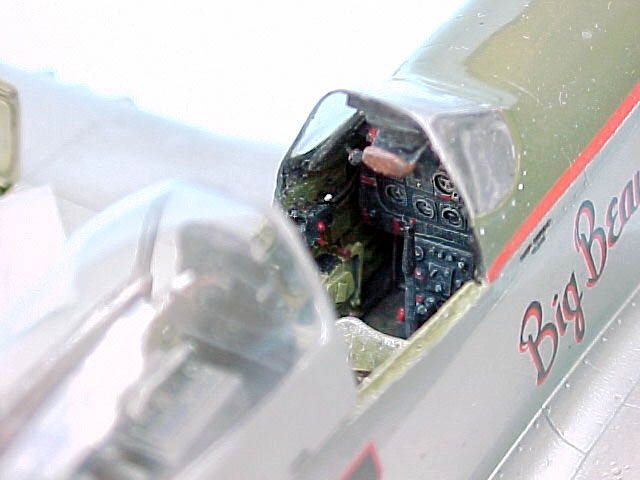
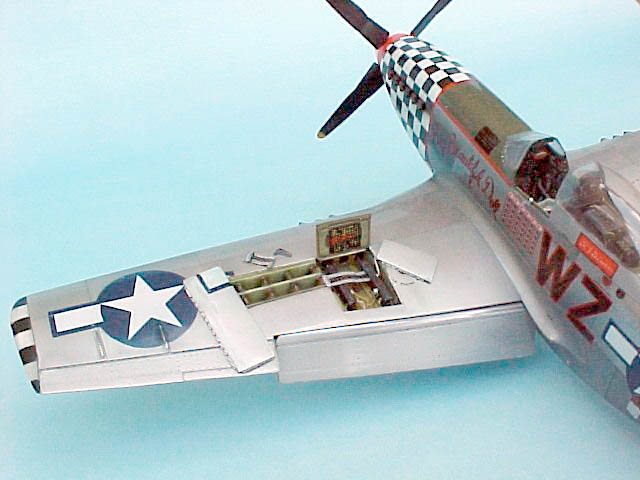
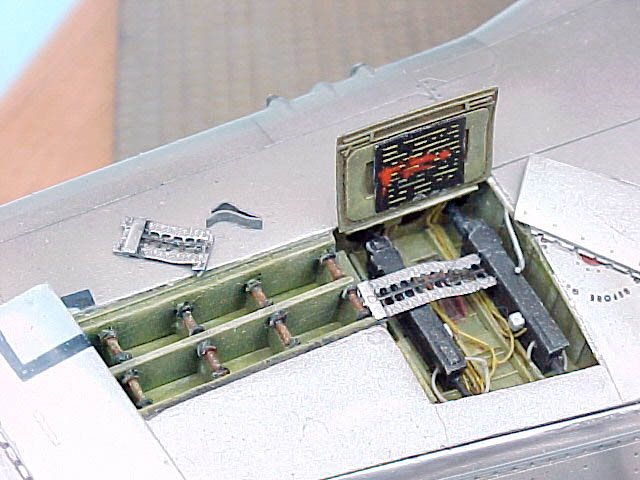
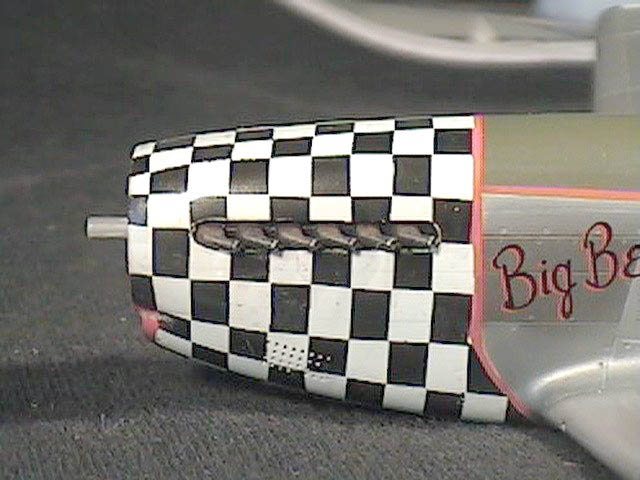
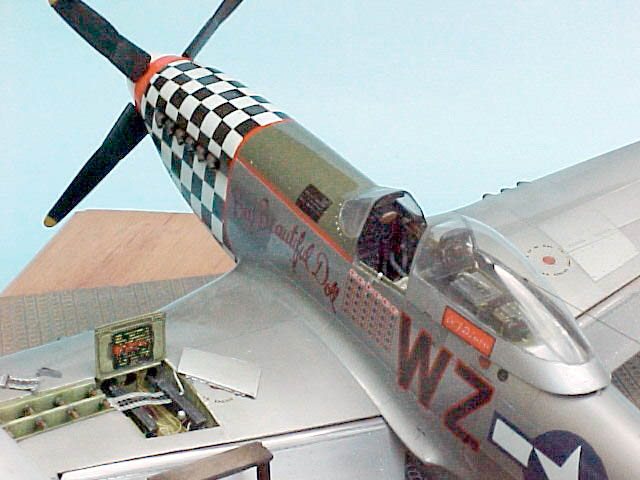
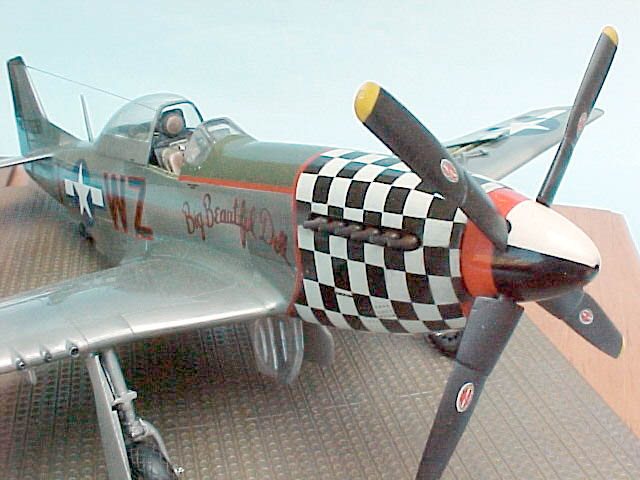
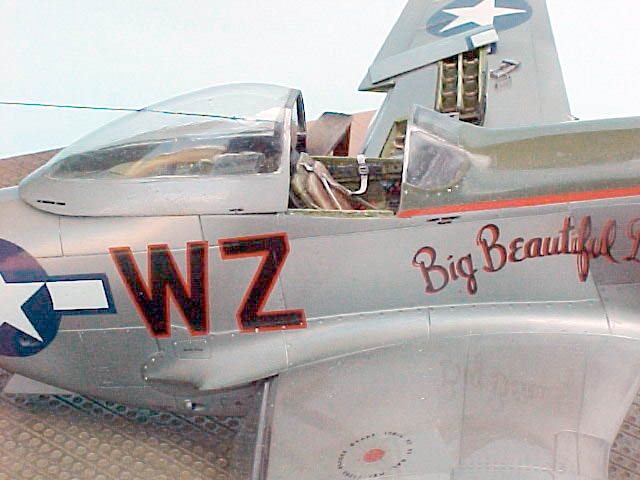
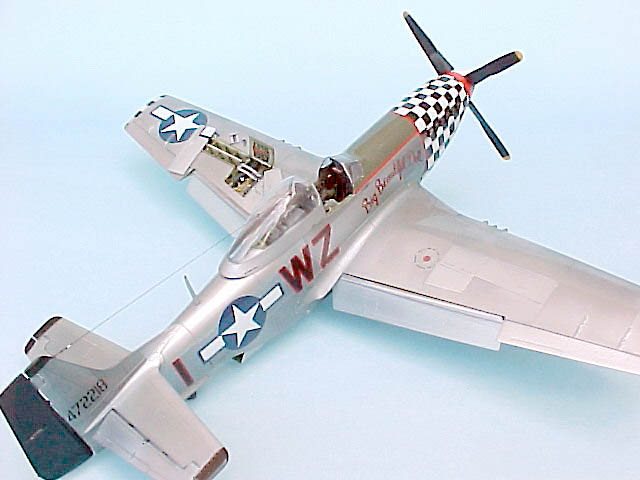
More than fifty years have gone since the end of WWII and even today there is a lot of people who think that the Mustang P-51 was the best fighter in the war scenario. What none of us can deny, at least from my point of view, is that its design was beautiful and way ahead of its time. After detailing and finishing several models of this plane, including the one from Monogram, I chose the one from Tamiya because of its good proportions; the surface detailing is very good and everything fits perfectly. I glued the wings to the fuselage using M.E.K. (methil-ethil-ketone). I like this kind of cement because it dries fast and leaves no trace of it. As I said before, the fit is very good and there is very little need for puttying. Without any doubt, the Big Beautiful Doll is one of the most beautiful versions of this plane; very well remembered, and an absolute challenge, well known by every modeler who has built this plane. The problem is with the checkerboard nose decal. The plane, a D model P-51, was flown by Lt. Cor. John D. Landers, who started his war pilot career flying P-40's in the Pacific in the 49FG (fighting group) where he attained 6 victories. After that, he was transferred to the European scenario, where he flew P-47 Thunderbolts, and P-51 Mustangs for the 38FG and the 55FG respectively, all of his planes were named Big Beautiful Doll. Landers attained another four victories, while flying in these groups. At that time he was promoted to Commander in the 357FG, between October and December 1944. after that, he was transferred to Duxford Cambs, England, where he commanded the 78FG. There, he had another 8.5 victories for a grand total of 14.5 officially confirmed. Inside cockpit The cockpit is very simple, compared to other kits. I decided to use the "True detail" set, which has side panels, seat, instrument panel, and the "wooden" floor pan, which includes the fuel tank (behind the seat), and the radio equipment with the battery, above it
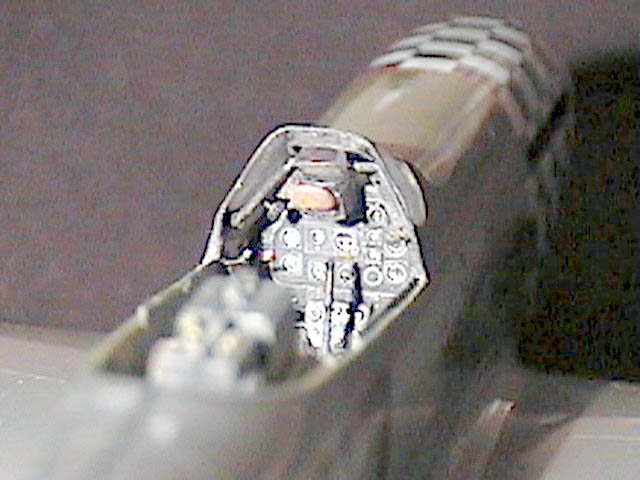
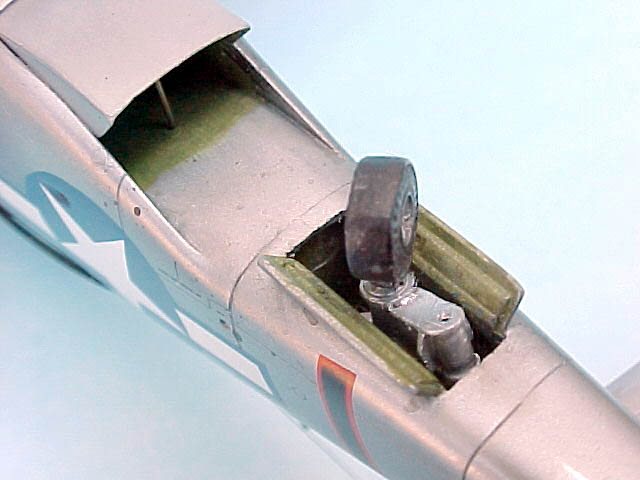
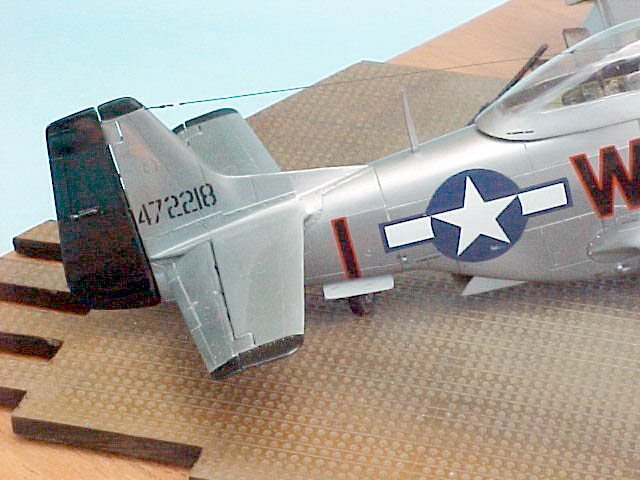
I changed the kit's seat belts, harness, and some other pieces, and used the PE parts from a set for the "Edwards" tank. I made a new instrument panel, using the original from Tamiya and drilling out the instrument faces in order to put the ones from the Edward. I put the film in the Edward set, from the rear of the panel, and some white paper in order to give more depth to the instruments. I added some details like the panel lights, several ignition switches, toggles, handles, some hoses (oxygen, etc.), connections, etc. For interior painting I used acrylic paints, in the customary "interior green" common to all the American war airplanes, at that time. Tail wheel well The one in the Tamiya kit is absolutely plain with no detail at all. I detailed it using plastic sheet in different thickness. I made the two under beams that run to the tail, and two bulkheads. I also modified the parts that supports the wheel, in order to let it turn.
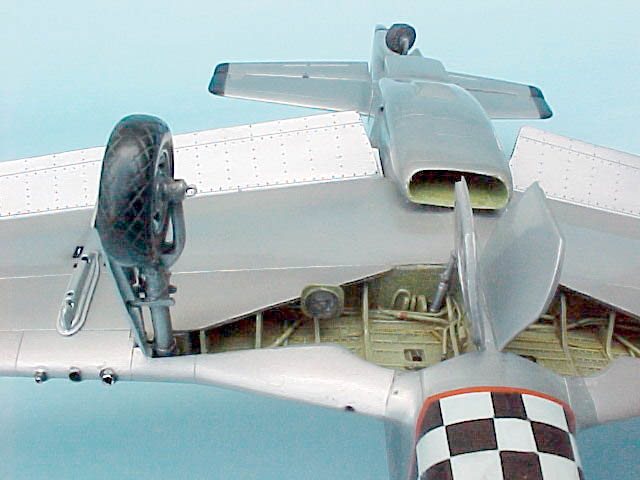
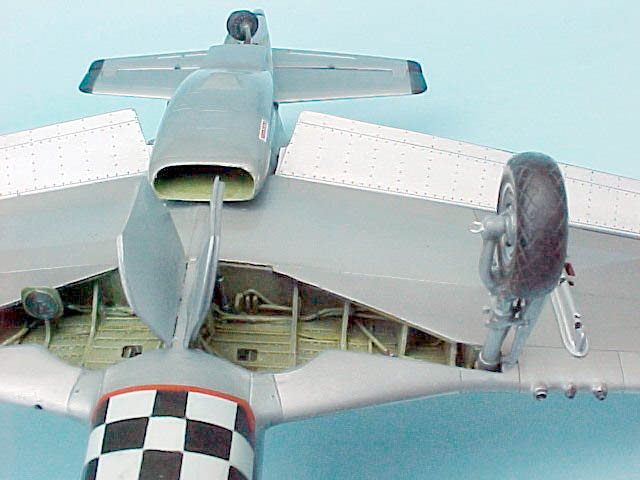
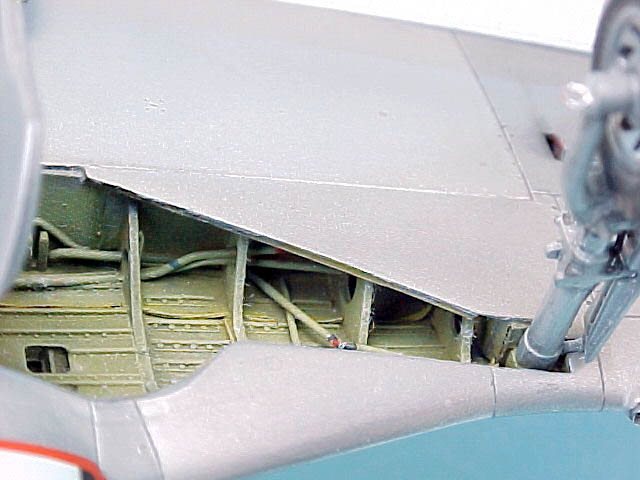
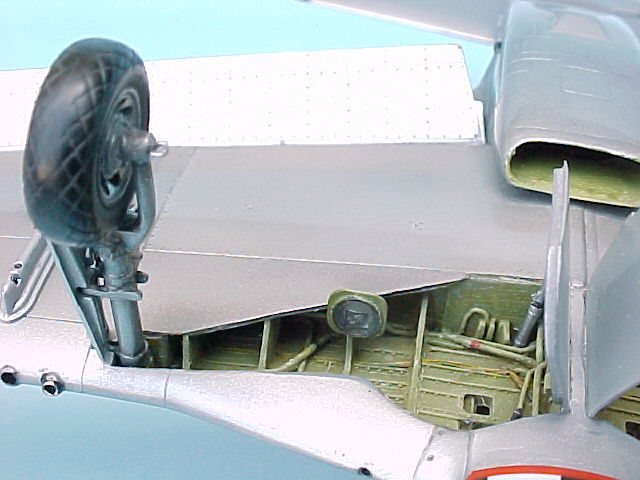
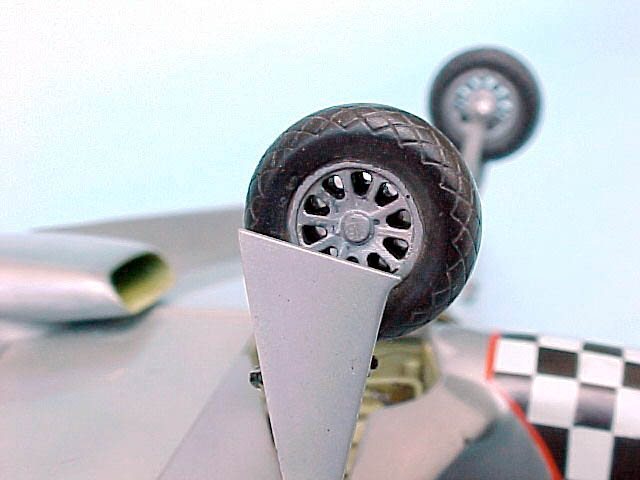
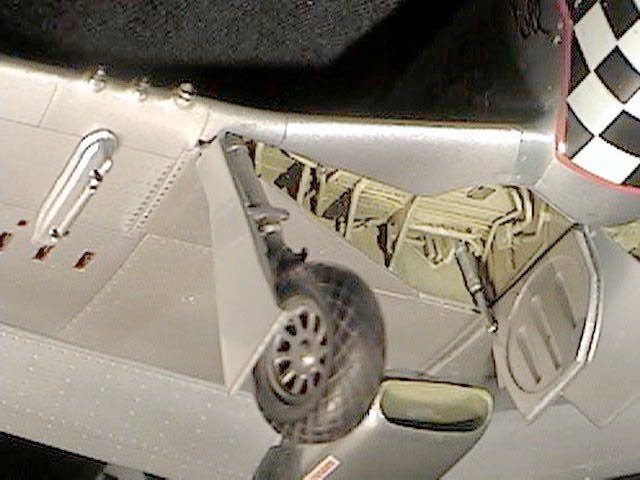
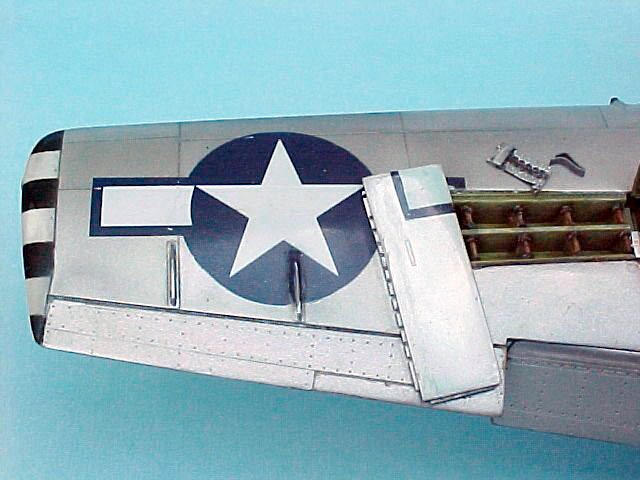
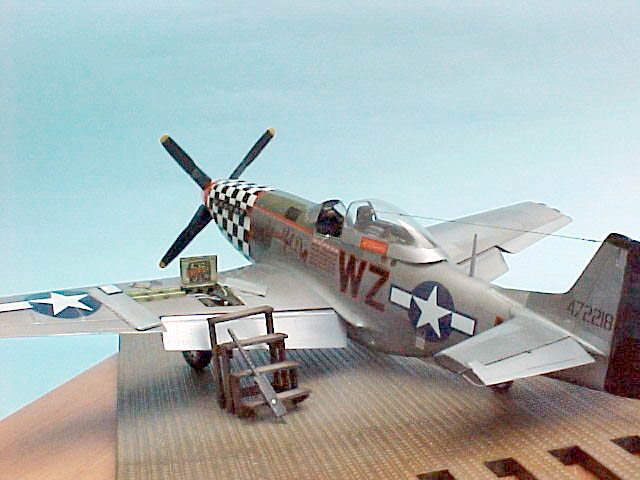
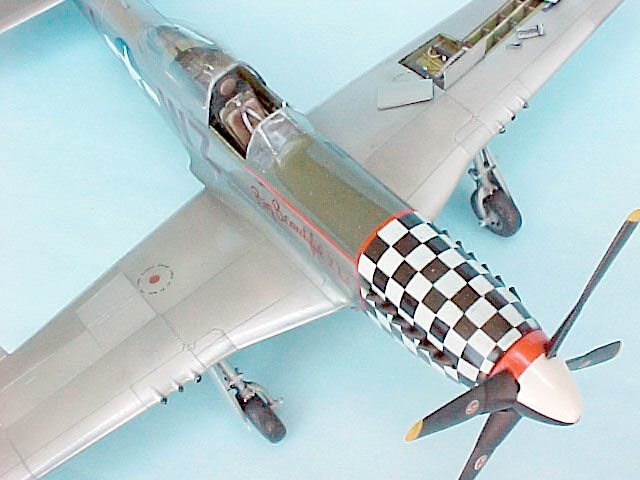
Main landing gear wheel wells The main landing gear wheel wells are not correct. This is a common problem with all Mustang kits, and it seems this is to make it easier for the manufacturers to do their job. Actually, they are deeper and they go all the way up to the wings main beam. So I decided to cut the wall and the bulkheads, and redo everything using plastic sheet. I added some "cables" and "hoses" using heat stretched plastic sprue, and painted everything in "interior green" color. I detailed both landing gears with several cables and PE pieces, in order to simulate hydraulic and electrical leads. The wheels that come with the model, are very well detailed, they come in two parts, I glued and sanded them with 400 sandpaper and drilled them, to give them more realism. I added some more details, like the retracting rods, and painted everything using Humbrol's Metal Cote.
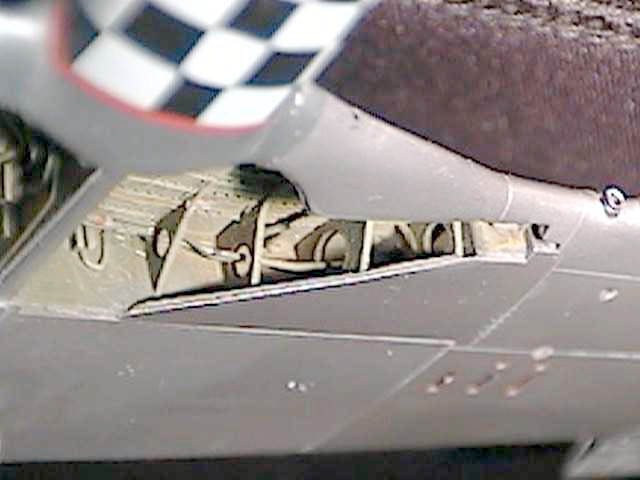
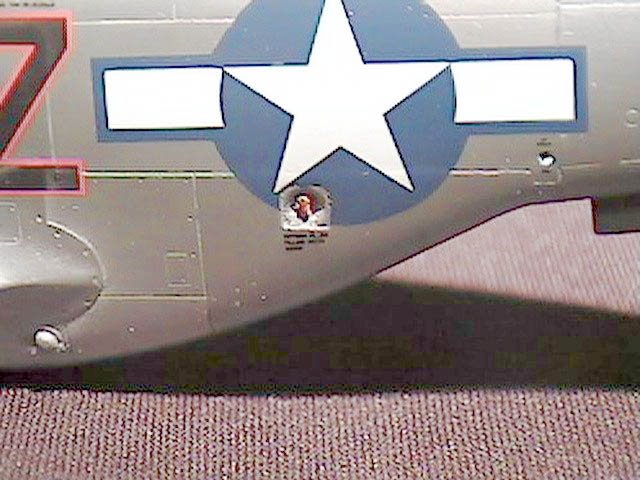
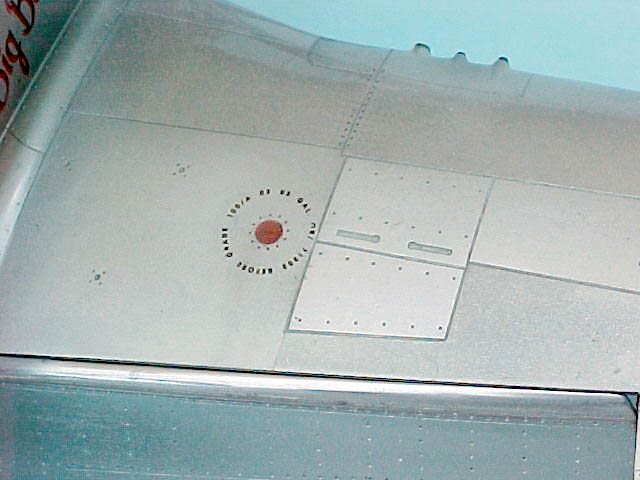
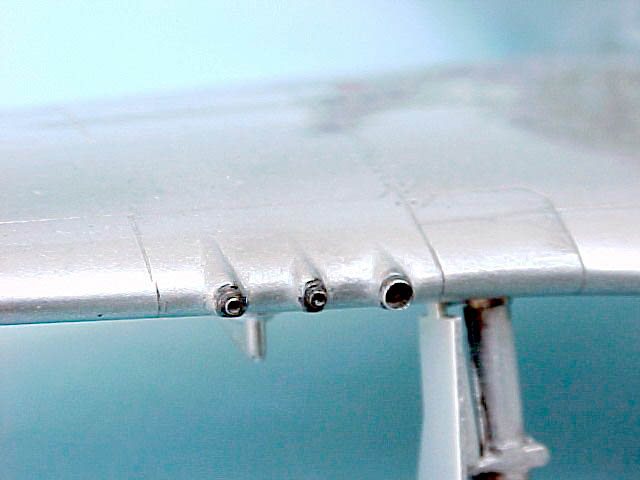
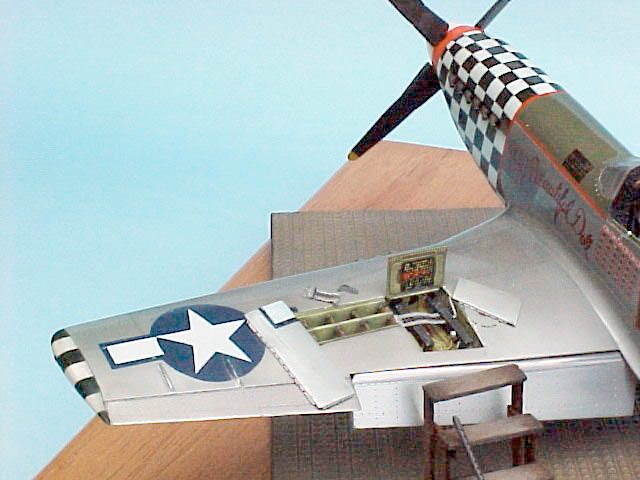
Gun bays To cut the gun bay panels I used a very thin sewing needle, and "cleaned" them from the inner part. The whole bay must be scratch built with plastic sheet for the bays, and hypodermic needles for the machine guns. The ammo belts are PE. One of the problem was the sign that indicates how to load all the ammunition; that sign doesn't come in the decal sheet. I firmly believe that a modeler must not omit any detail, as long as you're able put it, so I looked for some old decals that would resemble those signs, put them together, drew some lines on them with red paint, and finished them with a light clear cote.
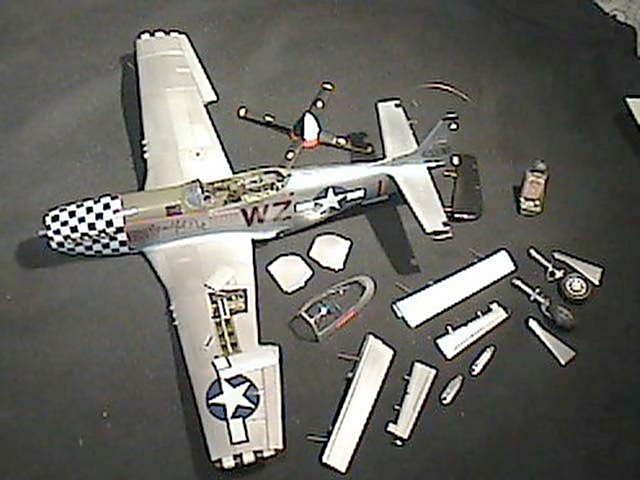
Painting the model As for the painting, I studied my references very carefully. Then, I decided which parts I would paint already installed in the main group (wings and fuselage), and which ones I would paint separate.
I started my painting job polishing the surface, in order to "erase" the sandpaper lines. For that job I used an old 1200 sandpaper (a good way to wear out a new piece of sanding paper, is to cut the sheet in two pieces and rub one part against the other). For this job, I chose two paint types: Humbrol metal cote #27002 for the wings (the real plane had them painted) and Testor's "Aluminum plate buffing metalizer" #1401 for the fuselage (the real planes had polished aluminum in the fuselage). Besides these two colors, I've used Testor's "stainless steel" #1402, and "Exhaust" #1406. these two colors were used to darken a little some panels.
Bibliography
|
|||||||||||||||||||||||||||||||||||||||||||||||||||