|
|
|||||||||||||||||||||||||||||
|
Formula one |
|
||||||||||||||||||||||||||||
|
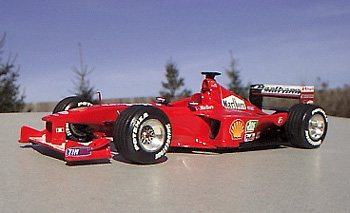
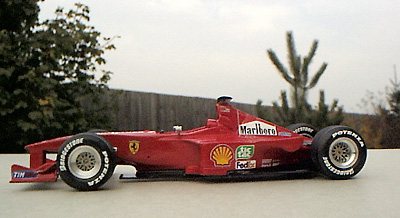
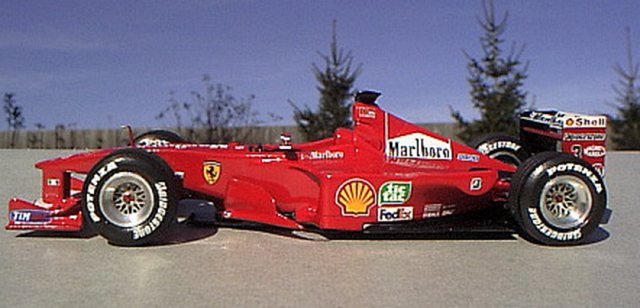
Ferrari F1-2000, Australia G.P.1/43rd scale Tameo white metal kit |
|||||||||||||||||||||||||||||
|
by Steve Yeun |
|||||||||||||||||||||||||||||
|
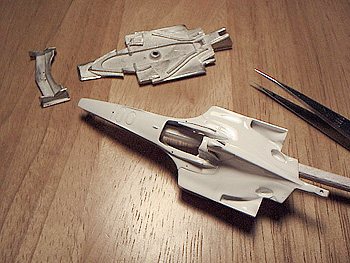
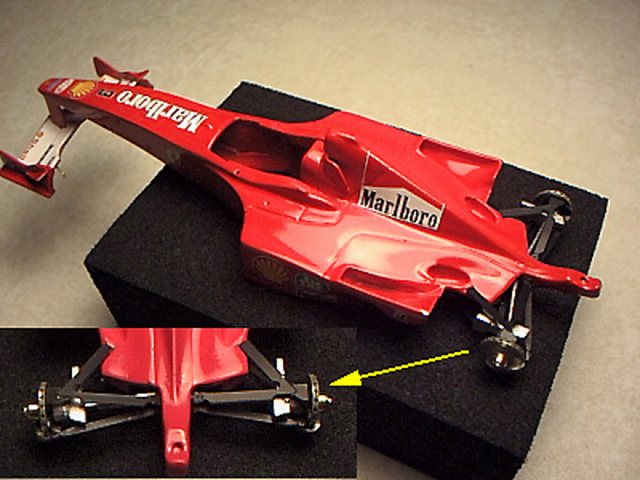
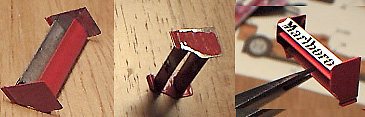
Everyone thought 1999 was the year that Ferrari had a chance to take away the World Championship Title from McLaren's Mika Hakkinen. Unfortunately, the 1999 season not turned out to be Ferrari's year. We all witnessed the horrible accident involving Michael Schumacher in the British GP sending Eddie Irvine alone to battle with Mercedes' Silver Arrows for rest of the season... Eventually the time has come to those who wait, 2000 season became the year when Ferrari finally clinched the World Championship Title ending their Championship drought of 21 years. The Subject This is the car, which started all. The Ferrari F1-2000 to be exact. This is the car that brought the long waited championship to Ferrari; superbly driven by fully recovered Michael Schumacher and his new talented teammate Rubens Barrichello. The kit is produced by the well known Tameo in Italy and it is very nicely engineered. It contains white metal body, photo-etched parts, and tuned wheel components. The front wing is a single white metal piece where as the rear wing is composed of 9 P/E and white metal parts. The newer Tameo kits such as this one are thoughtful as well, they all include two set of decal sheet to cover your first mistake. The color reference photos are also included as well as full Marlboro markings. The kit will build into F1 2000 Aualia GP version (mid-down force wing configuration) and both #3 and #4 markings are available so you can build either car of Schumacher or Rubens. Both of the cars finished 1-2 finish respectively in Australia GP. I will be making German ace's car wearing #3 which also won this race. The car will be built straight out of the box without any additional modifications as it will be a good opportunity to see how nice the kit itself really is. The initial Building Process
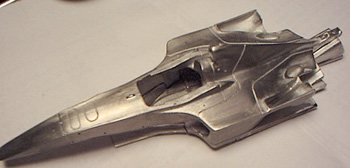
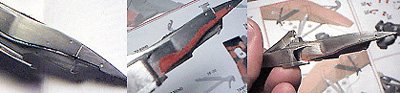
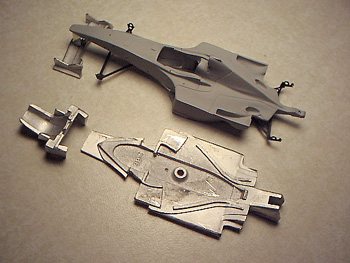
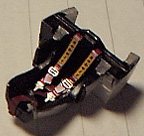
The joint seams on the lower part of monocoque are fairly visible. I used normal plastic putty to fill those gaps. After the putty has been completely dried, I sanded out any uneven areas with #400 grade sand paper. Most of modelers will admit that sanding and puttying part of modeling aren't very fun, but without a proper surface preparation at this stage, it is hard to achieve a beautiful shine at the end. In order to verify whether all the joints are properly sealed, I sprayed a thin coat primer and sanded out some uneven areas. I would repeat this process till everything is absolutely smooth. Tameo marked insertion areas where I would need to drill them out for suspensions and other mounts. I drilled out all of them prior to the puttying process because I was afraid that my putty work might fill those fainted insertion marks made by Tameo.
The Painting and Detailing Process
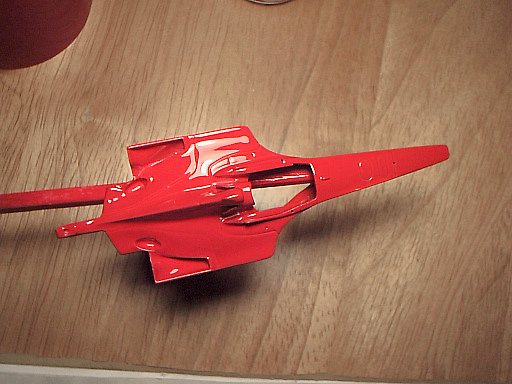
In order to achieve a mirror finish, I airbrushed two light coats and then give a final heavy (wet) coat at the end. The technique here is that two initial coats will provide a good surface grip for the wet coat later. It also minimizes any chance of having a paint run when airbrushing a wet coat at the end. The pictures here were taken after five minutes of wet coat application. The coat seems to be somewhat thick, but it will shrink to normal thickness as the coat dries. If anyone is using spraying cans instead of airbrush, I would not recommend applying several coats on 1/43rd scale kits as spray cans spray larger volume of paint than airbrush. This would make the paint coat way too thick for 1/43rd kits. Instead, I would warm up the spray can and just try to spray the body on a single session.
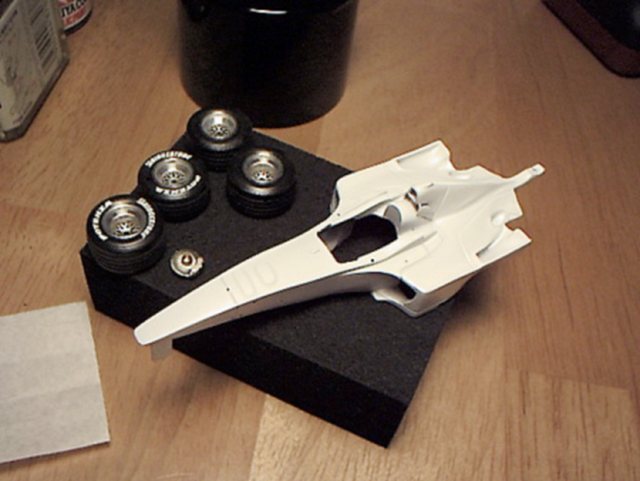
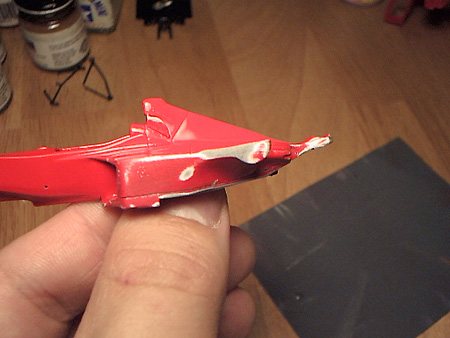
After everything was dried, I saw noticable scratches on the side pod area! Luckly all the scratches were came from the the side area only, I was able to quickly re-finish them without a problem. Next step is to build the front wing assembly and I also made the rear suspension arms. I used CA glue to attach photo-etched rear suspension parts here. It is shame that wheels will be mounted on top of Ferrari's beautiful rotors because we won't be able to see all the details once wheels are put on. The attaching suspension arms wasn't as tricky as I tested the fitting in the prior steps. I will still need to make minor adjustment on suspensions, but I will perform that in later steps.
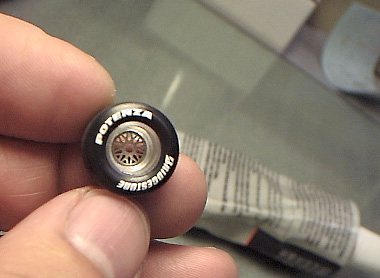
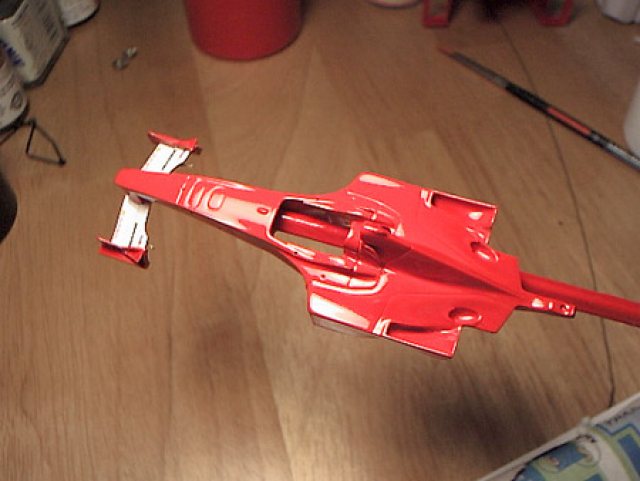
I attached rear wheels first checking the correct camber settings. The rear wheel should have very slight negative cambers and no toe-in. I used CA glue (sets in seconds) to attach wheels, but if you are not comfortable with it, I would suggest 5 minutes epoxy setting glue to do this kind of work. It will give you enough time for you to adjust the wheels, helping you to find a correct setting.
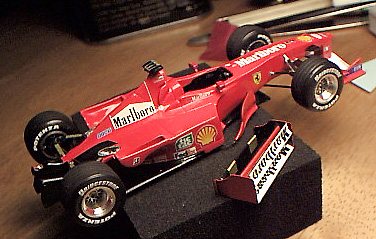
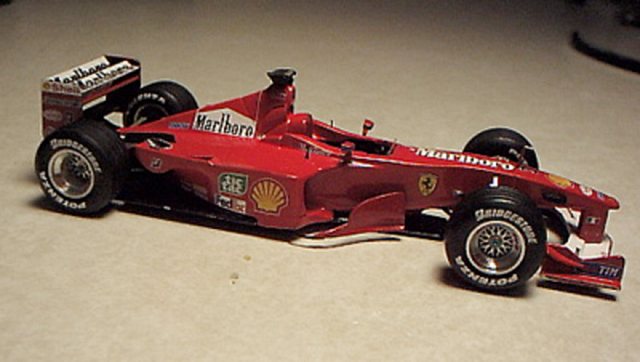
One the rear wing assembly was completed, I was able to build rest of the car. I added the on-board camera on top of the intake, finished up the side mirrors, and attached barge boards on the side of monocoque. I also placed a radio antenna and attached a wind shield in front of the cockpit. I used very little reference photos, the instruction from Tameo is all I needed to build this kit.
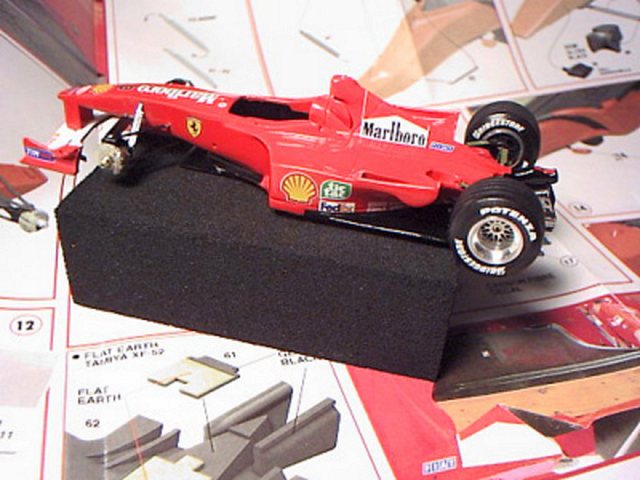
Conclusion I had a fun spending roughly 25 hours making this kit. If you have never built 1/43rd resin/metal kits before, give it a try! 1/43rd scale kits are very addicting and you can build them very fast. Don't let the scale fool you, this Tameo kit even comes with lug nut for each wheel. Yes, it is fascinating to see this beautiful Ferrari in my palm...
|
|||||||||||||||||||||||||||||