|
|
||||||||||||||||||||||||||||
|
Airplanes |
|
|||||||||||||||||||||||||||
|
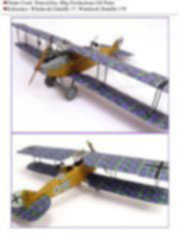
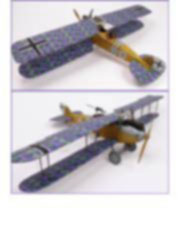
Building the Wingnuts Wings LVG C. VI 1/32… the best WW1 Kit Ever? |
||||||||||||||||||||||||||||
|
by Michael Capell © Modeler Site |
||||||||||||||||||||||||||||
|
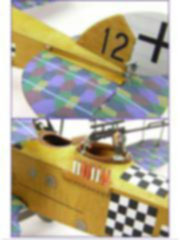
Legal Notice No material from Modeler Site any Web site owned, operated, licensed, or controlled by Damian Covalski may be copied, reproduced, republished, uploaded, posted, transmitted, or distributed in any way, except that you may download one copy of the materials on any single computer for your personal, non-commercial home use only, provided you keep intact all copyright and other proprietary notices. Modification of the materials or use of the materials for any other purpose is a violation of Damian Covalski's copyright and other proprietary rights. Read More here > Legal notice You may recall the SE5 I built several issues ago, really to get a feel for the larger scale Wingnut kits as I normally deal with 1/48 in the past . This was followed shortly after with the Sopwith Pup, just to make sure ( any excuse will do). So now I had the confidence to tackle what I consider their 'flag ship' of the present range namely the LVG C.VI.
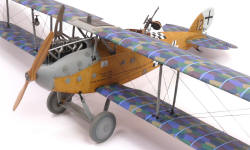
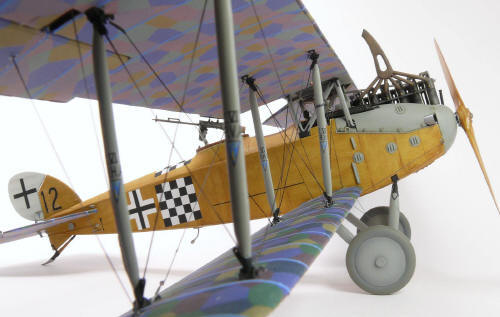
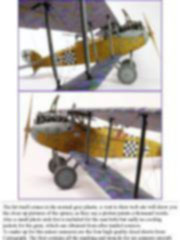
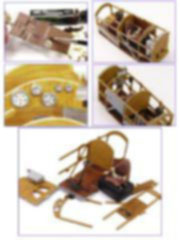
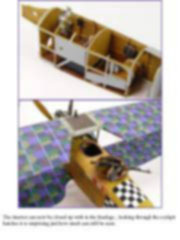
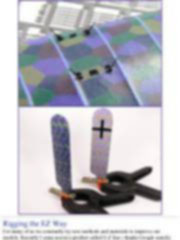
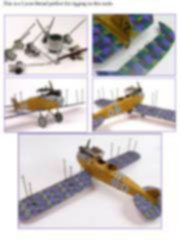
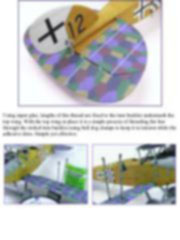
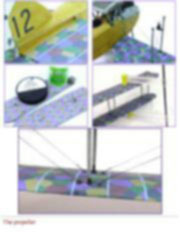
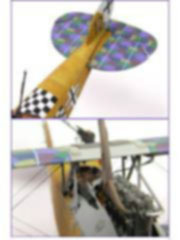
The kit itself comes in the normal grey plastic, a visit to their web site will show you the close up pictures of the sprues, as they say a picture paints a thousand words. Also a small photo etch fret is included for the seat belts but sadly no cooling jackets for the guns, which can obtained from after market sources. To make up for this minor omission are the four high quality decal sheets from Cartograph. The first contains all the marking and stencils for six separate aircraft. The other three sheets are just for the wing lozenge and rib tapes, if you like decals then this model is definitely for you. Shall We Begin After the normal wash and dry of the sprues I like to airbrush all the parts with a light coat of primer while they are still on the sprue using Hannants XDBB base coat heavily thinned with white spirit so the surface detail is not obscured. This helps to speed up the building process with out constantly having to prep each assembly separately. A similar method can be used for the wooden parts, here the colour instructions are an advantage as the paint symbol letters are also colour coded making it easier to identify these parts. There are a lot of them so grouping them together makes sense as the wood effect is achieved using oil paint which can take up to a week to dry!
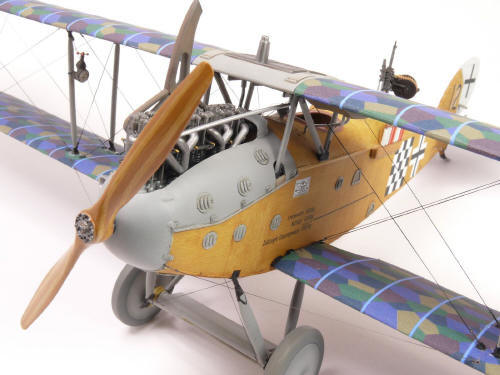
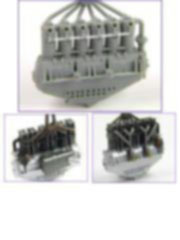
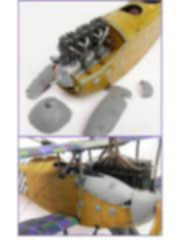
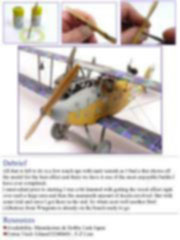
While the oil paint is left to dry I could get on with the engine. Wingnuts offer two separate cylinder blocks, one with moulded in push rods the other without for you to add yourself. I used the latter with some stainless steel rod from the spares box to represent the push rods. This is worth the extra effort and straight forward just measure between the rocker assembly and crank case and cut to size they have even thoughtfully provided the location points for the rods. Even with the engine cowling on most of the engine can be seen.
Esta Nota es ofrecida en formato PDF, el cual puede ser leído o impreso usando el Acrobat reader, contacte a nuestro webmaster > Aquí Incluye más de 55 imágenes, aquí solo mostramos las paginas de texto.
This note is offered in PDF format to be read or printed using Acrobat reader, contact our webmaster > Here Includes more than 55 pics, here we show only the text pages.
|
||||||||||||||||||||||||||||