|
|
||||||||||||||||||||||||||||||||||||||||||||||||||||
|
Airplanes |
|
|||||||||||||||||||||||||||||||||||||||||||||||||||
|
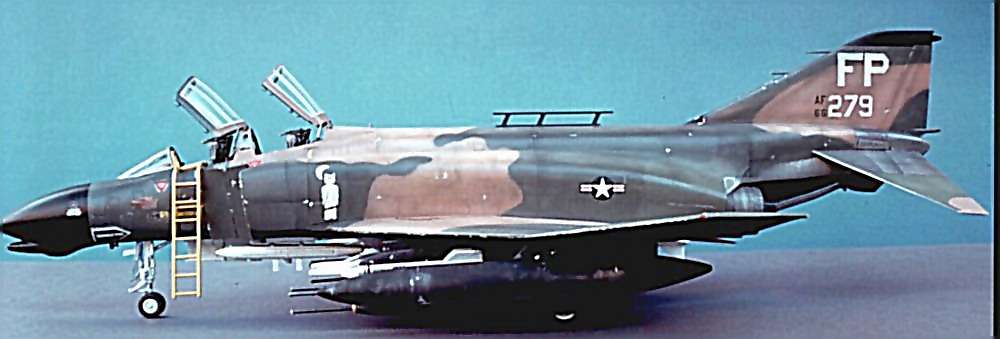
Fabulous Phantom: F-4D Tamiya 1/32 scale |
||||||||||||||||||||||||||||||||||||||||||||||||||||
|
by Giovanni Galvan © 2000 Modeler Site |
||||||||||||||||||||||||||||||||||||||||||||||||||||
|
Legal Notice No material from Modeler Site any Web site owned, operated, licensed, or controlled by Damian Covalski may be copied, reproduced, republished, uploaded, posted, transmitted, or distributed in any way, except that you may download one copy of the materials on any single computer for your personal, non-commercial home use only, provided you keep intact all copyright and other proprietary notices. Modification of the materials or use of the materials for any other purpose is a violation of Damian Covalski's copyright and other proprietary rights. Read More here > Legal notice Do you have desire to build one of the more "glamorous" kit ever produced? Are you able to preserve a 55 x 37 cm "baby" in your poor (but honest) home? Have you found somewhere Cutting Edge decals? If your response to these three questions (specially the least) are "yes", then you're ready to deal with the 1/32 Tamiya Phantom, which will not spare you strong emotions.
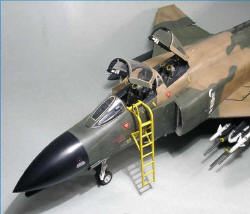
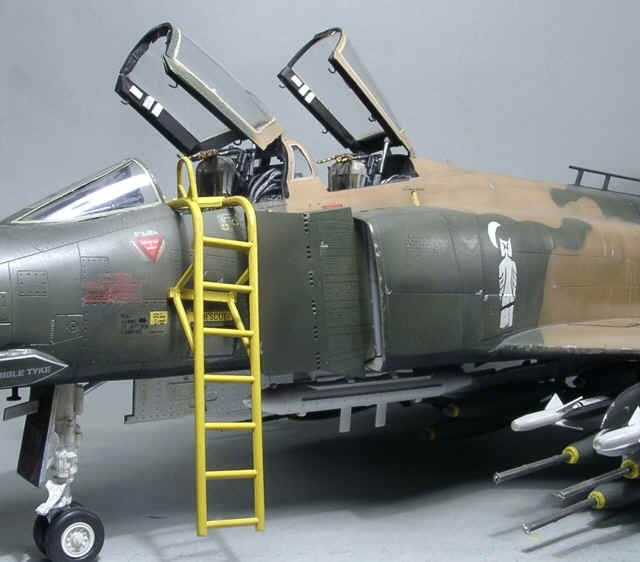
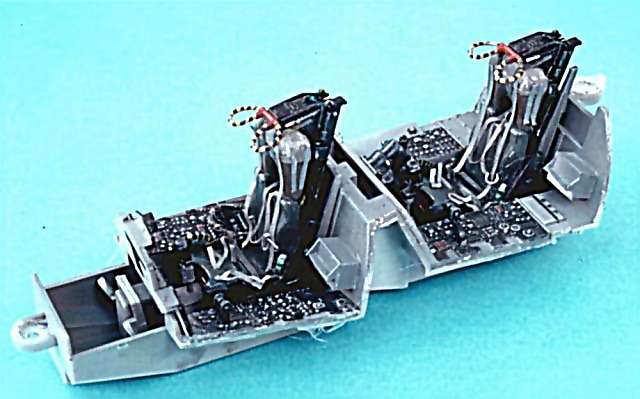
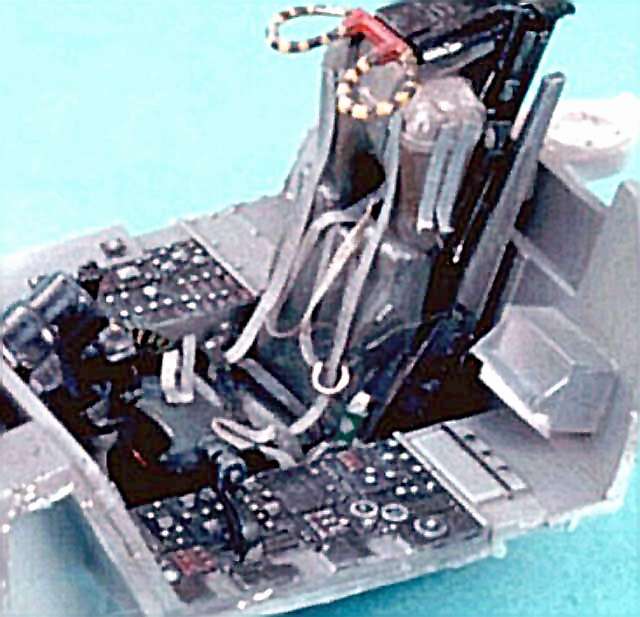
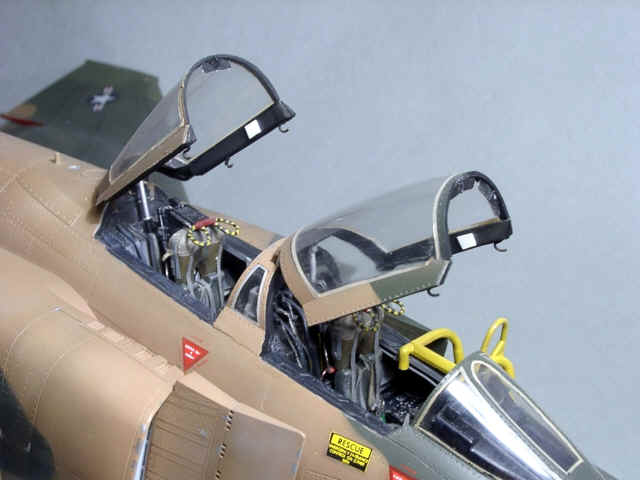
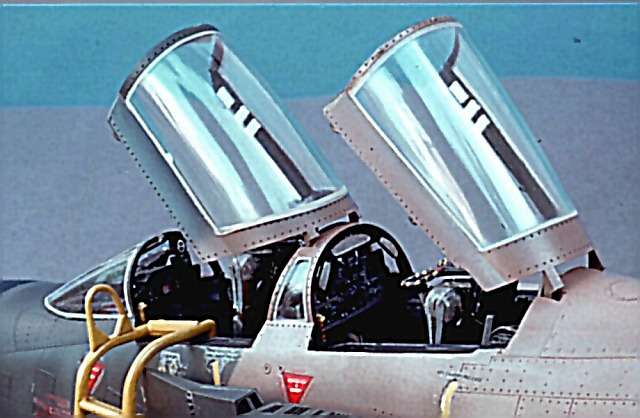
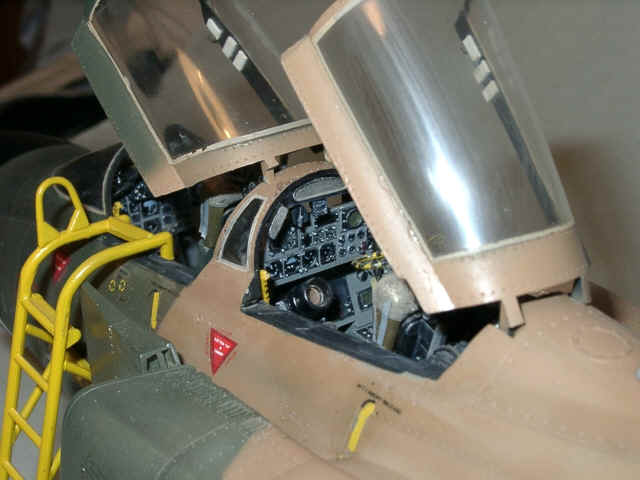
The "mammoth" Japanese box contains an industrial quantity of pieces (well 375) in light Grey plastic and transparent, with PVC tires, the landing gears in metal, some screws and a small screwdriver. It's not missing obviously the instruction book, big and well detailed, a decal sheet "Invisa Clear" by Microscale, about which we will talk further. The composition of the kit is unusual, we think enough intelligent, with the upper part of the fuselage molded in one piece, sparing us long and complex operations of gluing and filling the dorsal zone, so visible. Is notable also the recessed detail of the surfaces and of the detail inside the cockpit and landing gear bays. But wanting to build a "real" F-4D operational in Vietnam in '60s, we eliminated all these patches with the abrasive diskette of a drill and various gradations of abrasive paper, from the 300 to the 800. We scribed with the Squadron scriber the paneling and the rivets blanked during this operation. The assemblage of the cockpit, rich of detail, doesn't give problems, containing all the necessary pieces, including well executed seats. We recall that the lateral consoles are those of the version F-4D, while for the F-4C there are specific parts only for the instrument panels and the lateral consoles.
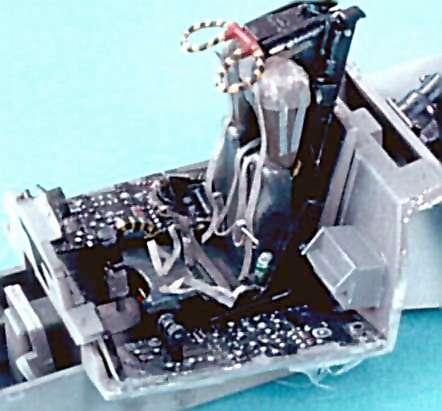
No problem for us, having decided to build a F-4D. The instrument panels are composed of a transparent part with the face of the instruments fitting in the frontal part, giving a realistic effect; this solution remembers the Airfix kit in 1/24 scale. The seats are enough perfect and need only paper stripes as the seat belts. There is some problem only with the assemblage of the switch panel in the back cockpit, which requires the filling of the external panel, closing the receptacle for the Navy Phantom.
In most part we used telephone wires, more or minus peeled, to simulate the wiring. Winding a wire of thin copper around to the point of a drill and passing a layer of vinilic glue, we made the oxygen pipes. The color of the interiors is the Dark Gull Gray FS 36231 (Gunze H317), with consoles and instruments in semi gloss Black and seats stuffing of various tones of Green. The closing of the upper fuselage with that lower is based mainly on the famous screws, for which it's better to use a screwdriver a few bigger and stronger than the Tamiya one. This solution has advantages and disadvantages. In fact, if the screw consents a firm fixing given the big bulks of plastics and the weakness of the glue based fixings, but reduces the possibilities of adjustment of the various gap that are opened. In effects these are few, but enough difficult from eliminate without deep abrasions over the beautiful detail. But it's the lower tail in Titanium, which has the greater difficulty of alignment. In fact it's molded in one piece, but it's narrower than the upper part. So we inserted a brass rod across the inner walls of the part. In spite of this we made airy filler and cianoacrlilate work, followed by an accurate re-scribing.
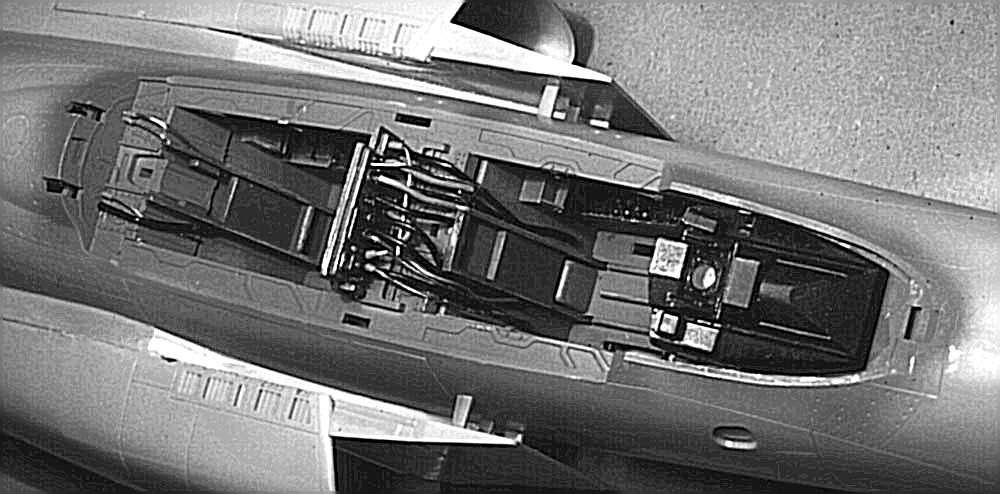
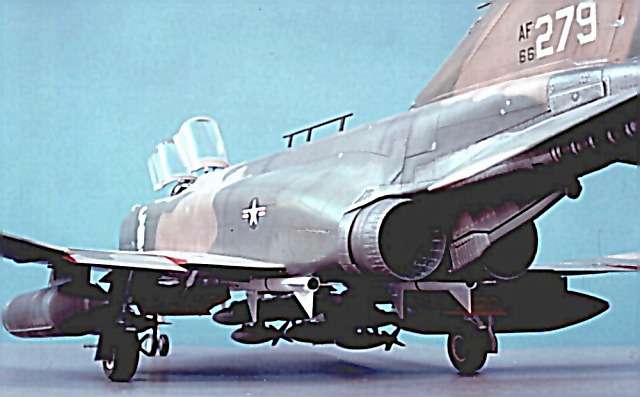
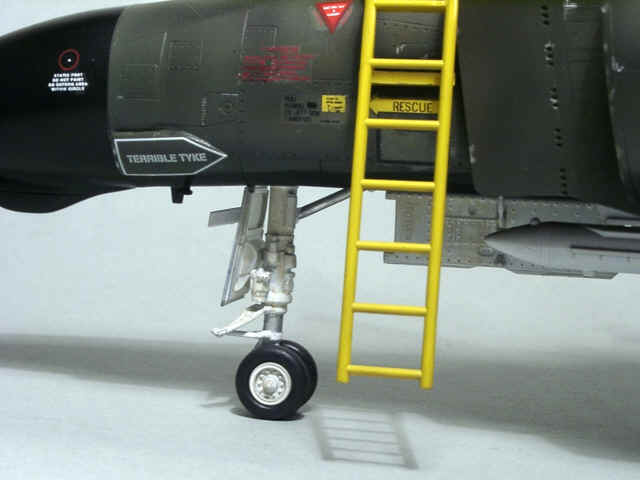
Before you assemble this piece, you must insert the tail plane group. This is molded in one piece passing from a part to the other of the tail, allowing the perfect symmetrical inclination of the tail planes. The inside part of the exhaust contains all the details. This group of piece must be fixed to an inside hooker with a screw, but inserting the afterburner cans after the painting, will be definitely firmed. The landing gears have the leg in metal and have only a partial detail, instead present on the plastic plates to be glued on the sides. Very beautiful, even if hard-working, the result refined by the beautiful PVC wheels. We added the usual metal wires to make the brake piping. The wheel wells are well detailed, the interiors of the bays are deep, and necessitate only of the usual piping for the detail.
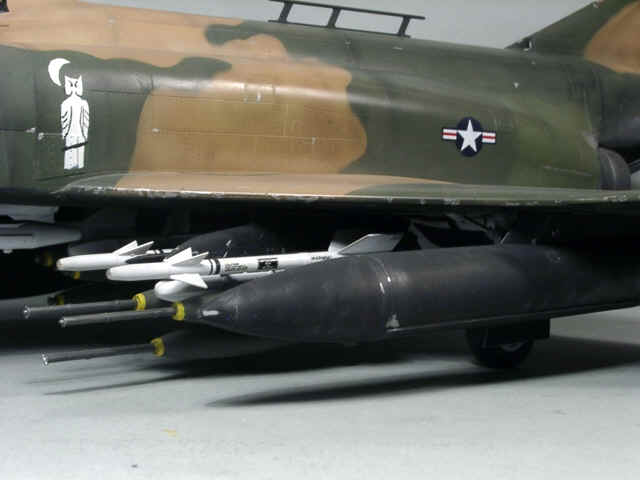
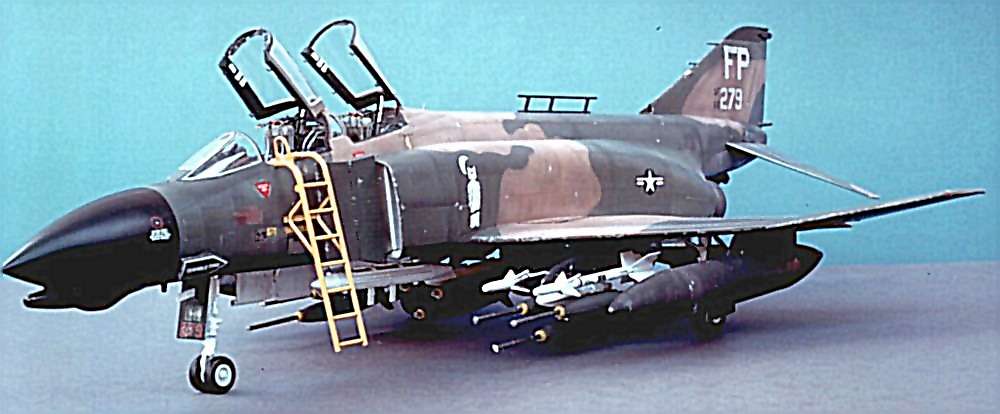
Scheme One is a F-4D of the 435th Tactical Fighter Squadron of the 8th Tactical Fighter Wing, with a MiG Kill. Another is the famous F-4C, named "The Scat," of the mythical Robin Olds, Commander of the 8th Wing of based in Thailand, unit full of MiG Killers and hero of the famous Bolo operation. For the rest we used the information technology, designing the codes with Corel Draw, and printing them on self-adhesive HP special paper to obtain painting masks. Other stencils were recovered from our spare decals box.
Color Correspondences
Support us ordering our notes in PDF > Here |
||||||||||||||||||||||||||||||||||||||||||||||||||||