|
History about Matra
In 1967 the manager group that directed the Matra International team, decide a Formula One construction to compete in the World Championship.
While this project was developed, a F2 with a more cylinder capacity motor, the MATRA MS 8, ran in the last races of that year, drove by Jean Pierre Beltoise.
The project included the construction he/she of a 12 cylinders motor, although at first a V8 Ford Cosworth would be used, and the contract of the Scottish pilot Jackie Stewart.
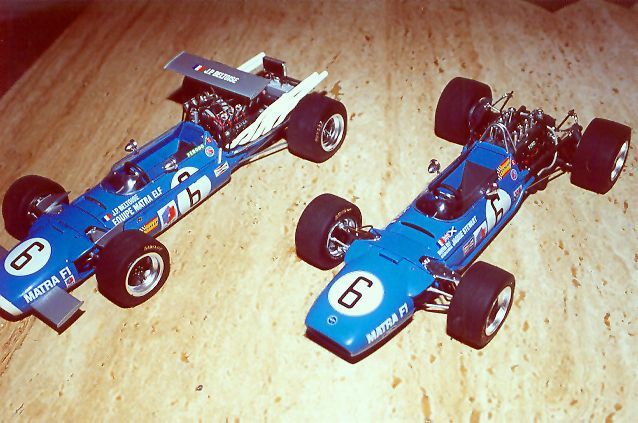
The new chassis with the V8 installed ran for the first time in March of 1968 in Brands Hatch, it was called MATRA MS10. During that year MATRA gets good results with the MS10 driven by Jackie and in 1969 with the MS80 model the team obtains the championship of constructors and pilots.
|

|
In February of 1968 Matra present their new V12 motor with upper aspiration (then a more compact with lateral aspiration would come, to locate the injectors in the central area of the motor). Their first race was the 1968 Monaco Grand Prix.
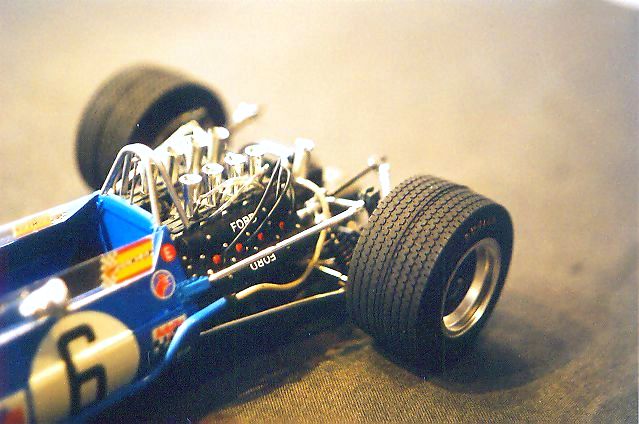
The new motor was longer than the Ford V8 and several modifications in the monocoque were necessary, it was called MS11. Although at first the MS11 performance was good, the motor didn't get the team expectations, it was very heavy for the delivered power. It shared its time with the Cosworth, but it was not effective to obtain a championship.
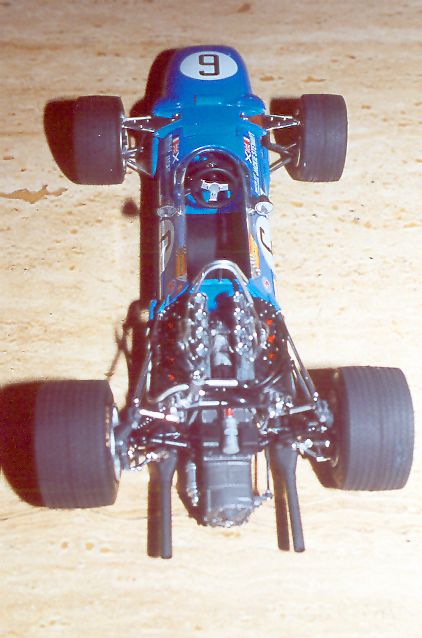
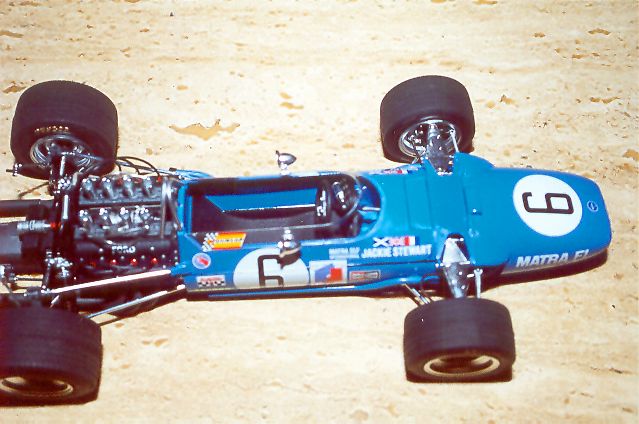
The conversion
The MATRA MS10 building is based on two Tamiya's kits, the whole Matra MS11 and Lotus 49 motor
The actual modifications can be summarized step by step, following the Tamiya's MATRA Ms11 instruction manual.
Step 1
The rear part of the body has to be cut off ( but not as much I did) behind part A16.
Top of part A16 has to be painted silver instead of Black. The roll-bar has to be double. I used part D30 or D31 from a Lotus 49 and fixed it later to the engine and to part A16
Step 6 & 7
I didn't use parts B24, B25, A3, A17 and A18. I filled up the holes in the nose cowling with putty and sanded it off finely.
Step 8
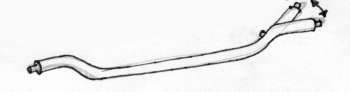
The fuel tanks are not used with the Ford engine, so don't fix parts A8, A9 and B13. The plastic parts on the body that hold parts A8 and A9 have to be cut off. The rear end of part H5 has to be folded horizontally to follow along the left cam cover. I did it using the hair dryer method.
Step 9
A4, A5, A13, A24 and D4 were not used. Keep B3 and B16 for later use.
Step 10
I used most of the rear suspension of the Lotus 49, uprights and radius arms. I made holes in the body to fix upper radius arms (D16 and D17 of the Lotus) and glued parts B6 of the Lotus to cover the end. I cut off the end of part D39 of the Lotus and inserted it into holes of part A16 from the Matra.
I'm afraid anyway my rear suspension is far from perfect. The best is to experiment and be patience.
Steps 12 to 20
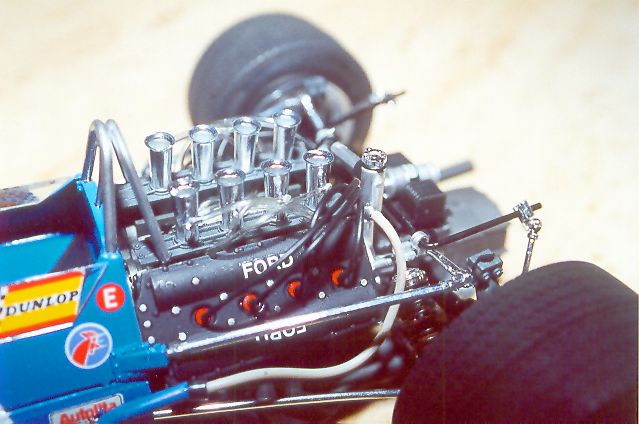
The engine and gear box used are taken a Lotus 49 and assembled as indicated in the manual except for two things:
1) The end of the exhaust pipes ( parts F4) have to be straight because they are horizontal on the Matra instead of going up like on the Lotus.
To keep it simple I shortened parts F4 by cutting off, drilling a hole and reinforcing it inserting a plastic tube
2) The stabilizer bar use comes from the Matra, parts B10 and B20 also.
On thing more: on the Lotus reverse tank (part D19) I glued a cylinder with a plastic tube and Matra reverse tank cap ( part B16) on top. A thick rubber pipe joins Matra's left cooler pipe (H5) and this cylinder was made with Matra B3
At last, I used some of the decals ( "Ford" logo, "Matra Elf International" team logo) produced by Studio27 that I got from F1s.
Conclusions
As it can be appreciated in the photos, I didn't look for the super detail neither the perfection, the project objective was to demonstrate that the conversion can be made. You can take this idea and, I am sure, to improve it. If you have doubts or need some extra explanation, I will gladly answer all emails.
|