|
|
||||||||||||||||||||||||||||||||||
|
Armor |
|
|||||||||||||||||||||||||||||||||
|
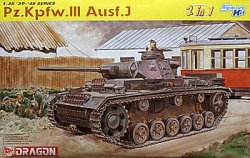
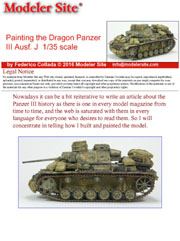
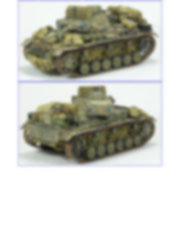
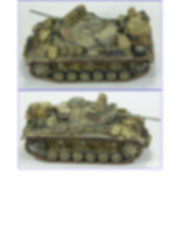
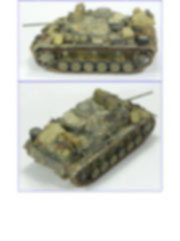
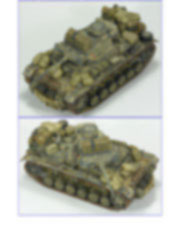
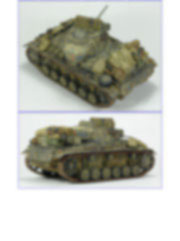
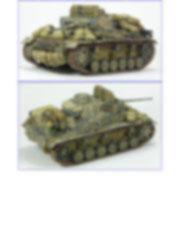
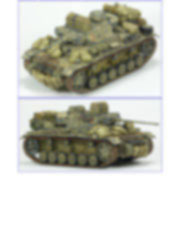
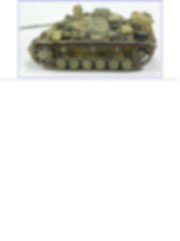
Painting the Dragon Panzer III Ausf. J 1/35 scale |
||||||||||||||||||||||||||||||||||
|
by Federico Collada © Modeler Site |
||||||||||||||||||||||||||||||||||
|
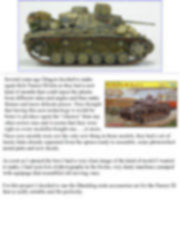
Legal Notice No material from Modeler Site any Web site may be copied, reproduced, republished, uploaded, posted, transmitted, or distributed in any way, except that you may download one copy of the materials on any single computer for your personal, non-commercial home use only, provided you keep intact all copyright and other proprietary notices. Modification of the materials or use of the materials for any other purpose is a violation of copyright and other proprietary rights. Read More here > Legal notice Nowadays it can be a bit reiterative to write an article about the Panzer III history as there is one in every model magazine from time to time, and the web is saturated with them in every language for everyone who desires to read them. So I will concentrate in telling how I built and painted the model.
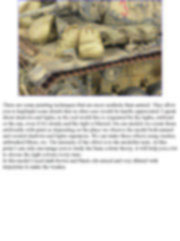
These new moulds were not the only new thing in these models, they had a set of tracks links already separated from the sprues ready to assemble, some photoetched metal parts and new decals.
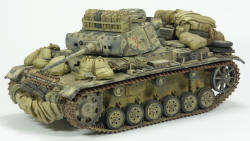
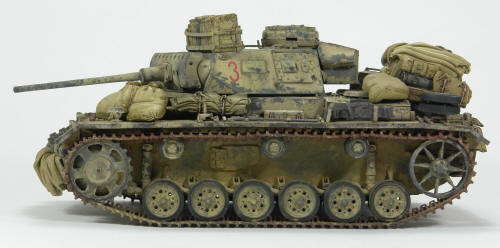
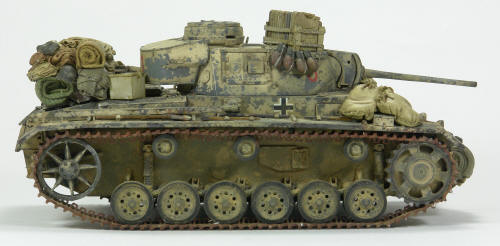
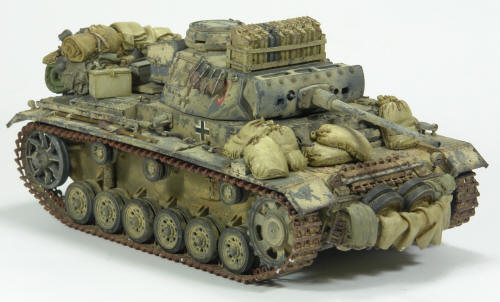
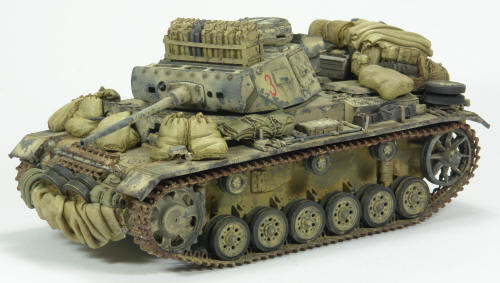
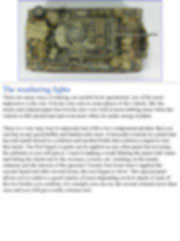
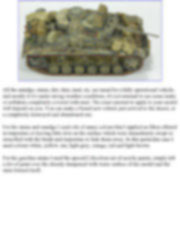
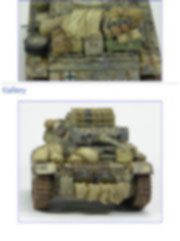
As soon as I opened the box I had a very clear image of the kind of model I wanted to make, I had seen lots of photographs in the books, very dusty machines cramped with equipage that resembled old moving vans.
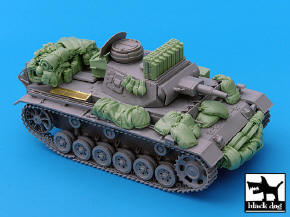
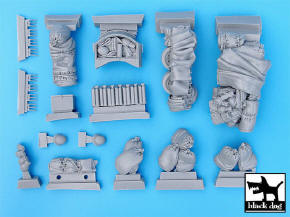
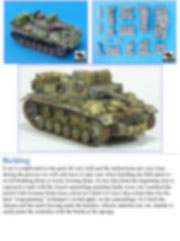
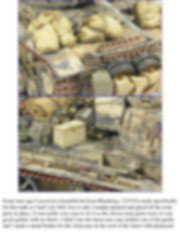
For this project I decided to use the Blackdog resin accessories set for the Panzer III that is really suitable and fits perfectly.
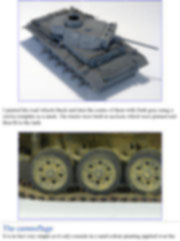
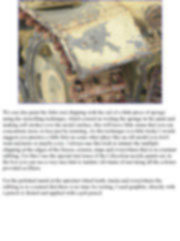
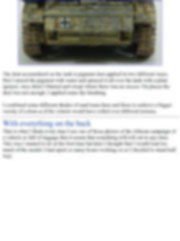
Building It isn’t complicated as the parts fit very well and the instructions are very clear, during the process we will only have to take care when handling the little parts to avoid breaking them or worst, loosing them. As my idea from the beginning was to represent a tank with the desert camouflage painting badly worn out, I painted the model with German Dark Grey colour as I built it to have this colour base for the later “soap painting” technique I would apply on the camouflage. So I built the chassis and the turret leaving aside the hatches, wheels, antenna rail, etc. mainly to easily paint the scratches with the brush or the sponge. This tutorial is offered in PDF format to be read or printed using Acrobat reader, contact our webmaster > Here Includes more than 35 pics, here we show only the text pages.
Esta Nota es ofrecida en formato PDF, el cual puede ser leído o impreso usando el Acrobat reader, contacte a nuestro webmaster > Aquí Incluye más de 35 imágenes, aquí solo mostramos las paginas de texto.
Big size photos are only available in our PDF format. Support us ordering our notes in PDF > Here |
||||||||||||||||||||||||||||||||||