|
|
|||||||||||||||||||||||||||||||||||||||||||||||||||||||||
|
Motorcycles |
|
||||||||||||||||||||||||||||||||||||||||||||||||||||||||
|
Superdetailing the Tamiya Honda NSR500 1984 – 1/12 scale |
|||||||||||||||||||||||||||||||||||||||||||||||||||||||||
|
by Antonio Busciglio © Modeler Site |
|||||||||||||||||||||||||||||||||||||||||||||||||||||||||
|
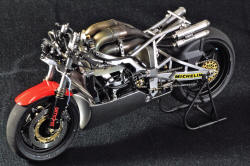
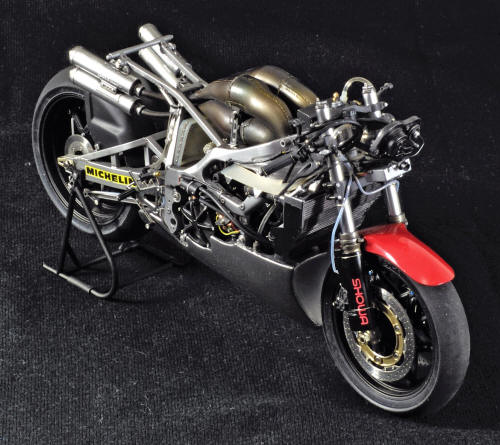
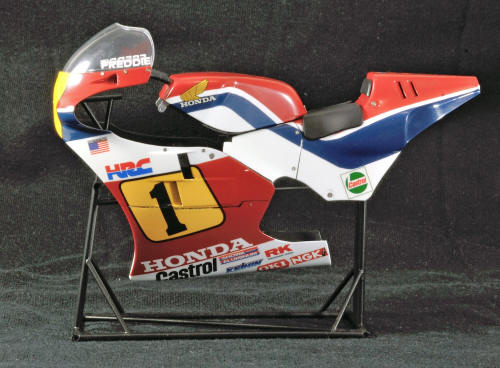
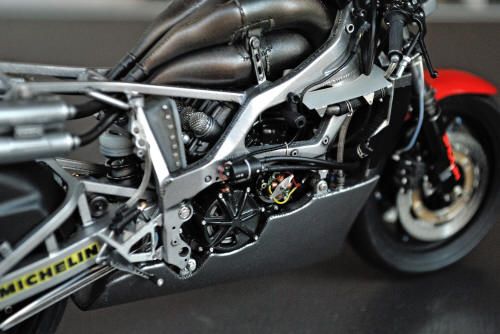
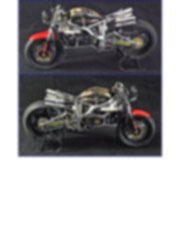
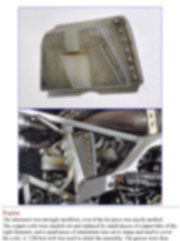
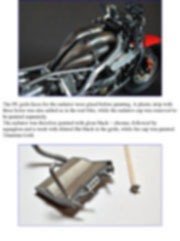
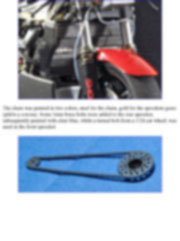
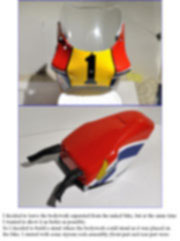
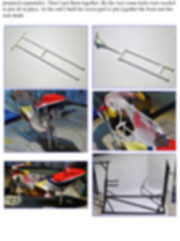
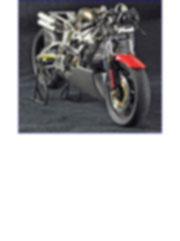
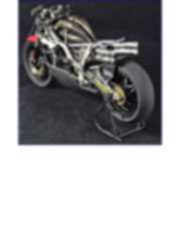
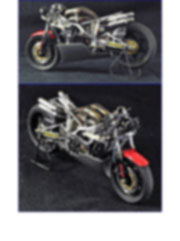
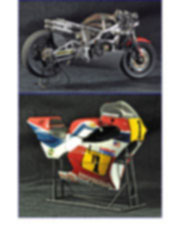
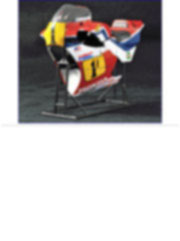
Legal Notice No material from Modeler Site any Web site may be copied, reproduced, republished, uploaded, posted, transmitted, or distributed in any way, except that you may download one copy of the materials on any single computer for your personal, non-commercial home use only, provided you keep intact all copyright and other proprietary notices. Modification of the materials or use of the materials for any other purpose is a violation of copyright and other proprietary rights. Read More here > Legal notice This article is about the assembly and detailing of the Tamiya Honda NSR500 from 1984, using the awesome Hobby Design detail set and other aftermarket stuff, such as rivets, bolts heads and so on. The model is a recent release from Tamiya, and the detail of the kit is astonishing. Given the very peculiar characteristic of this motorcycle, as the fuel tank placed below the engine, and the exhausts infront of the driver’s chest, I decided to show the cowling not placed on the chassis. This clearly implies that the mechanical part had to be pretty detailed (at least in my opinion), while a suitable cowl stand had to be prepared in order to display them separately.
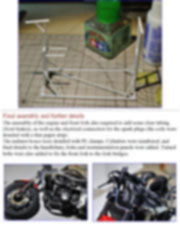
Building This step-by-step will be focused on details added in different parts of the model, divided into the following areas where the work was done:
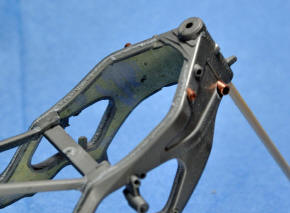
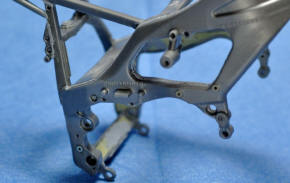
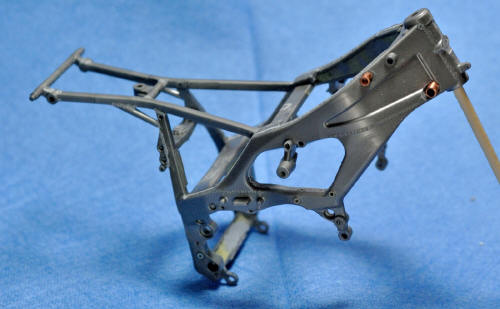
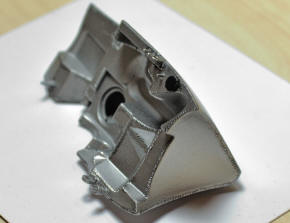
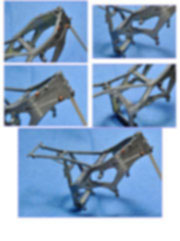
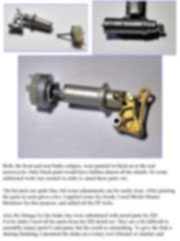
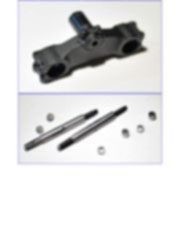
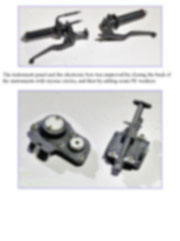
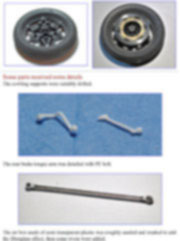
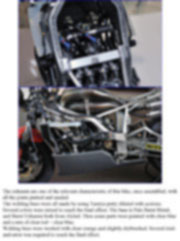
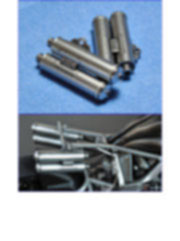
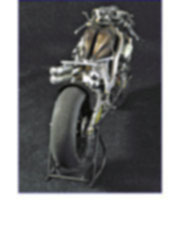
Chassis Mounted OOB, the main frame is very well done with crisp details. However, if you want to display a naked model, some additional work is needed. After assembly the two halves, I started filling the inside of the frame (hollow because of production issues) with epoxy putty. I also started replacing some of the supports (moulded in plastic) with small pieces of copper tube of the right measure. I also started reproducing the missing welding lines. This was done by diluting Tamiya gray putty with acetone, creating the lines with the tip of a toothpick and scratching them with the tip of a needle, when still are wet. Then I removed the support of the instrument panel and the foot pegs (will be substituted with the PE parts from the HD set).
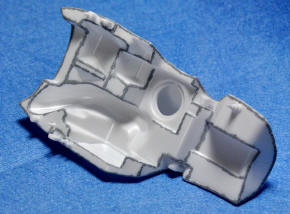
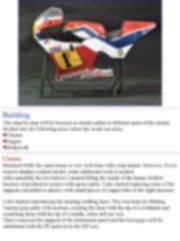
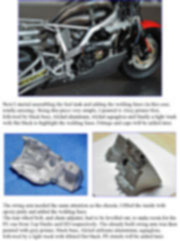
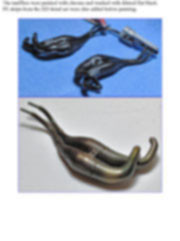
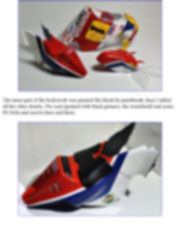
Next I started assembling the fuel tank and adding the welding lines (in this case, totally missing). Being this piece very simple, I painted it. Grey primer first, followed by black base, Alclad aluminum, Alclad aquagloss and finally a light wash with flat black to highlight the welding lines. Fittings and caps will be added later.
This article is offered in PDF format to be read or printed using Acrobat reader, contact our webmaster > Here Includes more than 114 pics, here we show only the text pages.
Esta Nota es ofrecida en formato PDF, el cual puede ser leído o impreso usando el Acrobat reader, contacte a nuestro webmaster > Aquí Incluye más de 114 imágenes, aquí solo mostramos las paginas de texto.
Big size photos are only available in our PDF format. Support us ordering our notes in PDF > Here |
|||||||||||||||||||||||||||||||||||||||||||||||||||||||||